
How to Purge Deleted Outlook Email
Managing the ever-increasing number of deleted emails in Outlook can be a daunting task. However, with a few simple steps, you can effectively purge and organize your deleted messages. Here are some techniques to help you regain control of your Outlook inbox:
-
Understanding the Deleted Items Folder
The first step in purging deleted Outlook email is to familiarize yourself with the Deleted Items folder. This folder serves as a temporary holding place for deleted emails until they are permanently removed or recovered. By default, Outlook retains deleted items for a specified period of time before they are automatically deleted.
-
Emptying the Deleted Items Folder
To free up storage space and remove deleted emails permanently, regularly empty the Deleted Items folder. Right-click on the folder and select “Empty Folder” to delete all the items contained within. Alternatively, you can press the “Shift + Delete” keys to bypass the Deleted Items folder and delete selected emails immediately.
-
Configuring AutoArchive for Deleted Items
AutoArchive is a convenient feature in Outlook that automatically moves older, inactive emails to an archive folder. By enabling AutoArchive for the Deleted Items folder, you can ensure that deleted emails are automatically moved to a separate storage location after a certain period of time. This helps to keep your inbox clutter-free and makes it easier to manage your stored emails.
Understanding the Deleted Items Folder
The Deleted Items folder is a designated folder in Microsoft Outlook where deleted emails are temporarily stored before they are permanently deleted or recovered. When you delete an email, it is moved from its original location to the Deleted Items folder, allowing you to easily retrieve or permanently remove messages.
By default, Outlook retains deleted items in the Deleted Items folder for a specified period of time. This retention period varies depending on your Outlook settings or the email server configuration. However, it is important to note that this folder can quickly accumulate a large number of deleted emails, potentially impacting the performance and storage space of your Outlook account.
Understanding the Deleted Items folder is crucial for effective management of deleted Outlook emails. Here are a few key points to consider:
- Recovery: If you accidentally delete an important email, you can easily recover it from the Deleted Items folder. Simply locate the email in the folder, right-click on it, and select “Move” or “Restore” to move it back to its original location or another desired folder.
- Storage: The Deleted Items folder contributes to the overall storage size of your Outlook account. As more emails are deleted, it is essential to regularly purge the folder to free up space and optimize the performance of your account.
- Retention Policies: In some cases, organizations may implement retention policies that dictate how long deleted items are stored in the Deleted Items folder. These policies are enforced to ensure compliance with legal requirements or internal regulations.
- Permanent Deletion: By default, items in the Deleted Items folder are automatically deleted after a certain period of time. However, you can also manually permanently delete emails from this folder by selecting the emails and pressing “Shift + Delete” or using the “Empty Folder” option.
Having a clear understanding of the Deleted Items folder allows you to effectively manage and organize your Outlook emails. Regularly reviewing and purging this folder will not only improve the performance of your account but also help maintain a clutter-free and efficient email workflow.
Emptying the Deleted Items Folder
The Deleted Items folder in Microsoft Outlook can quickly become cluttered with deleted emails, occupying valuable storage space. Emptying this folder on a regular basis is essential to maintain an organized and efficient Outlook inbox. Here’s how to effectively empty the Deleted Items folder:
Manual Emptying: The most straightforward way to empty the Deleted Items folder is to manually select and delete all the items within it. Right-click on the Deleted Items folder and choose “Empty Folder” from the context menu. This action will permanently delete all the items, freeing up storage space immediately. Alternatively, you can select specific emails and press “Shift + Delete” to bypass the folder and delete them directly, without storing them in the “Deleted Items” folder.
Automatic Emptying: To streamline the process, you can configure Outlook to automatically empty the Deleted Items folder at regular intervals. This can be done by setting up the AutoArchive feature. Right-click on the Deleted Items folder, go to “Properties,” navigate to the “AutoArchive” tab, and enable the option to “Archive this folder using these settings.” You can then specify the frequency and retention period for deleted items. When the specified time is reached, Outlook will automatically move the deleted items to the archive folder or permanently delete them, based on your settings.
Keyboard Shortcut: Another quick way to empty the Deleted Items folder is by using a keyboard shortcut. Select the Deleted Items folder and press “Ctrl + Shift + Delete.” This will open the “Empty Folder” dialog box, allowing you to confirm the deletion of all items within the folder with a single keystroke.
Caution: Before emptying the Deleted Items folder, double-check that you have reviewed and saved any important emails that may inadvertently be present. Once deleted, these items cannot be recovered unless you have backups or access to other methods of recovery.
Regularly emptying the Deleted Items folder not only helps to maintain a clutter-free Outlook inbox but also improves the overall performance of your email system. By incorporating these strategies into your email management routine, you can efficiently manage and organize your deleted emails in Microsoft Outlook.
Configuring AutoArchive for Deleted Items
Managing the storage of deleted items in Microsoft Outlook can be made easier by configuring the AutoArchive feature for the Deleted Items folder. AutoArchive automatically moves older and inactive items to an archive location, helping to keep your Outlook inbox organized and optimized. Here’s how to configure AutoArchive for the Deleted Items folder:
Accessing AutoArchive Settings: To begin, right-click on the Deleted Items folder in Outlook and select “Properties” from the context menu. In the Properties window, navigate to the “AutoArchive” tab.
Enabling AutoArchive: On the AutoArchive tab, check the box that says “Archive this folder using these settings.” By enabling this option, you activate the AutoArchive feature for the Deleted Items folder specifically.
Setting the Archive Frequency: Next, specify the frequency at which you want Outlook to automatically archive deleted items from the folder. You can choose daily, weekly, or monthly intervals, depending on your preferences and email usage patterns.
Defining the Retention Period: Determine the retention period for deleted items. This specifies the number of days after which items in the Deleted Items folder will be moved to the archive folder or permanently deleted, based on your AutoArchive settings. By default, Outlook retains items for 14 days, but you can adjust this as per your requirements.
Choosing the Archive Location: Specify the location where Outlook will store the archived items. You can either select an existing folder within your mailbox or create a new one to hold the archived items. It is recommended to organize and categorize your archive folders for easy retrieval and management.
Applying AutoArchive to Other Folders: In addition to the Deleted Items folder, you can also apply AutoArchive settings to other folders in Outlook. This feature allows you to automate the archiving process for folders such as Inbox, Sent Items, and more. Simply repeat the above steps for each folder you wish to configure.
Customizing AutoArchive Settings: Advanced settings such as permanently deleting old items and excluding specific folders from AutoArchive are also available. By customizing these options, you can tailor AutoArchive to suit your email management needs.
Once you have configured AutoArchive for the Deleted Items folder, older and inactive items will be automatically moved to the designated archive location based on your specified frequency and retention period. This helps to keep your inbox uncluttered, your storage space optimized, and ensures that important emails remain accessible while eliminating unnecessary clutter from your Outlook account.
Using the “Recover Deleted Items” Feature
Accidentally deleting an important email can cause panic and frustration. However, Microsoft Outlook provides a handy feature called “Recover Deleted Items” that allows you to retrieve deleted emails from the Deleted Items folder. Here’s how you can use this feature to recover deleted items:
Accessing the “Recover Deleted Items” Option: To initiate the recovery process, navigate to the folder from which the email was deleted (such as Inbox, Sent Items, or any other folder). Next, go to the “Folder” tab in the Outlook ribbon and click on “Recover Deleted Items.” This will open a separate window displaying all the items that have been recently deleted.
Selecting the Emails to Recover: In the “Recover Deleted Items” window, you will see a list of deleted items that can be recovered. You can sort the items by columns such as “From,” “To,” or “Subject” to locate the specific email you want to recover. To select multiple items for recovery, hold down the “Ctrl” key while making your selections.
Restoring the Deleted Emails: After selecting the emails you want to recover, click on the “Recover Selected Items” button. Outlook will move the selected items back to their original location, such as the Inbox or the folder from which they were deleted. If you want to restore all the items listed, you can click on the “Recover All” button.
Confirming the Recovery: Once the recovery process is complete, you will receive a confirmation message indicating whether the items were successfully recovered. If any items were not recovered, Outlook will provide an explanation for the failure.
Checking the Recovered Emails: To verify that the emails have been successfully restored, navigate to their original location or the folder where you wanted them to be recovered. You should see the recovered items back in their respective folders.
Caution: It is important to note that the “Recover Deleted Items” feature is only available for emails that have been deleted from the Deleted Items folder. If an email is permanently deleted from the Deleted Items folder or if the retention period has expired, it cannot be recovered using this method. In such cases, it may still be possible to recover deleted emails by utilizing backups or other specialized email recovery processes.
The “Recover Deleted Items” feature in Outlook is a valuable tool for retrieving accidentally deleted emails. By using this feature promptly, you can swiftly restore important emails and maintain a well-organized email workflow in Microsoft Outlook.
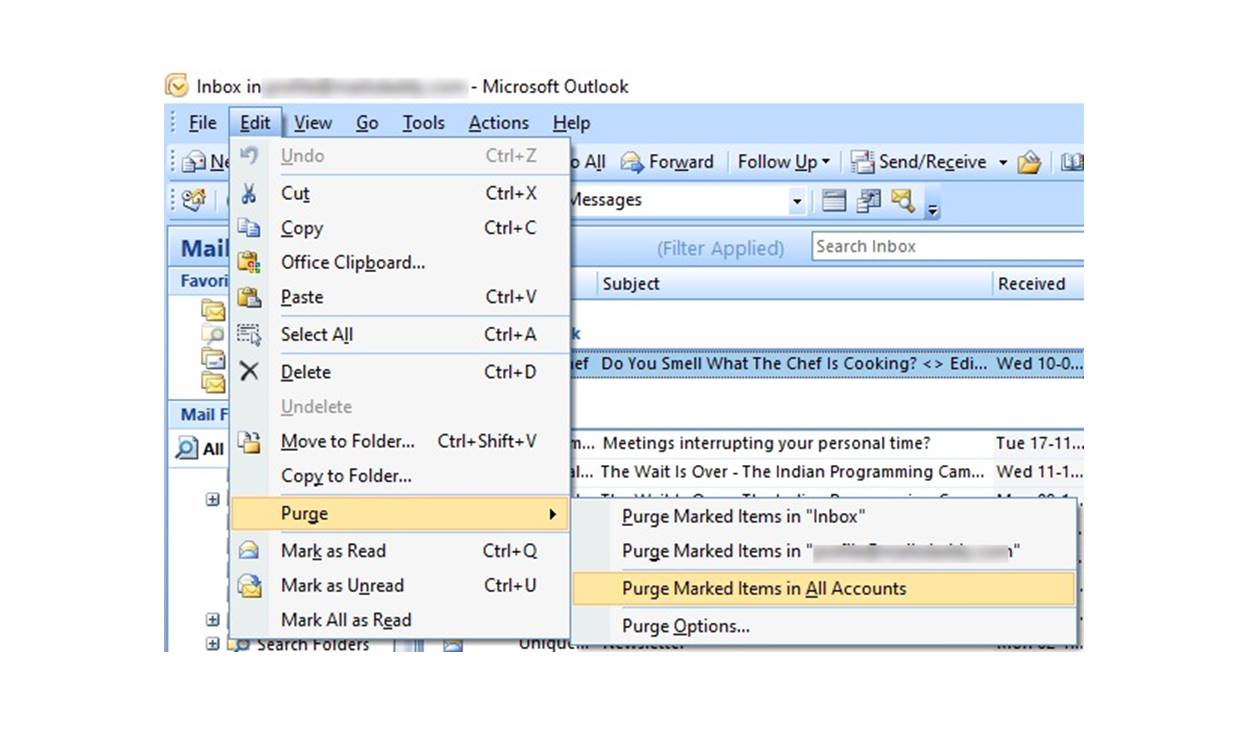
Permanently Deleting Emails from the Purge Folder
When managing Outlook emails, there may be situations where you want to permanently delete emails without sending them to the Deleted Items folder. Microsoft Outlook offers the option to bypass the Deleted Items folder and directly delete emails, ensuring they are not recoverable. Here’s how you can permanently delete emails from the Purge folder:
Navigating to the Purge Folder: To access the Purge folder, go to the “File” tab at the top-left corner of the Outlook window. From the dropdown menu, select “Options,” then click on “Advanced.” In the Advanced Options window, scroll down to find the “Purge Deleted Items” section.
Enabling the Purge Feature: In the Purge Deleted Items section, check the box that says “Purge items when switching folders while online.” This feature allows you to permanently delete emails when you switch folders or move to another folder within Outlook.
Permanently Deleting Emails: Once the purge feature is enabled, navigate to the folder that contains the emails you want to permanently delete. Select the desired emails by pressing the “Ctrl” key and clicking on each email. To select a continuous range of emails, hold down the “Shift” key while clicking on the first and last email in the range. Once the emails are selected, press the “Shift + Delete” keys on your keyboard to bypass the Deleted Items folder and permanently delete the emails.
Confirming Permanent Deletion: A dialog box will appear, asking you to confirm the permanent deletion of the selected items. Verify the emails to be deleted and click on “Yes” to proceed. Once confirmed, these emails will be permanently deleted and cannot be recovered through typical Outlook means.
Caution: Exercise caution when using the permanent deletion feature, as it does not provide an option for recovery. Ensure that you have selected the correct emails for deletion and that they are no longer needed before proceeding.
The Purge folder in Microsoft Outlook provides a convenient way to permanently delete emails without sending them to the Deleted Items folder first. By enabling and utilizing the purge feature, you can effectively manage and permanently remove emails from your Outlook account, providing a streamlined email management experience.
Automating the Purging Process
Manually purging emails from Microsoft Outlook can be time-consuming, especially if you have a large number of messages to delete. Fortunately, Outlook provides automation features that allow you to streamline the purging process, saving you time and effort. Here are some methods to automate the email purging process in Outlook:
AutoArchive: One of the built-in automation features in Outlook is AutoArchive. By enabling AutoArchive for specific folders, including the Deleted Items folder, you can schedule the automatic purging of emails based on criteria such as age and size. This ensures that deleted items are consistently and automatically removed from your folders, without requiring manual intervention.
Inbox Rules: Outlook’s Inbox Rules offer another way to automate the purging process. By creating rules based on specific criteria such as sender, subject, or keyword, you can set up actions to automatically delete or move emails to designated folders. For example, you can create a rule to delete all emails from a certain sender after a specified period of time, saving you from having to manually delete them.
VBA Macros: For users with advanced technical skills, Outlook also provides the option to create VBA (Visual Basic for Applications) macros to automate the purging process. VBA macros allow you to write custom scripts to perform specific tasks in Outlook. By creating a macro that deletes emails based on criteria you define, you can automate the purging process according to your specific needs.
Third-Party Add-Ins: There are several third-party add-ins available for Outlook that can enhance its functionality and provide additional automation options. These add-ins offer features such as advanced email management, automated email purging, and customized rules. Explore the available add-ins and choose the one that best suits your requirements for automating the purging process.
Scheduled Tasks: In addition to using Outlook’s built-in features, you can leverage the power of Windows’ Task Scheduler to automate the purging process. By creating a scheduled task that runs a specific macro or script at set intervals, you can automate the purging of emails without manual intervention. This method provides greater flexibility and control over the automation process.
Automating the purging process in Outlook allows you to save time and maintain an organized email system. By utilizing features such as AutoArchive, Inbox Rules, VBA macros, third-party add-ins, or scheduled tasks, you can streamline the management of deleted items and ensure that your Outlook inbox remains clutter-free and optimized for efficient email workflow.
Manually Deleting Emails from Specific Folders
In addition to automated methods, Microsoft Outlook provides simple yet effective ways to manually delete emails from specific folders. This allows you to have more control over the purging process and selectively remove unwanted or obsolete emails. Here are some manual methods to delete emails from specific folders in Outlook:
Folder View: In Outlook, navigate to the specific folder from which you want to delete emails, such as Inbox, Sent Items, or any custom folder. Ensure that the folder is displayed in the default or appropriate view, showing the list of emails.
Selecting Emails: To select individual emails for deletion, hold down the “Ctrl” key on your keyboard while clicking on each email you want to delete. To select a continuous range of emails, click on the first email in the range, hold down the “Shift” key, and click on the last email. This will select all the emails between the first and last one, including both endpoints.
Deletion Methods: Once the emails are selected, you have several options to delete them. You can use the “Delete” button on the Outlook toolbar, right-click and choose “Delete,” or press the “Delete” key on your keyboard. Using any of these methods will move the selected emails to the Deleted Items folder for temporary retention, allowing for potential recovery if needed.
Permanent Deletion: If you want to bypass the Deleted Items folder and permanently delete the selected emails, use the “Shift + Delete” keyboard shortcut. This will directly delete the emails without moving them to the Deleted Items folder, and they won’t be recoverable through normal means.
Multiple Folder Deletion: Outlook also provides a convenient method to delete emails from multiple folders simultaneously. By selecting the folders you want to delete emails from, you can perform a bulk deletion. To select multiple folders, hold down the “Ctrl” key while clicking on each folder name in the Outlook navigation pane.
Caution: Exercise caution when manually deleting emails, especially when using the permanent deletion method. Make sure to review the selected emails to avoid deleting any vital or important information. Once emails are permanently deleted, they cannot be retrieved through standard Outlook recovery methods.
Manually deleting emails from specific folders in Outlook allows you to take immediate action on unwanted or obsolete emails, providing quick and efficient management of your inbox. By utilizing these methods, you can keep your Outlook folders well-organized and ensure a clutter-free email workflow.
Using Third-Party Tools for Efficient Email Purging
While Microsoft Outlook offers built-in tools and features for managing and purging emails, there are third-party tools available that can provide additional functionality and efficiency. These tools offer advanced features and options to streamline the email purging process and enhance your overall email management experience. Here are some benefits of using third-party tools for efficient email purging:
Enhanced Filtering and Sorting: Third-party tools often provide advanced filtering and sorting capabilities that allow you to quickly identify and organize emails based on various criteria such as sender, subject, date, attachment size, and more. These tools enable you to efficiently sort through large volumes of emails and selectively purge or manage them according to your preferences.
Batch Processing: Many third-party tools allow you to perform batch processing, enabling you to delete multiple emails simultaneously. This feature saves time and effort, especially when dealing with a significant number of emails that need purging. You can select multiple emails or folders, and with a single command, delete them all at once.
Duplicate Detection and Removal: Duplicate emails can clutter your inbox and consume unnecessary storage space. Third-party tools often include features to detect and remove duplicate emails, allowing you to easily identify and delete these redundant messages. By removing duplicates, you can optimize your mailbox and improve its performance.
Scheduled Purging: Many third-party tools offer the ability to schedule automatic purging of emails. You can define specific criteria or rules to determine which emails should be deleted and when. This automation feature eliminates the need for manual intervention and ensures that outdated or unnecessary emails are regularly removed from your inbox, maintaining a clutter-free environment.
Advanced Search Capabilities: Third-party tools often include advanced search functionality that enables you to find specific emails based on complex search criteria. These tools provide more robust search options compared to the native Outlook search feature. By efficiently locating desired emails, you can easily manage and purge them as needed.
Additional Backup and Recovery Options: Some third-party tools offer backup and recovery capabilities as part of their email purging features. These tools allow you to create backups of your Outlook data, ensuring that important emails are safely stored before purging. In the event of accidental deletion, you can restore these emails from the backup, providing an extra layer of protection.
When choosing a third-party tool for efficient email purging, consider factors such as reliability, compatibility with your version of Outlook, user-friendly interface, customer support, and pricing. Evaluate the features and benefits provided by different tools to find the one that best suits your email management needs and preferences.
Using third-party tools for email purging can enhance your productivity, streamline your email management processes, and provide additional functionalities not available in the native Outlook application. By leveraging these tools, you can improve the efficiency and effectiveness of your email purging tasks.
Best Practices for Managing Outlook Email Deletions
Properly managing Outlook email deletions is key to maintaining an organized and efficient inbox. Follow these best practices to ensure effective and streamlined email deletion in Microsoft Outlook:
Regular Review and Purging: Take the time to regularly review your inbox and delete any unnecessary emails. Adopt a proactive approach by purging outdated or redundant messages to prevent your inbox from becoming cluttered and overwhelming.
Use Default Deleted Items Folder: Utilize the default Deleted Items folder as your primary location for deleted emails. This ensures that deleted items remain accessible for a certain period of time before they are permanently removed or recovered.
Enable AutoArchive: Configure AutoArchive settings to automatically move old and inactive emails to an archive folder. This helps to keep your inbox organized and prevents the Deleted Items folder from becoming excessively large.
Create Custom Folders: Create custom folders in Outlook to categorize and store important emails. This allows you to keep your main inbox clutter-free and easily locate specific emails when needed.
Set Up Inbox Rules: Use Inbox Rules to automatically delete or move emails based on specific criteria. This streamlines the email deletion process and helps keep your inbox organized. However, use caution to ensure important emails are not inadvertently deleted.
Exercise Caution with Permanent Deletion: When permanently deleting emails, double-check that you have selected the correct messages. Once permanently deleted, they cannot be recovered through normal means.
Backup and Recovery: Regularly back up your Outlook data to ensure the safety of important emails. In the event of accidental deletion, having a backup allows you to restore lost emails without hassle.
Stay Organized: Implement a consistent email filing system and adhere to it. Organize emails into appropriate folders to maintain a tidy inbox and facilitate easy retrieval.
Monitor Deleted Items Folder: Keep an eye on the Deleted Items folder and regularly purge it to free up storage space. Be mindful of any retention policies set by your organization or email server.
Limit Email Attachments: Avoid unnecessary email attachments to prevent storage overload. Instead, opt to share files through cloud storage or collaboration tools.
Train for Cybersecurity: Educate yourself and your team on best practices for identifying and avoiding email phishing scams, spam, and malware. By being vigilant, you can prevent harmful emails from entering your inbox and reduce the need for later deletions.
By following these best practices, you can effectively manage Outlook email deletions and maintain a clean, organized, and efficient inbox. Adopting a proactive approach to email management ensures that you can find essential messages when needed while keeping your mailbox optimized for productivity.