
Turn off unnecessary notifications
Sometimes, the constant barrage of email notifications can be overwhelming and distracting. To streamline your conversations in Outlook, it’s important to turn off unnecessary notifications. By doing so, you can regain control of your inbox and focus on what’s important without being constantly interrupted.
First, assess which notifications are truly essential for your workflow. Are you receiving notifications for every single email that lands in your inbox? If so, this can quickly lead to information overload. Consider disabling notifications for emails that aren’t urgent or require immediate action. You can do this by adjusting your notification settings in Outlook.
To turn off notifications for specific conversations or email threads, you can mute or ignore them. Muting a conversation means that you won’t receive any notification for new messages within that conversation. Ignoring a conversation takes it a step further – not only will you stop receiving notifications for new messages, but those messages won’t even appear in your inbox until you manually unignore the conversation.
Another helpful tip is to disable sound and pop-up notifications for new emails. While visual and audio cues can be useful for important messages, they can also become a distraction if they constantly interrupt your workflow. Adjusting your notification preferences to be less intrusive can help you stay focused and reduce unnecessary interruptions.
Additionally, it’s worth exploring the option to schedule specific times for when you want to receive notifications. Instead of being bombarded with emails throughout the day, you can set designated time slots to batch process and respond to messages. This allows you to allocate dedicated time for email-related tasks while minimizing interruptions during other work or focus periods.
Remember, the goal is to regain control of your inbox and create a more streamlined and efficient workflow. By turning off unnecessary notifications, you can prioritize your time and attention on the most important conversations and tasks in Outlook.
Use the conversation view
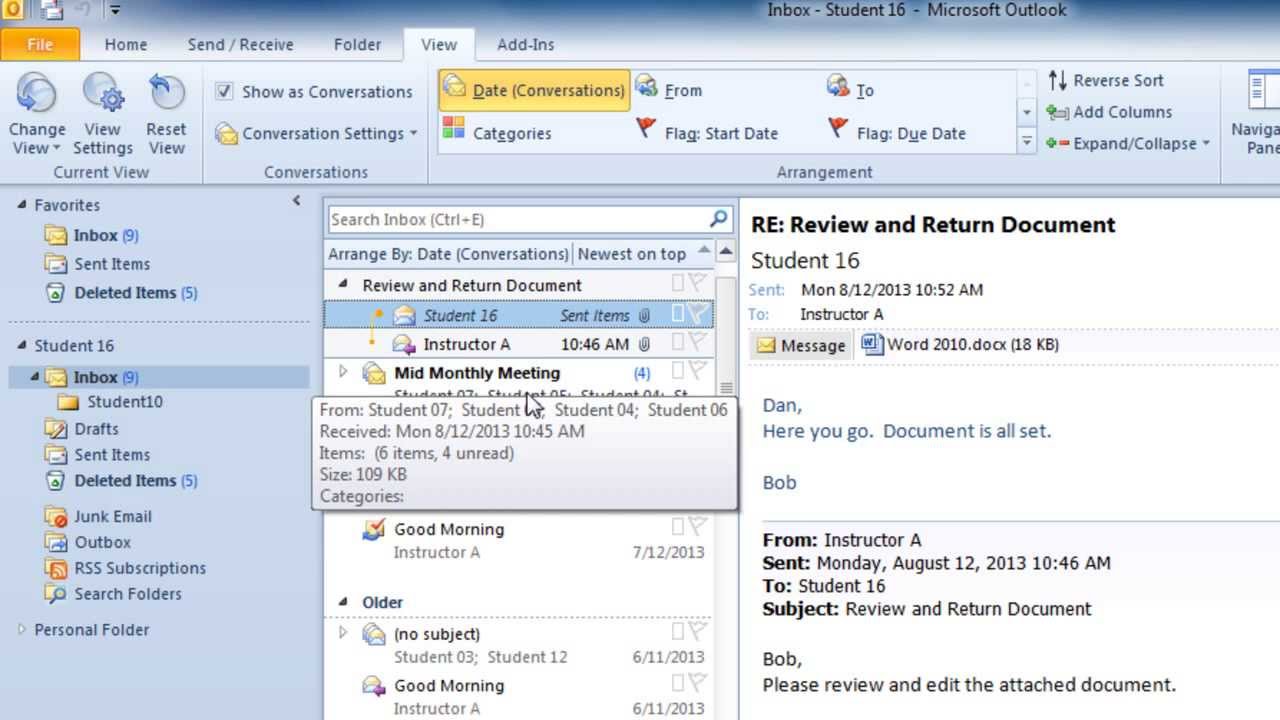
One of the most effective ways to streamline conversations in Outlook is by utilizing the conversation view feature. This feature organizes your emails by conversation, grouping related messages together. By enabling the conversation view, you can easily follow the flow of the conversation, reduce clutter, and efficiently navigate through your inbox.
With the conversation view turned on, messages are grouped based on the subject or topic, making it easier to track the progression of discussions. Instead of seeing multiple individual emails scattered throughout your inbox, you’ll see a single entry for each conversation, with the number of messages in each conversation indicated. This helps you quickly identify ongoing conversations and avoid unnecessary duplication or confusion.
The conversation view also allows you to collapse and expand individual conversations, providing a clear overview of your inbox. You can collapse threads that are not currently relevant or require your immediate attention, freeing up space and reducing visual clutter. This feature becomes especially useful when dealing with long and complex email chains, where finding a specific message can be time-consuming.
Another benefit of the conversation view is that it helps you stay organized. Instead of searching through multiple folders or relying solely on email subjects, you can rely on the conversation view to keep related emails together. This saves you time and effort when looking for specific information or trying to locate an email in the future.
Moreover, using the conversation view makes it easier to manage and take action on multiple emails at once. You can select an entire conversation and perform actions such as archiving, deleting, or marking as read/unread, saving you from manually performing the same actions on individual emails within the conversation.
It’s important to note that the conversation view may not be suitable for everyone, especially those who prefer a more traditional approach to email organization. However, giving it a try can provide significant benefits in terms of efficiency and productivity. If you find that the conversation view doesn’t suit your needs, you can always disable it and revert to the standard email view.
Incorporating the conversation view into your Outlook workflow can vastly improve your email management and help you stay organized amid a deluge of messages. Give it a try and experience the benefits of a streamlined and clutter-free inbox.
Clean up your inbox
An overflowing inbox can be overwhelming and hinder your productivity. To streamline conversations in Outlook, it’s essential to clean up your inbox and maintain a clutter-free workspace. Here are some tips to help you achieve inbox nirvana:
1. Start by deleting unnecessary emails: Take a ruthless approach and delete any emails that are no longer relevant or important. Be selective and only keep messages that require action or contain vital information. Clearing out the clutter will instantly make your inbox more manageable.
2. Create folders and labels: Organize your emails into folders or labels based on projects, clients, or topics. This allows you to quickly locate and access specific conversations without sifting through your entire inbox. Creating a logical folder structure will significantly streamline your email management process.
3. Archive old emails: Instead of keeping every email in your inbox, consider archiving older conversations. Archiving moves messages out of your inbox but still keeps them accessible for reference. This simple step will help declutter your inbox while ensuring important information is just a search away.
4. Use the sweep function: Outlook offers a “sweep” feature that allows you to clean up your inbox from unwanted clutter. With sweep, you can delete or move multiple emails from a specific sender, set rules to automatically delete or move future emails, or keep the latest email and delete the rest. This handy tool saves time and helps maintain a streamlined inbox.
5. Unsubscribe from newsletters and promotional emails: If your inbox is constantly bombarded with newsletters, marketing emails, or other subscriptions, take the time to unsubscribe from them. This not only reduces the clutter in your inbox but also helps you regain control over your email flow.
6. Set up automatic rules: Outlook’s rule feature allows you to automate the organization of incoming emails. You can create rules to automatically move, categorize, or flag emails based on specific criteria, such as the sender, subject, or keywords. Setting up rules helps keep your inbox organized and ensures that important conversations are prioritized.
7. Regularly review and purge: Make it a habit to review and clean up your inbox regularly. Set aside dedicated time each week or month to go through your emails, delete unnecessary messages, and file important ones. By consistently maintaining a clutter-free inbox, you’ll save time and reduce stress in the long run.
Remember, a clean and organized inbox is essential for efficient communication and increased productivity. By implementing these strategies, you can transform your inbox into a streamlined workspace, allowing you to focus on what truly matters.
Set up rules for automatic organization
One of the key strategies to streamline conversations in Outlook is by utilizing the powerful feature of rules. Rules allow you to automate the organization of your emails, saving you time and effort in managing your inbox. By setting up rules, you can ensure that incoming emails are automatically categorized, flagged, moved to specific folders, or even marked as read or unread based on predefined criteria.
To set up rules in Outlook, follow these steps:
1. Identify your organization needs: Before creating rules, assess your email workflow and determine which criteria are important for organizing your conversations. For example, you may want to create a rule to automatically move emails from specific senders to a designated folder, or flag messages with specific keywords for priority attention.
2. Open the Rules and Alerts dialog box: In Outlook, go to the “File” tab and click on “Manage Rules & Alerts”. This will open the Rules and Alerts dialog box, where you can create and manage your rules.
3. Create a new rule: In the Rules and Alerts dialog box, click on the “New Rule” button to start creating a new rule. You will be presented with various options to define the conditions and actions for the rule.
4. Define the conditions: Choose the conditions that match your organization needs. This can include specific senders, subject lines, recipient addresses, or keywords present in the email. Outlook provides a range of options to help you create customized rules that fit your requirements.
5. Specify the actions: Once the conditions are defined, determine the actions that you want Outlook to perform automatically when an email meets those conditions. This can include moving the email to a folder, marking it as read or unread, flagging it for follow-up, or assigning it a category.
6. Test and apply the rule: Before finalizing the rule, test it on a few selected emails to ensure it functions as intended. Once you are confident in its accuracy, click “Finish” to apply the rule to incoming emails.
By setting up rules for automatic organization, you can significantly reduce the time spent on manual email management. This feature takes care of repetitive tasks, allowing you to focus on important conversations and tasks that require your attention.
Remember to review and update your rules periodically to adapt to changing circumstances or new organization requirements. Outlook provides the flexibility to modify or delete existing rules as your needs evolve.
Take advantage of the rules feature in Outlook and let it do the heavy lifting to keep your inbox organized and your conversations streamlined.
Take advantage of Quick Steps
To further streamline your conversations in Outlook, make use of the powerful feature called Quick Steps. Quick Steps are a set of predefined actions that allow you to perform multiple actions with just a single click or keyboard shortcut. By utilizing Quick Steps, you can automate repetitive tasks and efficiently manage your inbox.
Here are some ways you can take advantage of Quick Steps:
1. Create custom Quick Steps: Outlook provides a variety of built-in Quick Steps, but you can also create your own custom Quick Steps tailored to your specific needs. For example, you can create a Quick Step that moves an email to a specific folder, flags it for follow-up, and sends a pre-defined response, all with a single click.
2. Apply multiple actions with a single click: With Quick Steps, you can perform multiple actions on an email with just one click. For instance, you can mark an email as read, move it to a folder, and forward a copy to a colleague, all in one go. This saves you time and reduces the need for manual actions on individual emails.
3. Assign keyboard shortcuts: To make Quick Steps even more efficient, you can assign keyboard shortcuts to your most commonly used actions. This allows you to perform actions without even reaching for the mouse, further speeding up your workflow. Accessing and executing Quick Steps becomes a seamless process with the use of keyboard shortcuts.
4. Combine Quick Steps with rules: You can also combine Quick Steps with rules to automate specific actions based on certain conditions. For example, you can create a rule that applies a custom Quick Step to all emails from a specific sender, automatically performing a set of actions without any manual intervention.
5. Share Quick Steps with colleagues: If you work in a team or collaborate with others, you can share your Quick Steps with colleagues. This ensures consistency and boosts productivity by allowing everyone to benefit from the same set of automated actions. Sharing Quick Steps can be particularly useful for streamlining common tasks and procedures within a group or department.
By leveraging Quick Steps in Outlook, you can automate routine email processes and save valuable time. Whether it’s moving emails to specific folders, categorizing messages, or sending pre-drafted responses, Quick Steps provide a convenient and efficient solution to managing your inbox.
Explore the different built-in Quick Steps available in Outlook, and don’t hesitate to create your own custom Quick Steps to streamline your unique email workflow. With Quick Steps, you can simplify your day-to-day email tasks and focus on more important conversations and projects.
Utilize keyboard shortcuts
One of the best ways to streamline your conversations in Outlook is by utilizing keyboard shortcuts. These shortcuts allow you to perform actions quickly and efficiently, without the need to navigate through menus or click on buttons. By mastering keyboard shortcuts, you can greatly enhance your productivity and reduce the time spent on repetitive tasks. Here are some essential keyboard shortcuts to help you streamline your Outlook experience:
1. Create a new email: Press Ctrl + N to create a new email message. This shortcut saves time by bypassing the need to manually navigate to the “New Email” button.
2. Send an email: To send an email, simply press Alt + S. This shortcut eliminates the need to move the mouse and click on the “Send” button, allowing you to send messages with a single keystroke.
3. Reply to an email: When replying to an email, press Ctrl + R. This shortcut opens a reply window, allowing you to quickly compose and send a response without interrupting your workflow.
4. Reply to all: To reply to all recipients of an email, press Ctrl + Shift + R. This shortcut saves time by automatically including all email addresses in the reply, ensuring that everyone involved in the conversation stays updated.
5. Forward an email: Press Ctrl + F to forward an email. This shortcut opens a new email window with the original message attached, allowing you to quickly forward it to the intended recipients.
6. Open the address book: To access the address book, press Ctrl + Shift + B. This shortcut simplifies the process of finding and adding contacts to your emails, saving you time and effort.
7. Move between folders: Navigate between folders by pressing Ctrl + Y. This shortcut allows you to switch between different folders in Outlook, making it easier to locate and access specific conversations or emails.
8. Mark an email as read or unread: To mark an email as read, press Ctrl + Q. To mark it as unread, press Ctrl + U. These shortcuts provide a quick way to manage the read/unread status of your emails.
9. Search for emails: Press Ctrl + E to activate the search feature in Outlook. This shortcut allows you to quickly search for specific emails, keywords, or phrases, helping you locate information and conversations swiftly.
10. Switch to the calendar: To switch to your calendar view, press Ctrl + 2. This shortcut provides instant access to your calendar, allowing you to manage your schedule without interrupting your workflow.
Mastering these keyboard shortcuts will significantly speed up your email management in Outlook. With just a few keystrokes, you can perform actions like composing, replying, and navigating between folders, all without lifting your hands from the keyboard. Practice and familiarize yourself with these shortcuts, and watch your productivity soar as you streamline your conversations in Outlook.
Use the @mentions feature
When it comes to streamlining conversations in Outlook, the @mentions feature is a game-changer. This feature allows you to specifically notify and get the attention of someone in an email conversation by using the “@” symbol followed by their name. By utilizing @mentions, you can improve collaboration, focus communication, and ensure that important messages are not overlooked.
Here’s how you can make the most out of the @mentions feature:
1. Directly notify individuals: When you need to get the attention of a specific person in a group email thread, simply type “@” followed by their name. This will highlight their name and send them a notification, indicating that they have been mentioned in the conversation. They will be instantly alerted, making it easier for them to identify and respond to the relevant message.
2. Enhance collaboration: @mentions are particularly useful when working on projects or tasks with multiple team members. By mentioning specific individuals in an email, you can assign tasks, request feedback, or seek input from the relevant parties directly. This helps streamline communication and ensures that everyone involved is aware of their responsibilities and can provide timely responses.
3. Reduce email overload: When you need to have a focused conversation involving specific people within a larger email thread, @mentions help draw attention to the relevant messages. Instead of everyone in the thread receiving constant notifications for every new message, only those who are mentioned will receive direct notifications. This helps minimize email overload and enables individuals to filter through the noise and prioritize their involvement.
4. Effectively delegate responsibilities: The @mentions feature is also beneficial for delegating tasks and responsibilities within a conversation. By specifically mentioning individuals who need to take action or provide input, you can ensure that everyone understands their role and can easily track their assignments. This streamlines the delegation process, promoting clarity and accountability.
5. Collectively address issues: If there is a particular issue or challenge that requires a group’s attention, @mentions can be an efficient way to bring it to their notice. By mentioning all relevant team members, you can ensure that the right people are aware of the issue, facilitating collective problem-solving and minimizing miscommunication.
Remember, effective use of the @mentions feature requires being mindful of who you are mentioning and when. Be considerate and use it sparingly to prevent overwhelming individuals with unnecessary notifications. Reserve @mentions for important messages that require immediate attention or involvement.
By using the @mentions feature in Outlook, you can streamline your conversations, improve collaboration, and ensure important messages are seen by the right people. Harness the power of @mentions to optimize your email communication and enhance productivity.
Customize your email templates
Customizing email templates is a fantastic way to streamline your conversations in Outlook and save time when composing repetitive or standardized emails. By creating customized email templates, you can easily insert pre-written content, formatting, and even attachments, ensuring consistency and efficiency in your communication. Here’s how you can make the most out of email templates:
1. Identify common email types: Take note of the types of emails you find yourself writing repeatedly. These may include introductory emails, follow-ups, thank you notes, or responses to frequently asked questions. Identifying common email types will help you determine which templates to create.
2. Create your templates: Open a new email in Outlook and compose the content you want to include in the template. This can include the subject line, the body text, any specific formatting, and even attachments. Once you are satisfied with the contents, save the email as a template by going to “File” > “Save As” > “Outlook Template”. Give the template a descriptive name and save it in the appropriate folder.
3. Personalize your templates: While templates provide a convenient starting point, it’s important to personalize them for each recipient. Leave room to insert names, specific details, and any other information that may vary from one email to another. This allows you to maintain a consistent structure while still tailoring the message to the individual.
4. Access your templates: To use a saved email template, open a new email in Outlook and go to the “Home” tab. Click on the “New Items” dropdown menu and select “More Items”. Choose “Choose Form” and then select the “User Templates in File System” option. This will open a window where you can browse and select the desired template to use.
5. Customize and send: Open the selected template and make any necessary changes or additions to personalize the email. Fill in the recipient’s information, edit the content as needed, and add any additional details or attachments. Once you have customized the template, simply click “Send” to deliver your message.
6. Manage and update templates: Regularly review and update your templates to reflect any changes in your communication needs or branding. Remove outdated templates and create new ones based on evolving email types or recurring scenarios. Keeping your template library up to date ensures you have the most relevant and effective tools at your disposal.
By customizing your email templates, you can save significant time and effort when composing repetitive emails. Whether it’s sending out meeting summaries, responding to inquiries, or requesting information, having a library of customized templates at your fingertips helps streamline your conversations and ensure consistent messaging.
Experiment with different templates and refine them over time based on feedback and effectiveness. With a little upfront investment in creating and organizing your templates, you can enjoy the benefits of streamlined and efficient email communication in Outlook.
Use the Focused Inbox feature
To further streamline your conversations in Outlook, take advantage of the Focused Inbox feature. The Focused Inbox separates your inbox into two tabs: Focused and Other. The Focused tab displays important and relevant emails, while the Other tab contains less important messages. By utilizing this feature, you can prioritize your attention and focus on the most crucial conversations.
Here’s how you can make the most out of the Focused Inbox feature:
1. Enable the Focused Inbox: To activate the Focused Inbox, go to the “View” tab in Outlook and click on the “Show Focused Inbox” option. Outlook will analyze your email patterns and start sorting emails into the Focused and Other tabs automatically. You can also train Outlook by moving emails between the tabs to teach it which messages are important to you.
2. Focus on important emails: The Focused Inbox ensures that your most critical emails are conveniently displayed in the Focused tab. These emails are typically from senders you frequently interact with or those that Outlook deems as important based on your past behavior. By focusing on this tab, you can quickly attend to high-priority conversations without being overwhelmed by less important messages.
3. Review the Other tab: The Other tab houses emails that may be less important or of lower priority. While it’s recommended to review the Focused tab first, periodically check the Other tab to ensure you haven’t missed any important messages. Outlook does its best to sort emails accurately, but it’s always a good idea to double-check to avoid overlooking any crucial communications.
4. Train the Focused Inbox: If Outlook occasionally misplaces emails into the Other tab, you can move them to the Focused tab or vice versa to train the Focused Inbox. This helps Outlook learn your preferences and ensures that future emails from those senders are sorted correctly. Over time, the Focused Inbox becomes more accurate in sorting your emails based on your preferences.
5. Customize your Focused Inbox settings: Outlook offers options to customize your Focused Inbox experience. You can choose to disable the Focused Inbox feature entirely, adjust its behavior, or fine-tune the sorting criteria. Explore the settings and personalize them to suit your specific needs and preferences.
6. Sync across devices: The Focused Inbox feature is available across various Outlook platforms, including Outlook on the web, Outlook mobile apps, and the desktop application. This ensures consistency in your email organization and helps you stay focused on important conversations regardless of the device you’re using.
The Focused Inbox feature in Outlook is designed to optimize your email workflow and help you stay on top of your most critical conversations. By leveraging this feature, you can easily prioritize your attention, minimize distractions, and streamline your email management.
Experiment with the Focused Inbox feature and assess its impact on your productivity. Tailor it to your preferences, train it over time, and adjust as needed. Enjoy a more organized and focused Outlook experience with the Focused Inbox.
Archive old conversations
Over time, our inboxes can become cluttered with old conversations and emails that are no longer relevant or require immediate action. To streamline your conversations in Outlook, it’s important to archive old conversations regularly. Archiving allows you to remove these conversations from your inbox while keeping them accessible for future reference. Here’s how you can effectively archive old conversations:
1. Determine archiving criteria: Decide on the criteria you’ll use to identify conversations to archive. For example, you might choose to archive conversations older than a certain date, those that are marked as resolved, or ones that are no longer actively being worked on. Establishing clear archiving criteria will help you identify the conversations that can be safely archived.
2. Take advantage of archiving options: Outlook provides various archiving options to suit different preferences and needs. You can choose to manually archive individual conversations or use automatic archiving rules to streamline the process. Automatic archiving rules allow you to define specific criteria, such as the age of conversations or specific folders to include, and Outlook will archive them accordingly.
3. Archive conversations to a separate folder: Create a dedicated archive folder in Outlook to store your archived conversations. This keeps them segregated from your main inbox, reducing clutter and maintaining a clear distinction between active and archived conversations. Consider organizing the archive folder into categories or subfolders for better organization and ease of retrieval.
4. Review before archiving: Before archiving a conversation, it’s wise to review its content to ensure that no important information or attachments are lost. Take a moment to skim through the conversation, especially the most recent messages, to confirm that there are no outstanding actions or unresolved issues.
5. Use search and filter options: If you ever need to retrieve archived conversations, Outlook’s powerful search and filter options make it easy. You can search by sender, keywords, date range, or specific folder to locate the archived conversations you’re looking for. Take advantage of these features to quickly access archived information when needed.
6. Regularly review and purge archived conversations: While archiving is a useful way to manage old conversations, it’s important to periodically review your archived items and remove any that are no longer relevant or necessary. Performing regular cleanouts of your archive folders will ensure that you maintain an organized and streamlined email system.
Archiving old conversations in Outlook helps declutter your inbox and improves your overall productivity. By removing old and inactive conversations from your main view, you can better focus on the conversations that require your attention. It also makes it easier to search for and retrieve archived information when needed.
Establish a regular archiving routine and stick to it. Consistency is key in maintaining an organized and efficient email system. By effectively archiving old conversations, you can streamline your conversations in Outlook and enjoy a more streamlined and productive email experience.