
Check if Screen Rotation is Locked
If you’re facing the issue of your iPhone screen not rotating, the first thing you should check is if the screen rotation is locked. When the screen rotation is locked, your iPhone will not rotate, regardless of its physical orientation. Here’s how you can check if screen rotation is locked:
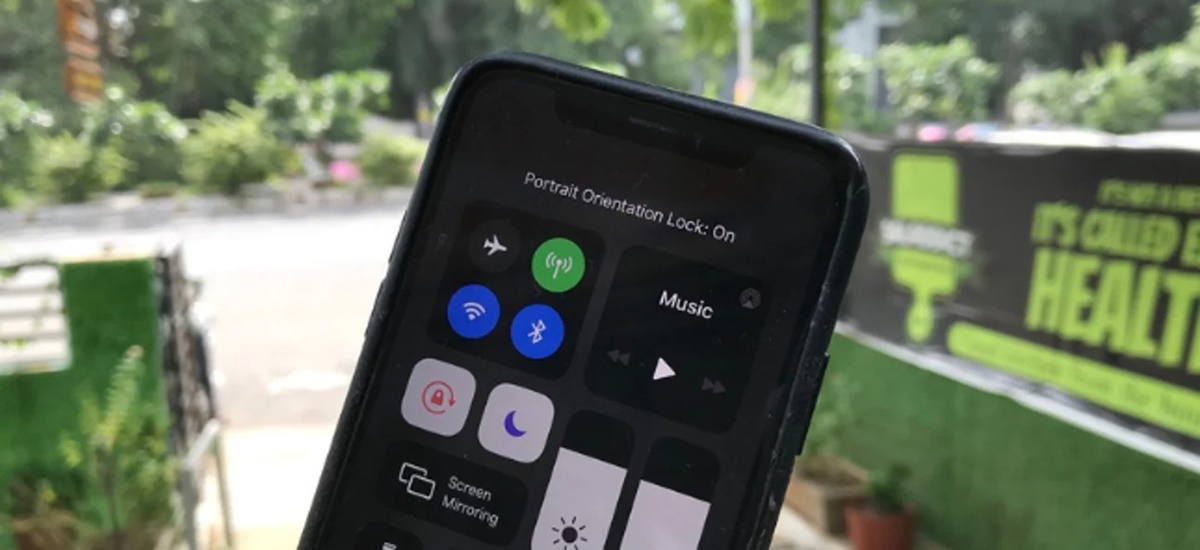
1. Open the Control Center by swiping down from the top-right corner (iPhone X and later) or swiping up from the bottom (iPhone 8 and earlier) of your screen.
2. Look for the lock icon with a circular arrow inside it. If the icon appears highlighted or orange, it means the screen rotation is locked. To unlock it, tap the lock icon once to disable the rotation lock.
3. Alternatively, you can also check if screen rotation is locked by accessing the Control Center from the Home Screen. Swipe up from the bottom (iPhone X and later) or swipe down from the top-right corner (iPhone 8 and earlier). Look for the lock icon with a circular arrow inside it and tap it to unlock screen rotation.
Once you have unlocked the screen rotation, try rotating your iPhone to see if the screen automatically adjusts its orientation. If the issue persists, move on to the next troubleshooting method.
It’s important to remember that the screen rotation lock feature was introduced by Apple to prevent unwanted rotation changes, especially in situations where you want the screen to remain fixed in one orientation, like reading a book or viewing a document. However, sometimes this feature might be accidentally enabled, leading to the issue of the iPhone screen not rotating.
Now that you have checked whether the screen rotation is locked and unlocked it, let’s move on to the next troubleshooting step to address the iPhone screen rotation issue.
Restart Your iPhone
If your iPhone screen is not rotating, a simple but effective troubleshooting method is to restart your device. Restarting your iPhone can help resolve temporary software glitches that may be interfering with the screen rotation. Here’s how you can restart your iPhone:
1. Press and hold the power button (located either on the top or side of your iPhone) until you see the power off slider on the screen.
2. Slide the power off slider from left to right to turn off your iPhone.
3. Once your iPhone is off, press and hold the power button again until you see the Apple logo appear on the screen.
4. Release the power button and wait for your iPhone to fully restart.
After the restart, check if the screen rotation issue persists. Try rotating your iPhone again to see if the screen adjusts to the correct orientation.
Restarting your iPhone is a simple step that can often solve minor software glitches that may be causing your screen not to rotate. It refreshes the device’s settings and clears any temporary bugs or conflicts that may be affecting its functionality.
If the screen rotation issue continues after restarting your iPhone, don’t worry. There are still other troubleshooting methods that you can try to fix the problem.
Update iOS
If restarting your iPhone did not resolve the screen rotation issue, it’s time to check if there are any available iOS updates. Updating your iPhone to the latest version of iOS can often fix bugs and glitches that may be causing the screen rotation problem. Here’s how you can update iOS:
1. Connect your iPhone to a stable Wi-Fi network.
2. Go to the Settings app on your iPhone and scroll down to find “General”. Tap on it.
3. In the General settings, select “Software Update”. Your iPhone will check for any available updates.
4. If an update is available, tap “Download and Install”. Make sure your iPhone is connected to a power source, as the update process may take some time.
5. Follow the on-screen instructions to complete the update. Your iPhone will restart after the update is installed.
Updating to the latest version of iOS can fix software-related issues that may be causing the screen rotation problem on your iPhone. Apple regularly releases updates to improve system performance, stability, and fix known bugs.
After updating iOS, test if the screen rotation issue is resolved by rotating your iPhone. If the problem persists, don’t worry. There are still a few more troubleshooting steps you can try to fix the issue.
Note: It is recommended to backup your iPhone before updating iOS to ensure that your data is safe in case of any unforeseen issues during the update process.
Disable Screen Rotation on Control Center
If your iPhone screen rotation is not functioning as expected, there is a possibility that the screen rotation feature is disabled in the Control Center. Disabling this feature prevents the screen from automatically changing its orientation. Here’s how you can check and disable screen rotation on the Control Center:
1. Open the Control Center on your iPhone. To do this, swipe up from the bottom of the screen on older iPhones or swipe down from the top-right corner on newer iPhones.
2. Look for the lock icon with a circular arrow inside it. If the icon appears highlighted or orange, it means the screen rotation is locked. To disable it, tap the lock icon once.
3. The lock icon will no longer be highlighted, indicating that the screen rotation is now enabled. You should now be able to rotate your iPhone and the screen will adjust accordingly.
If you are still facing issues with the screen rotation after disabling it in the Control Center, there may be other factors contributing to the problem. Continue reading to explore additional troubleshooting steps to fix the issue.
It’s worth pointing out that the screen rotation lock on the Control Center is a useful feature when you want to keep the screen in a fixed orientation, such as when reading or watching a video. However, if it is accidentally enabled, it can prevent the screen from rotating even when you want it to.
Now that you have disabled the screen rotation lock on the Control Center, test if the screen rotation issue has been resolved by rotating your iPhone. If the problem persists, don’t worry. There are still more troubleshooting methods you can try.
Check if an App is Preventing Rotation
If your iPhone screen is still not rotating properly, it’s possible that a specific app is preventing the screen rotation. Some apps have the option to lock the screen orientation within the app itself, overriding the system-wide screen rotation settings. Here’s how you can check if an app is preventing rotation:
1. Launch the app that is not rotating properly on your iPhone.
2. Once the app is open, try rotating your iPhone. If the screen does not rotate, there may be an option within the app that is preventing rotation.
3. Look for a lock icon, a screen rotation option, or a similar setting within the app’s interface. This setting is usually located in the top or bottom toolbar of the app or within the app’s settings menu.
4. If you find an option related to screen rotation, make sure it is disabled or set to allow rotation. Depending on the app, this option may be labeled as “Lock Rotation,” “Orientation Lock,” or similar phrasing.
5. Once you have disabled the screen rotation lock within the app, exit the app and test if the screen rotation is working properly on your iPhone.
If the screen rotation issue persists even after checking and adjusting the app-specific settings, it’s possible that other factors are causing the problem. In the next section, we will explore additional troubleshooting steps to address the issue.
Note that not all apps support screen rotation. Some apps are designed to be used in a specific orientation or may not have the capability to rotate the screen. In such cases, the screen rotation issue is app-specific and not a device problem.
Now that you have checked if an app is preventing screen rotation and made necessary adjustments, let’s move on to the next troubleshooting method to fix the screen rotation issue.
Reset All Settings
If you’ve tried the previous troubleshooting methods and your iPhone screen still refuses to rotate, it may be time to reset all settings on your device. Resetting all settings can resolve any underlying software conflicts or incorrect settings that may be causing the screen rotation issue. Here’s how you can reset all settings on your iPhone:
1. Open the Settings app on your iPhone.
2. Scroll down and tap on “General”.
3. Scroll down again and select “Reset”.
4. Tap on “Reset All Settings”. You may be prompted to enter your passcode or Apple ID password.
5. Confirm the reset by tapping on “Reset All Settings” again.
Please note that resetting all settings will not delete any data or media from your iPhone. However, it will erase all your customized settings, including Wi-Fi networks, Bluetooth connections, and other preferences.
After the reset is complete, your iPhone will restart. Once it’s back on, try rotating your iPhone to see if the screen rotation issue has been resolved.
If the screen rotation problem continues even after resetting all settings, there is one more troubleshooting method to consider before taking more drastic measures.
Resetting all settings essentially reverts your iPhone to its default factory settings but retains your personal data and media. It’s a helpful step to eliminate any potential software-related issues that may be affecting the screen rotation functionality.
Now that you have reset all settings on your iPhone, let’s move on to the final troubleshooting method to address the screen rotation issue.
Perform a Factory Reset
If you’ve exhausted all the previous troubleshooting methods and your iPhone screen still won’t rotate, you may need to perform a factory reset. Performing a factory reset will erase all data and settings on your iPhone, restoring it to its original factory state. Before proceeding with a factory reset, make sure to back up your iPhone to avoid losing any important data. Here’s how you can perform a factory reset on your iPhone:
1. Go to the Settings app on your iPhone.
2. Scroll down and tap on “General”.
3. Scroll down again and select “Reset”.
4. Tap on “Erase All Content and Settings”. You may be prompted to enter your passcode or Apple ID password.
5. Confirm the factory reset by tapping on “Erase iPhone”.
After confirmation, your iPhone will begin the reset process. This may take some time, so make sure your iPhone is connected to a power source. Once the reset is complete, your iPhone will restart and prompt you to set it up as a new device.
Performing a factory reset should only be done as a last resort, as it erases all data and settings on your iPhone. It is recommended to back up your iPhone before proceeding with a factory reset to ensure you can restore your data after the process.
If the screen rotation issue persists even after a factory reset, it may indicate a hardware problem with your iPhone. In such cases, it is advisable to contact Apple Support or visit an authorized service center for further assistance.
Now that you are familiar with the factory reset process, you can decide if it’s necessary to perform this step to resolve the screen rotation issue on your iPhone.