
What is LogiLDA.dll?
LogiLDA.dll is a dynamic link library file that is associated with Logitech hardware and software. DLL stands for Dynamic Link Library, which is a collection of small programs or functions that can be used by different applications. LogiLDA.dll plays a crucial role in the functionality of Logitech devices such as keyboards, mice, webcams, and speakers.
This DLL file is typically located in the C:\Windows\System32 folder on a Windows operating system. It contains important code and instructions that allow Logitech software and drivers to communicate with the connected hardware and provide the necessary functionalities.
LogiLDA.dll is loaded into the memory when you start your computer or launch a Logitech application. It is essential for the proper functioning of Logitech devices and software components. However, it is not uncommon to encounter errors related to this DLL file, which can cause inconvenience and affect the performance of your Logitech devices.
It is worth noting that LogiLDA.dll is not a system-critical file and is specific to Logitech products. Therefore, if you don’t have any Logitech devices or software installed on your computer, it is unlikely that you will encounter any issues related to this DLL file.
Now that we have a basic understanding of what LogiLDA.dll is, let’s explore why it might be causing errors and how you can fix them.
Why is LogiLDA.dll causing errors?
LogiLDA.dll errors can occur due to various reasons, and understanding the underlying causes can help in effectively resolving the issues. Here are some common reasons why LogiLDA.dll may be causing errors:
- Corrupted or missing DLL file: One of the primary reasons for LogiLDA.dll errors is a corrupted or missing DLL file. This can happen due to improper installation or uninstallation of Logitech software, system file corruption, or malware infections.
- Outdated Logitech software: If you are using outdated Logitech software, it may not be compatible with the operating system or other software components, leading to LogiLDA.dll errors. Updating the Logitech software can often resolve compatibility issues.
- Conflicts with other software: Sometimes, LogiLDA.dll errors can occur due to conflicts with other installed software on your computer. This can be caused by incompatible versions, conflicting drivers, or interference from security software.
- Startup settings: LogiLDA.dll may cause errors if it is set to run automatically during system startup. In some cases, this can lead to conflicts or high resource usage, resulting in errors or system slowdowns.
- Malware or virus infections: Malware or virus infections can corrupt or modify DLL files, including LogiLDA.dll, leading to errors. It is essential to have up-to-date antivirus software to detect and remove any malicious threats.
These are just a few possible reasons why LogiLDA.dll may be causing errors. Identifying the specific cause of the error will help in implementing the appropriate solutions to resolve the issue. In the next section, we will discuss the symptoms of LogiLDA.dll errors and provide solutions to fix them.
Symptoms of LogiLDA.dll errors
When LogiLDA.dll encounters errors or issues, it can manifest through various symptoms. These symptoms can vary in severity and can impact the performance and functionality of your Logitech devices and software. Here are some common symptoms of LogiLDA.dll errors:
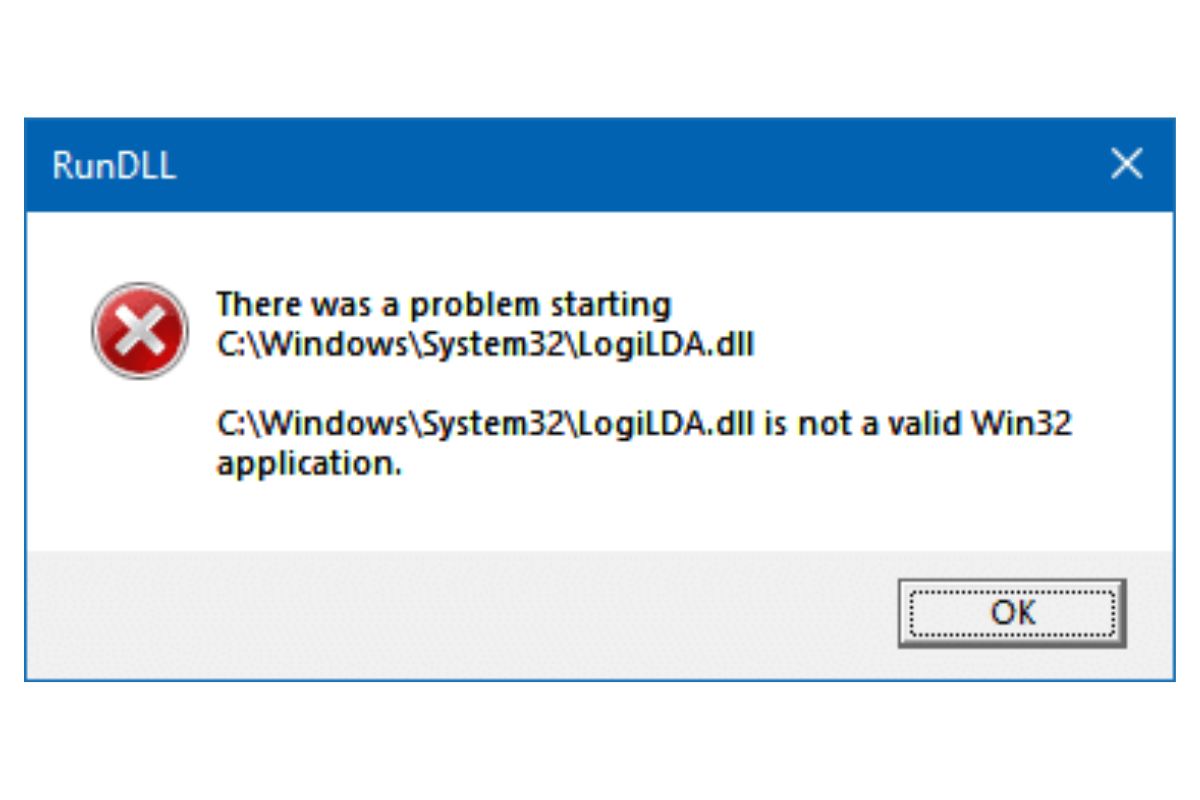
- Error messages: One of the most obvious signs of LogiLDA.dll errors is the appearance of error messages. These messages may indicate that LogiLDA.dll is missing, corrupted, or cannot be found. Common error messages include “LogiLDA.dll not found” or “LogiLDA.dll is missing.”
- Device malfunctions: LogiLDA.dll errors can cause your Logitech devices, such as keyboards, mice, or webcams, to malfunction. You may experience issues like non-responsive buttons, erratic cursor movement, or inability to use certain features of the device.
- Software crashes: LogiLDA.dll errors can lead to software crashes or freeze-ups. If you notice that Logitech software, like Logitech Options or Logitech Gaming Software, frequently crashes or becomes unresponsive, it could be due to LogiLDA.dll issues.
- System slowdowns: LogiLDA.dll errors can also result in system slowdowns or performance issues. Your computer may take longer to boot up, launch applications, or respond to commands. High CPU or memory usage caused by LogiLDA.dll errors can contribute to these slowdowns.
- Compatibility issues: Incompatibility between LogiLDA.dll and your operating system or other software components can cause compatibility issues. This can result in software features not working correctly, error messages related to conflicts, or unexpected behavior of Logitech software and devices.
If you are experiencing any of these symptoms, it is likely that LogiLDA.dll errors are the underlying cause. Fortunately, there are several solutions available to fix these errors, which will be discussed in the following sections.
How to fix LogiLDA.dll errors
Experiencing LogiLDA.dll errors can be frustrating, but fortunately, there are several solutions available to resolve these issues. Here are a few methods you can try to fix LogiLDA.dll errors:
- Reinstall Logitech software: The first step in fixing LogiLDA.dll errors is to reinstall the Logitech software. This ensures that you have a clean installation and can help resolve any corrupted or missing files. Uninstall the existing Logitech software from your computer and then download and install the latest version from the Logitech website.
- Update Logitech software: Outdated Logitech software can lead to compatibility issues and LogiLDA.dll errors. Check for updates for your Logitech software and install any available updates. This can address any known issues and improve the compatibility of the software with your operating system.
- Run a system file checker scan: System file corruption can cause LogiLDA.dll errors. Run the System File Checker utility to scan and repair any corrupted system files. Open the Command Prompt as an administrator, type “sfc /scannow,” and press Enter. Wait for the scan to complete and follow any prompts to fix detected errors.
- Perform a clean boot of your system: Conflicts with other software or services can cause LogiLDA.dll errors. Perform a clean boot to start your computer with minimal startup programs and services. This can help identify if any third-party software is causing the issue. Instructions for performing a clean boot can be found on the Microsoft support website.
- Disable LogiLDA.dll from startup: If LogiLDA.dll is set to run automatically during system startup and it is causing errors, you can disable it from the startup. Open the Task Manager, go to the Startup tab, find LogiLDA.dll, right-click on it, and choose Disable. Restart your computer to apply the changes.
- Remove LogiLDA.dll using antivirus software: If LogiLDA.dll is flagged as a potential threat by your antivirus software, you can try removing it. Run a full system scan with your antivirus software and follow any prompts to quarantine or remove the file. Be cautious when removing files and ensure that you have a backup or restore point in case of any issues.
- Use System Restore to revert changes: If you recently made changes to your system, such as installing or uninstalling software, and started experiencing LogiLDA.dll errors, you can use System Restore to revert your system to a previous stable state. Open the System Restore utility, choose a restore point before the changes were made, and follow the prompts to restore your system.
- Replace LogiLDA.dll with a known working version: If none of the above solutions work, you can try replacing LogiLDA.dll with a known working version. Locate a working version of LogiLDA.dll from a trusted source or from a computer with a similar configuration, and replace the existing LogiLDA.dll file with it. Be cautious when replacing files and ensure that you have a backup in case of any complications.
- Contact Logitech support: If you have tried all the above solutions and are still experiencing LogiLDA.dll errors, it may be best to contact Logitech support for further assistance. They can provide personalized guidance and solutions specific to your Logitech hardware and software.
Try these solutions one by one until the LogiLDA.dll errors are resolved. If the issue persists, it may be indicative of a more significant underlying problem, and seeking professional assistance is recommended.
Solution 1: Reinstall Logitech software
One of the most effective ways to fix LogiLDA.dll errors is to reinstall the Logitech software on your computer. This solution ensures that you have a fresh installation of the software, which can help resolve any corrupted or missing files that may be causing the LogiLDA.dll errors. Here’s how you can reinstall Logitech software:
- Start by uninstalling the existing Logitech software from your computer. To do this, go to the Control Panel and open the “Programs and Features” or “Add or Remove Programs” section. Look for any Logitech-related software, such as Logitech Options, Logitech Gaming Software, or Logitech SetPoint, and select them one by one to uninstall.
- Follow the on-screen prompts to complete the uninstallation process. It’s important to note that uninstalling Logitech software may also remove any custom settings or profiles associated with the software. Make sure to back up any important settings or profiles if needed.
- After uninstalling the software, visit the official Logitech website to download the latest version of the software. Navigate to the “Support” or “Downloads” section of the website and search for your specific Logitech device or software.
- Once you find the appropriate software, click on the download link and save the installation file to your computer.
- Once the download is complete, locate the installation file and double-click on it to start the installation process.
- Follow the on-screen instructions to complete the installation. Make sure to read any prompts carefully and select the desired options when prompted.
- After the installation is complete, restart your computer to apply the changes.
By reinstalling the Logitech software, you are ensuring that you have a clean installation of the software and its associated DLL files. This can often resolve issues related to LogiLDA.dll errors. If the error persists even after reinstalling the software, you may need to explore the other solutions mentioned in this article.
Solution 2: Update Logitech software
Updating the Logitech software is another effective solution for fixing LogiLDA.dll errors. Outdated software versions can often lead to compatibility issues and errors associated with LogiLDA.dll. Updating the software ensures that you have the latest bug fixes, patches, and enhancements, which can address known issues and improve compatibility with your operating system. Here’s how you can update your Logitech software:
- Start by opening the Logitech software installed on your computer. This could be Logitech Options, Logitech Gaming Software, or any other Logitech software associated with your device.
- In the software interface, look for a “Settings” or “Preferences” option. Click on it to access the software settings.
- Within the settings, navigate to the “Update” or “Check for Updates” section. This option allows you to check if there are any available updates for the software.
- Click on the “Check for Updates” button and wait for the software to connect to the Logitech server and check for updates.
- If any updates are found, a prompt will appear asking if you would like to download and install them. Click on “Yes” or “Install” to proceed with the update process.
- Follow the on-screen instructions to complete the update. Ensure that you have a stable internet connection during the update process to avoid any interruptions.
- Once the update is finished, restart your computer to apply the changes.
By updating the Logitech software, you are ensuring that you have the latest version with all the necessary improvements and bug fixes. This can resolve compatibility issues and hopefully address LogiLDA.dll errors. If the error persists after updating the software, you may need to try other solutions mentioned in this article.
Solution 3: Run a system file checker scan
If LogiLDA.dll errors persist on your computer, it’s possible that system file corruption is the underlying cause. Running a system file checker scan can help identify and repair any corrupted or missing system files, including LogiLDA.dll. Here’s how you can run a system file checker scan:
- Open the Command Prompt as an administrator. To do this, search for “Command Prompt” in the Start menu, right-click on it, and select “Run as administrator.”
- In the Command Prompt window, type the command “sfc /scannow” and press Enter. This will initiate the system file checker scan.
- Wait for the scan to complete. The scan may take some time, so be patient during the process.
- If any corrupted or missing system files are detected, the system file checker will attempt to repair them automatically. Follow the on-screen instructions, if any, to complete the repair process.
- Once the scan and repair process is finished, restart your computer to apply the changes.
The system file checker scan will examine all protected system files on your computer and attempt to repair any issues it detects. By repairing any corrupted or missing system files, including LogiLDA.dll, you may be able to resolve the LogiLDA.dll errors. If the errors persist even after running the system file checker scan, proceed to explore the other solutions mentioned in this article.
Solution 4: Perform a clean boot of your system
If you’re still encountering LogiLDA.dll errors, performing a clean boot of your system can help identify if any third-party software or services are causing conflicts. Clean booting your system allows you to start your computer with minimal startup programs and services, which can help isolate the issue. Here’s how you can perform a clean boot:
- Press the Windows key + R to open the Run dialog box. Type “msconfig” and hit Enter.
- In the System Configuration window, navigate to the “Services” tab.
- Check the box that says “Hide all Microsoft services” to avoid disabling essential system services. Then, click on the “Disable all” button.
- Next, switch to the “Startup” tab and click on “Open Task Manager.”
- In the Task Manager window, disable all startup items individually by right-clicking on each item and selecting “Disable.”
- Close Task Manager and go back to the System Configuration window. Click on “OK.”
- When prompted to restart the computer, click “Restart.”
After your computer restarts, it will be in a clean boot state. Test to see if the LogiLDA.dll errors persist. If the errors are resolved, it suggests that a third-party program or service is causing the conflict. You can then gradually enable the disabled services and startup programs one by one until you identify the one causing the error.
Note that performing a clean boot may temporarily disable some functionality or features of certain programs. If you need those features, you can manually enable them while troubleshooting. Remember to restore your system to its normal startup state once you have identified the conflicting program or service.
If performing a clean boot does not resolve the LogiLDA.dll errors, proceed to explore the other solutions provided in this article.
Solution 5: Disable LogiLDA.dll from startup
If LogiLDA.dll errors continue to persist, disabling LogiLDA.dll from startup can be an effective solution. By preventing LogiLDA.dll from automatically running during system startup, you can potentially resolve any conflicts or high resource usage that may be causing the errors. Here’s how you can disable LogiLDA.dll from startup:
- Press the Ctrl + Shift + Esc keys together to open the Task Manager.
- In the Task Manager window, navigate to the “Startup” tab.
- Scroll through the list of startup programs until you find an entry related to LogiLDA.dll. The specific name may vary, but it usually includes “LogiLDA” or “Logitech Download Assistant.”
- Right-click on the LogiLDA.dll entry and select “Disable” from the context menu.
- Repeat this process for any other Logitech-related startup programs that you find.
- Close the Task Manager.
- Restart your computer to apply the changes.
By disabling LogiLDA.dll from startup, you are preventing it from automatically running when your computer boots up. This can help address any conflicts or resource issues associated with LogiLDA.dll, potentially resolving the LogiLDA.dll errors. If the errors persist after disabling LogiLDA.dll from startup, proceed to explore the other solutions mentioned in this article.
Solution 6: Remove LogiLDA.dll using antivirus software
If LogiLDA.dll is flagged as a potential threat by your antivirus software, removing it might help resolve the errors. LogiLDA.dll can become infected or modified by malware, which can cause issues and trigger error messages. Here’s how you can remove LogiLDA.dll using antivirus software:
- Ensure that your antivirus software is up to date. Update it if necessary to ensure the latest virus definitions are used for scanning.
- Open your antivirus software and initiate a full system scan. Select the option to scan all files and folders on your computer.
- Wait for the scan to complete. This may take some time, depending on the size of your system and the speed of your computer.
- If your antivirus software detects LogiLDA.dll as a threat, follow the prompts provided to remove or quarantine the file. Be cautious when removing files and ensure you have a backup or restore point in case any complications arise.
Removing LogiLDA.dll using antivirus software can help eliminate any potential threats or malware that might be causing errors. Once the removal process is complete, restart your computer and check if the LogiLDA.dll errors persist.
If the antivirus scan does not flag LogiLDA.dll as a threat or if the errors persist after removing it, it’s recommended to explore the other solutions provided in this article.
Solution 7: Use System Restore to revert changes
If you recently made changes to your system, such as installing or uninstalling software, and started experiencing LogiLDA.dll errors, using System Restore can help revert your system to a previous stable state. System Restore allows you to undo system changes without affecting your personal files. Here’s how you can use System Restore to revert changes and potentially resolve LogiLDA.dll errors:
- Press the Windows key and search for “System Restore” in the Start menu. Open the System Restore utility.
- In the System Restore window, click on “Next” to proceed.
- You will see a list of available restore points. Select a restore point that was created before you started experiencing the LogiLDA.dll errors. You can choose a manually created restore point or a system-generated restore point.
- Click on “Next” and then “Finish” to start the System Restore process.
- System Restore will warn you that it cannot be interrupted once started. Review the details and ensure that you have saved any important files or data.
- Click on “Yes” to confirm and start the System Restore process. Your computer will restart and begin the restoration.
- Wait for the process to complete. This may take some time, depending on the size of your system and the chosen restore point.
- Once the system restore is finished, your computer will reboot. Check if the LogiLDA.dll errors are resolved.
Using System Restore allows you to undo recent changes that might have led to LogiLDA.dll errors. If the errors persist after performing a system restore, you can explore other solutions mentioned in this article.
Solution 8: Replace LogiLDA.dll with a known working version
If none of the previous solutions have resolved the LogiLDA.dll errors, you can try replacing the problematic LogiLDA.dll file with a known working version. It’s possible that the current LogiLDA.dll file on your system has become corrupted or damaged, leading to the errors. Here’s how you can replace LogiLDA.dll with a known working version:
- Start by checking if you have a known working version of the LogiLDA.dll file available. You can search for a working version on trustworthy websites or copy it from a computer with a similar configuration that does not experience LogiLDA.dll errors.
- Once you have a known working version of LogiLDA.dll, make sure to create a backup of the existing LogiLDA.dll file in case any issues arise during the replacement process.
- Next, navigate to the folder where LogiLDA.dll is located. It is typically found in the C:\Windows\System32 folder on Windows operating systems.
- Right-click on the existing LogiLDA.dll file and select “Rename.” Change the filename to something like “LogiLDA.dll.old” to differentiate it from the new file.
- Copy the known working version of LogiLDA.dll and paste it into the same folder where the original file was located.
- Once the new LogiLDA.dll file is in place, restart your computer to apply the changes.
By replacing the LogiLDA.dll file with a known working version, you are ensuring that a non-corrupted, functional version of the file is used. This can often resolve LogiLDA.dll errors. However, exercise caution when replacing system files, as any mistakes or errors during the process may result in system instability. If the errors persist even after replacing the file, consider exploring other solutions mentioned in this article.
Solution 9: Contact Logitech support
If none of the previous solutions have resolved the LogiLDA.dll errors, it may be best to reach out to Logitech support for further assistance. Logitech’s support team is well-equipped with expertise and resources to help troubleshoot and resolve issues related to their products. Here’s how you can contact Logitech support:
- Visit the official Logitech website and navigate to the “Support” or “Contact” section. Look for the support options specific to your region or country.
- Depending on the available options, you may be able to access support through live chat, email, or phone. Choose the option that is most convenient for you.
- Provide the necessary details, such as the product model, serial number, and a detailed description of the LogiLDA.dll errors you are experiencing.
- Engage in a conversation with the Logitech support representative, following their instructions and providing any requested information or diagnostic logs.
- Based on the information you provide, the Logitech support team will work with you to diagnose the issue and provide guidance on how to resolve it.
- Follow the recommended steps or solutions provided by the support team. They may provide specific instructions or software updates to address the LogiLDA.dll errors.
- If the support team determines that the issue is related to hardware, they may guide you through the warranty or replacement process.
By contacting Logitech support, you can benefit from their expertise and receive personalized assistance in resolving LogiLDA.dll errors. They understand the intricacies of their products and can guide you through specific troubleshooting steps or provide software updates tailored to your situation. Remember to provide as much detail as possible to help them better understand and address your issue.
If the LogiLDA.dll errors still persist after seeking support from Logitech, it may indicate a more complex problem, and they may be able to provide additional insights or solutions to help resolve the issue.