How to Set Up WhatsApp Web
If you’re someone who prefers typing on a full-sized keyboard or finds it easier to manage your WhatsApp messages on a larger screen, WhatsApp Web is the perfect option for you. With WhatsApp Web, you can sync your conversations and access them directly from your computer. Setting up WhatsApp Web is a simple process that requires just a few easy steps:
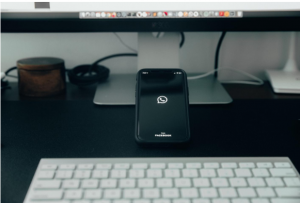
- Open the WhatsApp application on your mobile device.
- Tap on the three-dot menu icon in the top-right corner and select “WhatsApp Web” from the dropdown menu.
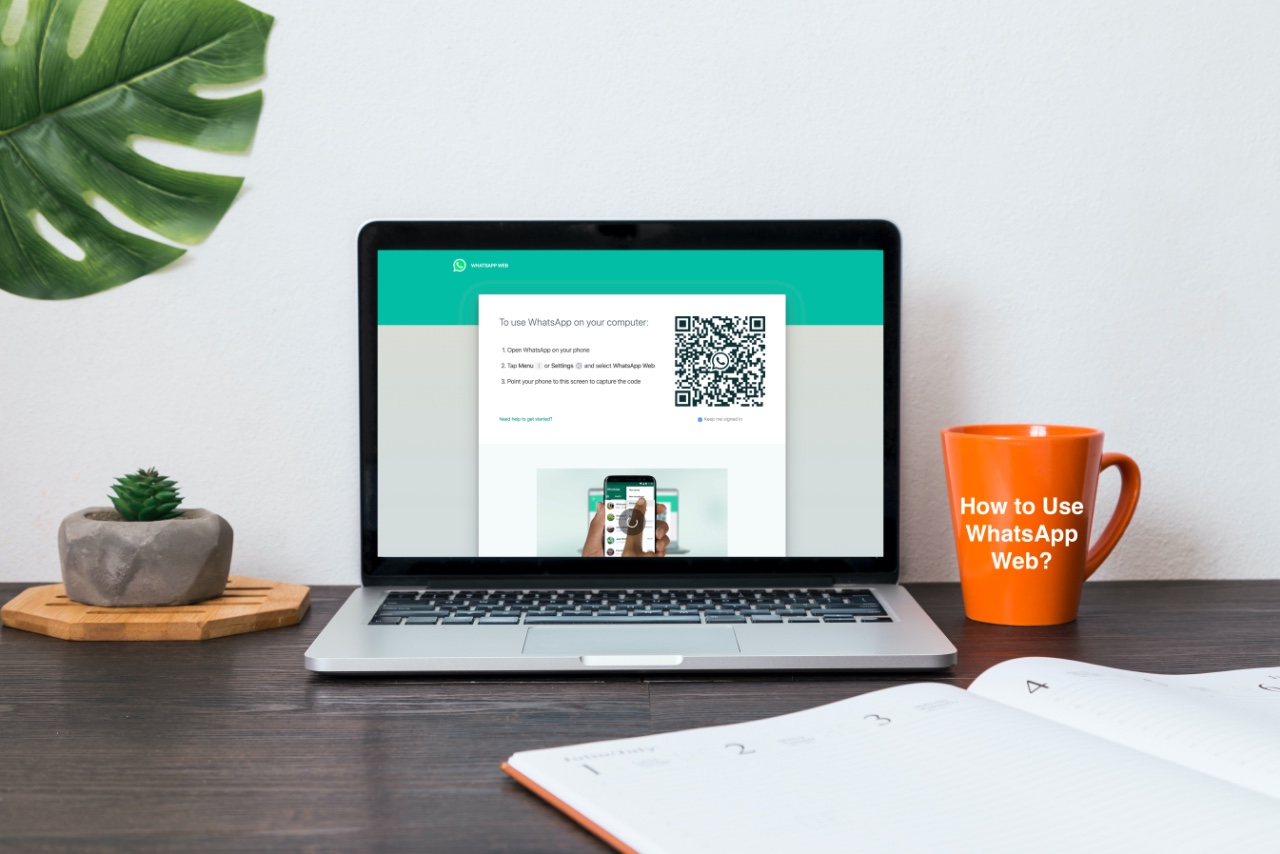
- Visit the WhatsApp Web website on your computer’s browser. You can do this by typing “web.whatsapp.com” in the address bar.
- You will see a QR code on the webpage. Scan this QR code using your phone’s camera. Make sure to align your phone’s camera with the QR code within the frame.
- Once the QR code is scanned successfully, your WhatsApp chats will appear on your computer screen, and you are ready to start using WhatsApp Web.
It’s important to note that WhatsApp Web requires you to have an active internet connection on both your mobile device and your computer. Also, make sure to keep your phone connected to the internet as WhatsApp Web syncs your messages directly from your phone.
Additionally, it is recommended to use WhatsApp Web on a private and secure network to protect your conversations and personal information. Avoid using public Wi-Fi networks or shared computers to minimize the risk of unauthorized access to your WhatsApp account.
Now that you’ve successfully set up WhatsApp Web, you can enjoy all the features and convenience it offers. In the following sections, we’ll guide you on how to make the most out of WhatsApp Web, including sending messages, sharing media, managing chats, and more.
How to Access WhatsApp Web
Accessing WhatsApp Web is a breeze and can be done in a few simple steps. Once you have set up WhatsApp Web, follow these instructions to access your WhatsApp account on your computer:
- Open your preferred web browser on your computer.
- Type “web.whatsapp.com” in the address bar.
- Hit enter or click on the search button to navigate to the WhatsApp Web homepage.
- A QR code will be displayed on the webpage.
- Now, open the WhatsApp application on your smartphone.
- Tap on the three-dot menu icon located at the top-right corner.
- Select “WhatsApp Web” from the menu options.
- A camera viewfinder will open on your phone.
- Align your phone’s camera with the QR code displayed on your computer screen.
- Once successfully scanned, your WhatsApp account will be mirrored on the browser, and you can start using WhatsApp Web.
Remember, to use WhatsApp Web, your phone must remain connected to the internet while you are using WhatsApp on your computer. It is essential for synchronization and maintaining the privacy of your messages.
WhatsApp Web provides you with seamless access to your conversations, allowing you to stay connected even when your phone is not directly in your hands. So whether you’re working on your computer or simply prefer a larger screen, WhatsApp Web makes it easy to keep in touch with your contacts.
Now that you know how to access WhatsApp Web, let’s dive into the various features and functionalities it offers, such as sending messages, making voice and video calls, managing chats, and more.
How to Connect WhatsApp Web to Your Phone
Connecting WhatsApp Web to your phone is a straightforward process that allows you to access and manage your WhatsApp messages on your computer. To establish the connection, follow these simple steps:
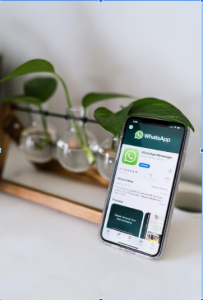
- Ensure that you have the latest version of the WhatsApp application installed on your smartphone.
- Open WhatsApp on your phone.
- Tap on the three-dot menu icon located at the top-right corner.
- Select “WhatsApp Web” from the menu options.
- A camera viewfinder will appear on your screen.
- Now, open your preferred web browser on your computer and visit the WhatsApp Web homepage by typing “web.whatsapp.com” in the address bar.
- On the WhatsApp Web homepage, you will see a QR code.
- Align your phone’s camera with the QR code on your computer screen.
- Once the QR code is successfully scanned, your phone will establish a connection with WhatsApp Web.
- Your WhatsApp chats and conversations will now be mirrored on your computer screen, and you can start using WhatsApp Web.
It’s important to note that the connection between your phone and WhatsApp Web is secure and encrypted, ensuring the privacy and security of your messages. However, it’s recommended to connect to a trusted network and avoid using public Wi-Fi to further protect your data.
Furthermore, if you ever wish to disconnect WhatsApp Web from your phone, you can do so easily. Simply navigate back to the “WhatsApp Web” section on your phone and tap “Log out from all devices.” This will end the connection between your phone and WhatsApp Web.
Now that you know how to connect your phone to WhatsApp Web, you can enjoy the convenience of accessing your WhatsApp messages on a larger screen and easily managing your conversations.
How to Use WhatsApp Web
Now that you’ve set up WhatsApp Web and connected it to your phone, let’s explore how to make the most of this powerful tool. WhatsApp Web provides a user-friendly interface that allows you to access all essential features of the mobile app. Here’s a step-by-step guide on how to use WhatsApp Web:
- Viewing Chats: Upon logging into WhatsApp Web, you’ll see your chat list on the left-hand side. Simply click on a contact or group to view the conversation.
- Typing: To type a message, click on the chat input box. You can then begin typing your message using your keyboard.
- Sending Messages: After typing your message, hit Enter to send it. Alternatively, you can use Ctrl + Enter to start a new line within the message.
- Emoji and Formatting: Just like on your phone, WhatsApp Web supports emojis and text formatting. To access emojis, click on the smiley face icon next to the chat input box. To format text, use asterisks for bold (*text*), underscores for italics (_text_), and tildes for strikethrough (~text~).
- Attachments: To send photos or videos, click on the paperclip icon at the top of the chat window. Select the file you want to send from your computer’s files or drag and drop it into the chat window.
- Voice and Video Calls: WhatsApp Web also supports voice and video calls. Click on the phone or video icon at the top of the chat window to initiate a call with your contact or group.
- Managing Chats: You can manage your chats by right-clicking on a contact or group. From the options presented, you can archive, delete, mute, or mark a chat as unread.
- Creating and Managing Groups: To create or manage groups, click on the three-dot menu icon in the left-hand chat pane. Select “New Group” to create a new group or access the settings of an existing group.
- Profile Picture and Status: You can update your profile picture and status by clicking on your name at the top-left corner of the screen. From there, you can upload a new photo or update your status message.
- Notification Settings: Customize your notification settings by clicking on the three-dot menu icon at the top-right corner of the screen. From there, select “Settings” and then “Notifications.” Here, you can control how and when you receive notifications.
With these simple instructions, you can easily navigate WhatsApp Web and take advantage of its features. Whether you’re sending messages, making calls, or managing your chats, WhatsApp Web offers a convenient and efficient way to stay connected with your contacts. Enjoy the seamless integration between your phone and computer, making it easier than ever to communicate with your loved ones and colleagues!
How to Send Messages on WhatsApp Web
Sending messages on WhatsApp Web is a breeze, and it allows you to communicate seamlessly using your computer’s keyboard. Here’s a step-by-step guide on how to send messages on WhatsApp Web:
- Open WhatsApp Web on your computer by visiting the website web.whatsapp.com and scanning the QR code with your phone.
- Once logged in, you’ll see your chat list on the left-hand side of the screen. Click on the contact or group you want to send a message to.
- At the bottom of the chat window, you’ll find the message input box. Simply click on it to activate the typing area.
- Type your message in the input box. You can use your keyboard to type the message instead of relying on your smartphone’s touchscreen keyboard.
- To send the message, press Enter on your keyboard or click on the send button next to the input box. The message will be sent instantly to the recipient.
WhatsApp Web also supports emojis and text formatting, allowing you to enhance your messages. To access emojis, click on the smiley face icon next to the input box. Choose from the wide range of emojis available and click on the desired one to insert it into your message.
If you want to format your text, you can use simple symbols. To make text bold, enclose it between asterisks (*like this*). To make text italic, enclose it between underscores (_like this_). If you prefer to strike through your text, enclose it between tildes (~like this~).
Additionally, WhatsApp Web provides the option to send voice messages. To do so, click on the microphone icon next to the input box and hold down the button to record your message. Release the button when you’re done recording, and the voice message will be sent automatically.
Remember that WhatsApp Web requires an active internet connection on both your computer and smartphone to send and receive messages. So ensure that you’re connected to a stable network for uninterrupted communication.
With these simple steps, you can easily send messages on WhatsApp Web and stay connected with your contacts without the need to reach for your phone. Enjoy the convenience of typing on a full-sized keyboard while enjoying the seamless integration between your smartphone and computer!
How to Send Photos and Videos on WhatsApp Web
Sending photos and videos on WhatsApp Web is a great way to share visual moments and memories with your contacts. Follow these simple steps to send photos and videos from your computer:
- Open WhatsApp Web on your computer by visiting web.whatsapp.com and scanning the QR code with your phone.
- Select the chat or group you want to send the photo or video to from the chat list on the left side.
- Click on the paperclip icon located at the top of the chat window.
- A menu will appear with various options. Choose “Photos & Videos” to open the file explorer on your computer.
- Browse for the photo or video you want to send and select it.
- Click “Open” to confirm your selection.
- The photo or video will be uploaded and appear as a preview in the chat window.
- You can add a caption to accompany the photo or video by typing in the input box below the preview.
- Once you’re ready to send, press Enter on your keyboard or click on the send button next to the input box.
WhatsApp Web also allows you to send multiple photos or videos at once. Simply hold down the Ctrl key on your keyboard (or Cmd on Mac) and select multiple files from your computer’s file explorer before clicking “Open.”
It’s important to note that WhatsApp has certain file size and format limitations for photos and videos. Videos can be a maximum of 16MB, while photos can be up to 8MB. Additionally, both photos and videos must be in commonly supported formats such as JPEG for images and MP4 for videos.
By following these steps, you can effortlessly share precious moments captured through photos and videos with your contacts on WhatsApp Web. Enjoy the convenience of sharing visual content directly from your computer!
How to Make Voice and Video Calls on WhatsApp Web
WhatsApp Web not only allows you to send messages and photos but also provides the capability to make voice and video calls right from your computer. Here’s a step-by-step guide on how to make voice and video calls on WhatsApp Web:
- Open WhatsApp Web on your computer by visiting web.whatsapp.com and scanning the QR code with your phone.
- Select the contact or group you want to call from your chat list on the left-hand side.
- At the top-right corner of the chat window, you’ll see two icons: a phone icon for voice calls and a video camera icon for video calls.
- To make a voice call, click on the phone icon. The voice call will connect, and you can start conversing with the recipient.
- If you want to make a video call, click on the video camera icon. The video call will initiate, and your webcam will turn on, allowing the recipient to see you.
- During a call, you have access to additional features such as muting the call, switching between the front and rear cameras (for video calls), and ending the call.
It’s important to note that both you and the person you are calling must have an active internet connection in order to make voice and video calls on WhatsApp Web. Additionally, the quality of the call may vary depending on the stability and speed of your internet connection.
WhatsApp Web offers a convenient way to make calls when you’re working on your computer or prefer the larger screen. It allows you to stay connected with your contacts even if your phone is not within reach. So go ahead and enjoy the seamless experience of making voice and video calls through WhatsApp Web!
How to Manage Chats on WhatsApp Web
WhatsApp Web provides several useful features for managing your chats efficiently, allowing you to stay organized and in control of your conversations. Here are the steps to manage chats on WhatsApp Web:
- Open WhatsApp Web on your computer by visiting web.whatsapp.com and scanning the QR code with your phone.
- From the chat list on the left-hand side, select the contact or group that you want to manage.
- Right-click on the chat to reveal a menu of options specific to that contact or group.
- From the menu, you can choose various actions:
- Archive Chat: This option allows you to archive the chat, removing it from your main chat list. Archived chats can still be accessed by scrolling to the bottom of your chat list or searching for the contact or group.
- Delete Chat: If you want to permanently delete a chat and all its messages, select this option. Deleted chats cannot be recovered.
- Mute Notifications: If you receive frequent notifications from a particular chat, you can mute them for a specified period of time. This will prevent WhatsApp Web from displaying notifications for that chat.
- Mark as Unread: If you want to highlight a chat as unread, click on this option. It will display a bold notification badge on the chat, indicating that you haven’t read it yet.
- Additionally, at the top-right corner of the chat window, you’ll find options to search for specific messages within the chat, star important messages, and access the chat settings.
Managing chats on WhatsApp Web allows you to prioritize conversations, declutter your chat list, and stay focused on the most relevant messages. It’s particularly useful when dealing with several active chats and groups.
Remember that archived chats can still receive new messages, so it’s important to periodically review your archived chats to stay updated.
With these simple steps, you can easily manage your chats on WhatsApp Web, keeping your conversations organized and easily accessible. Enjoy the flexibility and convenience of managing your chats on your computer!
How to Create and Manage Groups on WhatsApp Web
WhatsApp Web not only allows you to communicate with individual contacts but also enables you to create and manage groups. Group chats are a convenient way to connect with multiple people simultaneously. Here’s how you can create and manage groups on WhatsApp Web:
- Open WhatsApp Web on your computer by visiting web.whatsapp.com and scanning the QR code with your phone.
- In the left-hand chat pane, click on the three-dot menu icon located at the top-right corner.
- From the menu options, select “New Group.”
- A new window will appear, displaying contacts from your phone’s address book. Select the participants you want to add to the group by clicking on their names. You can select multiple contacts.
- Once you’ve selected the participants, click on the green checkmark button to create the group.
- Next, you’ll be prompted to enter a group subject. This will be the title of the group, visible to all participants.
- Optionally, you can add an icon for the group by clicking on the camera icon next to the group subject field. Choose a photo or icon from your computer to represent the group visually.
- Finally, click on the green checkmark button to create the group.
Once the group is created, you can manage it using various options:
- Group Info: To view the group participants, click on the group name in the chat list. Then, click on the three-dot menu icon at the top-right corner and select “Group info.” Here, you can see the group members, add participants, change the group subject, and manage group settings.
- Group Settings: Within the “Group Info” page, you can access group settings. From here, you can edit the group subject, change the group icon, restrict participants from changing the group subject and icon, set group permissions, and enable or disable group notifications.
- Group Admins: Group admins have additional privileges in managing groups. As an admin, you can promote or demote participants to admin status, remove participants from the group, and control group settings.
By creating and managing groups on WhatsApp Web, you can easily communicate and collaborate with multiple people at once. Whether it’s for work-related discussions or social gatherings, WhatsApp groups provide a platform for seamless communication and coordination.
Enjoy the convenience of group chats on WhatsApp Web and make the most out of your interactions with friends, family, and colleagues!
How to Change Profile Picture and Status on WhatsApp Web
Your profile picture and status on WhatsApp Web help personalize your account and allow your contacts to identify you easily. Changing them is a simple process. Here’s how you can update your profile picture and status on WhatsApp Web:
- Open WhatsApp Web on your computer by visiting web.whatsapp.com and scanning the QR code with your phone.
- At the top-left corner of the screen, you’ll see your profile picture and name. Click on your name to access your profile settings.
- In the profile settings, you’ll see your current profile picture at the left side of the screen.
- To change your profile picture, click on the camera icon next to your current picture. You can then select a new image from your computer or take a new photo using your webcam.
- Once you’ve selected or taken a new picture, click on the “Upload” or “Save” button to update your profile picture.
- Additionally, you can update your status by clicking on the pencil icon next to your current status. This will allow you to enter a new status message.
- Enter your desired status message in the input box.
- After entering your new status, click on the “Save” or “Update” button to apply the changes.
It’s important to note that your profile picture and status are visible to all your WhatsApp contacts. Make sure to choose an appropriate picture and status that represents you professionally or reflects your desired level of privacy.
By updating your profile picture and status, you can give a personal touch to your WhatsApp Web account, allowing your contacts to easily identify and connect with you. Enjoy customizing your profile to reflect your personality, mood, or current activities!
How to Change Notification Settings on WhatsApp Web
Customizing your notification settings on WhatsApp Web allows you to manage how you receive alerts and stay updated on your conversations. Whether you prefer subtle notifications or want to mute certain chats, WhatsApp Web provides flexibility in adjusting your preferences. Here’s how you can change your notification settings:
- Open WhatsApp Web on your computer by visiting web.whatsapp.com and scanning the QR code with your phone.
- At the top-right corner of the screen, click on the three-dot menu icon.
- From the dropdown menu, select “Settings.”
- Within the Settings menu, click on “Notifications.”
- You’ll now see various options for customizing your notification settings.
- Message notifications: If you wish to receive notifications for new messages, ensure that the “Message Notifications” toggle is enabled.
- Desktop alerts: To receive popup notifications on your computer screen for new messages, enable the “Desktop Alerts” toggle. You can also choose to display only the sender’s name or show a preview of the message content.
- Sound: Toggle the “Sound” option to enable or disable notification sounds for incoming messages.
- Group notifications: If you want to customize notifications specifically for group chats, click on “Group Notifications.” Here, you can choose whether to receive alerts for all messages, mentions, or disable group notifications entirely.
- Disable notifications: If you need some quiet time or wish to focus without interruptions, you can click on “Disable Notifications.” This will temporarily mute all incoming notifications from WhatsApp Web.
- After adjusting your notification settings, click on the back arrow icon to save your changes and return to the main settings menu.
WhatsApp Web allows you to tailor notification settings to suit your preferences and needs. By customizing how you receive notifications, you can stay informed about your conversations without feeling overwhelmed.
Take advantage of these notification settings to streamline your WhatsApp Web experience and create a notification setup that works best for you.
How to Log Out of WhatsApp Web
Logging out of WhatsApp Web is important to ensure the privacy and security of your WhatsApp account, especially if you are using a shared computer or a public device. Here’s how you can log out of WhatsApp Web:
- Open WhatsApp Web on your computer by visiting web.whatsapp.com and scanning the QR code with your phone.
- At the top-right corner of the screen, click on the three-dot menu icon.
- From the dropdown menu, click on “Log out.”
- A confirmation message will appear, asking if you want to log out of WhatsApp Web. Click on “Log out” to confirm.
Once you have logged out, all active sessions of your WhatsApp Web will be ended, and you will no longer have access to your chats or notifications on that particular computer.
Keep in mind that logging out of WhatsApp Web does not unlink or disconnect your WhatsApp account from your phone. It only terminates the connection between your phone and the web browser you used for WhatsApp Web.
It’s important to log out of WhatsApp Web, especially if you have used it on a public or shared computer. This protects your personal information and ensures that others cannot access or misuse your account.
If you forgot to log out of WhatsApp Web on a computer that you no longer have access to, you can remotely log out from all active sessions through the WhatsApp application on your phone. Simply go to WhatsApp settings, select “WhatsApp Web/Desktop,” and choose the option to log out from all devices.
By following these steps and logging out of WhatsApp Web when needed, you can maintain the security and privacy of your WhatsApp account and ensure that your conversations remain confidential.