
Reasons to Use Video Filters on Zoom
Video filters have become increasingly popular on Zoom, and for good reason. These fun and innovative tools allow users to enhance their video calls, adding a touch of creativity and personalization. Here are some compelling reasons why you should consider using video filters on Zoom:
- Enhance Your Appearance: Video filters enable you to put your best foot forward during virtual meetings. Whether you want to brighten your complexion, smooth out imperfections, or add a touch of makeup, video filters allow you to present yourself in the most flattering light.
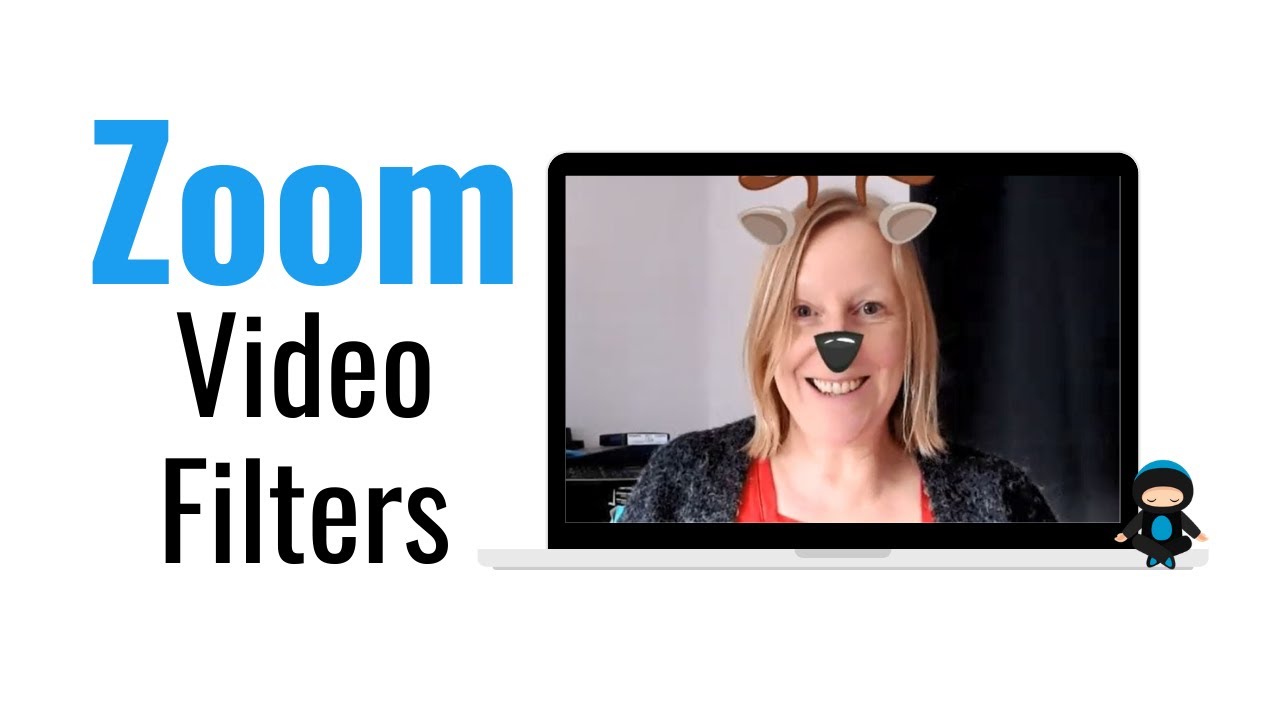
- Add a Personal Touch: Video filters let you express your personality and make your video calls more engaging. From quirky effects like cat ears or funny hats to elegant filters that mimic professional backgrounds, video filters make your meetings more visually appealing and memorable.
- Create a Professional Look: With video filters, you can transform your home into a professional setting. Use virtual backgrounds that resemble a sleek office or a professional workspace to maintain a polished and business-like appearance, even when you’re working from the comfort of your own home.
- Break the Ice: Video filters can help break the ice and add a dose of fun to your meetings. Start your meetings with a playful filter and lighten the mood, making everyone feel more relaxed and comfortable. It’s a great way to foster a positive and friendly atmosphere.
- Engage Your Audience: Whether you’re delivering a presentation or conducting a virtual event, video filters can help capture your audience’s attention. Use filters that align with your content or theme to add an extra visual element and make your presentation more captivating and memorable.
These are just a few reasons why you might want to consider using video filters on Zoom. Whether you’re looking to enhance your appearance, add a personal touch, or create a professional vibe, video filters offer a range of options to meet your needs. Now let’s explore how to access and apply video filters during your Zoom meetings.
How to Access Video Filters on Zoom
Accessing video filters on Zoom is a breeze, and you can easily transform your video calls with just a few clicks. Follow these steps to access and apply video filters in your Zoom meetings:
- Open the Zoom desktop application on your computer and sign in to your account.
- Click on the profile icon in the top right corner of the app and select “Settings” from the dropdown menu.
- In the settings window, navigate to the “Video” tab from the left-hand sidebar.
- Scroll down until you find the “My Video” section. Here, you’ll see an option called “Touch up my appearance.” Check this box to enable the default video filters provided by Zoom.
- If you want to explore additional video filters, click on the “Video Filters” button located just below the “Touch up my appearance” option.
- A new window will pop up, presenting you with a variety of video filters to choose from. You can preview each filter by selecting it, and once you find one you like, simply click on it to apply it to your video feed.
- To disable a video filter, click on the “Video Filters” button again and select the default “No filter” option.
Voila! You’ve successfully accessed and applied video filters on Zoom. Feel free to experiment with different filters to find the one that suits your style and needs. Remember, you can always change or disable the video filter during your meetings by following the same steps.
Now that you know how to access video filters on Zoom, let’s move on to applying them during your meetings and adjusting filter settings to suit your preferences.
Applying Video Filters During a Meeting
Once you’ve accessed video filters on Zoom, applying them during a meeting is simple and can be done on the fly. Follow these steps to apply video filters to your video feed while in a Zoom meeting:
- Start or join a Zoom meeting as you normally would.
- Click on the “^” arrow next to the “Stop Video” button at the bottom of the meeting window.
- A menu will appear, showing all the available video filters. Move your cursor over each filter to see a live preview of how it will affect your video feed.
- Select the video filter you want to use by clicking on it. The filter will instantly be applied to your video feed for all meeting participants to see.
- If you want to disable the video filter during the meeting, click on the “^” arrow again and select the “None” option from the video filters menu.
- You can switch between different video filters during the meeting by following the same steps and selecting a new filter from the menu.
Applying video filters during a meeting allows you to instantly change the look and feel of your video feed, adding a touch of creativity and personalization. This feature is especially useful for presentations, virtual events, or when you simply want to have fun and engage your meeting participants.
Now that you know how to apply video filters during a meeting, let’s explore how you can adjust video filter settings to further customize your video feed appearance.
Adjusting Video Filter Settings
In addition to applying video filters during a Zoom meeting, you can also adjust the settings to customize the appearance of the video filters. Here’s how you can adjust video filter settings on Zoom:
- Open the Zoom desktop application and sign in to your account.
- Click on the profile icon in the top right corner of the app and select “Settings” from the dropdown menu.
- In the settings window, navigate to the “Video” tab from the left-hand sidebar.
- Scroll down until you find the “My Video” section, which will show the option “Touch up my appearance” that you previously enabled to access video filters.
- Click on the “Video Settings” button next to the “Touch up my appearance” option.
- A new window will open, displaying the video settings. Here, you can adjust the intensity of the video filter by moving the slider to the left or right.
- Preview the changes by observing the impact on your video feed within the settings window.
- Once you’re satisfied with the adjustments, click on the “Apply” or “OK” button to save the changes and apply them to your video feed during meetings.
By adjusting the video filter settings, you can fine-tune the appearance and intensity of the filters according to your preferences. This allows you to achieve the desired look and feel for your video feed during Zoom meetings.
Now that you know how to access, apply, and adjust video filter settings on Zoom, let’s explore some popular video filters that you can try out during your meetings.
Popular Video Filters to Try on Zoom
Zoom offers a wide range of popular and exciting video filters that can add a whole new level of fun and creativity to your virtual meetings. Here are some of the most popular video filters to try on Zoom:
- Background Blur: This filter allows you to blur the background of your video feed, creating a professional and distraction-free environment.
- Glamour: The Glamour filter enhances your appearance, providing a soft and flattering glow to your complexion.
- Sketch: The Sketch filter gives your video feed a unique hand-drawn effect, lending an artistic touch to your meetings.
- Document Camera: This filter transforms your video into a document camera, making it ideal for showcasing documents, presentations, or reading from a book.
- Black and White: The Black and White filter adds a classic, vintage feel to your video feed, perfect for adding a touch of nostalgia or sophistication to your meetings.
- Cyberpunk: The Cyberpunk filter offers a futuristic, neon-infused look, adding a cool and trendy vibe to your video calls.
- Pop Art: With the Pop Art filter, you can give your video a vibrant and colorful comic book-inspired appearance, making your meetings visually engaging.
- Fantasy: The Fantasy filter adds a magical touch to your video feed, with dreamy effects like floating bubbles or twinkling stars.
These are just a few examples of the popular video filters available on Zoom. Feel free to experiment with different filters to find the ones that resonate with your style and purpose. Remember, using video filters adds an element of fun and creativity to your meetings, making them more engaging and enjoyable for all participants.
Now that you have an idea of the popular video filters on Zoom, let’s explore how you can create custom video filters to truly personalize your video feed.
Creating Custom Video Filters on Zoom
While Zoom offers a variety of built-in video filters, you can also create custom video filters to personalize your video feed even further. Here’s how you can create your own custom video filters on Zoom:
- Open the Zoom desktop application and sign in to your account.
- Click on the profile icon in the top right corner of the app and select “Settings” from the dropdown menu.
- In the settings window, navigate to the “Background & Filters” tab from the left-hand sidebar.
- Scroll down to find the “Video Filters” section and click on the “+” button.
- A new window will appear, allowing you to upload your own image or video file to use as a custom video filter. You can also adjust the placement and size of the filter using the provided settings.
- Once you have uploaded your custom video filter, click on the “Save” button to add it to your video filters library.
- During a meeting, you can access your custom video filters by following the steps mentioned earlier, and you’ll find your custom filter alongside the built-in filters.
- Select your custom video filter to apply it to your video feed during the meeting.
Creating custom video filters allows you to bring your own personal touch to your Zoom meetings. Whether it’s a company logo, a specific background image, or a unique overlay, custom video filters give you endless possibilities to make your video feed truly one-of-a-kind.
Remember to keep file size and aspect ratio in mind when creating custom video filters to ensure they display properly during your meetings. Experiment with different images or videos to find the ones that best reflect your personality, brand, or desired theme.
Now that you know how to create custom video filters, let’s explore some tips for using video filters effectively on Zoom.
Tips for Using Video Filters Effectively on Zoom
Using video filters on Zoom can be a fun and creative way to enhance your video calls. To make the most out of video filters and ensure a seamless experience, here are some tips to keep in mind:
- Choose filters that align with your purpose: When selecting a video filter, consider the purpose of your meeting or presentation. Use filters that enhance your appearance or create a professional environment for business meetings, while opting for more playful or themed filters for social gatherings or casual meetings.
- Keep it subtle and professional: While video filters can add a touch of fun, be mindful of maintaining professionalism. Avoid overly distracting or exaggerated filters that might detract from the content of your meeting or presentation.
- Test and preview filters before meetings: It’s a good practice to test and preview different filters before your actual meetings. This way, you can see how they look on your video feed and make any necessary adjustments in terms of lighting, positioning, or intensity to ensure the best visual experience for your participants.
- Consider your background: When selecting a video filter, take into account your background. Choose filters that complement or contrast well with your background to ensure clarity and visibility. For example, avoid using dark filters if you have a dark background.
- Maintain a balance: The key to using video filters effectively is finding a balance. Use filters to enhance your video feed without overshadowing your message or becoming a distraction. Remember that the purpose of video filters is to complement your presence, not overpower it.
- Be mindful of the audience: Consider the preferences and comfort levels of your audience when using video filters. While some may appreciate the creative effects, others may find them distracting or unnecessary. Always be attentive to your audience’s reactions and adjust your use of video filters accordingly.
- Stay updated with new filters: Zoom frequently adds new video filters and updates to its library. Stay updated with the latest filters and explore new options to keep your video calls fresh and engaging.
By following these tips, you can effectively utilize video filters on Zoom to enhance your video calls and create a visually appealing experience for all participants. Remember to have fun and experiment with different filters to find the ones that best fit your style and purpose.
Now let’s address any potential issues you may encounter when using video filters on Zoom and how to troubleshoot them.
Troubleshooting Video Filter Issues on Zoom
While using video filters on Zoom can enhance your virtual meetings, you may encounter some issues or glitches along the way. Here are a few common video filter issues and troubleshooting steps to help you resolve them:
- Video filters not working: If you’re unable to access or apply video filters during a meeting, ensure that you are using the latest version of the Zoom desktop application. Additionally, check your internet connection and restart the Zoom app if necessary. If the issue persists, reach out to Zoom support for further assistance.
- Video quality degradation: Certain video filters may affect the quality of your video feed, causing pixelation or lag. To improve video quality, ensure you have a stable internet connection, close any other bandwidth-intensive applications or downloads, and consider reducing the intensity of the filter or using filters that have minimal impact on video quality.
- Incompatibility with your device: Some video filters may not be compatible with certain devices or operating systems. If you experience issues or notice that certain filters are not functioning correctly, check Zoom’s official documentation or support forums to verify compatibility with your specific device and software version.
- Unintended background effects: Video filters like virtual backgrounds may sometimes glitch or produce unintended effects, such as blending with your actual background or distorting parts of your video feed. To resolve this, ensure proper lighting in your room, use a solid-colored and well-lit background, and experiment with different filters and settings until you achieve the desired effect.
- Excessive resource consumption: Certain video filters, especially those that involve animations or complex effects, may consume significant system resources and impact the overall performance of your device. If you experience slowdowns or freezing during meetings, consider using lighter or less resource-intensive filters and closing any unnecessary applications running in the background.
If you encounter any other video filter-related issues on Zoom, check Zoom’s official support resources, such as their knowledge base or community forums, for further guidance. Additionally, keep your Zoom app and device software up to date to ensure the best compatibility and performance with the latest features and fixes.
Now that you’re aware of how to troubleshoot potential video filter issues, let’s explore how video filters on Zoom compare to those on other platforms or applications.
Comparing Video Filters on Different Platforms
Video filters are popular across various video conferencing platforms, each offering its own unique set of features and filters. Let’s compare video filters on Zoom with those on other platforms:
Zoom: Zoom provides a diverse range of video filters, including filters to enhance appearance, virtual backgrounds, and artistic effects. It offers a user-friendly interface to access and apply these filters during meetings. Zoom also allows users to create custom video filters, enabling a personalized touch.
Microsoft Teams: Microsoft Teams offers a selection of video filters, primarily focused on enhancing appearance and improving video quality. They provide options such as background blur, background effects, and lighting adjustments. However, the variety of filters may be more limited compared to Zoom.
Google Meet: Google Meet has recently introduced video filters, although the options available are more limited compared to Zoom. Users can choose from a few basic filters like portrait mode or background blur. However, the range of artistic or thematic filters may be less extensive on Google Meet.
Skype: Skype provides various video filters, including artistic filters, background blur, and face masks. While the selection is decent, it may not be as extensive as Zoom. Skype offers both built-in filters and the ability to download additional filters created by third-party developers.
When comparing video filters, it’s essential to consider factors such as functionality, variety, and ease of use. Zoom stands out with its wide range of filters, customization options, and the ability to create custom filters. However, the suitability of a platform ultimately depends on your specific needs and preferences.
Remember to keep your software and applications up to date to access the latest filter options and ensure compatibility with your devices.
Now that you have an understanding of video filters on different platforms, let’s explore the advantages and disadvantages of using video filters on Zoom.
Pros and Cons of Using Video Filters on Zoom
Using video filters on Zoom can enhance your video calls and add a touch of creativity to your virtual meetings. However, it’s essential to consider the pros and cons before fully embracing the use of video filters. Let’s explore both sides:
Pros:
- Enhanced appearance: Video filters allow you to improve your appearance during meetings, whether by smoothing out imperfections or adding a touch of makeup.
- Personalization: Video filters let you express your personality and make your video calls more engaging, with options like virtual backgrounds or playful effects.
- Professional look: Through virtual backgrounds and filters, you can create a professional setting, regardless of your physical location.
- Engagement: Video filters can captivate your audience’s attention during presentations or virtual events, making them more visually appealing and memorable.
- Fostering a positive atmosphere: Adding fun and creative video filters can help break the ice and create a relaxed and friendly atmosphere during meetings.
Cons:
- Potential distractions: In some cases, video filters may be considered distracting and take the focus away from the meeting’s content and purpose.
- Compatibility limitations: Some video filters may not be compatible with certain devices or operating systems, limiting their availability for all participants.
- Resource consumption: Certain video filters, especially those with complex animations or effects, may consume additional system resources, potentially impacting device performance.
- Unsuitable for all occasions: While video filters can be fun and creative, they may not always be appropriate for formal or serious meetings that require utmost professionalism and focus.
When using video filters on Zoom, carefully consider your audience, the nature of the meeting, and the desired atmosphere. Balance personalization and engagement with professionalism and the needs of your participants.
By weighing the pros and cons, you can make an informed decision about when and how to use video filters effectively on Zoom.
Now that you’re aware of the advantages and disadvantages of video filters on Zoom, you can make the most of this feature during your virtual meetings.