
What is Trezor?
Trezor is a hardware wallet that offers secure storage and management for cryptocurrencies. It is designed to provide a convenient way for users to store their digital assets offline, protecting them from online threats such as hacking and phishing attacks. The device is small, portable, and easy to use, making it an ideal solution for both seasoned cryptocurrency traders and newcomers to the world of digital currencies.
One of the key features of Trezor is its ability to generate and store private keys offline. Private keys are essential for accessing and managing cryptocurrencies stored in wallets. By keeping these keys offline, Trezor provides an added layer of security by minimizing the risk of exposing them to potential online threats.
Another important aspect of Trezor is its compatibility with a wide range of cryptocurrencies, including popular ones like Bitcoin, Ethereum, and Litecoin, as well as many others. This makes it a versatile option for users who hold different types of digital assets in their portfolio.
Trezor also incorporates a user-friendly interface that allows you to easily navigate and interact with your cryptocurrencies. The device has a small screen that displays important information, such as transaction details and wallet balances. It also has physical buttons that you can use to confirm transactions, adding an extra layer of protection against unauthorized actions.
Additionally, Trezor supports integration with various cryptocurrency wallets and platforms, enabling you to securely manage your digital assets across different services. This makes it a convenient tool for those who engage in cryptocurrency trading or regularly use different platforms to interact with their cryptocurrencies.
Overall, Trezor provides a reliable and secure solution for storing and managing cryptocurrencies. Its offline storage of private keys, wide cryptocurrency compatibility, user-friendly interface, and integration with other platforms make it an excellent choice for anyone looking to enhance the security of their digital assets.
Setting Up Your Trezor Device
To get started with your Trezor device, follow these simple steps to set it up:
- Connect your Trezor to a computer or mobile device using the provided USB cable.
- Visit the Trezor website and download the Trezor Bridge software, which allows your device to communicate with your computer or mobile device.
- Install the Trezor Bridge software by following the on-screen instructions. This will ensure that your device is properly recognized and connected.
- Once the Trezor Bridge is installed, you will need to set up a new wallet. On the Trezor website, click on “Create New Wallet” and follow the instructions.
- During the setup process, you will be prompted to create a strong and unique PIN. This PIN will be used to unlock your device and access your cryptocurrencies, so be sure to choose one that is easy to remember but difficult for others to guess.
- After setting up your PIN, you will be presented with a recovery seed. This is a crucial backup that allows you to restore your wallet in case your Trezor is lost or damaged. Write down the recovery seed on a piece of paper and keep it in a safe place.
- Once the setup is complete, safely disconnect your Trezor from your computer or mobile device.
Congratulations! You have successfully set up your Trezor device. Now, whenever you want to access your cryptocurrencies, simply connect your Trezor to your computer or mobile device and enter your PIN. Your device will then be ready for use, allowing you to securely manage and transact with your digital assets.
Remember to always keep your PIN and recovery seed in a safe and secure place. These are critical for retrieving your cryptocurrencies in case of any unforeseen events. Additionally, make sure to keep your Trezor device updated with the latest firmware to benefit from the latest security enhancements and features.
Installing the Trezor Bridge and Ethereum App
In order to use your Trezor device with the Ethereum blockchain, you will need to install the Trezor Bridge software and the Ethereum app. Follow these steps to install them:
- Connect your Trezor device to your computer or mobile device using the provided USB cable.
- Visit the Trezor website and navigate to the “Downloads” section.
- Download and install the Trezor Bridge software for your respective operating system (Windows, macOS, or Linux).
- After installing the Trezor Bridge, you need to download the Trezor Ethereum app.
- Open the Trezor Wallet website and connect your Trezor device with your PIN.
- In the top left corner of the wallet interface, you will see a menu. Click on it and select “Apps”.
- Look for the Ethereum app and install it by following the on-screen instructions.
Once the installation is complete, you can access the Ethereum app on your Trezor device. Simply connect your Trezor to your computer or mobile device and navigate to the Ethereum app on the Trezor Wallet website.
The Trezor Ethereum app provides a secure and user-friendly interface for interacting with your Ethereum account. From the app, you can view your account balance, send and receive Ethereum transactions, and manage ERC-20 tokens.
By using the Trezor device, you can be confident that your private keys are stored offline and protected from online threats. This gives you peace of mind when managing your Ethereum assets, knowing that your funds are stored securely within your Trezor device.
Installing the Trezor Bridge software and the Trezor Ethereum app is an essential step in securely using your Trezor device with the Ethereum blockchain. It ensures that your device is properly recognized and enables you to manage your Ethereum holdings with ease.
Remember to regularly update both the Trezor Bridge software and the Ethereum app to benefit from the latest security enhancements and features offered by Trezor.
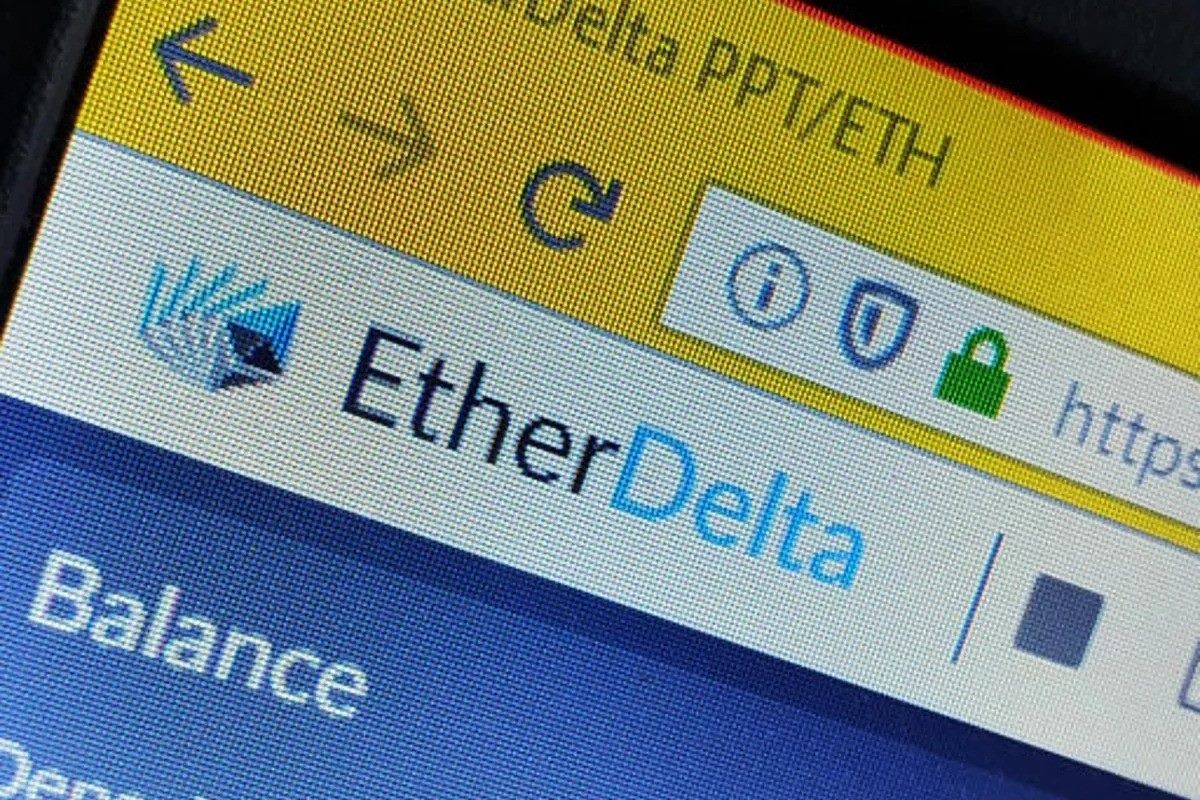
Creating an Etherdelta Account
Etherdelta is a decentralized cryptocurrency exchange that provides users with the ability to trade Ethereum and ERC-20 tokens directly from their wallets. To get started, you will need to create an Etherdelta account. Here’s how:
- Visit the Etherdelta website (etherdelta.com).
- Click on the “Create Account” button located in the top right corner of the homepage.
- You will be redirected to a page where you can create a new account.
- Enter a username of your choice and a secure password. Make sure to choose a strong password to protect your account.
- After entering your username and password, click on the “Submit” button.
- You will then be prompted to download your wallet file. This file contains your encrypted private key and is used to access your Etherdelta account.
- Download the wallet file and keep it in a secure location on your computer or external storage device.
- After downloading the wallet file, click on the “Continue” button to proceed.
- On the next page, you will be asked to unlock your wallet. Click on the “Select Wallet File” button and locate the wallet file you downloaded earlier.
- Enter the password you created for your Etherdelta account to unlock your wallet.
- Once your wallet is unlocked, you will gain access to your Etherdelta account.
Now that you have successfully created an Etherdelta account, you can start exploring the platform and its features. Take some time to familiarize yourself with the user interface, learn about the available trading pairs, and understand the various order types.
It’s important to note that Etherdelta is a decentralized exchange, which means that you are solely responsible for the security of your funds. Keep your wallet file and password secure and never share them with anyone. Additionally, make sure to thoroughly research any token or project before initiating a trade.
By creating an Etherdelta account, you gain access to a decentralized and secure platform for trading Ethereum and ERC-20 tokens. With your account set up, you are now ready to start exploring the exciting world of decentralized trading on Etherdelta.
Generating a New Etherdelta Wallet Address
In order to start trading on Etherdelta, you will need to generate a new wallet address. This address will serve as your personal wallet on the Etherdelta platform and will allow you to securely store, send, and receive Ethereum and ERC-20 tokens. Follow these steps to generate a new Etherdelta wallet address:
- Log in to your Etherdelta account using your username and password.
- Once logged in, click on the “Account” tab located in the top right corner of the interface.
- Under the “Account” section, click on the “Generate New Address” button.
- A pop-up window will appear, asking you to confirm the generation of a new wallet address.
- Read the information provided and ensure that you understand the process. Generating a new wallet address will require a small fee, usually in the form of gas fees.
- If you are comfortable with the fee and the terms, click on the “Generate New Address” button.
- The system will then generate a unique wallet address for you. This address will be displayed on the screen and can be used to send and receive Ethereum and ERC-20 tokens on the Etherdelta platform.
- Make sure to safely and securely store your newly generated wallet address. Consider saving it in a password-protected document or writing it down on a piece of paper and keeping it in a secure location.
Generating a new Etherdelta wallet address is an important step as it provides you with a unique identifier for your funds on the platform. It allows you to easily track and manage your Ethereum and ERC-20 tokens within the Etherdelta ecosystem.
Remember to always double-check the accuracy of the wallet address before sending any funds. Any errors in the address could result in the loss of your assets. Additionally, be cautious of phishing attempts and only use the official Etherdelta website to generate your wallet address.
Now that you have generated a new Etherdelta wallet address, you are ready to start depositing funds and exploring the wide range of trading opportunities available on the platform.
Connecting Your Trezor to Etherdelta
Connecting your Trezor to Etherdelta allows you to securely trade Ethereum and ERC-20 tokens using the hardware wallet for enhanced security. By integrating your Trezor device with Etherdelta, you can ensure that your private keys remain offline and protected from potential online threats. Follow these steps to connect your Trezor to Etherdelta:
- Ensure that you have set up your Trezor device and installed the necessary software on your computer or mobile device.
- Visit the Etherdelta website (etherdelta.com) and log in to your account using your username and password.
- Once you are logged in, click on the “Connect to Trezor” button, typically located in the account or wallet section of the Etherdelta interface.
- A pop-up window will appear, asking for confirmation to access your Trezor device. Click on the “Connect” button to proceed.
- Follow the on-screen instructions to select the Ethereum app on your Trezor device and confirm the connection.
- After successfully connecting your Trezor, you will be able to see your Trezor account and wallet details within the Etherdelta interface.
Connecting your Trezor to Etherdelta brings an additional layer of security to your trading activities. By keeping your private keys offline within the Trezor device, you reduce the risk of exposing them to potential online attacks and unauthorized access.
When making transactions on Etherdelta, you will be prompted by your Trezor device to confirm the transaction details. Simply review the information shown on the device’s screen and press the corresponding physical button to approve the transaction.
Remember to keep your Trezor device up to date with the latest firmware to benefit from improved security features and enhancements. Regularly check for updates and install them as instructed by the Trezor team.
By connecting your Trezor device to Etherdelta, you can trade cryptocurrencies with peace of mind, knowing that your private keys are stored securely offline and protected by the strong security measures of your hardware wallet.
Now that your Trezor is successfully connected to Etherdelta, you can start exploring the platform and executing trades while enjoying the added security and control offered by your hardware wallet.
Accessing Your Balances on Etherdelta
Once you have connected your Trezor to Etherdelta and executed some trades, you may be interested in checking your balances to monitor your assets. Etherdelta provides a straightforward way to access and view your balances within the platform. Here are the steps to access your balances on Etherdelta:
- Login to your Etherdelta account using your username and password.
- Once logged in, navigate to the “Wallet” or “Account” section of the Etherdelta interface.
- In this section, you will find a list of your available balances, including your Ethereum and ERC-20 tokens.
- Each balance will be listed with its corresponding token symbol and total amount held in your wallet.
- Take note of the different columns that may include information such as the token name, the total balance, available balance for trading, and any open orders associated with the token.
- You can perform actions such as depositing, withdrawing, or trading tokens directly within the “Wallet” or “Account” section of Etherdelta.
- Additionally, Etherdelta may offer the option to view your balances in different currencies, such as USD or BTC. This can be useful for tracking the value of your assets in relation to other cryptocurrencies or traditional currencies.
Accessing your balances on Etherdelta allows you to stay informed about the status of your assets and make well-informed decisions regarding your portfolio. Regularly checking your balances ensures that you have an up-to-date understanding of how much of each token you hold and whether any changes or updates are needed.
Remember to keep your Trezor device securely connected and disconnected when not in use to minimize the risk of unauthorized access to your assets. Additionally, verify the accuracy of your balances and double-check transaction details before confirming any actions.
With easy access to your balances on Etherdelta, you can confidently manage and monitor your cryptocurrency holdings, making informed decisions about your trades and investments.
Making a Deposit on Etherdelta using Trezor
If you want to trade cryptocurrencies on Etherdelta, you’ll need to deposit funds into your account. By using your Trezor wallet, you can securely deposit Ethereum and ERC-20 tokens onto the platform. Follow these steps to make a deposit on Etherdelta using your Trezor:
- Login to your Etherdelta account using your username and password.
- In the Etherdelta interface, locate the “Wallet” or “Account” section.
- Under this section, you will find the different cryptocurrency balances available in your Trezor wallet.
- Identify the token you want to deposit and click on the “Deposit” or “Send” button next to it.
- A pop-up window will appear, prompting you to enter the deposit amount and destination address.
- On your Trezor device, confirm the transaction by verifying the transaction details displayed on the screen.
- Enter the destination address provided by Etherdelta into your Trezor device.
- After verifying the details, press the physical button on your Trezor to authorize the transaction.
- Wait for the transaction to be confirmed on the Ethereum blockchain.
Once the transaction is confirmed, the deposited funds will appear in your Etherdelta account, allowing you to begin trading with them. It is important to note that deposit times may vary depending on the network congestion and gas fees paid.
Using Trezor to make deposits on Etherdelta provides an added layer of security, as your private keys remain offline and are securely stored within the Trezor device. This protects your funds from potential online threats.
Remember to always double-check the destination address before authorizing any transactions. Make sure that the address corresponds to your Etherdelta account to avoid sending funds to the wrong recipient.
By following these steps and utilizing your Trezor wallet, you can confidently make deposits on Etherdelta, ensuring that your funds are secure and ready for trading within the platform.
Placing a Trade on Etherdelta using Trezor
Once you have deposited funds into your Etherdelta account, you can start trading Ethereum and ERC-20 tokens using your Trezor wallet. Placing a trade on Etherdelta involves executing a buy or sell order for a specific token pair. Here’s how you can place a trade on Etherdelta using your Trezor:
- Login to your Etherdelta account using your username and password.
- In the Etherdelta interface, navigate to the trading section or the desired token pair.
- Under the trading section, you will find order books displaying current buy and sell orders for the selected token pair.
- Decide whether you want to place a buy order (if you want to purchase the token) or a sell order (if you want to sell the token).
- Enter the desired amount of the token you wish to trade and the price at which you want to execute the trade.
- Review the details of your trade order, including the token pair, amount, and price.
- On your Trezor device, confirm the trade by verifying the transaction details displayed on the screen.
- After verifying the details, press the physical button on your Trezor to authorize the trade.
- Your trade order will be sent to the Ethereum blockchain for processing.
- Wait for the trade to be executed and confirmed on the blockchain. This may take some time, depending on network congestion and gas fees paid.
Once your trade is executed and confirmed, the corresponding tokens will be credited or debited from your Etherdelta account, depending on the type of trade you executed.
Using your Trezor device to place trades on Etherdelta adds an extra layer of security, as your private keys remain securely stored offline within the hardware wallet. This minimizes the risk of exposing your private keys to potential online threats.
Make sure to double-check the trade details before confirming the transaction. Verify the token pair, amount, and price to ensure that the trade aligns with your intentions.
By following these steps and utilizing your Trezor wallet, you can confidently place trades on Etherdelta, knowing that your funds are secure and your transactions are protected.
Withdrawing Funds from Etherdelta using Trezor
If you have completed trades on Etherdelta and you want to withdraw funds from your account, you can use your Trezor wallet to securely withdraw Ethereum and ERC-20 tokens. Withdrawing funds from Etherdelta involves transferring the desired amount of tokens from your Etherdelta account to your Trezor wallet. Here’s how you can withdraw funds from Etherdelta using your Trezor:
- Login to your Etherdelta account using your username and password.
- In the Etherdelta interface, go to the “Wallet” or “Account” section.
- Under this section, locate the token you want to withdraw and click on the “Withdraw” or “Send” button next to it.
- A pop-up window will appear, prompting you to enter the withdrawal amount and the destination address.
- On your Trezor device, confirm the transaction by verifying the transaction details shown on the screen.
- Enter the destination address, which should be your Trezor wallet address, into your Trezor device.
- After verifying the details, press the physical button on your Trezor to authorize the withdrawal.
- Wait for the withdrawal transaction to be confirmed on the Ethereum blockchain. The withdrawal time may vary depending on network congestion and gas fees paid.
Once the withdrawal transaction is confirmed, the funds will be transferred from Etherdelta to your Trezor wallet, and you will have full control over your assets. You can securely store and manage the withdrawn tokens using your Trezor device.
By using your Trezor wallet to withdraw funds from Etherdelta, you ensure that your private keys remain securely stored offline within the hardware wallet. This adds an extra layer of protection and minimizes the risk of exposing your private keys to potential online threats.
Double-check the withdrawal details before confirming the transaction, including the token, amount, and destination address. Ensure that the destination address is the correct address of your Trezor wallet.
By following these steps and utilizing your Trezor wallet, you can confidently withdraw funds from Etherdelta, knowing that your assets are securely transferred to your personal hardware wallet.
Securing Your Trezor Device and Private Keys
Securing your Trezor device and private keys is essential to protect your cryptocurrencies from unauthorized access or theft. By following these best practices, you can enhance the security of your Trezor device and safeguard your digital assets:
- Keep your Trezor device updated: Regularly check for firmware updates from the Trezor team and install them as soon as they become available. Firmware updates often include security enhancements and bug fixes, improving the overall security of your device.
- Choose a strong PIN: When setting up your Trezor device, choose a PIN that is easy for you to remember but difficult for others to guess. Avoid using common or easily guessable combinations, such as birth dates or sequential numbers.
- Enable passphrase protection: Trezor offers an optional passphrase feature that adds an extra layer of security to your device. Consider enabling this feature and using a unique and strong passphrase that is not easily associated with you or recoverable.
- Store your recovery seed offline: During the initial setup of your Trezor device, you are provided with a recovery seed. This seed is crucial for restoring your wallet in case of device loss or failure. Write down the recovery seed on a piece of paper and keep it in a secure location. Avoid storing it electronically or in the cloud, as it may be vulnerable to hacking or theft.
- Protect against phishing attacks: Be cautious of phishing attempts that try to trick you into revealing your Trezor device’s PIN, recovery seed, or other sensitive information. Always double-check the website URL, ensure that the connection is secure (HTTPS), and only enter your details on the official Trezor website.
- Practice physical security: Keep your Trezor device in a safe and secure place, such as a locked drawer or a personal safe. Avoid leaving it unattended or in easily accessible areas. Additionally, keep your recovery seed separate from your device, preferably in a different physical location.
- Enable a passphrase timeout: If you enable the optional passphrase feature, consider setting a timeout that requires you to re-enter the passphrase after a period of inactivity. This adds an extra layer of protection in case your device is left unattended.
- Enable two-factor authentication (2FA): Wherever possible, enable 2FA on platforms or applications that support it. This adds an extra layer of security by requiring a second verification step, such as a one-time password or biometric authentication, in addition to your Trezor device.
By following these security measures, you can significantly enhance the protection of your Trezor device and private keys. Remember that the security of your cryptocurrencies ultimately depends on your own diligence and responsible practices.
Always stay informed about the latest security recommendations from the Trezor team, as they continuously work on improving the security features of their devices. Additionally, keep yourself updated on any potential vulnerabilities or security risks associated with the use of hardware wallets.
Securing your Trezor device and private keys is the cornerstone of protecting your digital assets. Taking the necessary precautions and implementing strong security measures helps ensure that your cryptocurrencies remain safe from unauthorized access or theft.
Troubleshooting Tips
While using your Trezor device, you may encounter certain issues or difficulties. Here are some troubleshooting tips to help you resolve common problems and ensure a smooth user experience:
- Ensure the Trezor Bridge is up to date: If you are experiencing connectivity issues between your Trezor device and your computer or mobile device, make sure you have the latest version of the Trezor Bridge software installed. Visit the Trezor website to download and install any available updates.
- Try a different USB cable or port: If you are having trouble connecting your Trezor device, try using a different USB cable or connecting it to a different USB port on your computer. This can help determine if the issue lies with the cable or port rather than the device itself.
- Restart your device and computer: Sometimes, a simple restart can resolve connectivity issues or temporary glitches. Try restarting both your Trezor device and the computer or mobile device you are using to troubleshoot any persistent issues.
- Check for compatibility: Ensure that the software or application you are using with your Trezor device is compatible. Trezor supports a wide range of wallets and platforms, but compatibility may vary. Visit the Trezor website or check with the specific software or application provider for compatibility information.
- Reset your device: If you are experiencing persistent issues that cannot be resolved, you may consider performing a device reset. This will erase all data on your Trezor device, including your wallet and private keys, so make sure to have a backup of your recovery seed beforehand. Follow the instructions provided by Trezor for the proper reset procedure.
- Contact Trezor customer support: If you have tried the above troubleshooting steps and are still experiencing difficulties, it is recommended to reach out to the Trezor customer support team. They will be able to provide further assistance and guidance in resolving any issues you may be facing.
Remember, troubleshooting can vary depending on the specific issue you are encountering. It is essential to carefully read the instructions provided by Trezor and follow their official troubleshooting guides if available.
By following these troubleshooting tips and seeking support when needed, you can address common issues and ensure the proper functioning of your Trezor device. This will enable you to securely manage your cryptocurrencies and have peace of mind in their protection.