
Installing Trezor Bridge
Installing Trezor Bridge: Ensuring Smooth Communication between Your Mac and Trezor Device
If you are a Mac user and a proud owner of a Trezor hardware wallet, setting up and connecting your device to your computer is an essential step in securely managing your cryptocurrency. To establish a seamless connection between your Trezor device and your Mac, you will need to install the Trezor Bridge software. In this guide, we will walk you through the steps to install Trezor Bridge on your Mac.
Step 1: Visit the Trezor Website
First, visit the official Trezor website at https://trezor.io/ on your Mac’s web browser. Look for the ‘Downloads’ section and click on it to access the available software options.
Step 2: Select Your Operating System
On the Downloads page, you will find various operating system options. Select the ‘Mac OS’ option to initiate the download process specific to your Mac computer.
Step 3: Download the Trezor Bridge Installer
Click on the ‘Download’ button to begin downloading the Trezor Bridge installer file. The file will be saved to your designated download location on your Mac.
Step 4: Open the Installer
Locate the downloaded installer file on your Mac and double-click on it to launch the installation process. A security prompt may appear asking for your confirmation to open the installer. Click ‘Open’ to proceed.
Step 5: Follow the Installation Wizard
The installation wizard will guide you through the setup process. Read and agree to the terms and conditions, and click ‘Next’ to continue. Select the destination folder for the installation and click ‘Install’ to initiate the installation process.
Step 6: Complete the Installation
Once the installation is complete, you will see a confirmation message. Click ‘Finish’ to exit the installation wizard.
Step 7: Verify the Installation
To ensure that Trezor Bridge is successfully installed, connect your Trezor device to your Mac using the USB cable provided. Open your web browser and visit the Trezor Wallet website at https://wallet.trezor.io/. If you see the Trezor Bridge icon displayed in the top right corner of the web page, it means the installation was successful, and your Trezor device is now properly connected to your Mac.
By following these simple steps, you can easily install Trezor Bridge on your Mac and establish a secure connection between your computer and your Trezor hardware wallet. Now that the installation is complete, you can move on to setting up your wallet and managing your cryptocurrency with confidence.
Connecting Your Trezor Device to Your Mac
Connecting your Trezor Device: Establishing a Secure Connection with Your Mac
Once you have successfully installed Trezor Bridge on your Mac, the next step is to connect your Trezor device to your computer. This will allow you to manage your cryptocurrency securely and perform transactions using your Trezor hardware wallet. In this section, we will guide you through the process of connecting your Trezor device to your Mac.
Step 1: Ensure Trezor Bridge is Running
Before connecting your Trezor device, make sure the Trezor Bridge software is running on your Mac. Look for the Trezor Bridge icon in the top right corner of your screen. If the icon is visible, it indicates that Trezor Bridge is active and ready to establish a connection.
Step 2: Connect via USB Cable
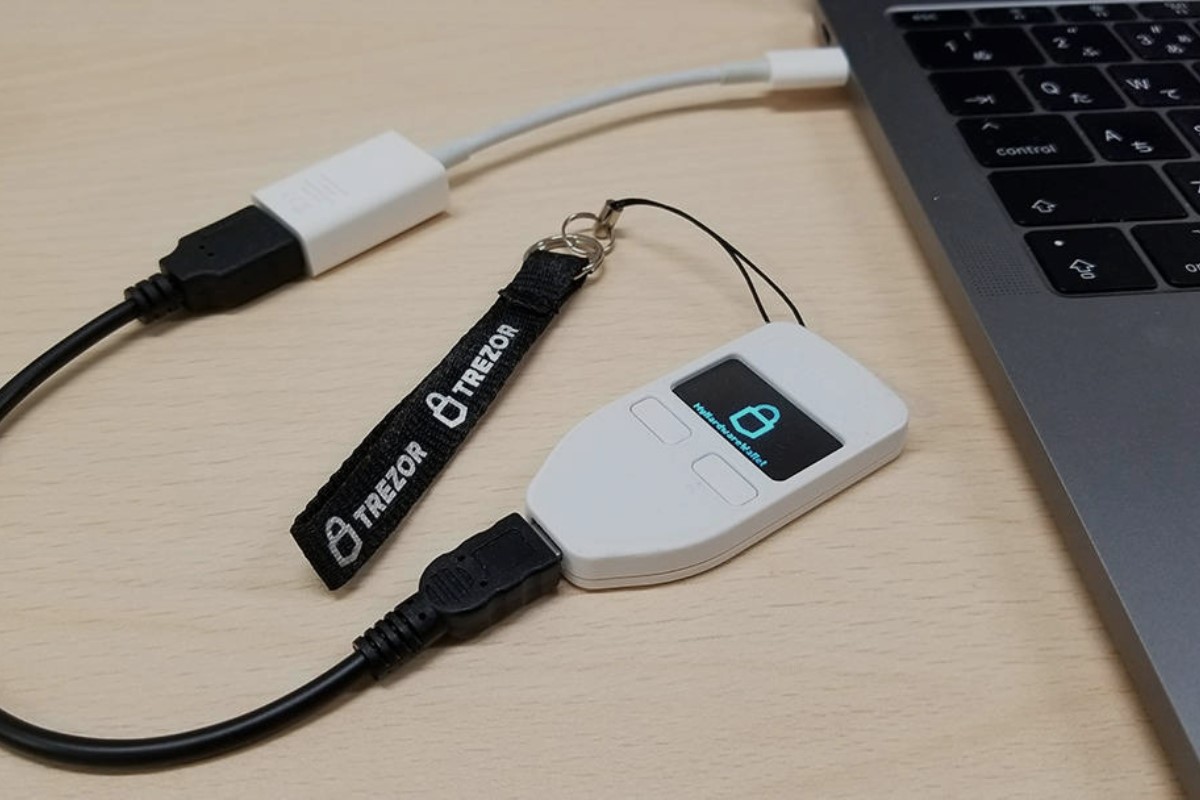
Take the USB cable provided with your Trezor device and connect one end to the device itself and the other end to an available USB port on your Mac. Ensure that the connection is secure and snug.
Step 3: Confirm Connection on Your Trezor Device
On your Trezor device, you will see a prompt asking you to confirm the connection. Use the device’s touchscreen to navigate and confirm that you want to connect your Trezor to the computer. Once confirmed, your device will establish a secure connection with your Mac.
Step 4: Access Trezor Wallet
Open your preferred web browser on your Mac and visit the Trezor Wallet website at https://wallet.trezor.io/. The website interface will guide you through the necessary steps to set up and access your wallet. Follow the instructions provided to log in to your Trezor wallet and access your cryptocurrency holdings.
Step 5: Verify Connection Status
Once you have successfully logged into your Trezor wallet, check the Trezor Bridge icon in the top right corner of your browser. It should indicate a successful connection between your Trezor device and your Mac. This icon confirms that you are now ready to manage your cryptocurrencies securely.
By carefully following these steps, you can establish a secure connection between your Trezor hardware wallet and your Mac. This connection is crucial for managing your cryptocurrency with peace of mind and ensuring the safety of your digital assets.
Using Trezor Bridge with Your Trezor Wallet
Utilizing Trezor Bridge: Seamlessly Manage Your Cryptocurrency with Your Mac
Now that you have installed Trezor Bridge and connected your Trezor device to your Mac, you are ready to explore the full functionality of your Trezor hardware wallet. In this section, we will delve into the various features and capabilities that Trezor Bridge offers when used in conjunction with your Trezor wallet.
1. Access Your Wallet
Open your preferred web browser on your Mac and visit the Trezor Wallet website at https://wallet.trezor.io/. Log in to your wallet using the credentials you set up during the initial setup process. Once logged in, you will have full access to your cryptocurrency holdings and transaction history.
2. Manage Your Cryptocurrencies
With Trezor Bridge, you can easily manage an extensive range of cryptocurrencies supported by the Trezor wallet. From Bitcoin and Ethereum to lesser-known altcoins, Trezor provides a secure platform for storing, sending, and receiving your digital assets. Explore the wallet interface to manage and organize your cryptocurrencies effortlessly.
3. Confirm Transactions with Your Trezor Device
One of the key features of the Trezor hardware wallet is the ability to securely confirm transactions using your Trezor device. When initiating a transaction on your Trezor wallet, such as sending cryptocurrency to another address, you will receive a prompt on your device to confirm the transaction. This ensures that even if your computer is compromised, your funds remain secure.
4. Enable Additional Security Features
Trezor Bridge allows you to further enhance the security of your Trezor wallet by enabling additional features such as multi-factor authentication (2FA) and passphrase encryption. By enabling 2FA, you add an extra layer of protection to your wallet, requiring both your physical Trezor device and a secondary authentication method to access your funds.
5. Keep Your Firmware Up to Date
Trezor regularly releases firmware updates to enhance the performance and security of your device. With Trezor Bridge, you can conveniently update the firmware directly from your Mac. Stay up to date with the latest firmware to ensure your Trezor wallet remains secure and compatible with new developments in the cryptocurrency landscape.
By utilizing Trezor Bridge in conjunction with your Trezor hardware wallet, you can confidently manage your cryptocurrencies on your Mac with ease. Explore the features and functions of your Trezor wallet to make the most of your digital assets while ensuring their safety and security.
Troubleshooting Common Issues with Trezor Bridge on Mac
Tackling Technical Hiccups: Troubleshooting Tips for Trezor Bridge on Your Mac
While Trezor Bridge is generally reliable and easy to use, you may occasionally encounter technical issues. In this section, we will address some common problems that Mac users may face when using Trezor Bridge and provide troubleshooting tips to help you resolve them.
1. Connection Issues
If you are experiencing difficulty connecting your Trezor device to your Mac, try the following steps:
- Ensure that your Trezor device is properly connected to your Mac via the USB cable.
- Check if the Trezor Bridge software is running and active. If not, try restarting your computer and relaunching the software.
- If the issue persists, try using a different USB cable or USB port on your Mac.
2. Firmware Update Failure
If you encounter any issues while updating the firmware of your Trezor device through Trezor Bridge, follow these steps:
- Confirm that you have a stable internet connection and that Trezor Bridge is running on your Mac.
- Make sure that your Trezor device has sufficient battery power and is properly connected to your Mac.
- Try updating the firmware using a different USB cable or USB port on your Mac.
- If the problem persists, visit the Trezor Support Center for further assistance or reach out to their customer support team.
3. Wallet Synchronization Issues
If your Trezor wallet is not synchronizing properly or not displaying the correct balance, try these troubleshooting steps:
- Check your internet connection to ensure it is stable and functioning.
- Refresh the wallet interface by closing and reopening your web browser or clearing cache and cookies.
- If the issue persists, try accessing your wallet on a different web browser or a different device to identify if the problem is specific to your Mac.
4. Unexpected Error Messages
If you encounter error messages or unexpected behavior while using Trezor Bridge, follow these steps:
- Record the exact error message or take a screenshot for reference.
- Check the Trezor Support Center or online forums to see if others have experienced similar issues and if there are any known solutions.
- If the problem is persistent, contact the Trezor customer support team and provide them with the details of the issue for further assistance.
By following these troubleshooting tips, you can overcome common issues that may arise when using Trezor Bridge on your Mac. Remember to consult the Trezor Support Center or reach out to their customer support team if you require additional assistance for any persistent issues you may encounter.
Updating Trezor Bridge on Mac
Staying Current: How to Update Trezor Bridge on Your Mac
Regularly updating your Trezor Bridge software is crucial to ensure that you have the latest features, improvements, and security enhancements. In this section, we will guide you through the steps to update Trezor Bridge on your Mac, allowing you to stay current with the latest advancements in Trezor technology.
Step 1: Check for Updates
Before updating Trezor Bridge, it is a good practice to check if there are any updates available. Start by launching the Trezor Bridge software on your Mac by clicking on the Trezor Bridge icon located in the top right corner of your screen.
Step 2: Access the Update Function
Once the Trezor Bridge interface is open, look for the ‘Check for Updates’ or ‘Update’ button. Click on it to initiate the update process. The software will automatically scan for available updates.
Step 3: Install the Update
If an update is available, the Trezor Bridge software will prompt you to download and install it. Follow the on-screen instructions to proceed with the update. It is important not to disconnect your Trezor device or close the software during the update process.
Step 4: Restart if Necessary
After the update is complete, you may be required to restart your Mac to finalize the installation. If prompted to do so, save your work and close any open applications before restarting your computer.
Step 5: Verify the Update
Once your Mac has restarted, open the Trezor Bridge software again. Check the version number or release notes to ensure that the update was successful. A corresponding notification or message may also indicate that you are now using the latest version of Trezor Bridge.
Step 6: Take Advantage of New Features
With the updated version of Trezor Bridge, you can now enjoy the latest features and security enhancements that the Trezor team has implemented. Take the time to explore the software and discover any new functionalities that can further optimize your experience with your Trezor hardware wallet.
By following these simple steps, you can easily update Trezor Bridge on your Mac. Keeping your software up to date ensures optimal functionality, improved security, and compatibility with the latest developments in the cryptocurrency industry. Make it a habit to regularly check for updates and install them as they become available to stay ahead of the curve.
Uninstalling Trezor Bridge from Your Mac
Removing Trezor Bridge: How to Uninstall the Software from Your Mac
If you no longer require Trezor Bridge on your Mac or if you encounter any issues that require a clean reinstallation, you may need to uninstall the software. In this section, we will guide you through the steps to successfully remove Trezor Bridge from your Mac.
Step 1: Quit the Trezor Bridge Software
Before proceeding with the uninstallation process, ensure that the Trezor Bridge software is not running. If the software is open, go to the top right corner of your screen and click on the Trezor Bridge icon. From the dropdown menu, select ‘Quit’ or ‘Exit’ to close the software completely.
Step 2: Locate the Application Folder
Next, open a new Finder window on your Mac by clicking on the Finder icon in the Dock or using the keyboard shortcut Command + N. From the left-side menu, select ‘Applications’ to access the list of installed applications on your Mac.
Step 3: Find Trezor Bridge
In the Applications folder, locate the Trezor Bridge application. It should be listed as ‘Trezor Bridge’ or ‘Bridge’ with the Trezor logo. You can identify it by the icon or by searching for ‘Trezor Bridge’ using the search bar in the top right corner of the Finder window.
Step 4: Move to Trash
Once you have found the Trezor Bridge application, drag and drop it into the Trash bin located in the Dock. Alternatively, you can right-click on the application and select ‘Move to Trash’ from the context menu.
Step 5: Empty Trash
To complete the uninstallation process, right-click on the Trash icon in the Dock and select ‘Empty Trash.’ Confirm the action when prompted. This permanently deletes the Trezor Bridge application and any associated files from your Mac.
Step 6: Confirm Uninstallation
After emptying the Trash, the Trezor Bridge application and its associated files should be completely removed from your Mac. To verify the uninstallation, you can restart your computer and check the Applications folder to ensure that Trezor Bridge is no longer present.
By following these steps, you can easily uninstall Trezor Bridge from your Mac. Removing the software allows you to start fresh or re-install it if needed. If you ever decide to use Trezor Bridge in the future, you can easily download and install it again from the official Trezor website.