
What is Trezor Two-Factor Authenticator?
Trezor Two-Factor Authenticator is a security feature provided by Trezor, a leading hardware wallet provider. It adds an extra layer of protection to your cryptocurrency assets by requiring you to verify your identity using two separate factors: something you have (your Trezor device) and something you know (a supported app on your computer or mobile device).
With the increasing prevalence of online threats and hacking attempts, it is crucial to take steps to secure your digital assets. Two-Factor Authentication (2FA) is a widely recommended security measure that adds an additional layer of protection to your online accounts.
Trezor’s Two-Factor Authenticator leverages the security capabilities of its hardware wallet to provide a robust and reliable authentication solution. It ensures that even if your account credentials are compromised, an attacker would still need physical access to your Trezor device to gain control over your cryptocurrency funds.
By incorporating Two-Factor Authentication into your Trezor device, you can significantly enhance the security of your cryptocurrency holdings. This added layer of protection makes it extremely difficult for unauthorized individuals to access your funds, providing you with peace of mind and a higher level of confidence in managing your digital assets.
Trezor Two-Factor Authenticator works seamlessly with the Trezor Suite, a comprehensive software interface that enables you to manage your cryptocurrency portfolio and interact with various blockchain networks. The combination of the hardware and software components ensures that your authentication process is both secure and user-friendly.
In the following sections, we will guide you through the process of setting up the Trezor Two-Factor Authenticator. By following these steps, you can further reinforce the security of your Trezor device and your cryptocurrency holdings.
Step 1: Get your Trezor device
To set up Trezor Two-Factor Authenticator, the first step is to acquire a Trezor device. Trezor offers a range of hardware wallets that provide top-notch security for your cryptocurrency assets.
You can purchase a Trezor device from the official Trezor website or from authorized resellers. It’s essential to buy directly from trusted sources to ensure the authenticity and integrity of the device.
When selecting a Trezor device, consider factors such as the model, features, and pricing. Trezor offers different models, including Trezor One and Trezor Model T. The Trezor Model T is the latest version, providing a more advanced and user-friendly experience.
Once you have chosen the Trezor device that suits your needs, proceed with the purchase and wait for it to be delivered. Trezor takes security seriously, and their devices undergo rigorous testing and quality assurance processes before being shipped out.
When your Trezor device arrives, make sure to inspect the packaging for any signs of tampering. Trezor devices come in a sealed box with holographic stickers. If the stickers appear to be tampered with or damaged, it’s best to contact Trezor support for assistance.
Inside the box, you will find the Trezor device, a USB cable for connecting it to your computer, and some additional accessories depending on the model you purchased. Take a moment to familiarize yourself with the different components and ensure everything is included.
Trezor devices are well-known for their durability and reliability. They are designed to withstand physical wear and tear, making them suitable for everyday use. The sleek and compact design of the device also allows for easy portability.
Once you have your Trezor device in hand, you are ready to proceed to the next step of setting up Trezor Two-Factor Authenticator, which involves installing the necessary software components.
Step 2: Install the Trezor Bridge
In order to interact with your Trezor device and enable Two-Factor Authenticator, you need to install the Trezor Bridge on your computer. The Trezor Bridge is a communication software that allows your computer to recognize and interact with your Trezor device securely.
The Trezor Bridge is compatible with major operating systems such as Windows, macOS, and Linux. To install it, follow these steps:
- Visit the official Trezor website and navigate to the “Downloads” section.
- Choose the appropriate version of the Trezor Bridge for your operating system and click on the download link.
- Once the download is complete, locate the installer file on your computer and double-click on it to begin the installation process.
- Follow the on-screen instructions provided by the installer to complete the installation. This may involve reviewing and accepting the terms and conditions, selecting the installation location, and granting necessary permissions.
- If prompted, restart your computer to ensure that the Trezor Bridge is fully integrated into your system.
After installing the Trezor Bridge, connect your Trezor device to your computer using the provided USB cable. Make sure the device is properly connected and recognized by your computer.
The Trezor Bridge establishes a secure connection between your computer and the Trezor device, ensuring that all communication is encrypted and protected from potential security threats.
By installing the Trezor Bridge, you have taken an important step towards enabling Two-Factor Authenticator on your Trezor device. The next step involves connecting your device to the Trezor Suite software, where you will complete the setup process.
Step 3: Connect your Trezor device to your computer
Now that you have installed the Trezor Bridge, it’s time to connect your Trezor device to your computer. By establishing this connection, you will be able to configure and manage your Trezor device securely.
Here’s how to connect your Trezor device to your computer:
- Take your Trezor device and locate the USB cable that came with it.
- Connect one end of the USB cable to the appropriate port on your Trezor device.
- Connect the other end of the USB cable to an available USB port on your computer.
- Your computer should recognize the Trezor device and establish a connection. Depending on your operating system and settings, you may see a notification or a Trezor icon appearing on your screen.
It’s important to ensure that the connection between your Trezor device and computer is secure. Use a reputable and trustworthy USB cable to prevent any potential data compromise or connectivity issues.
When connecting your Trezor device, make sure the device’s screen is powered on and functional. You may be prompted to enter your device’s PIN code or perform other necessary actions to verify your ownership.
Once the connection is established, your Trezor device will be ready to interact with the Trezor Suite software, allowing you to enable Two-Factor Authenticator and manage your cryptocurrency assets securely.
By connecting your Trezor device to your computer, you have completed an essential step in the setup process. In the next step, we will guide you through the configuration and setup of your Trezor device.
Step 4: Set up your Trezor device
After connecting your Trezor device to your computer, the next step is to set it up. During this process, you will configure the device, set up a PIN code, and create a recovery seed.
Follow these steps to set up your Trezor device:
- On your computer, open your web browser and navigate to the Trezor Suite website.
- If prompted, choose the option to connect with your Trezor device. The Trezor Suite should detect your device automatically.
- Follow the on-screen instructions to initiate the setup process. This may involve installing additional firmware updates on your device or confirming your device’s authenticity.
- Create a PIN code for your Trezor device. Ensure that your PIN code is unique and not easily guessable. Remember, this PIN code will be required every time you need to access your Trezor device.
- After setting up your PIN code, the device will generate a recovery seed. This is a crucial aspect of your Trezor device’s security. Write down the seed on the provided recovery card or another secure and offline location. Make sure to keep this recovery seed safe and confidential, as it can be used to restore your device in case of loss or damage.
- Confirm the recovery seed by entering the words in the correct order. This step ensures that you have accurately recorded the seed.
- Once the setup process is complete, your Trezor device will be ready to use.
Setting up your Trezor device ensures that only you have access to your cryptocurrency holdings. The PIN code and recovery seed add extra layers of security to protect your funds.
Make sure to keep your Trezor device, PIN code, and recovery seed in a secure place. Consider using a fireproof and waterproof safe or a digital security box for added protection.
By completing the setup process, you have taken significant strides in securing your cryptocurrency assets. In the next step, we will guide you through the installation and configuration of the Trezor Suite software.
Step 5: Install the Trezor Suite
In order to manage your Trezor device and enable Two-Factor Authenticator, you need to install the Trezor Suite software on your computer. The Trezor Suite provides a user-friendly interface for interacting with your Trezor device and managing your cryptocurrency assets.
To install the Trezor Suite, follow these steps:
- Open your web browser and navigate to the official Trezor website.
- Go to the “Downloads” section and look for the Trezor Suite installer.
- Choose the correct version of the Trezor Suite for your operating system (Windows, macOS, or Linux).
- Click on the download link and save the installer file to your computer.
- Once the download is complete, locate the installer file and double-click on it to start the installation process.
- Follow the on-screen instructions to install the Trezor Suite. This may involve accepting the terms and conditions, selecting the installation location, and granting necessary permissions.
- Once the installation is complete, launch the Trezor Suite on your computer.
The Trezor Suite will detect your connected Trezor device and prompt you to verify its authenticity. This step ensures that you are interacting with a genuine Trezor device.
Make sure your Trezor device is connected to your computer via the USB cable and that it is powered on.
The Trezor Suite provides a comprehensive interface for managing your cryptocurrency portfolio. It allows you to view your account balances, send and receive funds, and enable additional security features such as Two-Factor Authentication.
By installing the Trezor Suite, you can conveniently access and manage your cryptocurrency assets in a secure manner.
In the next step, we will guide you on how to access and navigate the Trezor Suite to enable Two-Factor Authenticator on your Trezor device.
Step 6: Access the Trezor Suite
After installing the Trezor Suite on your computer, you are ready to access and navigate the software to manage your Trezor device, including enabling Two-Factor Authenticator.
Here’s how to access the Trezor Suite:
- Launch the Trezor Suite by double-clicking on the application icon.
- If your Trezor device is already connected to your computer, the Trezor Suite will detect it automatically. Otherwise, connect your Trezor device using the provided USB cable.
- On the Trezor Suite dashboard, you will see an overview of your connected Trezor device and any associated cryptocurrency accounts.
- Click on the desired account or select the “Wallet” option to access your cryptocurrency portfolio.
The Trezor Suite provides a user-friendly and intuitive interface, allowing you to manage your cryptocurrency assets with ease. You can view your account balances, monitor transaction history, send and receive funds, and configure various settings.
To enable Two-Factor Authenticator on your Trezor device, navigate to the Security section or Settings in the Trezor Suite. Consult the Trezor Suite documentation or user guide for step-by-step instructions specific to your device model and firmware version.
It’s important to note that the Trezor Suite regularly receives updates and improvements to enhance security and user experience. Therefore, it’s recommended to keep your Trezor Suite software up to date by installing any available updates.
By accessing the Trezor Suite, you unlock the full potential of your Trezor device and gain greater control over your cryptocurrency holdings.
In the next step, we will guide you on how to enable Two-Factor Authenticator on your Trezor device, adding an extra layer of security to protect your funds.
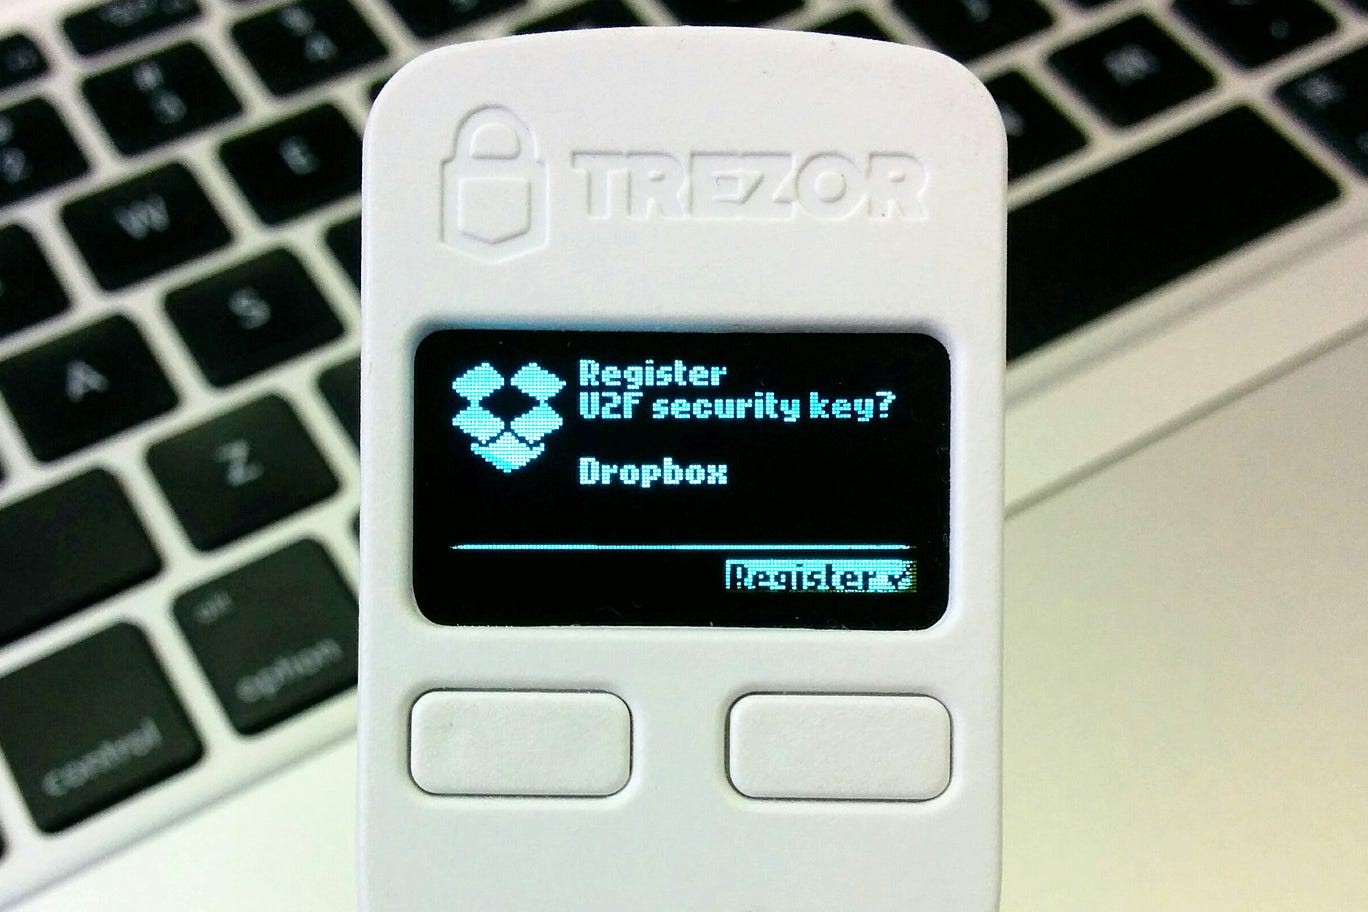
Step 7: Enable Two-Factor Authenticator on your Trezor
Enabling Two-Factor Authenticator on your Trezor device adds an extra layer of security to protect your cryptocurrency holdings. It ensures that even if your account credentials are compromised, an attacker would still need physical access to your Trezor device to gain control over your funds.
Follow these steps to enable Two-Factor Authenticator on your Trezor device:
- Access the Trezor Suite on your computer and make sure your Trezor device is connected.
- Navigate to the Security or Settings section in the Trezor Suite.
- Select the Two-Factor Authenticator option.
- Follow the on-screen instructions to configure Two-Factor Authenticator on your Trezor device.
- You may be prompted to set up a secondary authentication method, such as a PIN or a passphrase, to strengthen the security of your device. Make sure to choose a strong and unique authentication method.
- Once configured, your Trezor device will generate a unique QR code or a series of recovery codes.
- Scan the QR code or securely store the recovery codes in a safe place. These codes will be used to set up Two-Factor Authenticator on your supported app.
Enabling Two-Factor Authenticator on your Trezor device enhances the security of your cryptocurrency accounts. It ensures that only authorized devices can access your funds, providing you with peace of mind and protection against unauthorized access.
Remember to keep your Trezor device, authentication methods, and recovery codes secure. Store them in separate, secure locations, and avoid sharing them with anyone.
In the next step, we will guide you through setting up Two-Factor Authenticator on a supported app to further enhance the security of your Trezor device.
Step 8: Set up Two-Factor Authenticator on your supported app
In order to fully utilize Two-Factor Authenticator with your Trezor device, you need to set it up on a supported app that you will use to access your accounts. These apps, often referred to as authenticator apps, generate time-based one-time passwords (TOTPs) that are required in addition to your Trezor device to log in to your accounts.
Follow these steps to set up Two-Factor Authenticator on your supported app:
- Choose an authenticator app that is compatible with your device’s operating system. Some popular options include Google Authenticator, Authy, and LastPass Authenticator.
- Install the authenticator app from your device’s app store or download it from the respective website.
- On your Trezor device, access the Two-Factor Authenticator settings.
- Select the option to add a new authenticator app.
- A QR code will be displayed on your Trezor device screen.
- Open the authenticator app on your smartphone or other device.
- Select the option to add a new account or scan a QR code.
- Scan the QR code displayed on your Trezor device using the authenticator app’s scanning feature.
- The app will generate a time-based one-time password (TOTP) associated with your Trezor device.
- Confirm the setup by entering the generated TOTP code on your Trezor device.
Once the setup is complete, the authenticator app will generate a new TOTP code every few seconds. When logging in to your accounts, you will need to enter this code, along with your Trezor device, to successfully authenticate.
It is important to note that each authenticator app may have slightly different setup steps. Consult the app’s documentation or support resources for detailed instructions specific to your chosen app.
Setting up Two-Factor Authenticator on a supported app greatly enhances the security of your accounts. Even if an attacker has access to your username and password, they won’t be able to log in without the correct TOTP code generated by your Trezor device and the authenticator app.
In the next step, we will guide you on how to link your Trezor device to the authenticator app.
Step 9: Link your Trezor device to the app
After setting up Two-Factor Authenticator on your supported app, the next step is to link your Trezor device to the app. This process allows the app to generate time-based one-time passwords (TOTPs) in sync with your Trezor device.
Follow these steps to link your Trezor device to the app:
- Open the authenticator app on your device.
- Locate the option to add a new account or scan a QR code.
- On your Trezor device, access the Two-Factor Authenticator settings.
- Select the option to link your authenticator app.
- A QR code will be displayed on your Trezor device screen.
- Use the authenticator app’s scanning feature to scan the QR code displayed on your Trezor device.
- Once successfully scanned, the app will link to your Trezor device and start generating TOTPs.
- Verify the link by entering a generated TOTP code from the app on your Trezor device.
Linking your Trezor device to the authenticator app ensures that both devices are synchronized and generating the same TOTP codes at any given time.
It’s important to keep your linked device secure and prevent unauthorized access. Ensure that your smartphone or device is protected with a strong passcode or biometric authentication, and be cautious about handing over physical access to your linked device.
By linking your Trezor device to the authenticator app, you have established a connection between the two that adds an additional layer of security to your accounts. This combination of your Trezor device and the authenticator app will be required to successfully log in to your accounts that have Two-Factor Authentication enabled.
In the last step, we will cover how to test the Two-Factor Authenticator setup to ensure that everything is working properly.
Step 10: Test the Two-Factor Authenticator setup
After completing the setup process for Two-Factor Authenticator on your Trezor device and the supported app, it’s essential to test the configuration to ensure that it is working correctly. Testing the setup will verify that both your Trezor device and the app are generating and accepting the correct time-based one-time passwords (TOTPs).
Follow these steps to test your Two-Factor Authenticator setup:
- Open a website or application that has Two-Factor Authentication enabled.
- Enter your username and password as you normally would.
- You will be prompted to provide the Two-Factor Authentication code.
- On your Trezor device, access the Two-Factor Authenticator settings.
- Check the authenticator app on your linked device for the generated TOTP code.
- Enter the current TOTP code displayed on the authenticator app into the prompt on your computer or device.
- Confirm the code submission.
If the entered code is accepted and the authentication is successful, it means that the Two-Factor Authenticator setup is functioning correctly. You have successfully added an extra layer of security to your accounts.
However, if the entered code is not accepted, double-check that you have entered it correctly, ensuring that there are no typos or missing characters. Also, ensure that the time on both your Trezor device and the authenticator app is synchronized, as the generated TOTP codes are time-sensitive.
If you encounter any issues during the testing process, consult the documentation or support resources of your Trezor device, the authenticator app, or the specific website or application you are trying to access. They should be able to provide troubleshooting steps or guidance to resolve any configuration or compatibility issues.
Regularly testing and verifying your Two-Factor Authenticator setup ensures that it actively safeguards your accounts from unauthorized access. It’s a recommended practice to periodically perform these tests to maintain the security of your online presence and digital assets.
Congratulations! You have successfully completed the process of setting up and testing the Two-Factor Authenticator for your Trezor device. Your cryptocurrency holdings are now protected by an additional layer of security.
Troubleshooting common issues
While setting up and using Two-Factor Authenticator with your Trezor device, you may encounter some common issues. Here are a few troubleshooting tips to help you resolve them:
1. Connectivity Issues: If your Trezor device is not being recognized by the Trezor Bridge or the Trezor Suite, try the following steps:
- Ensure that the USB cable is securely connected to both your Trezor device and your computer.
- Try using a different USB port on your computer.
- Restart your computer and reconnect your Trezor device.
- Make sure you have the latest version of the Trezor Bridge and Trezor Suite installed.
2. Incorrect TOTP Codes: If the TOTP codes generated by your authenticator app do not match the codes expected by your Trezor device, check the following:
- Verify that the time on your Trezor device and the authenticator app are synchronized. Even a small time discrepancy can cause the codes to be out of sync.
- Ensure that you are entering the TOTP code correctly, taking care to avoid any typos or mistakes.
- If the issue persists, try removing and re-linking your Trezor device to the authenticator app following the setup steps.
3. Forgotten PIN or Recovery Seed: If you have forgotten your Trezor device’s PIN or lost your recovery seed, restoring access can be challenging. However, there are some steps you can take:
- Refer to the recovery seed you saved during the setup process. If you cannot locate it, consider reaching out to Trezor support for further guidance.
- If you have forgotten your PIN, follow the instructions provided by Trezor to perform a PIN reset. Note that this process may involve erasing the device and restoring it using your recovery seed.
- Be cautious when resetting or restoring your Trezor device, as it may result in the loss of your existing funds if not done correctly.
It’s important to stay informed and keep your Trezor device, software, and app versions up to date. Regularly check for firmware updates, software upgrades, or security patches released by Trezor to ensure the best possible user experience and protection.
If you encounter persistent issues or require further assistance, don’t hesitate to reach out to Trezor support or consult their user documentation and online resources. They are equipped to guide you through any troubleshooting steps specific to your situation.
By being proactive in addressing and resolving common issues, you can maximize the security and functionality of your Two-Factor Authenticator setup with your Trezor device.