
What is Trezor Wallet?
Trezor Wallet is a hardware wallet that provides a secure and convenient way to store, manage, and transact with cryptocurrencies. It is designed to protect your digital assets from online threats such as hackers and malware. With its strong emphasis on security, Trezor Wallet gives you peace of mind by keeping your private keys offline and away from potential vulnerabilities.
As a hardware wallet, Trezor Wallet stores your private keys on a physical device, which is typically a small and compact device that resembles a USB stick. This means that your private keys never leave the device, reducing the risk of them being compromised by online attacks. In addition, the device is equipped with secure chip technology that provides tamper-proof protection for your private keys.
One of the main advantages of using Trezor Wallet is the ability to securely manage multiple cryptocurrencies in one place. Trezor Wallet supports a wide range of popular cryptocurrencies, including Bitcoin, Ethereum, Litecoin, and many more. This allows you to conveniently access and transact with your digital assets without having to rely on multiple wallets.
Setting up Trezor Wallet is also user-friendly and straightforward. You can easily connect the device to your computer via USB and follow the step-by-step instructions provided by the Trezor Wallet interface. This ensures that even beginners can start using the wallet with ease.
Moreover, Trezor Wallet provides an intuitive and user-friendly interface, making it simple to navigate and manage your cryptocurrency holdings. You can easily view your account balances, send and receive transactions, and even interact with decentralized applications (DApps).
With its robust security features and user-friendly design, Trezor Wallet has gained a strong reputation as one of the most trusted hardware wallets in the cryptocurrency industry. Whether you are a long-term investor or an active trader, Trezor Wallet offers a reliable solution for securing your digital assets and conducting transactions with confidence.
Setting up your Trezor Wallet
The process of setting up your Trezor Wallet is simple and user-friendly. By following a few easy steps, you can securely store and manage your cryptocurrencies. Let’s walk through the setup process to get you started:
- Connect your Trezor Wallet: Start by connecting your Trezor Wallet to your computer using the provided USB cable. Ensure that the device is properly connected and recognized by your computer.
- Access Trezor Wallet website: Open a compatible browser and visit the official Trezor Wallet website. You can access the website at https://wallet.trezor.io/. Make sure you are visiting the legitimate website to prevent any phishing attempts.
- Install the Trezor Bridge: If you are using the Trezor Wallet for the first time on your computer, you might need to install the Trezor Bridge, which acts as a bridge between the Trezor device and the web browser. Follow the on-screen instructions to install the Trezor Bridge if necessary.
- Choose the compatible extension: Depending on your browser, you may need to install a compatible extension to communicate with your Trezor Wallet. The Trezor Wallet website will guide you through the installation process for the appropriate extension.
- Create a new wallet: Once your device is connected and the necessary extensions are installed, you can create a new wallet. Follow the instructions on the website to set a strong password and select your preferred security options.
- Write down your recovery seed: During the setup process, you will be provided with a recovery seed. This seed is a crucial element for recovering your wallet in case of loss or damage. Write down the seed on a physical paper and store it in a secure location. Never share this recovery seed with others.
- Verify your recovery seed: After writing down the recovery seed, you will be prompted to verify it. This is an essential step to ensure that you have accurately noted the seed. Follow the instructions on the screen and confirm the seed words in the correct order.
- Set up additional security measures: Trezor Wallet offers additional security features such as a passphrase and 2-factor authentication. It is highly recommended to enable these options for enhanced protection.
Congratulations! You have successfully set up your Trezor Wallet. Now you can securely manage your cryptocurrencies and conduct transactions with peace of mind. Remember to keep your device and recovery seed safe to ensure the long-term security of your digital assets.
Connecting your Trezor Wallet to your computer
Connecting your Trezor Wallet to your computer is the first step to securely interact with your cryptocurrencies. The process is straightforward and can be done in a few simple steps:
- Retrieve your Trezor Wallet: Ensure that you have your Trezor Wallet device on hand. It should be in a safe and easily accessible location.
- Connect the USB cable: Plug one end of the USB cable into your Trezor Wallet device and the other end into an available USB port on your computer. Make sure the connection is secure and snug.
- Power on your Trezor Wallet: Press the button located on the front of your Trezor Wallet to power it on. You will see the Trezor logo or a request to connect to your computer.
- Visit the Trezor Wallet website: Open a compatible browser on your computer and navigate to the official Trezor Wallet website at https://wallet.trezor.io/. This is where you will access your wallet interface and perform various actions.
- Unlock your device: On the Trezor Wallet screen, you will be prompted to unlock your device. Follow the instructions on the screen and use the buttons on the device to enter your PIN number. This PIN is a security measure to protect access to your wallet.
- Access your Trezor Wallet: After successfully entering the PIN, your Trezor Wallet will be connected to your computer, and you will be able to access your wallet on the website. You will see a dashboard that displays your account balances, recent transactions, and other relevant information.
It’s important to note that each time you connect your Trezor Wallet, you may need to go through the device unlocking process to ensure maximum security. This ensures that even if someone gains temporary access to your computer, they won’t be able to access your wallet without entering the correct PIN on the physical device.
By following these simple steps, you can easily connect your Trezor Wallet to your computer and begin securely managing your cryptocurrencies. Remember to always use the official Trezor Wallet website and keep your device and PIN secure to protect your digital assets.
Choosing the compatible browser and extension for Trezor Wallet
When setting up your Trezor Wallet, it’s important to choose a compatible browser and install the necessary extensions to ensure a seamless and secure experience. Here are some key considerations:
Browser Compatibility: Trezor Wallet is compatible with various web browsers, including Google Chrome, Mozilla Firefox, and Opera. It’s essential to use a browser that is officially supported by Trezor to ensure optimal performance and compatibility.
Trezor Bridge: The Trezor Bridge is a software component that facilitates communication between your Trezor device and the web browser. It allows you to securely interact with your wallet, sign transactions, and ensure the integrity of the data exchanged. It’s recommended to install the Trezor Bridge to enhance the security and functionality of your Trezor Wallet.
Extensions: Depending on the web browser you choose, you may need to install a compatible extension to interact with your Trezor Wallet. Extensions act as a bridge between the web browser and your Trezor device, providing a secure connection for managing your cryptocurrency assets.
Here are the extensions available for the supported browsers:
- Trezor Extension for Google Chrome: If you are using Google Chrome, you can install the official Trezor Extension from the Chrome Web Store. Simply search for “Trezor” in the store, click on the extension, and follow the instructions to install it.
- Trezor Extension for Mozilla Firefox: For Mozilla Firefox users, you can find the Trezor Extension in the Firefox Add-ons Marketplace. Search for “Trezor” in the marketplace, click on the extension, and follow the on-screen instructions to install it.
- Trezor Extension for Opera: If you prefer using Opera as your browser, you can also find the Trezor Extension in the Opera Add-ons store. Search for “Trezor” in the store, select the extension, and follow the installation instructions.
By choosing a compatible browser and installing the necessary extension, you can ensure a secure and smooth experience while using your Trezor Wallet. Always make sure to download and install extensions from official sources to avoid potential security risks.
Remember to keep your browser and extensions up to date with the latest versions to benefit from improved security features and bug fixes. Regularly check the official Trezor website for any updates or recommendations regarding browser compatibility and extension usage.
Authenticating your Trezor Wallet
Authenticating your Trezor Wallet is a crucial step in ensuring the security and integrity of your cryptocurrency transactions. Trezor Wallet employs various authentication methods to verify your identity and authorize actions within the wallet. Here are some important authentication mechanisms to be aware of:
Device Verification: Every time you connect your Trezor Wallet to your computer, you will need to verify the device to ensure its authenticity. This verification process typically involves physically interacting with the device, either by entering a PIN or confirming a verification code displayed on the device’s screen. By verifying the device, Trezor Wallet ensures that only authorized users can access the wallet and perform transactions.
Two-Factor Authentication (2FA): In addition to device verification, Trezor Wallet supports the use of two-factor authentication (2FA) for enhanced security. With 2FA enabled, you will be required to provide a second verification code generated by an authentication app on your smartphone or other trusted device. This adds an extra layer of protection, as an attacker would need both your physical Trezor device and the second verification code to gain access to your wallet.
Passphrase: Trezor Wallet also allows you to set up a passphrase, sometimes referred to as a “25th word.” This passphrase acts as an additional layer of security on top of the PIN and recovery seed. It adds an extra word or phrase that you must remember and enter correctly when prompted. By using a passphrase, even if someone obtains your recovery seed, they will still need the passphrase to access your wallet.
It’s essential to follow best practices when authenticating your Trezor Wallet:
- Never share your recovery seed, PIN, or passphrase with anyone. Keep these details confidential and secure.
- Create a strong PIN and passphrase. Avoid using easily guessable combinations and ensure they are unique to your Trezor Wallet.
- Regularly update your recovery seed and passphrase. Consider changing them periodically to mitigate the risk of unauthorized access.
- Enable 2FA if supported by your Trezor Wallet. This adds an extra layer of protection and prevents unauthorized access.
By carefully authenticating your Trezor Wallet, you can ensure that only authorized individuals have access to your digital assets. This protects your cryptocurrencies from unauthorized transactions and safeguards them against potential security threats.
Updating firmware on your Trezor Wallet
Keeping the firmware of your Trezor Wallet up to date is essential for maintaining its security and functionality. Firmware updates often include bug fixes, performance improvements, and new features that enhance the overall user experience. Here is a step-by-step guide on how to update the firmware on your Trezor Wallet:
- Connect your Trezor Wallet to your computer using the provided USB cable. Ensure that the device is properly connected and recognized by your computer.
- Open a compatible browser and navigate to the official Trezor Wallet website at https://wallet.trezor.io/.
- Unlock your Trezor Wallet by entering your PIN on the device’s screen. This step ensures that only authorized individuals can access and update the firmware.
- In the Trezor Wallet interface, click on the “Wallet” tab or a similar option to access the wallet settings.
- Look for the “Firmware” or “Device firmware” section in the settings menu. If there is a firmware update available, you should see a notification or an option to update the firmware.
- Click on the option to update the firmware and follow the on-screen instructions. These instructions may include confirming the update on your Trezor device and acknowledging any potential risks or warnings.
- During the firmware update process, it is crucial to keep your Trezor Wallet connected and avoid disconnecting it or turning it off. Interrupting the update process may result in a failure or potential corruption of the firmware.
- Once the firmware update is complete, your Trezor Wallet will automatically restart and be ready to use with the latest firmware version.
It’s important to note that firmware updates may take some time, depending on the size of the update and the speed of your internet connection. Be patient and allow the update process to complete without interruptions.
Regularly checking for firmware updates is recommended to ensure that your Trezor Wallet benefits from the latest security enhancements and features. You can also subscribe to the official Trezor newsletter to receive notifications about important firmware updates and other news related to your wallet.
By keeping your Trezor Wallet’s firmware up to date, you are taking an important step towards maintaining the security and functionality of your cryptocurrency holdings.
Importing existing accounts into your Trezor Wallet
If you already have existing cryptocurrency accounts with other wallets or exchanges, you can easily import those accounts into your Trezor Wallet. This allows you to consolidate and manage all your digital assets in one secure hardware wallet. Here’s how you can import your existing accounts into your Trezor Wallet:
- Ensure that your Trezor Wallet is securely connected to your computer and is powered on. Make sure you have the necessary firmware and software updates installed on your Trezor device.
- Access the Trezor Wallet interface on the official Trezor Wallet website. You can do this by opening a compatible browser and going to https://wallet.trezor.io/.
- Unlock your Trezor Wallet by entering your PIN on the device’s screen. This authenticates your device and gives you access to your wallet’s settings and features.
- In the Trezor Wallet interface, navigate to the “Wallet” or similar section, where you can manage your accounts and addresses.
- Select the option to add a new account or import an existing account. The specific steps may vary depending on the wallet interface version.
- Follow the on-screen instructions to import your existing account. This typically involves providing relevant details such as the public key, wallet seed, or private key associated with the account you want to import.
- Once you have entered the required information, confirm the import process. Your Trezor Wallet will validate the information and import the account into your wallet.
- After the import is complete, you should see your imported account listed in the wallet interface, along with your other existing accounts.
It’s important to note that importing accounts into your Trezor Wallet does not physically transfer funds from one wallet to another. Instead, it allows you to manage and control those accounts using the Trezor Wallet interface, providing an added layer of security.
Remember, when importing accounts, it’s crucial to ensure the security of the associated private keys or seed phrases. Make sure to import accounts only from reputable wallets or exchanges and follow best practices for securing your private keys.
By importing your existing accounts into your Trezor Wallet, you can have a centralized and secure location for managing all of your cryptocurrencies. This simplifies your crypto portfolio management and provides enhanced security for your digital assets.
Creating a new account on your Trezor Wallet
Creating a new account on your Trezor Wallet is a straightforward process that allows you to expand your cryptocurrency holdings and manage them securely. Here’s a step-by-step guide on how to create a new account on your Trezor Wallet:
- Ensure that your Trezor Wallet is connected to your computer and is powered on. Make sure you have the necessary firmware and software updates installed on your Trezor device.
- Access the Trezor Wallet interface on the official Trezor Wallet website. Open a compatible browser and go to https://wallet.trezor.io/ to access your wallet.
- Unlock your Trezor Wallet by entering your PIN on the device’s screen. This authenticates your device and grants you access to your wallet’s settings and features.
- In the Trezor Wallet interface, navigate to the “Accounts” or similar section. This is where you can manage your existing accounts and create new ones.
- Click on the option to create a new account. The specific steps may vary depending on the version of the wallet interface you are using.
- Follow the on-screen instructions to set up the new account. You may be asked to specify the cryptocurrency type (e.g., Bitcoin, Ethereum) and set a label for the account to help you identify it easily.
- Once you have provided the necessary details, confirm the creation of the new account. Your Trezor Wallet will generate a new account address and add it to your wallet.
- Your new account will now be listed in the wallet interface, alongside your existing accounts. You can view the account balance, transaction history, and perform various actions specific to that account.
Creating a new account on your Trezor Wallet allows you to organize your cryptocurrency holdings and manage them efficiently. Each account has its unique address, making it easy to receive and track transactions specific to that account.
It’s important to note that creating a new account does not require any additional fees, as it is simply a feature of your Trezor Wallet. However, be aware that certain cryptocurrency networks may require you to pay network fees when sending transactions from your newly created account.
By creating new accounts on your Trezor Wallet, you can expand your cryptocurrency portfolio and securely manage multiple accounts in one centralized location.
Managing multiple accounts on your Trezor Wallet
Managing multiple accounts on your Trezor Wallet allows you to efficiently organize and track your various cryptocurrency holdings. Whether you have different types of cryptocurrencies or multiple addresses for the same cryptocurrency, Trezor Wallet offers a seamless solution for managing them all securely. Here’s how you can effectively manage multiple accounts on your Trezor Wallet:
Viewing Account Balances: The Trezor Wallet interface provides you with a clear overview of all your accounts and their respective balances. You can easily navigate between accounts to see the updated balance for each one. This feature enables you to keep track of your overall cryptocurrency portfolio without needing to switch between different wallets or services.
Receiving Funds: Each account in your Trezor Wallet has its unique address. To receive funds into a specific account, you can provide the corresponding account address to the sender. By using multiple accounts, you can easily segregate and track incoming transactions based on their respective accounts.
Organizing and Labeling: Trezor Wallet allows you to label your accounts to provide customized names or identifiers. This is particularly useful when managing multiple accounts of the same cryptocurrency or when using specific accounts for different purposes, such as personal and business transactions. You can conveniently rename your accounts to reflect their intended uses.
Transaction History: Each account in your Trezor Wallet maintains its transaction history. You can easily review the transaction details for each account, including the date, time, and transaction amount. This feature allows you to keep track of your transaction history for specific accounts, providing a comprehensive view of your cryptocurrency activity.
Switching Between Accounts: The Trezor Wallet interface provides a simple and intuitive way to switch between different accounts. You can easily navigate between accounts to manage transactions, view balances, and perform account-specific actions. This streamlined process eliminates the need to juggle multiple wallets or services, enhancing the convenience of managing multiple accounts within a single interface.
Backup and Recovery: With Trezor Wallet, you have the option to back up your entire wallet, including all the accounts and their associated balances. This ensures that even if you lose access to your device, you can securely recover all your accounts and continue managing your crypto holdings from a new device by restoring the backup.
By effectively managing multiple accounts on your Trezor Wallet, you can maintain an organized and secure approach to handling your various cryptocurrencies. Whether you have different cryptocurrencies or accounts for different purposes, Trezor Wallet provides the tools and features to simplify your cryptocurrency management and keep your digital assets safe.
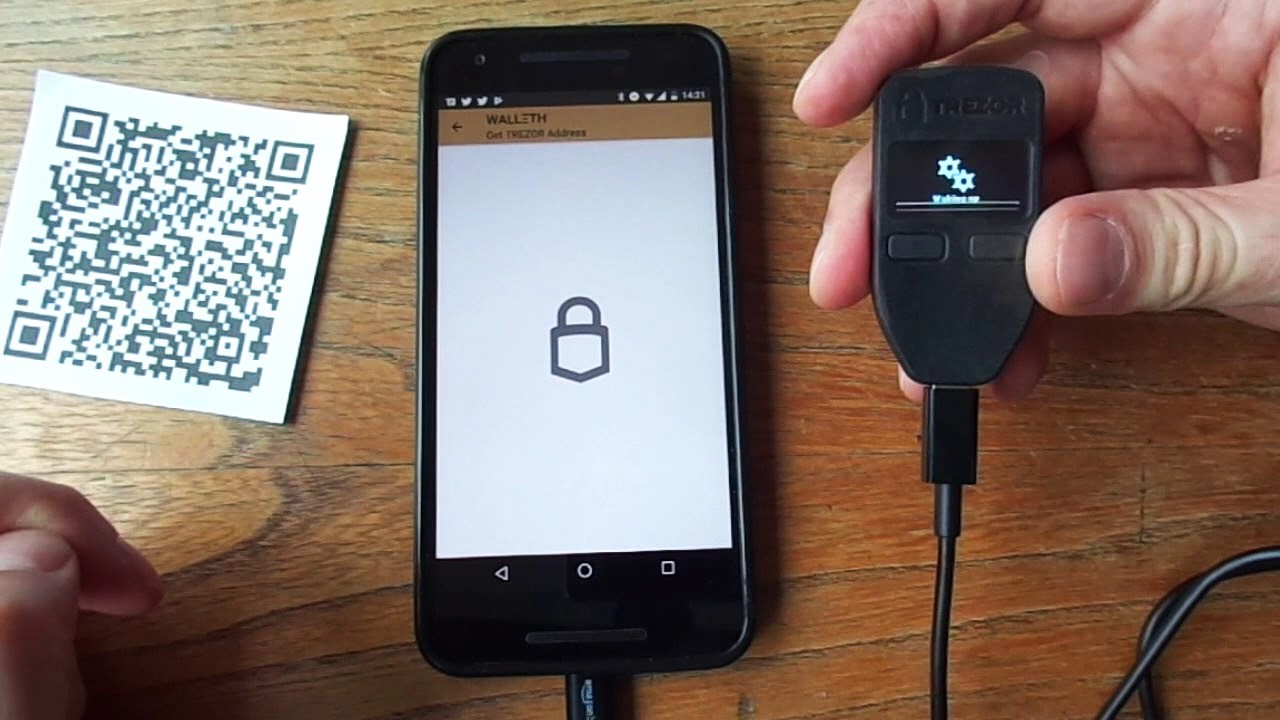
Sending and receiving cryptocurrency with your Trezor Wallet
Your Trezor Wallet not only allows you to securely store your cryptocurrencies but also enables you to send and receive them with ease. Whether you want to make a payment or receive funds from someone else, Trezor Wallet provides a user-friendly interface for managing these transactions. Here’s how you can send and receive cryptocurrency with your Trezor Wallet:
Sending Cryptocurrency:
- Connect your Trezor Wallet to your computer and unlock it by entering your PIN.
- Access the Trezor Wallet interface on the official Trezor Wallet website.
- In the wallet interface, navigate to the account from which you want to send funds.
- Click on the “Send” or similar option to initiate a transaction.
- Enter the recipient’s wallet address in the provided field. Make sure to double-check the address to avoid any errors.
- Specify the amount of cryptocurrency you want to send and choose the appropriate currency from the drop-down menu.
- Review the transaction details, including the recipient’s address and the amount, to ensure accuracy.
- Confirm the transaction on your Trezor Wallet device by verifying the details shown on the screen.
- Follow any additional on-screen instructions to complete the transaction and sign it with your Trezor Wallet.
- Wait for the transaction to be confirmed on the blockchain. This may take some time, depending on the network congestion and the specific cryptocurrency you are sending.
Receiving Cryptocurrency:
- Connect your Trezor Wallet to your computer and unlock it by entering your PIN.
- Access the Trezor Wallet interface on the official Trezor Wallet website.
- In the wallet interface, select the account to which you want to receive funds.
- Click on the “Receive” or similar option to generate a receiving address.
- Copy the generated address or use the provided QR code to share it with the sender.
- Ensure the sender uses the correct address when initiating the transaction.
- Wait for the sender to send the funds to your Trezor Wallet address.
- Once the transaction is confirmed on the blockchain, the received funds will be reflected in your Trezor Wallet balance.
It’s important to note that when sending or receiving cryptocurrency, you should always double-check the addresses and transaction details to avoid any mistakes or errors. Additionally, be mindful of network transaction fees, miner fees, and the specific requirements of the cryptocurrency you are transacting with.
By using your Trezor Wallet to send and receive cryptocurrency, you can securely manage your transactions and have peace of mind knowing that your digital assets are protected by the device’s robust security features.
Using Trezor Wallet with cryptocurrency exchanges
Trezor Wallet offers seamless integration with many cryptocurrency exchanges, allowing you to securely manage and transact with your digital assets directly from your hardware wallet. By using Trezor Wallet in conjunction with exchanges, you can benefit from enhanced security and control over your cryptocurrency holdings. Here’s how you can use Trezor Wallet with cryptocurrency exchanges:
Account Setup:
- First, ensure that your Trezor Wallet is connected to your computer and unlocked by entering your PIN.
- Access the exchange’s website and navigate to the account or settings section.
- Look for an option to add a new account or link an existing account.
- Select the option to connect a hardware wallet, and choose Trezor as the specific hardware wallet provider.
- Follow the on-screen instructions to establish a connection between your Trezor Wallet and the exchange.
Depositing Funds:
- Access the exchange’s deposit page or wallet section.
- Choose the cryptocurrency you want to deposit into your exchange account.
- Select Trezor Wallet as the source or the “send from” address.
- Authenticate the transaction on your Trezor Wallet device by verifying the details displayed on the screen.
- Confirm the transaction on the exchange’s website, following any additional on-screen instructions.
Withdrawing Funds:
- Access the exchange’s withdrawal or withdraw funds page.
- Select the cryptocurrency you want to withdraw from your exchange account.
- Enter the destination address, which is typically the address from your Trezor Wallet.
- Authenticate the transaction on your Trezor Wallet device by verifying the details displayed on the screen.
- Confirm the withdrawal request on the exchange’s website, following any additional on-screen instructions.
It’s important to note that each exchange may have slight variations in their user interface and specific steps for interacting with Trezor Wallet. However, the general process of connecting, depositing, and withdrawing funds remains relatively consistent.
When using Trezor Wallet with cryptocurrency exchanges, it’s crucial to be aware of the following:
- Ensure that you are accessing the legitimate website of the cryptocurrency exchange to avoid potential phishing attempts.
- Always verify the transaction details displayed on your Trezor Wallet device before confirming the transaction on the exchange’s website.
- Stay updated with the exchange’s security practices and enable any additional security features offered, such as two-factor authentication (2FA).
By utilizing Trezor Wallet with cryptocurrency exchanges, you can enjoy the convenience of managing your funds directly from your hardware wallet while benefiting from the enhanced security measures provided by Trezor’s technology.
Tips for securing your Trezor Wallet
Securing your Trezor Wallet is of utmost importance to protect your valuable cryptocurrencies from potential threats. Here are some essential tips to enhance the security of your Trezor Wallet:
Use a Strong PIN: Choose a PIN for your Trezor Wallet that is unique and difficult for others to guess. Avoid common patterns or easily memorable codes.
Enable 2FA: Two-factor authentication (2FA) provides an extra layer of security by requiring a second verification step, such as a code generated by an authentication app, in addition to your PIN.
Backup Your Recovery Seed: Write down your Trezor Wallet’s recovery seed on a piece of paper and store it in a safe and secure place. This seed can be used to recover your wallet if your device is lost, stolen, or damaged.
Secure Recovery Seed Access: Keep your recovery seed confidential and away from prying eyes. Store it in a place where only you have access and consider using additional security measures like a safe or a safety deposit box.
Enable Passphrase: Use a passphrase as an optional additional layer of security. This passphrase acts as a 25th word that you add to your recovery seed and must be kept secret and secure.
Update Firmware and Software: Regularly update the firmware and software of your Trezor Wallet. These updates often include important security enhancements and bug fixes.
Verify Cardano Signing Key: If you are using Cardano (ADA) with your Trezor Wallet, make sure to verify the signing key on the device each time you connect to confirm it matches what is displayed on your computer screen.
Secure Your Computer: Keep your computer’s operating system and antivirus software up to date. Ensure that you are using a secure and trusted internet connection to avoid potential threats.
Use Official Channels: Only download firmware updates and extensions from the official Trezor website or trusted sources. Be cautious of phishing attempts or malicious software.
Be Wary of Suspicious Emails or Websites: Stay vigilant against phishing attempts that may try to trick you into revealing your Trezor Wallet details. Always ensure you are visiting legitimate websites and exercise caution when interacting with emails or links related to your wallet.
Test Recovery Process: Familiarize yourself with the recovery process of your Trezor Wallet by performing a test recovery. This will ensure that you can retrieve your wallet in case of an emergency.
Implementing these security measures will significantly enhance the protection of your Trezor Wallet and the cryptocurrencies it safeguards. By staying proactive and vigilant, you can maintain the integrity and security of your digital assets.