
Unboxing and Contents
When you receive your Trezor Model T, the first step is to unbox it and familiarize yourself with its contents. The Trezor Model T comes in a sleek and secure packaging that ensures the safety of the device during shipping. Upon opening the box, you will find:
- The Trezor Model T device itself, which is a compact and robust hardware wallet.
- A USB cable for connecting the device to your computer or mobile device.
- A recovery seed card, which is a crucial component for securely restoring your wallet in case of loss or damage to the device.
- An instruction manual that provides step-by-step guidance on how to set up and use your Trezor Model T.
Before proceeding, ensure that all the items are present and in good condition. It is important to note that the recovery seed card should be kept in a safe place, ideally in a fireproof and waterproof location, as it serves as the ultimate backup for your funds.
The aesthetics and quality of the packaging reflect the attention to detail that Trezor puts into the design and manufacturing of their devices. The minimalist yet elegant design of the Trezor Model T is also evident in the functionality and user interface.
Once you have familiarized yourself with the contents of the box, you are ready to proceed with connecting your Trezor Model T to your computer and setting it up for usage.
Connecting Trezor to your Computer
In order to start using your Trezor Model T, you will need to connect it to your computer. Follow these simple steps to establish a secure connection:
- Connect one end of the USB cable to the Trezor Model T device and the other end to an available USB port on your computer.
- The device will power on automatically once it is connected to your computer. You will see the Trezor logo and a prompt to go to trezor.io/start.
- Open a web browser and visit the trezor.io/start page as indicated. This will redirect you to the official Trezor website.
- On the website, you will be prompted to install the Trezor Bridge, which is a software that allows your computer to communicate with the device securely. Follow the on-screen instructions to download and install the Trezor Bridge on your computer.
- Once the Trezor Bridge is installed, refresh the trezor.io/start page. You should see a notification indicating that the device has been successfully connected.
By following these steps, you have established a secure connection between your Trezor Model T and your computer. This connection ensures that all communication between the device and your computer is encrypted, providing an added layer of security for your cryptocurrency transactions and sensitive data.
It’s important to note that the Trezor Model T can also be connected to a mobile device using an OTG (On-The-Go) adapter. This allows for convenient usage on the go or when a computer is not readily available.
With the Trezor Model T successfully connected, you are now ready to proceed with the device setup and create your first cryptocurrency wallet!
Setting Up a New Device
Once you have connected your Trezor Model T to your computer, it’s time to set up the device and create a new cryptocurrency wallet. Follow these steps to get started:
- On the trezor.io/start page, click on the “Create a new wallet” button.
- Make sure that the Trezor Model T is selected as your device and click “Continue.”
- The next step is to install the Trezor Wallet browser extension. This extension enables you to manage your cryptocurrencies securely and conveniently through a user-friendly interface. Follow the instructions provided for your specific browser to install the extension.
- Once the extension is installed, refresh the trezor.io/start page. You should now see a prompt to connect your Trezor Model T.
- Click on the “Connect” button to initiate the connection. Ensure that the Trezor Model T is still connected to your computer through the USB cable.
- The next screen will show a random set of words on your Trezor Model T display. This is the recovery seed. It is essential to write down and securely store this sequence of words as it serves as a backup for your wallet.
- Using the Trezor Wallet browser extension, confirm the order of the words by clicking on the corresponding box on the screen. This step ensures that the recovery seed was recorded correctly and can be used to restore your wallet in case of loss or damage to the device.
- Once you have confirmed the recovery seed, you will be prompted to set a PIN for your Trezor Model T. Follow the on-screen instructions to choose a PIN that is easy for you to remember but difficult for others to guess.
- After setting a PIN, your Trezor Model T will be successfully initialized, and you will be directed to the Trezor Wallet interface.
By completing these steps, you have successfully set up your new Trezor Model T device and created a new cryptocurrency wallet. It is important to ensure the security of your recovery seed and PIN, as they are vital for accessing and restoring your wallet.
Take a moment to explore the Trezor Wallet interface and familiarize yourself with its features. In the next sections, we will delve into more advanced functionalities and usage scenarios for your Trezor Model T.
Creating a New Wallet
One of the first steps in setting up your Trezor Model T is creating a new wallet. Follow these simple instructions to create a new wallet for your cryptocurrencies:
- Ensure that your Trezor Model T is connected to your computer and the Trezor Wallet browser extension is installed.
- On the Trezor Wallet interface, click on “Create new” to initiate the wallet creation process.
- You will be prompted to choose a label for your wallet. This label is for your reference and can help you differentiate between multiple wallets if desired.
- Next, select the cryptocurrencies you want to include in your wallet. The Trezor Model T supports a wide range of cryptocurrencies, so you can choose the ones you wish to manage using your device.
- Click on “Add account” to create the first account for your chosen cryptocurrencies. Each account represents a separate wallet within your Trezor Model T and can be assigned different labels if desired.
- Follow the on-screen instructions to confirm the account creation on your Trezor Model T display. You will be asked to verify the account name and confirm the account creation using the device’s buttons.
- Once the account is created, you will see it listed on the Trezor Wallet interface. You can click on the account to view its balance, transaction history, and receive addresses.
- Repeat the process of adding accounts for any additional cryptocurrencies you wish to include in your wallet.
With your new wallet created and accounts added, you are now ready to manage and secure your cryptocurrencies using your Trezor Model T. The wallet interface provides you with a clear overview of your balances and transaction history, making it easy to stay updated on your cryptocurrency holdings.
Remember to keep your device and recovery seed secure at all times. This will ensure that your cryptocurrencies are protected from unauthorized access or loss.
In the next sections, we will explore additional features of the Trezor Model T, such as sending and receiving cryptocurrencies, enabling passphrase protection, and using the device with third-party wallets.
Setting up Recovery Seed
One of the most critical aspects of setting up your Trezor Model T is establishing a secure recovery seed. The recovery seed acts as a backup that allows you to restore your wallet and access your cryptocurrencies in case your device is lost, stolen, or damaged. Follow these steps to set up your recovery seed:
- During the initial setup process, the Trezor Model T will display a random sequence of 24 words on its screen. These words constitute your recovery seed.
- Write down these words on the recovery seed card that came with your Trezor Model T. Ensure that you write them down in the exact order as displayed.
- Store the recovery seed card in a safe and secure location, preferably in a fireproof and waterproof container. It is crucial to keep the recovery seed card separate from your device to prevent both from being compromised simultaneously.
- Do not store the recovery seed digitally or take pictures of it, as it increases the risk of it falling into the wrong hands.
- Once you have securely recorded the recovery seed, you will be prompted to confirm its authenticity. This step ensures that you have accurately written down the seed.
- Verify the recovery seed by selecting the correct words in the correct order on the Trezor Model T display. This acts as a double-check to prevent any errors in the recording of the seed.
- Once the recovery seed is successfully verified, your Trezor Model T will be ready for use. It is advisable to test the recovery process by performing a dry-run restoration before adding any funds to the device. This will ensure that you can confidently recover your wallet if the need arises.
Setting up a recovery seed is an essential step in securing your cryptocurrencies. It provides a fail-safe mechanism to regain access to your funds even if your Trezor Model T is lost or damaged. Remember to keep your recovery seed card safe and confidential, as anyone with access to it can potentially gain control of your wallet.
In the event that your Trezor Model T is lost or damaged, you can use the recovery seed to restore your wallet on a new device or a compatible software wallet that supports BIP39 recovery.
In the following sections, we will explore additional features of the Trezor Model T, such as setting a PIN, installing firmware updates, and navigating the device’s interface.
Setting a PIN
Setting a PIN for your Trezor Model T is an essential security measure that adds an extra layer of protection to your device and ensures that only you can access your cryptocurrencies. Follow these steps to set up a PIN:
- After setting up your recovery seed and confirming its authenticity, you will be prompted to set a PIN for your Trezor Model T. This PIN is required every time you connect the device to your computer or mobile device.
- Choose a PIN that is easy for you to remember but difficult for others to guess. Avoid using obvious combinations like birthdates or repetitive sequences.
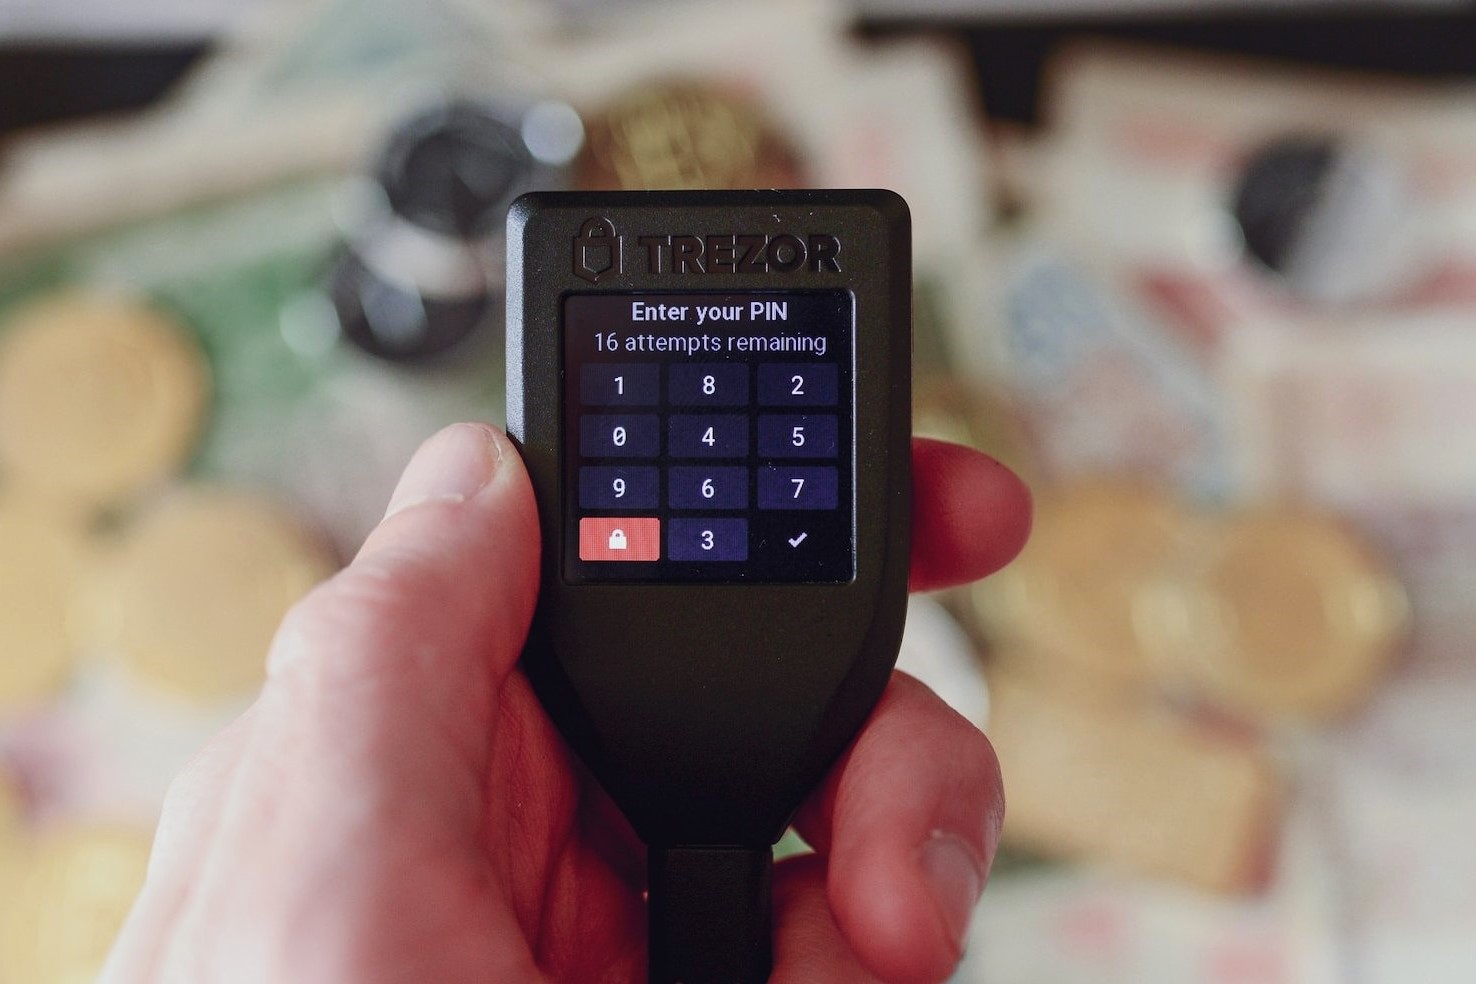
- Using the Trezor Model T’s touchscreen or buttons, enter your chosen PIN. Pay attention to the device’s display, as it will scramble the position of the numbers after each input to prevent anyone from determining your PIN based on finger smudges.
- After entering your PIN, the Trezor Model T will ask you to confirm it. Verify the digits on the device’s display to ensure you have entered the correct PIN.
- Once your PIN is successfully set, it will be required every time you connect your Trezor Model T to your computer or mobile device. Make sure to keep your PIN secret and do not share it with anyone.
By setting a PIN, you add an extra layer of security to your Trezor Model T. Even if someone gains physical possession of your device, they will be unable to access your cryptocurrencies without the correct PIN.
It’s important to note that the Trezor Model T follows the principles of a secure element, which means that the PIN is never exposed to the computer or the internet. This ensures that even if your computer is compromised, your PIN remains safe and secure on the device.
In the next sections, we will explore additional functionalities of the Trezor Model T, such as installing firmware updates, navigating through the device’s interface, and managing multiple accounts.
Installing Firmware Updates
Keeping your Trezor Model T’s firmware up to date is crucial for maintaining the security and functionality of your device. Firmware updates often include bug fixes, security enhancements, and support for new features and cryptocurrencies. Follow these steps to install firmware updates on your Trezor Model T:
- Connect your Trezor Model T to your computer using the provided USB cable.
- Open the Trezor Wallet interface on your computer and ensure that your device is connected and recognized.
- If a firmware update is available for your device, you will see a notification on the Trezor Wallet interface.
- Click on the update notification to start the firmware update process.
- Follow the on-screen instructions to proceed with the firmware update. This may involve confirming the update on your device and approving any necessary permissions.
- During the update process, it is crucial to keep your device connected and avoid disconnecting it until the update is complete.
- Once the firmware update is finished, your Trezor Model T will automatically restart with the updated firmware.
- You can verify that the firmware update was successful by checking the Trezor Wallet interface, where it should indicate the latest firmware version installed on your device.
It is important to regularly check for firmware updates and install them as soon as they become available. This ensures that your Trezor Model T benefits from the latest security patches and features provided by the manufacturer.
While firmware updates are essential, it’s important to exercise caution and only install updates from official sources. Stick to the official Trezor website and use the official Trezor Wallet interface to avoid downloading potentially harmful or fake updates.
In the next sections, we will explore other features of the Trezor Model T, such as navigating through its interface, managing multiple accounts, and sending or receiving cryptocurrencies.
Navigating through the Trezor Interface
The Trezor Model T features a user-friendly interface that allows you to easily navigate and manage your cryptocurrency wallets. Understanding how to navigate through the device’s interface is essential for performing various actions and accessing important features. Here’s a guide to help you navigate through the Trezor interface:
- After connecting your Trezor Model T to your computer and unlocking it with your PIN, you will be greeted with the Trezor Wallet interface.
- The main screen displays a list of your accounts, each representing a separate cryptocurrency wallet.
- Use the device’s touchscreen or buttons to scroll through the list and select the desired account.
- Once you’ve selected an account, you can view its balance, transaction history, and receive addresses on the Trezor interface.
- To access specific actions or settings for an account, navigate to the account page and explore the options available. This includes sending cryptocurrencies, enabling passphrase protection, and managing account settings.
- Use the navigation buttons on the Trezor Model T to move through menu options and select the desired action or setting.
- When entering sensitive information, such as a PIN or passphrase, the device’s touchscreen or buttons will display a randomized keypad to prevent anyone from determining your input based on finger smudges.
- To return to the main screen or previous menus, use the device’s navigation buttons to navigate back.
- If you are unsure about a particular feature or need assistance, consult the Trezor Wallet interface’s user guide or the official Trezor website for detailed instructions and FAQs.
Getting familiar with the Trezor interface allows you to confidently manage your cryptocurrencies and perform various actions securely. Take your time to explore the different features and functionalities available, ensuring you understand how to navigate effortlessly through the device’s interface.
In the upcoming sections, we will cover additional functionalities of the Trezor Model T, such as adding accounts, sending and receiving cryptocurrencies, and enabling passphrase protection.
Adding Accounts and Cryptocurrencies
The Trezor Model T supports a wide range of cryptocurrencies, allowing you to manage multiple accounts within a single device. Adding accounts for different cryptocurrencies is a straightforward process. Here’s how to add accounts and manage your supported cryptocurrencies:
- Connect your Trezor Model T to your computer and navigate to the Trezor Wallet interface.
- In the account overview section, locate the option to add a new account.
- Click on “Add account” and select the desired cryptocurrency from the list of supported coins.
- Follow the on-screen instructions to confirm the addition of the new account on your device.
- Once the account is added, it will appear in the account overview section, displaying the balance and transaction history specific to that particular cryptocurrency.
- You can repeat this process to add accounts for multiple cryptocurrencies, depending on your preferences and the coins supported by the Trezor Model T.
- To switch between accounts, simply select the desired account from the account overview section. The device will update its display to show the corresponding information for the selected account.
- When sending or receiving cryptocurrencies, ensure that you choose the correct account to avoid any confusion and ensure that the transactions are processed accurately.
- It’s worth mentioning that although Trezor Model T supports a wide range of coins, not all cryptocurrencies are directly enabled by default. You may need to install additional firmware or use third-party software wallets that are compatible with the Trezor Model T to manage certain coins.
By adding accounts for your supported cryptocurrencies, you can conveniently manage and monitor your holdings within a single device. The Trezor Model T’s user-friendly interface makes it easy to switch between accounts, view balances, and track transaction history for each specific cryptocurrency.
In the upcoming sections, we will explore more features of the Trezor Model T, including sending and receiving cryptocurrencies, enabling passphrase protection, and using the device with third-party wallets.
Sending and Receiving Cryptocurrencies
The Trezor Model T enables you to securely send and receive cryptocurrencies, allowing you to manage your digital assets with ease. Here’s a step-by-step guide on how to send and receive cryptocurrencies using your Trezor Model T:
Sending Cryptocurrencies:
- Connect your Trezor Model T to your computer and navigate to the Trezor Wallet interface.
- Select the account that holds the cryptocurrency you want to send.
- Click on “Send” or “Send transaction” to initiate the sending process.
- Enter the recipient’s wallet address in the designated field. Make sure to double-check the address to ensure accuracy, as sending funds to the wrong address can result in permanent loss.
- Specify the amount you want to send and select the appropriate cryptocurrency from the list.
- Review the transaction details, including the recipient address and the amount to be sent. Verify that all information is correct before confirming the transaction.
- On your Trezor Model T, confirm the transaction by reviewing the details on the device’s display and verifying the transaction’s accuracy.
- Once the transaction is confirmed on your device, the Trezor Wallet interface will display the transaction as pending. It may take some time for the transaction to be confirmed on the blockchain, depending on the cryptocurrency being sent.
- After confirmation, the transaction will be marked as complete, and the recipient will receive the cryptocurrencies you sent.
Receiving Cryptocurrencies:
- To receive cryptocurrencies, make sure your Trezor Model T is connected to your computer and navigate to the Trezor Wallet interface.
- Select the account for the specific cryptocurrency you want to receive.
- Click on “Receive” or “Receive transaction” to generate a receiving address.
- The Trezor Wallet interface will display a unique wallet address for that particular account.
- Copy the generated address or use the provided QR code to share it with the sender.
- Once the sender initiates the transaction to the provided address, the received amount will reflect in your Trezor Wallet interface.
Sending and receiving cryptocurrencies with your Trezor Model T is a straightforward and secure process. Always verify the accuracy of the transaction details before confirming, and double-check the recipient’s address when sending funds to ensure they are being sent to the intended recipient.
In the next sections, we will explore additional features of the Trezor Model T, such as enabling passphrase protection and using the device with third-party wallets.
Enabling Passphrase Protection
The Trezor Model T offers an additional layer of security through passphrase protection. By enabling passphrase protection, you add an extra passphrase to your device, providing enhanced protection for your cryptocurrencies. Here’s how to enable passphrase protection on your Trezor Model T:
- Connect your Trezor Model T to your computer and navigate to the Trezor Wallet interface.
- Click on the account you want to enable passphrase protection for.
- In the account overview page, navigate to the account settings or advanced settings section. The exact location may vary depending on the wallet interface you are using.
- Look for the option to enable passphrase protection and click on it.
- Follow the on-screen instructions to set up a unique passphrase. Make sure to choose a strong passphrase that is not easily guessable and ensure you remember it.
- After setting up the passphrase, confirm it on your Trezor Model T’s display.
- From now on, every time you connect your Trezor Model T and want to access the account with passphrase protection, you will be prompted to enter both your device’s PIN and the passphrase on the Trezor Wallet interface.
Enabling passphrase protection adds an additional layer of security to your Trezor Model T. Even if someone gains physical possession of your device or accesses your recovery seed, they will still need the passphrase to access your funds.
It is crucial to remember that passphrase protection is not the same as your device’s PIN. The passphrase is an additional layer of encryption and should be treated with the same level of care and confidentiality as your recovery seed and PIN.
In the next sections, we will explore other features of the Trezor Model T, such as importing seeds from other wallets, using the device with third-party wallets, and enabling two-factor authentication.
Importing Seeds from other Wallets
If you have used other cryptocurrency wallets in the past and want to consolidate your funds into your Trezor Model T, you have the option to import seeds from those wallets. Here’s how to import seeds from other wallets to your Trezor Model T:
- Ensure your Trezor Model T is connected to your computer and navigate to the Trezor Wallet interface.
- Click on the account you want to import the seed into or create a new account if required.
- In the account settings or advanced settings section, look for the option to “Import seed” or “Restore from seed.”
- Enter or paste the seed phrase from your previous wallet into the input field. Make sure to double-check the accuracy of the seed phrase to avoid any mistakes.
- Follow the on-screen instructions to confirm the seed import on your Trezor Model T’s display.
- Once the seed import is confirmed, the Trezor Wallet interface will initiate the restoration process and synchronize with the blockchain to retrieve your account balance and transaction history.
- After the restoration is complete, you will have access to your funds from the previous wallet within your Trezor Model T.
Importing seeds from other wallets to your Trezor Model T allows you to consolidate your funds and have complete control and security over your cryptocurrencies. It is important to note that after importing the seed, the previous wallet will not have access to your funds, as they are now securely stored on your Trezor Model T.
Remember to keep your Trezor Model T and recovery seed safe and secure at all times to prevent unauthorized access to your accounts.
In the next sections, we will explore additional features of the Trezor Model T, such as using the device with third-party wallets and enabling two-factor authentication for enhanced security.
Using Trezor with Third-Party Wallets
The Trezor Model T is compatible with a wide range of third-party wallets, allowing you to manage your cryptocurrencies using other software interfaces while still benefiting from the security provided by your Trezor device. Here’s how to use your Trezor Model T with third-party wallets:
- Ensure that your Trezor Model T is connected to your computer and powered on.
- Install the third-party wallet software that supports the Trezor Model T. Examples of popular wallets that are Trezor-compatible include Exodus, MyEtherWallet, and Mycelium. Check the Trezor website for a list of supported wallets.
- Open the third-party wallet software and locate the option to connect or pair a hardware wallet.
- Choose the Trezor Model T as your hardware wallet of choice.
- Follow the on-screen instructions provided by the third-party wallet to establish the connection between the wallet software and your Trezor Model T.
- Once connected, you will be able to manage your cryptocurrencies through the third-party wallet interface, using your Trezor Model T to securely sign transactions and access your funds.
- Remember that while using a third-party wallet, the security of your funds still relies on your Trezor Model T. Ensure that your device is in a safe and secure environment and avoid entering your PIN or recovery seed on untrusted devices or websites.
- When using a third-party wallet, the Trezor Model T acts as a secure signing device, keeping your private keys offline and protecting you from potential security threats.
Using your Trezor Model T with third-party wallets provides you with flexibility in managing your cryptocurrencies while maintaining the highest level of security. It allows you to benefit from the features and user interfaces of different wallet software, all while keeping your funds protected by the Trezor hardware.
Before choosing a third-party wallet, ensure that it supports the Trezor Model T and that it is reputable and trusted within the cryptocurrency community.
In the following sections, we will cover additional features and security measures available for your Trezor Model T, such as enabling two-factor authentication for enhanced account protection.
Enabling 2-Factor Authentication
Enhancing the security of your Trezor Model T can be achieved by enabling 2-factor authentication (2FA). 2FA adds an additional layer of protection to your device and accounts by requiring a second form of verification, usually a time-based one-time password (TOTP) generated by an authentication app on your smartphone. Here’s how to enable 2-factor authentication for your Trezor Model T:
- Ensure that your Trezor Model T is connected to your computer and navigate to the Trezor Wallet interface.
- Click on your account or the main settings tab, depending on the wallet interface you are using.
- Look for the 2FA or Authentication section in the settings and select “Enable.”
- Follow the on-screen instructions to download and install a 2FA app on your smartphone. Popular options include Google Authenticator, Authy, and LastPass Authenticator.
- Scan the QR code displayed on the Trezor Wallet interface using the 2FA app on your smartphone.
- Enter the code generated by the app to verify the setup process and enable 2FA for your Trezor Model T.
- From now on, when you access your Trezor Model T or perform any sensitive actions, you will be prompted to enter the TOTP code generated by the 2FA app on your smartphone.
Enabling 2-factor authentication provides an additional layer of security for your Trezor Model T. Even if someone gains physical possession of your device, they would still need to provide the correct TOTP code to access your accounts and perform transactions.
Remember to keep your smartphone with the 2FA app secure and consider backup options in case you lose or reset your smartphone.
By taking advantage of 2FA, you significantly improve the security of your Trezor Model T and protect your cryptocurrencies from unauthorized access.
In the next sections, we will further explore the functionality of the Trezor Model T and provide troubleshooting tips to address any potential issues that may arise.
Troubleshooting Tips
While the Trezor Model T is designed to provide a smooth and secure cryptocurrency management experience, you may encounter occasional challenges or issues. Here are some troubleshooting tips to help you address common problems:
Connection Issues:
- Ensure that the USB cable is securely connected to both your Trezor Model T and your computer or mobile device.
- Try using a different USB port or cable to rule out any potential issues with the connection.
- If you are using the Trezor Model T with a mobile device, check if an OTG (On-The-Go) adapter is required for proper connection.
- Restart your computer and try reconnecting your Trezor Model T.
Display Issues:
- If the display on your Trezor Model T is not working or is displaying garbled characters, try resetting the device by holding down both buttons for 10 seconds until the device restarts.
- Make sure that the firmware on your Trezor Model T is up to date, as firmware updates often include bug fixes that may resolve display issues.
- If the issue persists, contact Trezor customer support for further assistance.
Software Issues:
- Make sure that you are using the latest version of the Trezor Wallet software or the compatible third-party wallet software.
- If you encounter any error messages or unexpected behavior, try clearing your browser cache or reinstalling the wallet software.
- Check the Trezor website or the respective wallet’s documentation for any known issues or troubleshooting guides.
- If necessary, reach out to the appropriate customer support channels for further assistance.
Lost PIN or Recovery Seed:
- If you forget your PIN, you can enter an incorrect PIN several times to trigger the device’s security features. Follow the on-screen instructions to reset the device and recover your wallet using the recovery seed.
- If you lose your recovery seed, it is crucial to have a backup in place. Consider storing your recovery seed in a secure location and consider additional measures, such as metal backup storage, to protect against physical damage or loss.
- Never share your recovery seed or PIN with anyone and be cautious of phishing attempts or scams that may attempt to trick you into revealing this information.
If you encounter any issues that cannot be resolved through troubleshooting, it is advisable to reach out to the Trezor customer support team or consult the official Trezor documentation for further guidance.
By following these troubleshooting tips, you can quickly resolve common problems and continue to securely manage your cryptocurrencies with your Trezor Model T.