
Enabling Sleep Mode
Sleep Mode is a handy feature on the iPhone that allows you to temporarily disable all notifications and alerts, allowing you to enjoy uninterrupted sleep or focus on other activities without distractions. Enabling Sleep Mode is a simple process that can be done in a few easy steps.
To enable Sleep Mode on your iPhone, follow these steps:
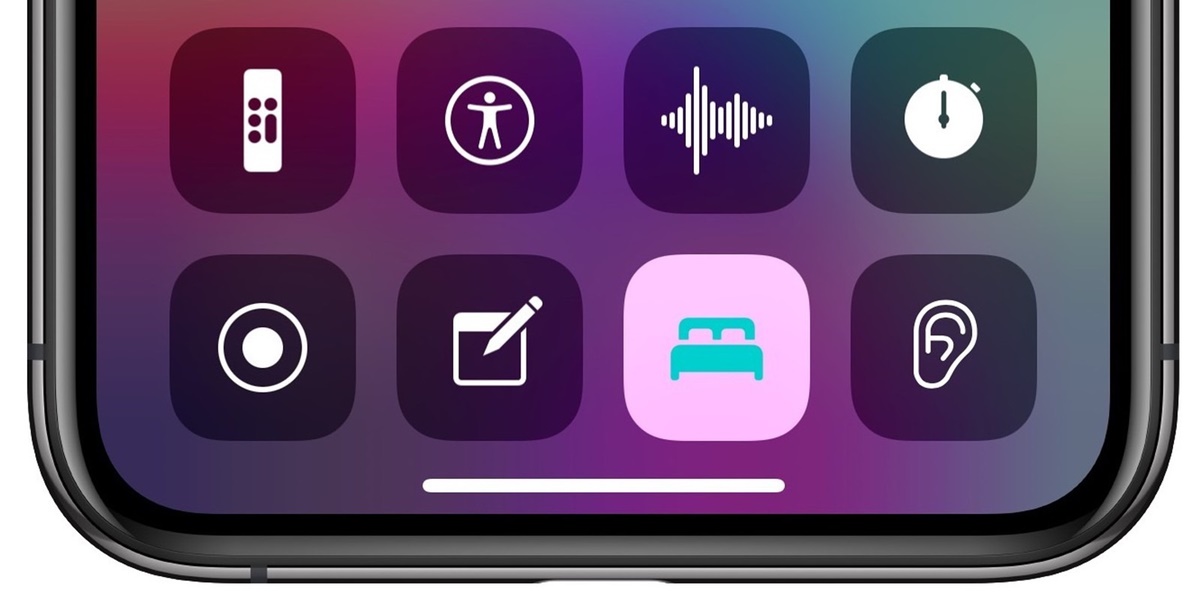
- Open the Control Center by swiping down from the top-right corner of the screen (or up from the bottom on older iPhone models).
- Look for the moon icon, which represents Sleep Mode.
- Tap on the moon icon to enable Sleep Mode.
Once Sleep Mode is enabled, you will notice that the moon icon appears in the status bar at the top of the screen, indicating that Sleep Mode is active. Now, all notifications and alerts will be silenced, and your iPhone will be in a more serene state.
It’s important to note that during Sleep Mode, emergency alerts like Amber Alerts or other critical notifications will still come through, ensuring your safety is not compromised.
In addition to enabling Sleep Mode manually, you can also schedule it to activate automatically at specific times, which we’ll cover later in this article.
Now that you know how to enable Sleep Mode, let’s explore how to access it quickly whenever you need it.
Accessing Sleep Mode
Accessing Sleep Mode on your iPhone is a breeze, and there are a couple of methods you can use to quickly toggle it on or off. Let’s take a look:
Method 1: Control Center
The most common way to access Sleep Mode is through the Control Center. Here’s how:
- Swipe down from the top-right corner of the screen (or up from the bottom on older iPhone models) to open the Control Center.
- Look for the moon icon, which represents Sleep Mode.
- Tap on the moon icon to enable or disable Sleep Mode.
By following these steps, you can quickly switch Sleep Mode on or off without navigating through the iPhone’s settings.
Method 2: Settings Menu
If you prefer accessing Sleep Mode through the Settings menu, here’s what you need to do:
- Go to the Settings app on your iPhone.
- Scroll down and tap on “Do Not Disturb.”
- Toggle on the “Manual” option to enable Sleep Mode, or toggle it off to disable Sleep Mode.
Using this method, you can access additional options related to Sleep Mode and customize your preferences accordingly.
Note that Sleep Mode and Do Not Disturb mode are closely related, and enabling Sleep Mode will also activate Do Not Disturb, silencing calls, notifications, and alerts during the specified timeframe.
Now that you know how to access Sleep Mode, let’s explore how to set a sleep timer to automatically activate it.
Setting a Sleep Timer
Setting a sleep timer on your iPhone allows you to automate the activation of Sleep Mode during specific hours. This feature can be particularly helpful if you have consistent sleep routines or want to ensure uninterrupted rest. Follow these steps to set up a sleep timer:
- Open the Settings app on your iPhone.
- Scroll down and tap on “Do Not Disturb.”
- Toggle on the “Scheduled” option.
- Select “From” to set the start time for Sleep Mode.
- Select “To” to set the end time for Sleep Mode.
By setting a sleep timer, Sleep Mode will be automatically enabled and disabled at the specified times. During these hours, notifications and alerts will be silenced, allowing you to have a more peaceful environment.
It’s worth noting that you can also allow calls from specific contacts to bypass Sleep Mode’s silence by enabling the “Allow Calls From” option. This ensures that important calls can still come through while others remain silenced.
Using a sleep timer not only simplifies the process of enabling Sleep Mode but also ensures that you don’t forget to turn it on during your designated sleep hours. However, if you want to use Sleep Mode in conjunction with Do Not Disturb mode outside of the scheduled time, there’s a way to do so. Let’s explore it next.
Using Sleep Mode with Do Not Disturb
Sleep Mode and Do Not Disturb mode go hand in hand, and using them together can offer even greater control over your iPhone’s notifications and alerts. Here’s how you can use Sleep Mode with Do Not Disturb:
- Open the Settings app on your iPhone.
- Scroll down and tap on “Do Not Disturb.”
- Toggle on the “Scheduled” option if you haven’t already done so and set the desired sleep timer.
- Under “Do Not Disturb,” tap on “Allow Calls From.”
- Select “Favorites” or “No One” to further limit incoming calls during Sleep Mode.
When Sleep Mode is activated, Do Not Disturb mode will also be enabled, which means your iPhone will stay in a peaceful state with all notifications, alerts, and calls silenced.
By specifying the “Allow Calls From” option, you can customize whether you want to receive calls from your favorite contacts only or completely block incoming calls during Sleep Mode.
This combination of Sleep Mode and Do Not Disturb mode ensures minimal distractions and interruptions during your designated sleep hours or any other time when you want to focus or relax without being disturbed.
Now that you know how to use Sleep Mode with Do Not Disturb, let’s explore how to manage Sleep Mode settings and customize them according to your preferences.
Managing Sleep Mode Settings
Managing Sleep Mode settings on your iPhone allows you to customize various aspects of this feature to suit your individual needs. Here are some of the key settings you can manage:
Sleep Mode Schedule
You can adjust the sleep timer schedule to activate Sleep Mode automatically during specific hours:
- Open the Settings app on your iPhone.
- Scroll down and tap on “Do Not Disturb.”
- Toggle on the “Scheduled” option.
- Select “From” to set the start time for Sleep Mode.
- Select “To” to set the end time for Sleep Mode.
By modifying the sleep schedule, you can ensure that Sleep Mode aligns with your sleep patterns or other periods when you want to minimize disturbances.
Allow Calls From
You can customize which calls can bypass Sleep Mode’s silence feature:
- Open the Settings app on your iPhone.
- Scroll down and tap on “Do Not Disturb.”
- Under “Do Not Disturb,” tap on “Allow Calls From.”
- Select “Favorites” to allow calls from your favorite contacts or choose “No One” to block all calls.
By selecting “Favorites,” you can ensure that important calls still come through during Sleep Mode while blocking unwanted interruptions.
Emergency Bypass
If there are certain contacts whose calls you never want to miss, you can enable Emergency Bypass:
- Open the Phone app on your iPhone.
- Go to the contact you want to enable Emergency Bypass for.
- Tap on “Edit” in the top-right corner of the screen.
- Scroll down and tap on “Ringtone.”
- Toggle on the “Emergency Bypass” switch.
With Emergency Bypass, calls from that specific contact will always come through, even when Sleep Mode or Do Not Disturb mode is active.
By managing Sleep Mode settings, you can personalize this feature to align with your preferences, ensuring you have uninterrupted sleep or focused periods as desired.
Now that you know how to manage Sleep Mode settings, let’s explore how to customize the Sleep Mode schedule to fit your specific needs.
Customizing Sleep Mode Schedule
Customizing the Sleep Mode schedule on your iPhone allows you to tailor the activation and deactivation times to best suit your daily routine. Here’s how you can customize the Sleep Mode schedule:
- Open the Settings app on your iPhone.
- Scroll down and tap on “Do Not Disturb.”
- Toggle on the “Scheduled” option if it isn’t already enabled.
- Select “From” to set the start time for Sleep Mode.
- Select “To” to set the end time for Sleep Mode.
With the Sleep Mode schedule, you can specify the exact hours when you want Sleep Mode to automatically turn on and off to ensure minimal disruptions during your preferred sleep schedule or other designated timeframes.
Additionally, you have the option to allow calls from specific contacts to bypass Sleep Mode’s silence feature. Here’s how:
- Open the Settings app on your iPhone.
- Scroll down and tap on “Do Not Disturb.”
- Under “Do Not Disturb,” tap on “Allow Calls From.”
- Select “Favorites” to allow calls from your favorite contacts or choose “No One” to block all calls.
By customizing the Sleep Mode schedule and selectively allowing calls from important contacts, you can create a personalized setting that maximizes tranquility during designated periods while still ensuring you don’t miss any critical calls.
Remember that Sleep Mode can also be accessed manually through the Control Center or the Settings menu. This gives you the flexibility to enable or disable Sleep Mode outside of the scheduled timeframe whenever needed.
By customizing the Sleep Mode schedule, you can optimize your iPhone’s functionality to align with your unique sleep patterns and lifestyle requirements.
Now that you know how to customize the Sleep Mode schedule, we’ll explore how to disable Sleep Mode altogether if it no longer suits your needs.
Disabling Sleep Mode
If you find that Sleep Mode is no longer necessary or if you want to disable it temporarily, you can easily turn it off on your iPhone. Here’s how:
Via Control Center
- Swipe down from the top-right corner of the screen (or up from the bottom on older iPhone models) to open the Control Center.
- Locate the moon icon representing Sleep Mode.
- Tap on the moon icon to disable Sleep Mode.
Once Sleep Mode is turned off, your iPhone will revert to its regular notification settings, and alerts and notifications will resume as usual.
Via Settings Menu
- Open the Settings app on your iPhone.
- Scroll down and tap on “Do Not Disturb.”
- Toggle off the “Manual” option to disable Sleep Mode.
By following these steps, you can easily deactivate Sleep Mode and restore normal notifications and alerts on your iPhone.
Remember that Sleep Mode can be reactivated at any time by following the steps mentioned earlier or by enabling the Sleep Mode schedule if you have it set up.
Disabling Sleep Mode is useful if you need to temporarily receive notifications or if you have decided not to use Sleep Mode altogether. By having control over Sleep Mode, you can ensure that your iPhone perfectly suits your preferences and needs.
Now that you know how to disable Sleep Mode, you have the flexibility to choose when to use it and when to revert back to normal notification settings.