
Overview of Using iPhone as Oculus Rift
The Oculus Rift is a popular virtual reality (VR) headset that provides an immersive gaming and entertainment experience. However, not everyone may have access to this expensive device. Fortunately, if you own an iPhone, you can transform it into a makeshift Oculus Rift and enjoy a similar VR experience. In this guide, we will outline the steps to use your iPhone as an Oculus Rift.
The first step is to download and install VR apps on your iPhone. There are numerous VR apps available on the App Store, ranging from games to 360-degree videos and virtual tours. Look for popular apps like Google Cardboard, VRSE, or the YouTube VR app. Install the desired app on your iPhone to begin your VR journey.
Next, you’ll need a virtual reality headset. There are various VR headset options available, such as the Google Cardboard, Merge VR, or Homido VR. These headsets are designed to hold your iPhone securely and provide a comfortable viewing experience. Choose a headset that fits your budget and preferences.
To use your iPhone as an Oculus Rift, connect it to the virtual reality headset using the designated slot or holder. Ensure that the iPhone is snugly inserted and that the screen is positioned properly inside the headset. Some headsets may require adjusting the lenses, so follow the manufacturer’s instructions to optimize the viewing experience.
In order to calibrate your iPhone for a realistic VR experience, it is crucial to correctly configure the settings. Make sure that the gyroscope function is enabled on your iPhone, as this allows the device to track your movements accurately. You may need to adjust the screen orientation, camera settings, or other customization options depending on the VR app you are using.
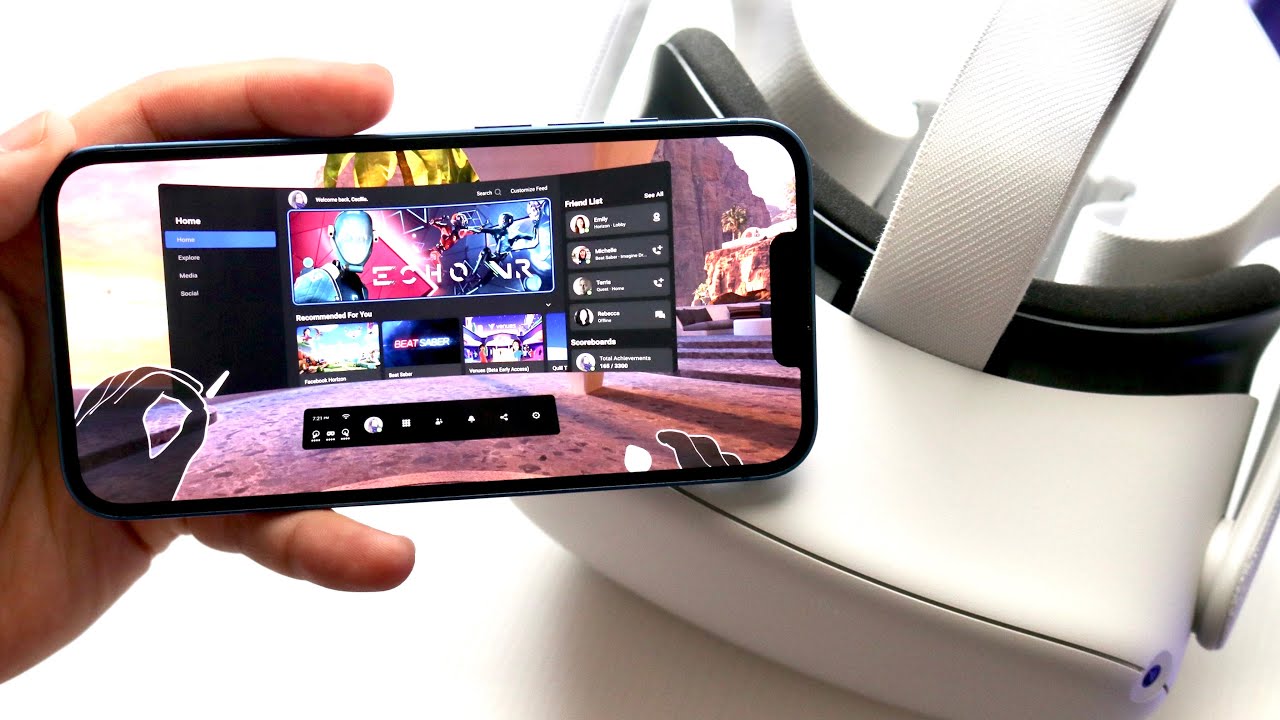
Once your iPhone is securely connected and calibrated, it’s time to explore the vast array of VR content available. Dive into breathtaking virtual worlds, embark on thrilling adventures, or simply enjoy 360-degree videos of your favorite destinations. The possibilities are endless, and you’ll be amazed at the immersive experience your iPhone can provide.
In addition to consuming VR content, you can also control your VR experience using the iPhone’s gyroscope. By tilting and rotating your iPhone, you can navigate through virtual environments, interact with objects, and enjoy a more interactive and engaging experience.
If gaming is your primary interest, you’ll be pleased to know that there are numerous VR games available for the iPhone. Many popular titles, such as Minecraft VR, End Space VR, and Anshar Wars, can be played using your iPhone and a compatible VR headset. Immerse yourself in these virtual worlds and challenge your gaming skills like never before.
To enhance your VR experience, consider investing in accessories such as a Bluetooth controller or headphones. These peripherals can further immerse you in the virtual world and provide a more cinematic and realistic experience.
If you encounter any issues during the process, there are numerous online forums and support communities where you can find solutions. Check for compatibility issues, firmware updates, or app-specific troubleshooting guides to overcome any obstacles you may encounter on your journey to using your iPhone as an Oculus Rift.
By following these steps, you can transform your iPhone into a makeshift Oculus Rift and enjoy the wonders of virtual reality without breaking the bank. Dive into a world of limitless possibilities and embark on thrilling adventures right from the palm of your hand.
Step 1: Download and Install VR Apps on Your iPhone
The first step in using your iPhone as an Oculus Rift is to download and install virtual reality (VR) apps on your device. These apps will provide you with a wide range of VR experiences, from games to virtual tours and 360-degree videos.
To get started, open the App Store on your iPhone and search for popular VR apps such as Google Cardboard, VRSE, or the YouTube VR app. These apps are widely used and offer a plethora of content for you to explore.
Once you have found the desired app, tap the “Get” or “Download” button to begin the installation process. Depending on the size of the app and the speed of your internet connection, it may take a few moments to complete the download.
After the installation is complete, locate the app on your home screen and tap on its icon to launch it. You may be prompted to create an account or sign in with an existing one, depending on the app’s requirements.
Once you have accessed the app, take some time to familiarize yourself with its interface and features. Some apps may offer a tutorial or guide to help you navigate through the VR experience effectively. Pay attention to any specific instructions provided by the app, as they may enhance your overall experience.
Keep in mind that the availability of VR apps may vary depending on your region and the version of iOS installed on your iPhone. Occasionally, certain apps may require a specific iPhone model or operating system version to function properly. Ensure that your iPhone meets the app’s requirements to avoid any compatibility issues.
After you have downloaded and installed the VR apps of your choice, you are ready to delve into the world of virtual reality. Open the app, follow the instructions, and prepare to be amazed by the immersive experiences that await you.
Remember to explore a variety of VR apps to discover new and exciting content. Experiment with different genres, such as gaming, travel, education, or entertainment, to find the experiences that resonate with your interests.
Installing VR apps on your iPhone is just the first step towards using it as an Oculus Rift. In the subsequent steps, we will guide you through the process of setting up a virtual reality headset, connecting your iPhone to the headset, calibrating the device, and exploring VR content in more detail.
Step 2: Set Up a Virtual Reality Headset
Now that you have downloaded and installed virtual reality (VR) apps on your iPhone, it’s time to set up a virtual reality headset. The headset will hold your iPhone securely and provide an immersive viewing experience.
There are various VR headsets available on the market, each with its own features and design. Popular options include Google Cardboard, Merge VR, Homido VR, and many more. When choosing a headset, consider factors such as comfort, adjustability, and compatibility with your iPhone model.
Once you have selected a headset, follow the manufacturer’s instructions to assemble and set it up. Most headsets require you to insert your iPhone into a slot or holder on the front. Make sure that your iPhone fits securely and that the screen aligns properly with the lenses in the headset.
Some headsets may have adjustable straps that help secure the headset to your head. Adjust these straps to ensure a snug and comfortable fit. It’s important to find the right balance between a tight fit and avoiding discomfort, as wearing the headset for extended periods can be tiring.
Additionally, some headsets offer adjustable lenses that allow you to customize the focus and optimize the viewing experience. Experiment with these settings to find the configuration that works best for your eyes and provides the sharpest and most immersive visuals.
It’s worth noting that certain VR headsets may have additional features, such as built-in headphones, audio ports, or touch controls. Familiarize yourself with these features and explore how they can enhance your VR experience.
After you have set up the VR headset, ensure that it is adjusted properly on your head. Position it securely, making sure the lenses align with your eyes, and adjust the straps to achieve a comfortable fit. A well-fitted headset will provide a more immersive and enjoyable VR experience.
By setting up a virtual reality headset, you are one step closer to transforming your iPhone into an Oculus Rift and unlocking a world of VR possibilities. In the next step, we will guide you through the process of connecting your iPhone to the virtual reality headset to begin your VR journey.
Step 3: Connect iPhone to the Virtual Reality Headset
Now that you have set up the virtual reality (VR) headset, it’s time to connect your iPhone to it and prepare for an immersive VR experience. This step will ensure that your iPhone is securely attached to the headset and ready to deliver captivating visuals and audio.
First, carefully insert your iPhone into the designated slot or holder on the front of the VR headset. Ensure that it fits snugly and that the screen aligns properly with the lenses of the headset. Double-check that the iPhone is centered and positioned correctly to ensure optimal viewing.
Once your iPhone is properly inserted, secure it in place using any straps or clamps provided by the VR headset. This will prevent the iPhone from accidentally falling out or moving while you are using it, ensuring a stable viewing experience.
Depending on the design of the VR headset, there may be additional adjustments or mechanisms to ensure the iPhone is tightly secured. Follow the manufacturer’s instructions to properly lock your iPhone in place, avoiding any potential damage or instability.
After connecting your iPhone to the VR headset, make sure that all the necessary connections are established. If your headset requires additional connections, such as audio or power cables, ensure they are properly plugged in to maintain a seamless experience.
Some VR headsets may incorporate features like onboard sensors or buttons that interact with your iPhone. Familiarize yourself with these features and their functionalities to fully utilize the capabilities of the headset. These buttons or sensors may allow you to perform actions like starting or pausing a VR app, adjusting volume, or navigating menus.
Before diving into the VR experience, take a moment to ensure that your iPhone is positioned properly within the headset. Adjust the lenses or straps if needed, aiming for the best possible alignment with your eyes. This will help avoid any discomfort or blurry visuals during your VR session.
Once you have successfully connected your iPhone to the VR headset, you are ready to explore the captivating world of virtual reality. In the upcoming steps, we will guide you through calibration, VR content exploration, and other tips to enhance your iPhone-as-Oculus-Rift experience.
Step 4: Calibrate the iPhone for Virtual Reality Experience
To ensure an optimal virtual reality (VR) experience using your iPhone as an Oculus Rift, it is essential to calibrate your device. Calibrating your iPhone will help accurately track your movements and provide a more immersive VR experience. Follow these steps to calibrate your iPhone for a seamless VR adventure.
Start by accessing the settings on your iPhone. Locate the “Motion & Orientation” or “Gyroscope” settings, which may vary depending on the iOS version. Ensure that the gyroscope function is enabled. The gyroscope tracks your device’s orientation and movement, allowing for more realistic and responsive interactions in the VR environment.
Next, consider adjusting the screen orientation of your iPhone to match the orientation when it’s inside the VR headset. For example, if the iPhone is inserted horizontally in the headset, ensure that the screen is also facing horizontally. This alignment will align the virtual environment correctly, preventing any distortions or misalignment during your VR experience.
Some VR apps may have specific instructions or calibration processes within the app itself. Follow those instructions to calibrate your iPhone within the specific VR environment. It may involve following on-screen prompts or performing specific gestures to align the virtual scene correctly with your iPhone’s orientation.
Once you have completed these initial calibration steps, it’s time to fine-tune the settings within the VR app. Look for options related to calibration, head tracking, or device positioning. These settings allow you to tailor the VR experience to your preferences and ensure accurate tracking of your movements.
Take the time to experiment with different sensitivity settings to find the optimal calibration that suits your comfort and gameplay style. Some apps may offer on-screen guides or visual cues to help you adjust the settings effectively.
If you ever feel that the orientation or tracking of your iPhone is off, consider recalibrating your device. This can be done by accessing the motion settings and choosing the option to recalibrate or reset the gyroscope. Ensure that your iPhone is on a stable surface and follow the instructions to complete the recalibration process.
Remember, proper calibration of your iPhone is crucial for an immersive and realistic VR experience. By taking these steps to calibrate your device, you will enhance the accuracy of head tracking and motion sensing, allowing you to fully immerse yourself in the virtual world.
In the upcoming steps, we will explore how to navigate and enjoy the VR content on your iPhone, control the VR experience using the iPhone’s gyroscope, and delve into exciting VR gaming possibilities.
Step 5: Explore VR Content on Your iPhone
Now that you have set up your iPhone as an Oculus Rift and calibrated it for a seamless virtual reality (VR) experience, it’s time to embark on your journey and explore the vast array of VR content available. Whether you’re interested in immersive games, virtual tours, or 360-degree videos, there is something for everyone to enjoy on your iPhone.
Open the VR app of your choice on your iPhone. Depending on the app, you may have access to a library of VR content, categorized by genres, themes, or experiences. Take your time to browse through the available options and select the content that intrigues you the most.
Consider starting with introductory experiences that showcase the potential of VR. These experiences often provide a glimpse into various VR scenarios, such as underwater exploration, space travel, or flying through picturesque landscapes. These introductory experiences can be a great way to get accustomed to the immersive nature of VR.
Once you’ve familiarized yourself with the basic VR content, expand your horizons and dive deeper into specific genres that interest you. For gaming enthusiasts, there are a wide range of VR games available on the App Store. From action-packed adventures to puzzle-solving challenges, the world of VR gaming on your iPhone offers thrilling experiences that push the boundaries of immersion.
If you have a passion for travel and exploration, VR apps offer virtual tours of famous landmarks, cities, and cultural sites all around the world. Visit the Great Wall of China, stroll through the streets of Paris, or marvel at ancient civilizations, all from the comfort of your own home. These virtual tours provide a unique opportunity to explore the world in a whole new way.
For those who appreciate immersive storytelling, VR apps often feature 360-degree videos and virtual experiences. Whether it’s a documentary, a concert, or a cinematic adventure, these experiences place you in the middle of the action, allowing you to be fully engaged in the narrative.
While exploring VR content, take advantage of various navigation options provided by the app. Some apps may utilize gaze-based controls, where you simply look at an object or button to interact with it. Others may utilize touch controls, Bluetooth controllers, or even voice commands. Familiarize yourself with the navigation methods within each app to ensure fluid interaction with the VR environment.
Remember to pace yourself and take breaks when needed. Extended periods of VR use can cause fatigue and discomfort. Listen to your body and give yourself time to rest between sessions to avoid eyestrain or other discomforts associated with prolonged use.
By exploring the wide range of VR content available on your iPhone, you can unlock new experiences and discover the limitless possibilities that virtual reality has to offer. In the upcoming steps, we will delve into using the iPhone’s gyroscope to control your VR experience and explore VR gaming possibilities on your iPhone.
Step 6: Control VR Experience with iPhone’s Gyroscope
One of the key features that makes using your iPhone as an Oculus Rift exciting is the ability to control your virtual reality (VR) experience using the iPhone’s gyroscope. The gyroscope enables your device to track its orientation and movement accurately, allowing you to navigate and interact with the virtual environment.
To control your VR experience using the iPhone’s gyroscope, ensure that the feature is enabled in your iPhone’s settings. Open the settings app on your iPhone, locate the “Motion & Orientation” or “Gyroscope” settings, and make sure it is turned on.
Once the gyroscope is enabled, simply move your iPhone in the desired direction to navigate through the VR environment. Tilt your device up, down, left, or right to look around and explore the virtual world. You’ll be able to view different aspects of the VR scene by moving your device accordingly.
Utilizing the gyroscope, you can also interact with objects in the VR environment. Depending on the app and its controls, you may need to tap, swipe, or perform specific gestures on the iPhone’s screen to interact with virtual elements. Pay attention to any on-screen prompts or instructions provided within each app to understand how to interact effectively.
Keep in mind that the gyroscope is sensitive to even slight movements, so be deliberate and controlled in your motions to have smooth navigation and interaction. Avoid making jerky or abrupt movements, as they may disrupt the VR experience and potentially cause discomfort.
Using the gyroscope can provide a more immersive and natural way of exploring the VR environment. It adds to the sense of presence and allows for a more interactive experience, making you feel as if you have entered another world.
Experiment with different movements and gestures to discover the range of interactions available within each VR app. Some apps may offer additional features such as teleportation or teleportation-based navigation, where you point at a specific spot or object to instantly transport yourself within the VR world.
Remember, the iPhone’s gyroscope is a powerful tool that enables you to control and interact with the virtual environment in your VR experience. Understanding how to utilize the gyroscope effectively adds to the immersion and enjoyment of your iPhone-as-Oculus-Rift setup.
In the upcoming steps, we will explore the exciting world of VR gaming on your iPhone and how to enhance your VR experience with external accessories.
Step 7: Use iPhone for VR Gaming
One of the most thrilling aspects of using your iPhone as an Oculus Rift is the opportunity to indulge in virtual reality (VR) gaming. With a wide range of VR games available on the App Store, you can dive into immersive worlds and enjoy exciting gameplay experiences.
To begin your VR gaming adventure on your iPhone, open the VR gaming app of your choice. Explore different genres such as action, adventure, puzzle, or simulation games to find the experiences that suit your gaming preferences.
Once you have selected a game, follow the instructions provided within the app to start playing. You may need to navigate menus, select difficulty levels, or customize game settings before diving into the virtual world.
VR gaming on your iPhone often requires you to interact with the virtual environment using gestures, buttons, or even your iPhone’s gyroscope. Pay attention to on-screen prompts or tutorial levels to familiarize yourself with the game’s controls and mechanics.
Some VR games may incorporate innovative gameplay mechanics that take full advantage of the iPhone’s capabilities. For example, you may need to physically duck or dodge virtual obstacles, aim and shoot using motion controls, or solve puzzles by manipulating virtual objects with your hands.
As you immerse yourself in VR gaming, keep in mind that your physical surroundings and safety should still be a priority. Ensure that you have enough space to move and avoid any obstacles that may be in your immediate surroundings. Stay aware of your positioning within the real world to prevent accidents or unnecessary collisions.
VR gaming on your iPhone offers an opportunity for social interaction as well. Some games allow multiplayer functionality, where you can connect with friends or other players around the world. Engage in multiplayer battles, cooperative gameplay, or competitive challenges for an even more immersive and social gaming experience.
Remember to pace yourself during VR gaming sessions and take breaks as needed. Extended periods of VR gameplay can be physically and mentally intense. It’s important to listen to your body and give yourself time to rest and recharge.
Explore the wide variety of VR games available on your iPhone and challenge yourself with new experiences. Immerse yourself in action-packed adventures, solve mind-bending puzzles, or test your skills in virtual sports competitions. The possibilities are endless as you unlock the immense gaming potential of your iPhone as an Oculus Rift.
In the upcoming step, we will discuss how you can enhance your VR experience with external accessories.
Step 8: Enhance Your VR Experience with External Accessories
While using your iPhone as an Oculus Rift can provide a fantastic virtual reality (VR) experience on its own, you can further enhance your immersion and enjoyment by incorporating external accessories into your setup. These accessories can add additional functionality, comfort, and realism to your VR experience.
One popular accessory to consider is a Bluetooth controller. A Bluetooth controller can provide more precise and intuitive controls for VR gaming and navigation. It allows for a more natural and familiar gaming experience as you interact with virtual objects and environments. Look for controllers that are compatible with your iPhone and popular VR apps to make the most out of your VR gaming sessions.
If you prefer a more immersive audio experience, investing in a pair of headphones can significantly enhance your VR experience. Opt for headphones that provide excellent sound quality and noise cancellation to fully immerse yourself in the virtual world. Many VR apps and games have spatial audio effects, making headphones essential to capturing the full depth and richness of the audio.
To address issues of discomfort or a lack of stability, you can consider acquiring a VR headset with additional features such as adjustable head straps, padding, or foam inserts. These enhancements can help customize the fit and make wearing the headset more comfortable, especially during extended VR sessions.
Another accessory to enhance your VR experience is an external battery pack or power bank. VR apps can be demanding on your iPhone’s battery, and having an external power source can prolong your VR sessions without worrying about running out of power. Ensure that the power bank is compatible with your iPhone model and has enough capacity to support your VR usage.
For those interested in a more tactile experience, haptic feedback devices can provide additional sensory stimulation. These devices vibrate or provide subtle vibrations to simulate physical feedback during VR interactions, such as feeling the sensation of a virtual object or experiencing the impact of a virtual punch. Explore haptic gloves or controllers that offer haptic feedback compatibility with your iPhone for a more immersive and engaging experience.
Keep in mind that the compatibility and availability of external accessories can vary, so research and verify the compatibility with your iPhone model and the VR apps you intend to use before making a purchase.
By incorporating external accessories into your iPhone-as-Oculus-Rift setup, you can elevate your VR experience to new levels of interactivity, comfort, and realism. Experiment with different accessories to find the combination that suits your preferences and makes your VR adventures even more captivating.
In the final step, we will address common troubleshooting issues that may arise while using your iPhone as an Oculus Rift and provide solutions to help you overcome them.
Step 9: Troubleshooting Common Issues with iPhone and Oculus Rift
While using your iPhone as an Oculus Rift can provide an immersive and enjoyable VR experience, you may encounter some common issues along the way. Here are some troubleshooting steps to help you overcome these issues and ensure a smooth VR experience.
One common issue is compatibility. Ensure that your iPhone model is supported by the VR apps and accessories you are using. Check for any specific requirements or recommendations listed by the app developers or accessory manufacturers. Keeping your iPhone’s operating system up to date can also help ensure compatibility with the latest VR apps and games.
If you are experiencing motion sickness or discomfort during VR sessions, try adjusting the virtual environment settings. Reduce the movement speed or sensitivity within the app to make the experience more comfortable for you. Alternatively, taking regular breaks between VR sessions and gradually increasing exposure to VR can help build tolerance over time.
Another common issue is the overheating of your iPhone during extended VR use. To prevent this, close any unnecessary apps running in the background and avoid using your iPhone while charging, as this can generate additional heat. Consider using a cooling fan or heat dissipation accessory specifically designed for smartphones to help maintain a stable temperature during VR sessions.
If you encounter tracking or calibration issues, ensure that the gyroscope is properly enabled in your iPhone’s settings. Check for any firmware or app updates for both your iPhone and the VR apps you are using, as updates may address any compatibility or performance issues. Recalibrate your iPhone using the built-in calibration tools within the VR app to ensure accurate tracking.
Some users may experience audio issues while using their iPhone as an Oculus Rift. If you encounter this problem, check the audio settings within the VR app and ensure that the volume is not muted or set too low. Consider using headphones with a built-in microphone to enhance the audio experience and enable better communication during multiplayer VR sessions.
If the VR display appears blurry or out of focus, make sure that the lenses of the VR headset are clean and free from dust or smudges. Adjust the headset’s straps and positioning to ensure that the lenses are aligned properly with your eyes. Experiment with the focus or IPD (inter-pupillary distance) adjustment settings if available, as this can help optimize the sharpness and clarity of the VR display.
If you’re unable to find or download specific VR apps on the App Store, check your region settings on your iPhone. Some VR apps may have regional restrictions, so ensure that your iPhone’s region settings are aligned with the desired app’s availability.
In case none of the troubleshooting steps resolve the issue, reach out to the app developer’s customer support or consult VR forums and communities for further assistance. The VR community is vast and supportive, and you’re likely to find solutions or recommendations from experienced users.
By addressing these common issues and taking the necessary troubleshooting steps, you can overcome any obstacles and enjoy a seamless VR experience with your iPhone as an Oculus Rift. Embrace the possibilities of virtual reality and immerse yourself in the captivating worlds that await you.