
Checking the Power Source
Before attempting to turn on your Dell laptop, it is crucial to ensure that it is properly connected to a power source. Here are the steps to check the power source:
- Plug in the Charger: Locate the power adapter that came with your Dell laptop. Connect one end to the laptop’s power port and the other end to a functioning electrical outlet. Make sure the connection is secure.
- Check the Charger Indicator: Look for a light or LED indicator on the laptop’s power adapter. If it is lit up or blinking, it indicates that the charger is receiving power from the outlet.
- Verify the Battery Level: If your laptop has a built-in battery, check the battery indicator on the device. Most Dell laptops have a battery icon on the front or side that shows the current battery level. If the battery is depleted, it may not turn on until it is charged.
- Try a Different Outlet: If the charger indicator is not lighting up or showing any activity, try plugging it into a different electrical outlet. Sometimes, the outlet might not be functioning correctly, causing the charger to not receive power.
- Inspect the Charger and Power Cord: Examine the charger and power cord for any signs of damage, such as frayed wires or broken plugs. If you find any issues, replace the charger or power cord before attempting to power on the laptop.
By following these steps, you can ensure that your Dell laptop is properly connected to a power source. This is a crucial step in troubleshooting if your laptop isn’t turning on. Once you have confirmed that the power source is reliable, you can proceed to the next steps to turn on your Dell laptop.
Opening the Laptop Lid
Once you have verified that your Dell laptop is properly connected to a power source, the next step is to open the laptop lid. Here are the simple steps to follow:
- Locate the Laptop Lid: Identify the top cover of your Dell laptop. The lid is typically hinged at the back of the device.
- Position the Laptop: Place the laptop on a flat surface, such as a desk or table. Make sure there is enough space for the lid to open fully without any obstructions.
- Gently Lift the Lid: Using both hands, grip the edges of the laptop lid. Lift it slowly and steadily, keeping it parallel to the surface. Avoid applying excessive force, as it may damage the hinges or the screen.
- Open the Lid Completely: Continue lifting the lid until it is fully open, revealing the laptop’s screen and keyboard. Take care not to tilt the lid too far back to prevent the laptop from toppling over.
- Ensure Smooth Movement: While opening the lid, pay attention to any resistance or unusual sounds. If you encounter any issues, stop immediately and assess the situation before proceeding.
Opening the laptop lid is a straightforward process, but it’s crucial to handle it with care to avoid any damage. By following these steps, you can safely and properly open the lid of your Dell laptop, allowing you to proceed to the next step of turning it on.
Locating the Power Button
Now that you have successfully opened the lid of your Dell laptop, the next step is to locate the power button. The power button is the key that initiates the startup process. Here’s how to find it:
- Find the Keyboard: Locate the keyboard on your Dell laptop. It is usually located right below the screen or integrated into the lower portion of the laptop’s body.
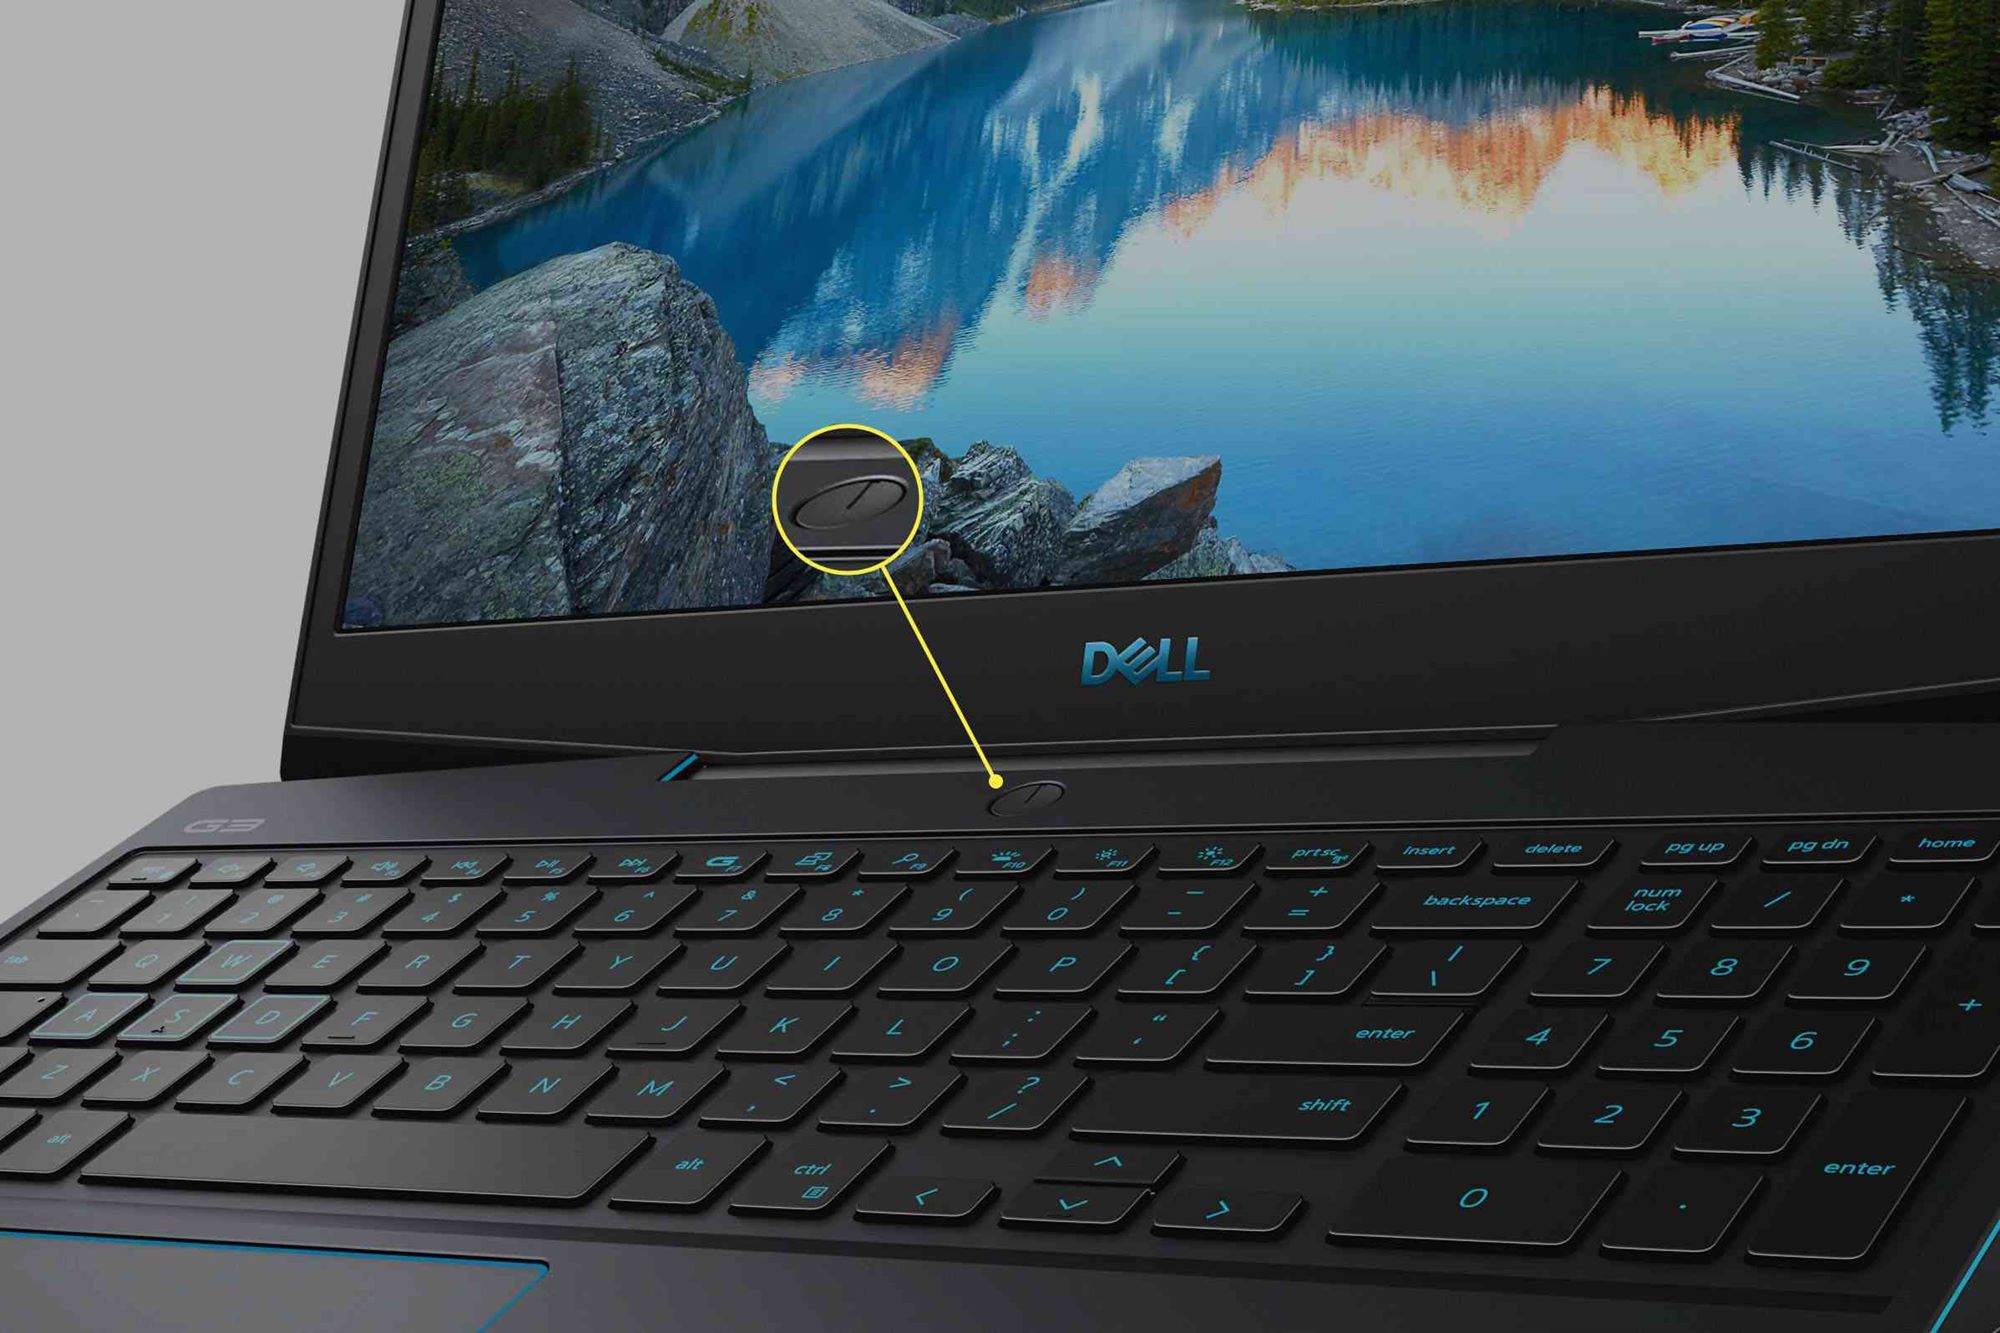
- Look for a Icon or Symbol: Scan the keyboard for a symbol or icon that represents the power button. It is commonly depicted as a circle enclosed within a vertical line, and often has the word “Power” or a power symbol (a lightning bolt) next to it.
- Check the Top Row: On some Dell models, the power button may be located on the top row of keys. Look for a dedicated power button with the power icon symbol.
- Consult the User Manual: If you’re still unable to locate the power button, refer to the user manual that came with your Dell laptop. It will provide specific information about the layout and placement of buttons and function keys.
Remember that the power button on Dell laptops may vary in placement depending on the model. Take your time to familiarize yourself with the keyboard and locate the power button before proceeding to the next step of turning on your Dell laptop.
Pressing and Holding the Power Button
Once you have located the power button on your Dell laptop, the next step is to press and hold it to initiate the startup process. Here’s what you need to do:
- Position Your Finger: Place your finger on the power button. Ensure that your finger is clean and dry to allow for a proper contact with the button.
- Apply Firm Pressure: Gently press and hold down the power button. You may need to apply a bit of pressure to engage the button, but be careful not to press too hard or forcefully, as it may damage the button or the internal components.
- Hold for a Few Seconds: Keep holding down the power button for about 3-5 seconds. This duration may vary depending on your Dell laptop model. You should start to see some signs of life, such as the laptop’s LED indicators turning on or the screen displaying the Dell logo.
- Release the Power Button: After a few seconds, release the power button. Your Dell laptop should continue the startup process, displaying the operating system logo or the login screen.
Pressing and holding the power button is the key step in turning on your Dell laptop. It sends a signal to the internal components to start powering up and booting the operating system.
If, after holding the power button for a reasonable amount of time, your laptop still doesn’t show any signs of starting up, there may be other underlying issues. In such cases, it is advisable to seek professional assistance or refer to the Dell support website for troubleshooting steps relevant to your specific model.
Releasing the Power Button
After holding the power button for a few seconds on your Dell laptop, the next step is to release it. Releasing the power button allows the laptop to continue its startup process and proceed to the operating system. Here’s what you need to do:
- Check for Signs of Life: While still holding down the power button, observe if any indicators on your laptop light up or if the screen shows any signs of activity. These signs confirm that your laptop has successfully started, and the operating system is booting up.
- Release the Power Button: Once you have confirmed signs of life, release the power button. Simply lift your finger off the button, allowing it to spring back to its initial position.
- Observe the Startup Process: After releasing the power button, continue to observe the laptop’s screen. You should see the Dell logo or the operating system loading screen, indicating that your laptop is progressing through the startup sequence.
- Wait Patiently: The startup process may take a few moments, depending on your laptop’s hardware specifications and the operating system. Avoid pressing any other buttons or keys during this time, as it may interrupt the startup process or cause undesired actions.
Releasing the power button is a crucial step that allows your Dell laptop to transition from the power-on phase to the actual startup sequence. By following these steps, you can ensure a smooth transition and allow your laptop to proceed to the operating system and become fully functional.
If, after releasing the power button, your laptop doesn’t show any signs of progress or remains unresponsive, refer to the troubleshooting steps provided by Dell for further assistance.
Troubleshooting if the Laptop Doesn’t Turn On
If your Dell laptop doesn’t turn on even after following the previous steps, don’t worry. There are some troubleshooting steps you can take to identify and resolve the issue. Here are some possible solutions:
- Check the Power Source: Ensure that the laptop is properly connected to a power source. Double-check the power adapter, power cord, and the outlet for any issues or damage. Try using a different power outlet to rule out any electrical issues.
- Remove External Devices: Disconnect any external devices such as USB devices, external monitors, or printers. Sometimes, a faulty external device can prevent the laptop from turning on. After removing the external devices, try turning on the laptop again.
- Perform a Hard Reset: A hard reset can help resolve many power-related issues. To do this, disconnect the power adapter and remove the battery (if it is removable). Then, press and hold the power button for about 30 seconds. After that, reconnect the power adapter and try turning on the laptop.
- Reset the BIOS Settings: Resetting the BIOS settings can sometimes resolve startup issues. To do this, turn off the laptop, then turn it back on and immediately press the BIOS setup key (usually F2 or Delete) repeatedly until the BIOS menu appears. In the BIOS menu, look for an option to “Load default settings” or “Reset BIOS settings to default.” After selecting this option, save the changes and exit the BIOS menu.
- Contact Dell Support: If none of the above steps work, it is recommended to contact Dell customer support or visit their support website. They can provide further assistance and guide you through additional troubleshooting steps for your specific Dell laptop model.
Remember that these troubleshooting steps are general suggestions and may not cover all possible scenarios. It is essential to refer to the specific troubleshooting resources provided by Dell for your laptop model or seek professional assistance if needed.
By following these troubleshooting steps, you can diagnose and potentially resolve the issue that is preventing your Dell laptop from turning on. It’s important to remain patient and methodical throughout the troubleshooting process to ensure the best possible outcome.