
Why Sync Your Xbox Controller?
Syncing your Xbox controller to your Xbox One or PC is an essential step that allows you to enjoy an immersive gaming experience. Whether you are a seasoned gamer or just starting out, syncing your controller enables you to effortlessly control your gameplay and interact with the virtual world.
By syncing your Xbox controller, you can wirelessly connect it to your gaming console or PC, eliminating the need for cumbersome cables. This grants you the freedom to sit back, relax, and play without any restrictions. Additionally, syncing your controller ensures that all buttons, triggers, and joysticks are properly recognized and responsive, enhancing your control and precision during gameplay.
Syncing your Xbox controller is especially important for multiplayer gaming, as it allows you to connect multiple controllers to your console or PC. This means you can invite friends over for epic gaming sessions or team up with players online, bringing excitement and camaraderie to your gaming experience.
Moreover, syncing your Xbox controller enables you to take advantage of advanced features and functionality. Certain games and applications rely on the unique capabilities of the Xbox controller, such as motion controls or haptic feedback. By syncing your controller, you can fully enjoy these enhanced features and immerse yourself in the game like never before.
Whether you prefer playing on your Xbox One or PC, syncing your controller is a seamless process that takes only a few simple steps. By following the instructions specific to your platform, you can quickly and easily connect your Xbox controller and embark on countless gaming adventures.
In the upcoming sections, we will guide you through the process of syncing your Xbox controller to both an Xbox One console and a PC, providing easy-to-follow steps and troubleshooting tips along the way. So, let’s dive in and get your controller synced up for an incredible gaming experience!
Xbox One Controller Sync
Syncing your Xbox One controller is a straightforward process that allows you to connect your controller to your Xbox One console and start gaming in no time. Follow these simple steps to sync your Xbox One controller:
Step 1: Prepare the Xbox One Console
Ensure that your Xbox One console is turned on and ready for syncing. Make sure there are no obstructions between the console and the controller that may interfere with the wireless signal.
Step 2: Turn on the Xbox One Console
Press the power button on your Xbox One console to turn it on. You will need to wait until the console fully boots up before proceeding to the next step.
Step 3: Press the Sync Button on the Console
Locate the sync button on the front of your Xbox One console, which is a small circular button near the disc tray. Press and hold the sync button until the light on the console starts flashing.
Step 4: Press the Sync Button on the Controller
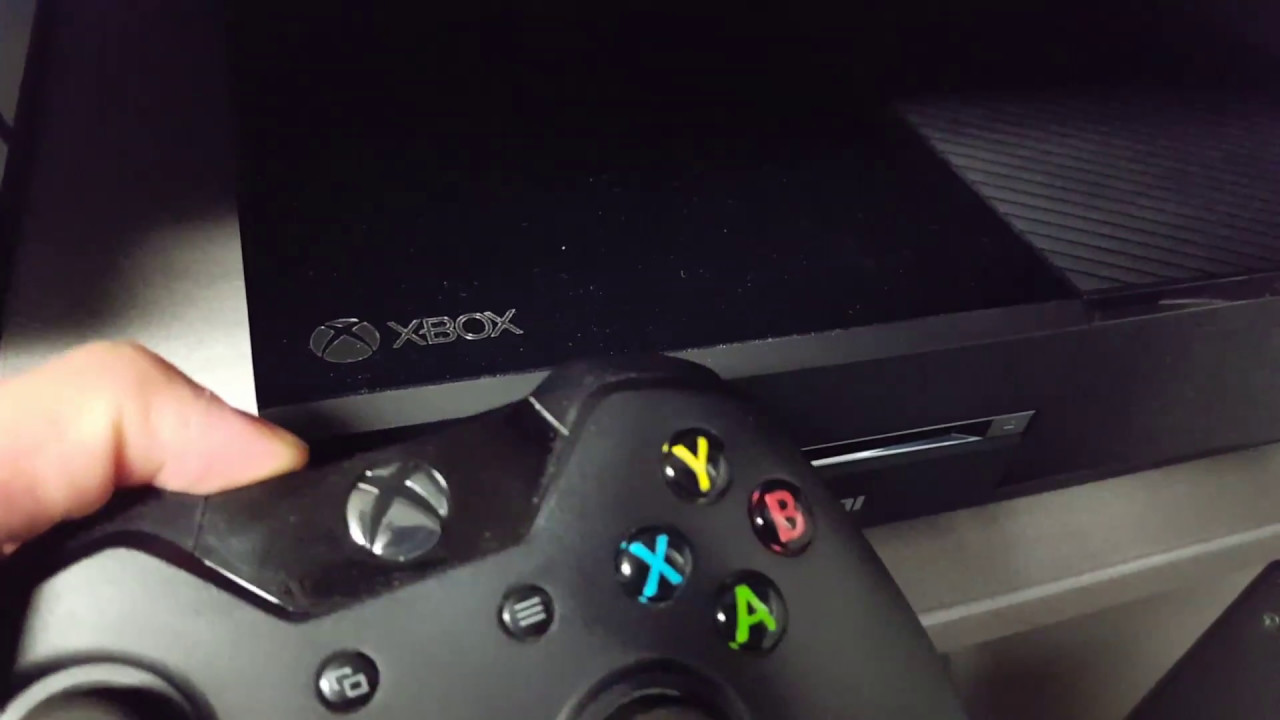
On your Xbox One controller, locate the sync button, which is a small rectangular button located near the left trigger. Press and hold the sync button until the Xbox logo starts flashing.
Step 5: Wait for the Controller to Sync
Once the sync button is pressed on both the console and the controller, they will search for each other and establish a wireless connection. Wait for a few seconds until the controller’s light turns solid, indicating a successful sync.
That’s it! Your Xbox One controller is now synced and ready to use with your Xbox One console. You can now navigate through menus, control game characters, and enjoy seamless gaming sessions.
If you encounter any difficulties during the syncing process, try repeating the steps or perform a hard reset of your console and controller. This can help resolve any minor connectivity issues that may prevent successful syncing.
Syncing your Xbox One controller ensures that you have full control and responsiveness while playing your favorite games. So grab your controller and get ready to embark on thrilling gaming adventures!
Step 1: Prepare the Xbox One Console
Before syncing your Xbox One controller, it’s important to ensure that your console is properly prepared. This step will help eliminate any potential issues that may hinder the syncing process. Follow these guidelines to prepare your Xbox One console:
1. Check Power and Connectivity
Make sure that your Xbox One console is connected to a power source and turned on. Additionally, ensure that your console is connected to the internet via Ethernet or Wi-Fi to enable a smooth syncing process.
2. Clear any Obstructions
Ensure that there are no physical obstructions between your Xbox One console and your controller. Avoid placing any large objects or electronic devices, such as routers or wireless speakers, in close proximity to the console. These objects may interfere with the wireless signal and disrupt the syncing process.
3. Remove Batteries or Disconnect the Play and Charge Kit
If you have batteries installed in your controller, remove them before starting the syncing process. Similarly, if you are using a Play and Charge Kit, disconnect it from the controller. This will prevent any power-related issues that may affect the syncing process.
4. Check for Firmware Updates
Occasionally, Microsoft releases firmware updates for the Xbox One console. These updates often include improvements and bug fixes that can enhance the syncing process and controller performance. To ensure that you have the latest firmware, go to the Settings menu on your Xbox One console and select System. From there, navigate to Console info and updates, and check for any available updates. Follow the prompts to install any updates if required.
By preparing your Xbox One console before syncing your controller, you can minimize potential obstacles and ensure a smooth syncing process. Following these simple steps will help create an optimal environment for successful sync, allowing you to enjoy uninterrupted gaming sessions and maximum control.
Step 2: Turn on the Xbox One Console
After preparing your Xbox One console, the next step in syncing your controller is to turn on the console. Follow these guidelines to ensure a successful synchronization:
1. Locate and Press the Power Button
Locate the power button on the front of your Xbox One console. It is usually marked with a power symbol. Press the power button and wait for the console to boot up. You will see the Xbox logo on your TV screen as the console starts.
2. Wait for the Boot-Up Process
It’s important to be patient during the boot-up process. Give your Xbox One console a few moments to load the operating system and fully start up. Depending on your console’s settings and any updates it may need to install, this process can take several seconds or a minute.
3. Sign in to Your Account (if Required)
If you have set up multiple profiles on your Xbox One console, you may be prompted to sign in to your account. Follow the on-screen instructions to sign in using your Xbox Live Gamertag and password. If your console is set to automatically sign in to a specific account, you can skip this step.
Once your Xbox One console is turned on and logged in, you are ready to proceed to the next step of syncing your controller. Ensure that your console is fully booted up and operational before moving forward.
It’s worth noting that some gaming consoles have an instant-on feature that allows them to go into a low-power standby state instead of fully shutting down. In this case, turning on the console may involve simply pressing a button on your controller or using voice commands. Consult your console’s user manual or Microsoft’s support website for specific instructions related to your console model.
By properly turning on your Xbox One console, you are setting the stage for a successful syncing process. Once your console is powered up, you’ll be one step closer to enjoying your gaming session with your synced controller.
Step 3: Press the Sync Button on the Console
To initiate the syncing process between your Xbox One controller and console, you’ll need to press the sync button on the console. Follow these steps to ensure a successful sync:
1. Locate the Sync Button
On your Xbox One console, locate the sync button. It is usually located on the front of the console, near the disc tray. The sync button is a small circular or rectangular button.
2. Press and Hold the Sync Button
Press and hold the sync button on the console. You’ll need to hold it down for a few seconds until the light on the console starts flashing. This action puts your console into “sync mode,” allowing it to search for and connect to nearby controllers.
3. Observe the Sync Light
Once you’ve pressed the sync button, pay attention to the LED light on the console. The light will start flashing, indicating that the console is actively searching for nearby controllers to sync with.
4. Place the Controller within Range
Make sure your Xbox One controller is within range of the console. Ideally, keep the controller no farther than 20 feet away from the console to ensure a strong wireless connection during the syncing process.
5. Prepare to Sync the Controller
By pressing the sync button on the console, you have put it in sync mode. Now, you’ll need to initiate the syncing process on your Xbox One controller, which we’ll guide you through in the next step.
By following these steps and pressing the sync button on your Xbox One console, you’ve set the stage for a successful sync with your controller. Your console is now actively searching for nearby controllers, ready to establish a secure and responsive wireless connection.
If, for any reason, the synchronization process is not successful, don’t worry. We’ll provide troubleshooting tips later in this guide to help you resolve any issues and get your controller synced up with your Xbox One console smoothly.
Step 4: Press the Sync Button on the Controller
Once you have activated the sync mode on your Xbox One console, the next step is to press the sync button on your controller. This will allow the console and controller to establish a wireless connection. Follow these steps to press the sync button on the controller:
1. Locate the Sync Button on the Controller
On your Xbox One controller, locate the sync button. It is usually a small rectangular button located near the left trigger or on the back of the controller, depending on the model.
2. Press and Hold the Sync Button
Press and hold the sync button on the controller. You need to hold it down until the Xbox logo on the controller starts flashing. This action puts the controller in the “sync mode,” indicating that it is actively searching for nearby devices to sync with.
3. Observe the Xbox Logo Light
As you press and hold the sync button on the controller, the Xbox logo on the controller will start flashing. This flashing light indicates that the controller is in the sync mode and actively searching for the Xbox One console.
4. Position the Controller
Make sure that the controller is positioned within range of the Xbox One console. Keeping the controller within 20 feet of the console helps ensure a strong wireless connection during the sync process.
5. Prepare for the Sync
With the sync button pressed on both the console and the controller, they are now ready to establish a wireless connection. The console and controller will communicate with each other and pair up to deliver seamless gaming experiences.
By following these steps and pressing the sync button on your Xbox One controller, you have initiated the sync process between the controller and console. As the Xbox logo on the controller flashes, it actively searches for the console, creating a strong and secure wireless connection.
If the sync process does not complete successfully, don’t worry. In the next section, we will provide troubleshooting tips to help you overcome any obstacles and ensure a successful sync between your Xbox One controller and console.
Step 5: Wait for the Controller to Sync
After pressing the sync buttons on both the Xbox One console and controller, it’s time to wait for the synchronization process to complete. During this step, the console and controller will communicate with each other and establish a wireless connection. Follow these guidelines as you wait for the controller to sync:
1. Observe the Controller’s Light
Keep an eye on the light on your Xbox One controller. When you initially pressed the sync button on the controller, the Xbox logo started flashing. As the synchronization process progresses, the flashing light will change to a solid light.
2. Be Patient
It’s important to be patient during the controller syncing process. Depending on various factors such as wireless signal strength, distance between the console and the controller, and other environmental conditions, syncing can take a few moments. Avoid pressing any buttons or attempting to interrupt the process. Allow the console and controller to establish a secure connection at their own pace.
3. Verify Successful Sync
Once the controller has synced successfully, the Xbox logo on the controller will stop flashing and remain solid. This indicates that the controller is now connected to the Xbox One console wirelessly and is ready for use.
4. Test the Controller
After the sync process is complete, test the controller to ensure it is working as intended. Navigate through menus, press buttons, and move the joysticks to verify that the controller’s inputs are being recognized by the console.
By following these steps and patiently waiting for the controller to sync, you allow the Xbox One console and controller to establish a strong and secure wireless connection. Once the controller’s light becomes solid, you can be confident that the sync process is complete and the controller is ready to deliver an immersive gaming experience.
If, after waiting for a considerable amount of time, the controller does not sync successfully, don’t worry. In the next section, we will provide troubleshooting tips to help you overcome any potential issues and successfully sync your Xbox One controller.
PC Controller Sync
Synchronizing your Xbox controller with your PC allows you to enjoy gaming on your computer with the comfort and familiarity of your Xbox controller. Here are the steps to sync your Xbox controller to your PC:
Step 1: Install the Xbox Accessories App
To begin, you’ll need to install the Xbox Accessories app on your PC. This app allows you to configure and update your Xbox controllers. You can download it for free from the Microsoft Store or the Xbox website.
Step 2: Connect the Xbox Wireless Adapter to Your PC
If you have an Xbox Wireless Adapter, plug it into a USB port on your PC. This adapter enables wireless connectivity between your PC and Xbox controllers. If your PC has built-in Xbox Wireless support, you can skip this step.
Step 3: Turn on Your Xbox Controller
Press the Xbox button on your controller to power it on. The Xbox logo on the controller will light up when it is turned on.
Step 4: Press the Sync Button on the Xbox Wireless Adapter
If you are using an Xbox Wireless Adapter, press the sync button on the adapter. The LED light on the adapter will begin rapidly flashing, indicating that it is ready to pair with a controller.
Step 5: Press the Sync Button on the Controller
On the Xbox One controller, locate the sync button, usually located near the top edge of the controller. Press and hold the sync button until the Xbox logo on the controller starts flashing rapidly.
Step 6: Wait for the Controller to Sync
As the sync button is pressed on both the Xbox Wireless Adapter and the controller, they will search for each other and establish a connection. Once the connection is established, the Xbox logo on the controller will become solid, indicating a successful sync.
That’s it! Your Xbox controller is now synced to your PC and ready to use for gaming. You can now enjoy the convenience and comfort of your Xbox controller while playing games on your computer.
If you encounter any issues during the sync process, ensure that your Xbox controller has sufficient battery life or is connected to a power source via a Play and Charge Kit. Additionally, make sure that your PC is updated with the latest Xbox controller driver and that the Xbox Accessories app is correctly installed.
Following these steps will enable you to sync your Xbox controller to your PC seamlessly. Take advantage of this easy setup process to elevate your gaming experience on your computer.
Step 1: Install the Xbox Accessories App
To sync your Xbox controller to your PC, the first step is to install the Xbox Accessories app. This app provides essential configuration and customization options for your Xbox controller, ensuring a seamless gaming experience on your computer. Follow these steps to install the Xbox Accessories app:
1. Go to the Microsoft Store or Xbox Website
Open the Microsoft Store on your PC or visit the official Xbox website using your preferred web browser.
2. Search for the Xbox Accessories App
In the search bar of the Microsoft Store or the Xbox website, enter “Xbox Accessories” and press the enter key. This will bring up the Xbox Accessories app in the search results.
3. Select and Install the App
Choose the Xbox Accessories app from the search results and click on it. On the app page, click on the “Install” button to start the installation process. The app will be downloaded and installed onto your PC.
4. Open the Xbox Accessories App
Once the installation is complete, locate the Xbox Accessories app on your PC. You can find it in the Start menu or by searching for “Xbox Accessories” in the Windows search bar. Click on the app icon to launch it.
5. Connect Your Xbox Controller
Connect your Xbox controller to your PC using a USB cable or the Xbox Wireless Adapter. The app will automatically detect the connected controller and display it on the screen.
By following these steps and installing the Xbox Accessories app, you have laid the foundation for syncing your Xbox controller to your PC. This app not only allows you to sync your controller but also provides additional features like button mapping, firmware updates, and controller customization options.
The Xbox Accessories app is a valuable tool for enhancing your gaming experience on your PC. Take advantage of its features and customization options to optimize your controller settings to suit your preferences, ensuring smooth and precise control while gaming on your PC.
Step 2: Connect the Xbox Wireless Adapter to Your PC
If you have an Xbox Wireless Adapter, you’ll need to connect it to your PC to enable wireless connectivity between your PC and Xbox controller. Follow these steps to connect the Xbox Wireless Adapter to your PC:
1. Locate an Available USB Port
Identify an available USB port on your PC where you can connect the Xbox Wireless Adapter. It is recommended to use a USB 2.0 or USB 3.0 port for optimal performance.
2. Insert the Xbox Wireless Adapter
Gently insert the Xbox Wireless Adapter into the USB port on your PC. Ensure that it is firmly connected and seated properly in the port.
3. Wait for the Adapter to be Recognized
After inserting the Xbox Wireless Adapter, your PC will automatically recognize the device and initiate the necessary driver installation process. Depending on your PC’s settings, this may take a few moments.
4. Check for Driver Installation
Once the Xbox Wireless Adapter is recognized, your PC will attempt to install the required drivers. You may see a notification or progress bar indicating the ongoing driver installation process. Wait for the installation to complete.
5. Verify Successful Connection
After the driver installation is complete, the Xbox Wireless Adapter should be successfully connected and ready to use. You can check the status of the adapter by opening the Xbox Accessories app or checking the list of connected devices in your PC’s settings.
If you encounter any difficulties during the connection process, ensure that you have a compatible Xbox Wireless Adapter and that it is inserted into a functional USB port on your PC. Additionally, make sure that your PC is updated with the latest system updates to ensure compatibility with the adapter.
Once the Xbox Wireless Adapter is successfully connected, you can proceed to sync your Xbox controller to your PC using the steps mentioned earlier. This wireless connection method provides freedom of movement and flexibility while gaming on your PC, giving you a seamless and enjoyable gaming experience.
Step 3: Turn on Your Xbox Controller
Before syncing your Xbox controller to your PC, you’ll need to ensure that it is powered on. Follow these steps to turn on your Xbox controller:
1. Power Button Position
Locate the power button on your Xbox controller. It is usually located in the center of the controller, marked with the Xbox logo. The power button may also be located on the top edge or near the bottom of the controller, depending on the model.
2. Press the Power Button
Press the power button on your Xbox controller. When you press the power button, the Xbox logo on the controller will light up, indicating that the controller is turned on and ready to be synced.
3. LED Light Indication
Pay attention to the LED light on the Xbox controller. When you power on the controller, the LED light will turn on and remain solid, indicating that the controller is active and ready for use.
4. Check Battery Level
Before proceeding, it’s a good idea to check the battery level of your Xbox controller. If the battery is low, consider replacing it with fresh batteries or connect the controller to a power source using a Play and Charge Kit. This ensures that the controller has sufficient power for the syncing process.
Once your Xbox controller is powered on and the LED light is solid, it is ready to be synced with your PC. The next step is to initiate the syncing process, which we will guide you through in the upcoming steps.
Remember, it’s important to have the Xbox controller powered on and in sync mode before attempting to sync it with your PC. This ensures that the controller is actively searching for nearby devices to establish a wireless connection and allows for a smooth and successful sync process.
Step 4: Press the Sync Button on the Xbox Wireless Adapter
If you are using an Xbox Wireless Adapter to connect your Xbox controller to your PC, the next step is to press the sync button on the adapter. Follow these steps to initiate the sync process:
1. Locate the Sync Button on the Adapter
Take a look at your Xbox Wireless Adapter and locate the sync button. The sync button is typically located on the front or side of the adapter. It is a small, circular button that may be recessed.
2. Press and Hold the Sync Button
Press and hold the sync button on the Xbox Wireless Adapter. You will need to hold it down for a few seconds until the LED light on the adapter starts flashing rapidly.
3. Observe the Adapter’s LED Light
As you press and hold the sync button on the adapter, the LED light on the adapter will begin flashing rapidly. This indicates that the adapter is in sync mode and actively searching for nearby devices.
4. Keep the Adapter in Range
Ensure that the Xbox Wireless Adapter remains within range of your Xbox controller. Keep it at a distance of no more than 20 feet to maintain a strong wireless connection throughout the syncing process.
5. Prepare for the Sync
By pressing the sync button on the Xbox Wireless Adapter, you have put it in sync mode and made it ready to connect with your Xbox controller. Now, you’re all set to move on to the next step: syncing your Xbox controller to the adapter.
By following these steps and pressing the sync button on the Xbox Wireless Adapter, you have set the stage for the successful synchronization of your Xbox controller to your PC. The adapter is now actively searching for the controller, creating a solid foundation for a strong and seamless wireless connection.
If the sync process does not initiate right away, ensure that the adapter is properly connected to your PC and that the LED light is flashing rapidly. If needed, repeat the steps to press and hold the sync button on the adapter to initiate the sync process.
Step 5: Press the Sync Button on the Controller
Now that your Xbox Wireless Adapter is in sync mode, the next step is to press the sync button on your Xbox controller. This will allow the adapter and controller to search for each other and establish a wireless connection. Follow these steps to initiate the sync process:
1. Locate the Sync Button on the Controller
On your Xbox controller, locate the sync button. It is usually a small rectangular button located near the top edge or on the back of the controller, depending on the model.
2. Press and Hold the Sync Button
Press and hold the sync button on the controller. You’ll need to hold it down for a few seconds until the Xbox logo on the controller starts flashing rapidly. This indicates that the controller is now in sync mode and actively searching for nearby devices to connect with.
3. Observe the Xbox Logo Light
As you press and hold the sync button on the controller, the Xbox logo on the controller will start flashing rapidly. This flashing light indicates that the controller is in sync mode and actively searching for the Xbox Wireless Adapter.
4. Place the Controller within Range
Make sure that the Xbox controller is within range of the Xbox Wireless Adapter. Keep the controller within approximately 20 feet of the adapter to ensure a strong wireless connection during the sync process.
5. Prepare for the Sync
By pressing the sync button on both the Xbox Wireless Adapter and the controller, they are now ready to establish a wireless connection. The adapter and controller will communicate with each other and pair up, enabling seamless interaction between your Xbox controller and PC.
By following these steps and pressing the sync button on your Xbox controller, you have initiated the sync process between the controller and the Xbox Wireless Adapter. As the Xbox logo on the controller flashes, it actively searches for the adapter, creating a strong and secure wireless connection.
If the sync process does not initiate right away, ensure that both the controller and the adapter are in sync mode and within range of each other. If needed, you can repeat the steps to press and hold the sync button on the controller to restart the sync process.
Step 6: Wait for the Controller to Sync
After pressing the sync buttons on both the Xbox Wireless Adapter and the Xbox controller, you’ll need to wait for the synchronization process to complete. During this step, the adapter and controller will establish a wireless connection and pair up for seamless gaming. Follow these guidelines as you patiently wait for the controller to sync:
1. Observe the Controller’s Light
Keep an eye on the light on your Xbox controller. When you initially pressed the sync button on the controller, the Xbox logo started flashing rapidly. As the synchronization process progresses, the flashing light will change to a steady, solid light.
2. Be Patient
It’s essential to be patient during the controller syncing process. Depending on various factors, such as wireless signal strength and environmental conditions, syncing can take a few moments. Avoid pressing any additional buttons or interrupting the process; allow the controller and adapter to establish a secure wireless connection at their own pace.
3. Verify Successful Sync
Once the controller has completed the sync process, the Xbox logo on the controller will stop flashing and remain solid. This indicates that the controller is now successfully connected to the Xbox Wireless Adapter and ready to be used for gaming.
4. Test the Controller
After the sync process is complete, it’s recommended to test the Xbox controller to ensure it is working correctly. Navigate through menus, press buttons, and move the joysticks to verify that the controller’s inputs are recognized by your PC. This step helps confirm that the controller and adapter synchronization was successful.
By following these steps and patiently waiting for the controller to sync, you allow the Xbox controller and the Xbox Wireless Adapter to establish a strong and secure wireless connection. Once the Xbox logo on the controller becomes solid, you can be confident that the sync process is complete, and the controller is ready to provide an immersive gaming experience on your PC.
If, after waiting for a reasonable amount of time, the controller does not sync successfully, try restarting the process by repeating the previous steps. It’s also a good idea to ensure that the Xbox Wireless Adapter is connected properly to your PC and that the controller’s battery level is sufficient.
Troubleshooting Tips
Sometimes, you may encounter issues while syncing your Xbox controller to your Xbox One console or PC. Don’t worry! Here are some troubleshooting tips to help you address any potential problems:
1. Check Controller Battery
Ensure that your controller has sufficient battery power or is connected to a power source using a Play and Charge Kit. Low battery levels can prevent successful syncing. Try using fresh batteries or charging the controller before attempting to sync again.
2. Verify Power and Connectivity
Make sure that your console or PC is powered on and properly connected to a power source. Check the cable connections and ensure that there are no loose or damaged cables that could interfere with the syncing process.
3. Restart Console or PC
Try restarting your Xbox One console or PC to refresh the system. Sometimes, a quick reboot can resolve minor connectivity issues and allow for a successful sync. After restarting, attempt to sync your controller again.
4. Clear Obstructions
Make sure that there are no physical obstructions between your controller and the console or PC. Remove any objects, such as large electronic devices or metal surfaces, that may interfere with the wireless signal. Maintaining a clear line of sight between the controller and the device can improve syncing performance.
5. Update Firmware and Drivers
Ensure that your console or PC has the latest firmware updates and controller drivers installed. Regular updates often address compatibility issues and provide improvements. Visit the official Xbox support website or the manufacturer’s website to check for any available updates and install them as needed.
6. Reset Controller
If you’re experiencing persistent syncing issues, you can try resetting your Xbox controller. Look for the small reset button on the back of the controller or consult the controller’s manual for specific instructions on how to reset it. After resetting, attempt to sync the controller again.
7. Replace Batteries or Cable
If you’re using batteries, try replacing them with fresh ones to ensure a strong power source for the controller. Alternatively, if you’re using a USB cable to connect the controller, try using a different cable to rule out any cable-related issues.
If you’ve tried these troubleshooting tips and are still unable to sync your controller, consider contacting Xbox support or referring to the manufacturer’s support resources for further assistance. They may provide additional guidance tailored to your specific situation.
Remember, patience and persistence are key when troubleshooting. With some troubleshooting and perseverance, you’ll soon be back to enjoying your gaming experience with a synced Xbox controller!