
What is a Ledger Nano S?
A Ledger Nano S is a hardware cryptocurrency wallet that provides a secure and convenient way to store and manage your digital assets. It is a compact device that is designed to keep your cryptocurrencies safe from online threats by storing your private keys offline. The Ledger Nano S uses a combination of secure chip technology and robust encryption to ensure the highest level of security for your cryptocurrency holdings.
This hardware wallet supports a wide range of cryptocurrencies, including popular ones like Bitcoin, Ethereum, and Litecoin, as well as a variety of altcoins. It features a simple and intuitive user interface, making it accessible to both novice and experienced users.
One of the main advantages of using a Ledger Nano S is that it provides an extra layer of protection against hacking attempts and phishing attacks. Since the private keys are stored securely in the device and never expose them to the computer or online environment, the risk of unauthorized access to your funds is significantly reduced.
Additionally, the Ledger Nano S offers the ability to sign messages with your cryptocurrency addresses. This feature allows you to provide cryptographic proof of ownership and authenticity, which can be useful in various scenarios.
Overall, the Ledger Nano S is a trusted hardware wallet solution that prioritizes the security and convenience of managing your cryptocurrencies. Whether you are a seasoned crypto investor or just starting your journey into the world of digital assets, using a Ledger Nano S can give you peace of mind knowing that your funds are protected.
Why sign a message with Ledger Nano S?
Signing a message with a Ledger Nano S offers several benefits and use cases for cryptocurrency users. Let’s explore some of the key reasons why you might want to sign a message with this hardware wallet:
1. Cryptographic Proof: When you sign a message with your Ledger Nano S, you are providing cryptographic proof that the message originated from your cryptocurrency address. This proof can be useful in situations where you need to verify your ownership or authenticity for various purposes, such as participating in blockchain-based voting systems or proving your identity during token sales.
2. Protection Against Tampering: By signing a message with your Ledger Nano S, you ensure that the integrity of the message remains intact and has not been tampered with. The signature acts as a digital seal that verifies the message’s content and prevents any unauthorized alterations. This feature can be particularly valuable when transferring sensitive information or when participating in smart contract interactions.
3. Enhanced Security: The Ledger Nano S leverages its secure chip technology and offline storage to protect your private keys. When signing a message, the private key never leaves the device, further reducing the risk of exposure to potential online threats. This added layer of security helps safeguard against potential attacks and minimizes the chances of your funds getting compromised.
4. Trustless Interactions: By signing a message with the Ledger Nano S, you can engage in trustless interactions with counterparties. This means that you can verify the authenticity of the party and their associated cryptocurrency address without relying on a trusted third party. This trustless nature simplifies and secures various types of transactions, including peer-to-peer trades, escrow arrangements, and decentralized applications.
5. Adherence to Standards: Signing messages with the Ledger Nano S reinforces your adherence to industry-recognized standards and best practices for cryptocurrency security. This device is widely trusted and utilized by individuals, businesses, and institutions alike, providing reassurance that you are taking the necessary precautions to protect your digital assets.
Step 1: Install necessary software
Before you can sign a message with your Ledger Nano S, you need to install the necessary software on your computer. Follow these steps to ensure you have the required software set up:
1. Visit the Ledger website: Go to the official Ledger website at www.ledger.com and navigate to the “Support” or “Downloads” section. Here, you will find the software needed to interact with your Ledger Nano S.
2. Choose the compatible software: Depending on your operating system, select the software that is compatible with your computer. Ledger provides software options for Windows, Mac, and Linux.
3. Download and install the software: Click on the download link for the appropriate software and follow the on-screen instructions to install it on your computer. The installation process is typically straightforward and user-friendly.
4. Update the firmware: Once the software is installed, connect your Ledger Nano S to your computer using the USB cable provided. Open the software and check for any available firmware updates. It is crucial to keep your device’s firmware up to date to benefit from the latest security enhancements and features.
5. Install necessary apps: To sign a message with a specific cryptocurrency, you need to have the corresponding app installed on your Ledger Nano S. Open the Ledger Live app on your computer and install the appropriate app for the cryptocurrency you want to sign with. Ledger supports a wide range of cryptocurrencies, so make sure to install the relevant app(s) for your needs.
6. Complete the setup: Follow any additional prompts or instructions provided by the software to complete the setup process. This may involve creating a password, setting up a PIN code for your Ledger Nano S, or setting up a recovery phrase for backup purposes. Make sure to carefully follow the instructions and keep your recovery phrase in a safe place.
7. Double-check the software: Before proceeding with signing a message, ensure that the software on your computer and the firmware on your Ledger Nano S are both up to date. This ensures compatibility and minimizes any potential issues.
By completing these steps and installing the necessary software, you are ready to proceed with signing a message using your Ledger Nano S. This initial setup process ensures a secure and seamless experience when interacting with your hardware wallet.
Step 2: Connect Ledger Nano S to computer
Once you have installed the necessary software on your computer, you can proceed to connect your Ledger Nano S to your computer. Follow these steps to establish a secure connection:
1. Locate the USB cable: Find the USB cable that came with your Ledger Nano S. It usually has a USB Type-A connector on one end and a Micro-USB or USB Type-C connector on the other end, depending on the model of your device.
2. Connect Ledger Nano S to your computer: Plug one end of the USB cable into a USB port on your computer. Then, take the other end of the cable and connect it to the Micro-USB or USB Type-C port on your Ledger Nano S. Ensure that the connection is secure.
3. Power on your Ledger Nano S: Once connected, press the side button of your Ledger Nano S to power it on. You should see the Ledger logo or a lock symbol on the display of your device.
4. Enter your PIN code: On the Ledger Nano S, you will be prompted to enter your PIN code using the device’s buttons. Enter the correct PIN code to unlock the device and grant access to your cryptocurrencies.
5. Authenticate the connection: Depending on the software you are using, you may need to authenticate the connection between your computer and your Ledger Nano S. Follow the instructions on the screen and confirm the connection on your Ledger Nano S by pressing the right button when prompted.
6. Ensure the connection is secure: Verify that your Ledger Nano S is securely connected to your computer. Both the device and the software should recognize the connection, and you should see relevant information about your device’s status and available cryptocurrencies on the software interface.
7. Keep your Ledger Nano S connected: For the duration of the signing process, it is important to keep your Ledger Nano S connected to your computer. Do not disconnect or power off the device until you have completed the necessary steps for signing the message.
By successfully connecting your Ledger Nano S to your computer, you establish a secure and reliable link that allows you to interact with your hardware wallet and perform various cryptocurrency operations, including signing messages and managing your digital assets.
Step 3: Open the Ledger Live app
To proceed with signing a message using your Ledger Nano S, you need to open the Ledger Live app on your computer. Follow these steps to access the app:
1. Launch the Ledger Live app: Locate the Ledger Live application on your computer and double-click to launch it. If you have not installed the Ledger Live app yet, refer to the previous steps in the setup process to download and install the correct software for your operating system.
2. Connect your Ledger Nano S: Ensure that your Ledger Nano S is still connected to your computer via the USB cable. The Ledger Live app should automatically detect the connected device and display information about it on the screen.
3. Authenticate the connection: Depending on your security settings, you may need to provide additional authentication to access your Ledger Nano S through the Ledger Live app. Follow the prompts on the screen and enter your PIN code on the device to authenticate the connection.
4. Select the appropriate account: Once you have successfully authenticated the connection, the Ledger Live app will display a list of supported cryptocurrencies. Select the account associated with the cryptocurrency address you want to sign a message with. If you have multiple accounts, make sure to choose the correct one.
5. Navigate to the message signing feature: Within the selected account, look for the option or button that allows you to sign a message. The exact location and label may vary based on the cryptocurrency and the version of the Ledger Live app you are using. Consult the app’s documentation or help section if needed.
6. Follow the on-screen instructions: Once you have accessed the message signing feature, carefully read and follow the instructions provided by the Ledger Live app. These instructions will guide you through the process of generating and signing the message using your Ledger Nano S.
7. Complete the message signing: Proceed with the necessary steps outlined in the Ledger Live app to sign the message using your Ledger Nano S. This typically involves confirming the details on your device’s screen and using the device’s buttons to approve the signature.
By opening the Ledger Live app on your computer, you gain access to the features and functionalities of your Ledger Nano S. This allows you to interact seamlessly with your hardware wallet and sign messages securely using your cryptocurrencies.
Step 4: Verify firmware and apps
Before proceeding with signing a message using your Ledger Nano S, it is important to verify that both the firmware on your device and the apps installed are up to date. Follow these steps to ensure everything is properly updated:
1. Connect your Ledger Nano S: Ensure that your Ledger Nano S is connected to your computer via the USB cable. Make sure the device is powered on and you have entered your PIN code to unlock it.
2. Open the Ledger Live app: Launch the Ledger Live app on your computer, which you have previously installed. If you haven’t installed the app yet, refer to the earlier steps in the setup process to download and install it correctly.
3. Go to the Manager tab: In the Ledger Live app, navigate to the “Manager” tab. This tab allows you to manage the apps installed on your Ledger Nano S.
4. Check for firmware updates: In the Manager tab, the Ledger Live app will automatically check if there are any firmware updates available for your Ledger Nano S. If a firmware update is available, you will see a notification. Click on the notification to proceed with the update. Follow the on-screen instructions to complete the firmware update process. This step is crucial to ensure you have the latest security features and enhancements.
5. Check for app updates: After updating the firmware, go to the “Apps” section within the Manager tab. Ledger Live will scan your Ledger Nano S and provide a list of installed apps. Check for any available updates for the cryptocurrency apps installed on your device. If updates are available, click on the corresponding app and select the option to update it. Confirm the update on both the Ledger Live app and your Ledger Nano S.
6. Confirm successful updates: Once the firmware and app updates have been completed, verify that everything has been successfully updated. Ensure that the firmware version displayed on your Ledger Nano S matches the latest version, and that the app versions listed in the Ledger Live app are also up to date.
7. Restart your Ledger Nano S: To finalize the update process, it is recommended to restart your Ledger Nano S. Disconnect the device from your computer and reconnect it after a few seconds.
By verifying the firmware and apps and keeping them up to date, you ensure that your Ledger Nano S is running the latest software versions with the most recent bug fixes and security patches. This helps to maintain the highest level of security and compatibility when signing messages and managing your cryptocurrencies.
Step 5: Open the application for the cryptocurrency you want to sign with
To proceed with signing a message using your Ledger Nano S, you need to open the application specific to the cryptocurrency you want to sign with. Here’s a step-by-step guide to help you navigate this process:
1. Ensure your Ledger Nano S is connected: Make sure your Ledger Nano S is connected to your computer via the USB cable. Power on the device and enter your PIN code to unlock it.
2. Launch the Ledger Live app: Open the Ledger Live app on your computer. If you haven’t installed the app yet, refer to the earlier steps in the setup process to download and install it correctly.
3. Navigate to the Accounts tab: In the Ledger Live app, go to the “Accounts” tab. This tab provides an overview of your various cryptocurrency accounts.
4. Select the appropriate account: Within the accounts section, locate and select the account associated with the cryptocurrency you want to sign a message with. If you have multiple accounts, ensure you choose the correct one.
5. Click on “Open” or similar: Look for a button or option that allows you to open the application for the selected cryptocurrency. In most cases, you can find this option within the account details or by right-clicking on the account and selecting the appropriate choice from the context menu.
6. Follow the device prompts: Once you click on “Open” in the Ledger Live app, you will be prompted on your Ledger Nano S to confirm the action. Check the device’s screen and press the right button to open the application for the chosen cryptocurrency.
7. Wait for the application to load: After confirming the action on your Ledger Nano S, the application for the cryptocurrency will load on the device’s screen. This may take a few seconds, depending on the specific cryptocurrency and the processing speed of your device.
8. Ensure the application is open: Verify on both the Ledger Live app and your Ledger Nano S that the application for your chosen cryptocurrency is successfully open. You should see relevant information for the selected cryptocurrency, such as the account balance, transaction history, and any specific options related to signing messages.
By opening the application for the cryptocurrency you want to sign with, you establish a direct connection between your Ledger Nano S and the specific blockchain network. This enables you to interact securely, access your addresses and balances, and initiate the process of signing messages using your Ledger Nano S.
Step 6: Generate a new address
Before signing a message with your Ledger Nano S, you may need to generate a new address for the cryptocurrency you are working with. Generating a new address provides you with a fresh public key to use for signing the message. Follow these steps to generate a new address:
1. Ensure you have opened the application: Make sure you have successfully opened the application for the cryptocurrency on your Ledger Nano S, as outlined in step 5. This ensures that you are in the correct app environment for generating a new address.
2. Navigate to the account details: Within the Ledger Live app, go to the “Accounts” tab and select the account associated with the cryptocurrency you are working with. This will give you access to the relevant options for generating the new address.
3. Look for the address generation option: Explore the account details or right-click on the account to find the option for generating a new address. The exact location and label of this option may vary depending on the cryptocurrency and version of the Ledger Live app.
4. Follow the prompts on your Ledger Nano S: After clicking on the address generation option, your Ledger Nano S will display prompts and instructions on its screen. Carefully follow these prompts and use the device’s buttons to navigate and confirm the address generation process.
5. Confirm the generated address: Once the address generation process is complete, your Ledger Nano S will display the newly generated address on its screen. Take note of this address as it will be used for signing the message later on. Additionally, you can also view the generated address in the Ledger Live app for future reference.
6. Verify the generated address: It is essential to verify the generated address to ensure accuracy and prevent any potential errors. Check the address displayed on your Ledger Nano S and compare it to the one shown in the Ledger Live app. They should match exactly, confirming that the address has been generated correctly.
7. Record the new address: Make sure to record the newly generated address in a safe and secure location. You may want to copy and paste it into a secure document, write it down, or store it securely in a password manager or hardware wallet backup. This allows you to easily access the address when signing the desired message.
By generating a new address, you have a fresh public key to use for signing the message with your Ledger Nano S. This ensures that the message is associated with the correct cryptocurrency address and provides cryptographic proof of its origin. Remember to securely store the generated address for future reference.
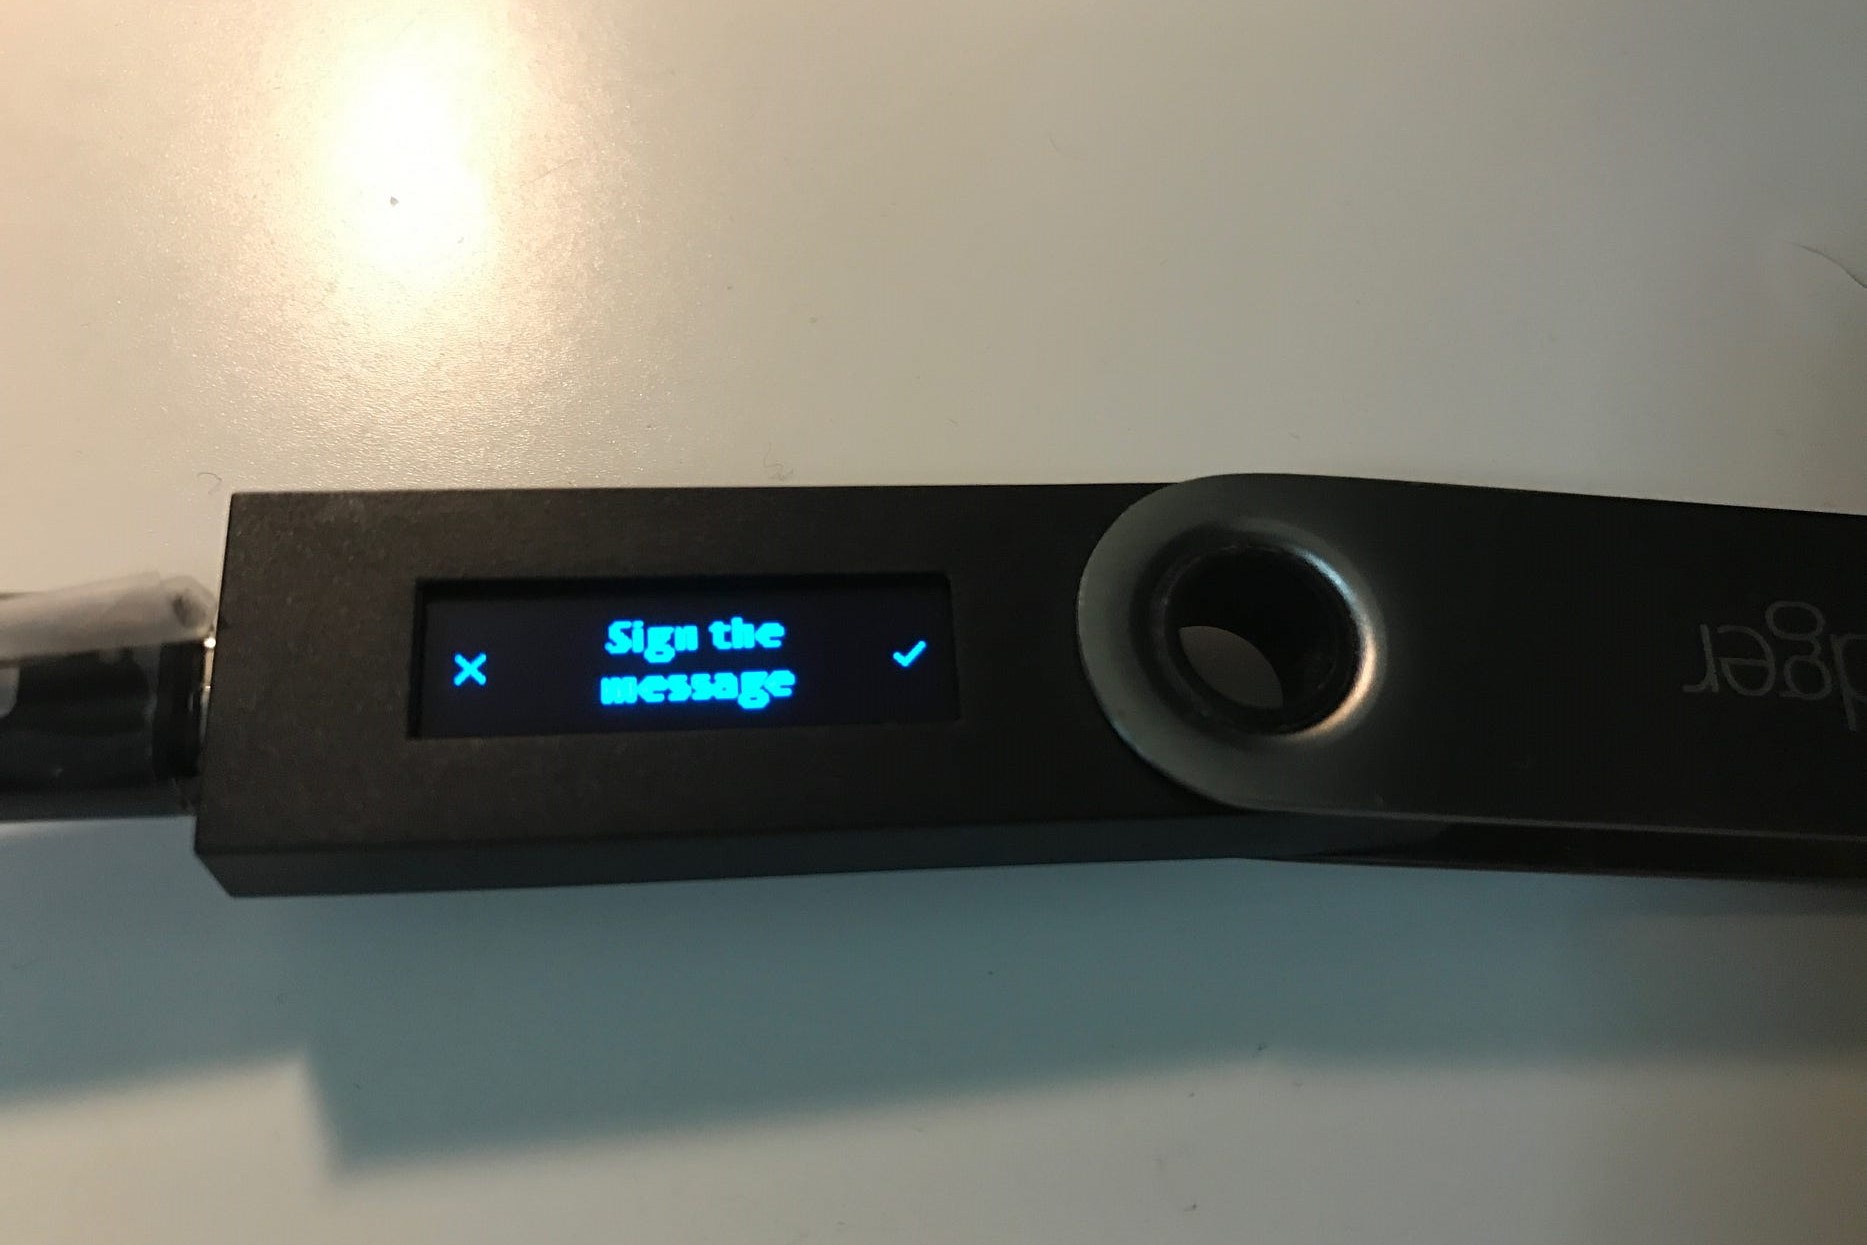
Step 7: Sign the message
Now that you have generated the necessary address, you can proceed with signing the message using your Ledger Nano S. Follow these steps to sign the message:
1. Open the message signing feature: Ensure you are still in the application for the cryptocurrency you want to sign the message with on your Ledger Nano S. Navigate to the message signing feature within the application. This feature may be labeled as “Sign message,” “Verify message,” or something similar.
2. Enter the message: In the message signing feature, you will typically have a text input field. Enter the message that you want to sign in this field. The message could be a specific string of text, a transaction, or any other content that you need to sign and verify.
3. Verify the details on your Ledger Nano S: Once you have entered the message in the application, your Ledger Nano S will display the details of the message on its screen. Double-check to ensure that the displayed message matches the one you entered. This step helps prevent any potential errors or discrepancies.
4. Confirm and sign the message: After verifying the details on your Ledger Nano S, you will be prompted to confirm and sign the message. Use the device’s buttons to navigate and approve the signing process. Follow the on-screen prompts and press the appropriate button to initiate the signing.
5. Wait for the signature: Once the signing process is initiated, your Ledger Nano S will generate a cryptographic signature for the message. The device will display the signature on its screen once it is ready. This signature is unique to the message and your Ledger Nano S, providing proof of its authenticity.
6. Copy the signature: Take note of the signature displayed on your Ledger Nano S. You can either manually copy it or use the device’s interface to copy it to your clipboard. This signature will be used to verify the authenticity of the message.
7. Complete the message signing: After copying the signature, you can proceed with any further steps or actions required by the specific use case of signing the message. This could involve sharing the signed message with the intended recipient, submitting it to a blockchain network, or any other process that requires proof of authenticity.
By successfully signing the message with your Ledger Nano S, you provide cryptographic proof of the message’s authenticity and integrity. The signature generated by your Ledger Nano S ensures that the message is associated with your cryptocurrency address and helps protect against tampering or unauthorized alterations.
Step 8: Copy the signed message
After successfully signing the message with your Ledger Nano S, the next step is to copy the signed message. Follow these steps to ensure you have a copy of the signed message:
1. Check the signed message on your Ledger Nano S: Verify the signed message displayed on your Ledger Nano S screen to ensure it matches the message you intended to sign. This step is crucial for accuracy and ensuring that you have the correct signed message.
2. Copy the signed message: There are a few different ways to copy the signed message, depending on your specific use case and requirements. Here are some common methods:
- Manually transcribe: If the signed message is short, you can manually transcribe it by carefully copying each character or digit into a document, text file, or any other desired location. Pay attention to accuracy to prevent any errors.
- Copy from the Ledger Live app: If you are using a software interface like the Ledger Live app to interact with your Ledger Nano S, you may have the option to copy the signed message directly from the app. Look for a “Copy” or “Copy Message” button, and click on it to copy the signed message to your computer’s clipboard.
- Use a screenshot or screen capture: In some cases, you may want to capture a visual representation of the signed message. Take a screenshot or use any screen capture tool to capture the signed message displayed on your Ledger Nano S screen.
3. Paste and save the signed message: Once you have copied the signed message, paste it into the desired location or application where you need to use or store it. This could be a text document, email, message field in a blockchain platform, or any other relevant location. Make sure to save the signed message in a secure and easily accessible location for future reference.
4. Verify the signed message: After copying the signed message, it is recommended to verify its integrity. Depending on your use case, you may need to submit the signed message (along with other required information) to the intended recipient, a blockchain network, or any system that requires proof of authenticity. This verification process ensures that the signed message is accurately transmitted and remains intact.
By copying the signed message, you have a record of the cryptographic proof that verifies the authenticity, integrity, and association of the message with your Ledger Nano S. Having a copy of the signed message allows you to securely use and share it as needed in various applications and use cases.
Step 9: Verify the signed message
After copying the signed message, the final step is to verify its authenticity. Verifying the signed message ensures that it has not been tampered with and provides confidence in its origin. Follow these steps to verify the signed message:
1. Obtain the original message: Retrieve the original message that you signed using your Ledger Nano S. Ensure that you have an accurate and unaltered version of the original message.
2. Access the verification tool or platform: Depending on the specific context and requirements, you may need to use a specific verification tool or platform to check the validity of the signed message. This could be a blockchain network explorer, a cryptographic verification tool, or a dedicated verification platform.
3. Enter the signed message: Use the provided functionality within the verification tool or platform to input the signed message. Paste the copied signed message into the designated field or follow the prompts as directed by the tool.
4. Verify the message integrity: Initiate the verification process, allowing the tool or platform to analyze the signed message. The tool will compare the signed message against the stored transaction data or the original message, depending on the use case. It will check whether the signature matches and if the message has remained unchanged.
5. Confirm the verification result: Once the verification process is complete, the tool or platform will display a verification result. This result will indicate whether the signed message is valid or if any discrepancies or issues were found. If the signed message passes the verification, it confirms the authenticity and integrity of the message.
6. Take necessary action: Depending on the outcome of the verification, you may need to take specific actions. If the signed message is verified successfully, you can proceed with sharing it, submitting it to a blockchain network, or using it in the intended context. If any issues arise during the verification, carefully review the details and consider contacting support or seeking additional assistance.
7. Maintain a record of verification: It is important to maintain a record of the verification result for future reference. This allows you to track and document the authenticity of the signed message and its associated actions, providing an audit trail if needed.
By verifying the signed message, you ensure that the cryptographic proof provided by your Ledger Nano S is authentic and valid. This step adds an extra layer of trust and integrity to the signed message, giving you confidence in its origin and preserving the security of your digital assets.