
Setting Up Ledger Nano X
The Ledger Nano X is a hardware wallet that provides secure storage for your cryptocurrencies. Before you can start using the device with your iPhone, you need to set it up. Follow the steps below to get started:
- Unboxing: Begin by unboxing your Ledger Nano X and gathering all the necessary contents, including the device itself, USB cable, recovery sheet, and instruction manual.
- Charging: Connect the Ledger Nano X to your iPhone using the USB cable and ensure that it is fully charged. The device has a built-in battery, which you can check by pressing the button on the front of the device. A green light indicates a full charge.
- Download Ledger Live: Open the App Store on your iPhone and search for “Ledger Live.” Download and install the app on your device. Ledger Live is the official companion app for the Ledger Nano X and allows you to manage your cryptocurrencies.
- Initial Setup: Launch the Ledger Live app on your iPhone and select “Get Started.” Follow the on-screen instructions to create a new Ledger Live account or sign in with an existing one. Make sure to choose the “Ledger Nano X” as your device during the setup process.
- Device Initialization: Once you have completed the initial setup, the Ledger Live app will guide you through the process of initializing your Ledger Nano X. This involves creating a new wallet and setting a PIN code to secure your device.
- Backup: During the initialization process, you will be prompted to write down your recovery phrase on the provided recovery sheet. This phrase is crucial for recovering your wallet in case your Ledger Nano X gets lost, stolen, or damaged. Ensure that you store the recovery sheet in a safe place.
- Account Configuration: After the device initialization, you can now configure additional accounts for different cryptocurrencies on your Ledger Nano X using the Ledger Live app. Follow the instructions in the app to add accounts and manage your portfolio.
Congratulations! You have successfully set up your Ledger Nano X and are ready to start managing your cryptocurrencies securely using your iPhone. Remember to always keep your device and recovery phrase safe and never share them with anyone.
Installing Ledger Live App on iPhone
To use your Ledger Nano X with your iPhone, you need to install the Ledger Live app. Follow the steps below to download and install the app on your device:
- Open App Store: Unlock your iPhone and navigate to the App Store. It’s a blue icon with a white letter “A” inside a circle.
- Search for Ledger Live: Tap the search icon at the bottom-right corner of the App Store and type “Ledger Live” into the search bar. Tap the search button to begin the search.
- Select Ledger Live: From the search results, locate the official Ledger Live app and tap on it to view more details.
- Install the App: On the app page, tap the “Get” or “Install” button (the cloud icon with the arrow), and then confirm the installation by authenticating with Face ID, Touch ID, or your device passcode.
- Wait for Installation: The app will begin downloading and installing on your iPhone. Once the process is complete, the app icon will appear on your home screen.
- Open Ledger Live: Tap on the Ledger Live app icon to launch the application on your iPhone.
- Create or Sign In to Your Account: Upon launching the Ledger Live app, you will be prompted to create a new account or sign in to an existing one. Follow the on-screen instructions to complete this step.
Congratulations! You have successfully installed the Ledger Live app on your iPhone. This application will serve as your gateway to managing your cryptocurrencies securely using your Ledger Nano X. Make sure to keep the app updated to access the latest features and security enhancements.
Connecting Ledger Nano X to iPhone
To fully utilize the capabilities of your Ledger Nano X with your iPhone, you need to establish a connection between the two devices. Follow the steps below to connect your Ledger Nano X to your iPhone:
- Ensure Bluetooth Is Enabled: On your iPhone, go to the “Settings” app and make sure that Bluetooth is turned on. You can find the Bluetooth option in the “Control Center” or by navigating to “Settings” > “Bluetooth.”
- Launch Ledger Live: Open the Ledger Live app on your iPhone. If you’re not already signed in, enter your account credentials to access the main dashboard.
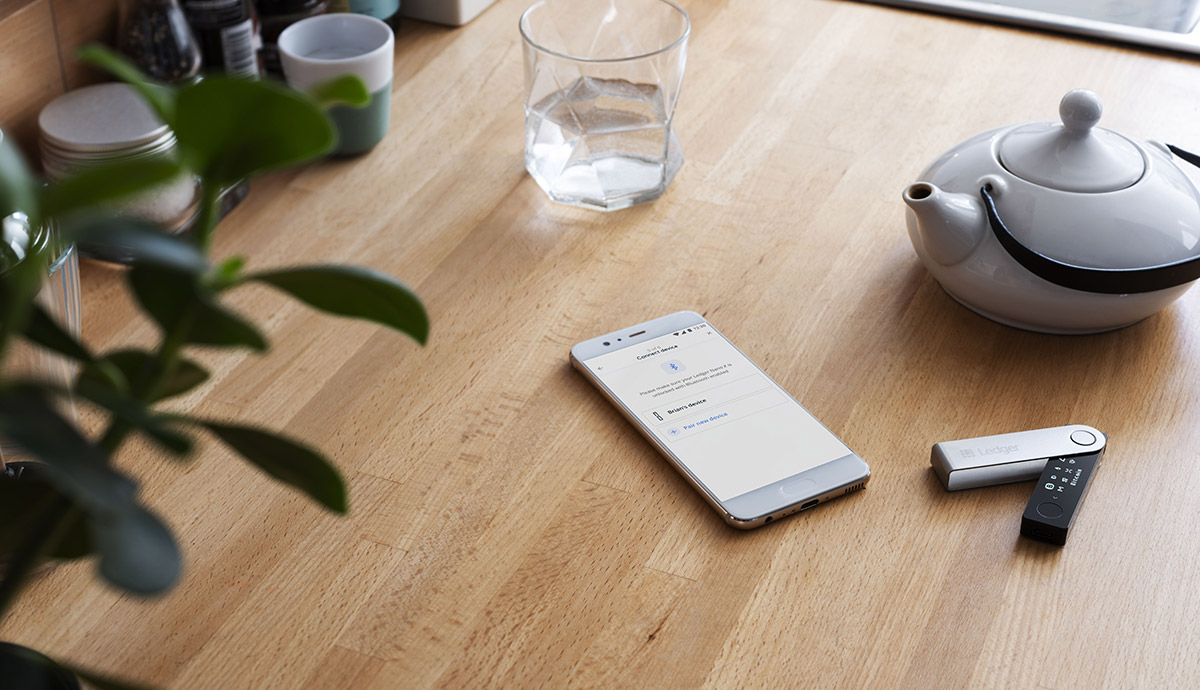
- Connect the Device: With the Ledger Live app open, press the button on your Ledger Nano X to wake it up. On the app, tap the “Manager” tab at the bottom and select “Connect a New Device.”
- Pair with Bluetooth: Follow the on-screen instructions to pair your Ledger Nano X with your iPhone via Bluetooth. Make sure the Bluetooth mode is enabled on your Ledger Nano X when prompted.
- Confirm Device Connection: Once the pairing process is complete, you will see your Ledger Nano X listed as a connected device in the Ledger Live app. Verify that the device name matches the name displayed on your Ledger Nano X screen.
Congratulations! You have successfully connected your Ledger Nano X to your iPhone. This enables seamless communication between the two devices, allowing you to securely manage your cryptocurrencies through the Ledger Live app. Remember to keep your Ledger Nano X and iPhone within close proximity to maintain a stable Bluetooth connection.
Creating a New Wallet on Ledger Nano X
Once your Ledger Nano X is set up and connected to your iPhone, you can create a new wallet to securely store your cryptocurrencies. Follow the steps below to create a new wallet on your Ledger Nano X:
- Access Ledger Live: Open the Ledger Live app on your iPhone and ensure that your Ledger Nano X is connected.
- Select Create a New Wallet: In the Ledger Live app, navigate to the “Accounts” tab at the bottom and select “Add Account.”
- Choose a Coin: Choose the cryptocurrency you want to create a wallet for from the list of supported coins. Ledger Live supports a wide range of cryptocurrencies, including Bitcoin, Ethereum, Litecoin, and many more.
- Install App on Device: If this is the first time you are creating a wallet for the selected cryptocurrency, Ledger Live will prompt you to install the corresponding app on your Ledger Nano X. Follow the instructions on the app to install the required app.
- Confirm Installation: Once the app is installed on your Ledger Nano X, confirm the installation by pressing the right button on your device.
- Create a Wallet: Ledger Live will now prompt you to create a new wallet for the selected cryptocurrency. Follow the on-screen instructions to set a name for the wallet and configure any additional settings, such as account derivation paths or advanced security options.
- Confirm on Device: After configuring the wallet settings, your Ledger Nano X will display a confirmation prompt. Verify that the information displayed on your device matches the details shown on the Ledger Live app, and confirm the creation of the wallet by pressing the right button.
Congratulations! You have successfully created a new wallet for your chosen cryptocurrency on your Ledger Nano X. Repeat these steps to create additional wallets for different cryptocurrencies within the Ledger Live app. Remember to keep your recovery phrase safe and secure, as it is essential for accessing your wallet and recovering your funds in case of any unforeseen circumstances.
Setting up Passphrase (Optional)
The Ledger Nano X provides an additional layer of security through the use of a passphrase. A passphrase is an extra word or phrase that you can add to your recovery phrase, making it even more challenging for unauthorized access. Enabling a passphrase is optional but highly recommended for users seeking enhanced security. Follow the steps below to set up a passphrase on your Ledger Nano X:
- Access Security Settings: Connect your Ledger Nano X to your iPhone and launch the Ledger Live app. Ensure that your device is unlocked and connected.
- Navigate to Security Settings: In the Ledger Live app, go to the “Settings” tab at the bottom and select “Security.” This will take you to the security settings menu.
- Enable Passphrase: Within the security settings, you will find an option to enable the passphrase. Toggle the switch to enable the passphrase feature.
- Enter a Passphrase: Once the passphrase is enabled, you will be prompted to enter a passphrase on your Ledger Nano X. Use the device buttons to navigate and select characters, and the right button to confirm each character. The passphrase can consist of letters, numbers, and symbols.
- Confirm Passphrase: After entering the passphrase, the Ledger Nano X will ask you to confirm it by re-entering the same passphrase. This ensures that there are no typing errors or discrepancies.
- Backup Passphrase: Just like your recovery phrase, it is crucial to properly back up your passphrase. Make sure to write it down on your recovery sheet and store it in a safe and secure location.
Congratulations! You have successfully set up a passphrase for your Ledger Nano X. With this additional security measure in place, you can have peace of mind knowing that your cryptocurrencies are further protected. Remember that the passphrase is required in addition to your recovery phrase for accessing your wallet, so keep it safe and always have a backup.
Managing Cryptocurrencies on Ledger Live App
The Ledger Live app offers a user-friendly interface for managing your cryptocurrencies on your Ledger Nano X. You can view your account balances, send and receive cryptocurrencies, and monitor your portfolio performance. Follow the steps below to effectively manage your cryptocurrencies on the Ledger Live app:
- Open Ledger Live: Launch the Ledger Live app on your iPhone and ensure that your Ledger Nano X is connected.
- Select an Account: On the main dashboard, you will see a list of your added accounts. Tap on the account you want to manage or view the details of.
- View Balances: Once you select an account, you can view the balance and value of cryptocurrencies held within that account. Ledger Live provides real-time updates on prices and portfolio performance.
- Send Cryptocurrencies: To send cryptocurrencies from your Ledger Nano X, tap on the “Send” button. Enter the recipient’s wallet address, the amount you want to send, and any additional transaction details. Follow the on-screen instructions to confirm and sign the transaction using the Ledger Nano X.
- Receive Cryptocurrencies: To receive cryptocurrencies into your Ledger Nano X, tap on the “Receive” button. A unique wallet address will be generated for the selected cryptocurrency. Share this address with the sender, who can then transfer the funds to your wallet address.
- Manage Accounts: Ledger Live allows you to add and manage multiple accounts for different cryptocurrencies. To add a new account, go to the “Accounts” tab and select “Add Account.” Follow the on-screen instructions to choose the cryptocurrency and set up the account.
- Portfolio Management: Ledger Live provides a comprehensive overview of your cryptocurrency portfolio. You can track the value and performance of your holdings, set price alerts, and customize your portfolio view to meet your specific needs.
- Update Accounts: Ledger Live regularly updates and synchronizes your accounts to provide accurate information. However, if you want to manually refresh your accounts or if you notice any discrepancies, you can do so by pulling down on the account page to trigger a refresh.
By utilizing the features available on the Ledger Live app, you can efficiently manage your cryptocurrencies, keep track of your portfolio, and securely perform transactions with your Ledger Nano X. Always ensure that your Ledger Nano X is connected and updated to the latest firmware for a seamless and secure experience.
Sending Cryptocurrencies from Ledger Nano X
Sending cryptocurrencies from your Ledger Nano X is a straightforward process that ensures secure and reliable transactions. Follow the steps below to send cryptocurrencies from your Ledger Nano X using the Ledger Live app:
- Open Ledger Live: Launch the Ledger Live app on your iPhone and ensure that your Ledger Nano X is securely connected.
- Select an Account: From the main dashboard, choose the account that holds the cryptocurrency you want to send.
- Tap on “Send”: Look for the “Send” button or icon, and tap on it to initiate the sending process.
- Enter Recipient’s Address: In the provided field, enter the wallet address of the recipient. Ensure the address is accurate and matches the intended recipient.
- Specify Amount: Enter the amount of cryptocurrency you wish to send. Ensure the entered amount is correct and double-check it before proceeding.
- Set Transaction Fee: Depending on the network congestion and desired transaction speed, you may have the option to adjust the transaction fee. You can choose from different fee levels, such as low, medium, or high. Higher fees generally result in faster confirmations, while lower fees may take longer.
- Confirm and Sign Transaction: Follow the on-screen instructions to confirm the transaction details on your Ledger Nano X. Verify the recipient’s address, the amount, and the transaction fee. Once you have reviewed the details, sign the transaction using your Ledger Nano X by following the prompts on the device.
- Monitor Transaction Status: After signing the transaction, Ledger Live will provide a transaction ID (TXID) or a confirmation message. You can use this information to track the progress and confirmation of your transaction on the respective blockchain explorer.
Congratulations! You have successfully sent cryptocurrencies from your Ledger Nano X. It is important to double-check all transaction details, including the recipient’s address and the amount, as transactions on the blockchain are irreversible. By using your Ledger Nano X and Ledger Live, you can have peace of mind knowing that your transactions are secure and your private keys are safely stored on the device.
Receiving Cryptocurrencies on Ledger Nano X
Receiving cryptocurrencies on your Ledger Nano X allows you to securely store and manage your digital assets. Follow the steps below to receive cryptocurrencies on your Ledger Nano X using the Ledger Live app:
- Open Ledger Live: Launch the Ledger Live app on your iPhone and ensure that your Ledger Nano X is securely connected.
- Select an Account: From the main dashboard, choose the account for which you want to receive cryptocurrencies.
- Tap on “Receive”: Look for the “Receive” button or icon, and tap on it to generate your receiving address.
- Verify Receiving Address: Ledger Live will generate a unique receiving address for the selected cryptocurrency. Double-check the address displayed on your Ledger Nano X screen and ensure that it matches the address shown in the app.
- Share the Receiving Address: Once you’ve verified the receiving address, you can share it with the sender or the platform from which you are expecting a cryptocurrency transfer. Use the provided address or scan the QR code with the sender’s device or application.
- Wait for Confirmation: Once a transaction is initiated to the generated receiving address, you will need to wait for the transaction to be confirmed on the respective blockchain. The confirmation time may vary depending on the cryptocurrency and network congestion.
- Check Transaction History: After the transaction is confirmed, you can check your transaction history in the Ledger Live app. The incoming transaction will be recorded in your account’s transaction log.
Congratulations! You have successfully received cryptocurrencies on your Ledger Nano X. Always verify the receiving address on your device and ensure it matches the one displayed in the Ledger Live app to avoid any potential mistakes or security risks. By utilizing your Ledger Nano X, you can securely receive and store your cryptocurrencies, knowing that your private keys are protected.
Signing Transactions with Ledger Nano X
One of the key security features of the Ledger Nano X is its ability to securely sign transactions using your private keys. By signing transactions with your Ledger Nano X, you can ensure the integrity and authenticity of your cryptocurrency transactions. Follow the steps below to sign transactions using your Ledger Nano X:
- Open Ledger Live: Launch the Ledger Live app on your iPhone and ensure that your Ledger Nano X is securely connected.
- Select an Account: Choose the account associated with the cryptocurrency you want to transact with.
- Initiate the Transaction: Within the selected account, look for the option to send or receive cryptocurrencies, depending on your transaction needs.
- Enter Transaction Details: Provide the necessary information for the transaction, including the recipient’s wallet address and the amount you wish to send or receive.
- Confirm the Transaction: Once you have reviewed the transaction details, confirm the transaction on the Ledger Live app. This will prompt the Ledger Nano X to display the transaction details on its screen.
- Verify and Sign: Carefully review the transaction details displayed on your Ledger Nano X. Check that the recipient’s address and transaction amount are correct. If everything looks accurate, confirm and sign the transaction using the physical buttons on your Ledger Nano X. This will generate a digital signature that ensures the transaction is valid and secure.
- Transaction Confirmation: After signing the transaction, Ledger Live will process and broadcast the transaction on the respective blockchain network. You can monitor the progress and confirmation status of the transaction through the transaction history in Ledger Live.
Congratulations! You have successfully signed a transaction using your Ledger Nano X. By utilizing your Ledger Nano X to sign transactions, you can have confidence in the security and authenticity of your cryptocurrency transfers. Always verify the transaction details on both the Ledger Nano X and the Ledger Live app before confirming and signing the transactions for added peace of mind and security.
Updating Firmware on Ledger Nano X
Updating the firmware on your Ledger Nano X is essential to ensure that your device has the latest security features, bug fixes, and performance improvements. Ledger regularly releases firmware updates to enhance the overall user experience and protect your cryptocurrencies. Follow the steps below to update the firmware on your Ledger Nano X:
- Connect Ledger Nano X: Make sure your Ledger Nano X is connected to your iPhone using the provided USB cable.
- Open Ledger Live: Launch the Ledger Live app on your iPhone and ensure that it is up to date.
- Navigate to Device: On the Ledger Live app, go to the “Manager” tab at the bottom and select your connected Ledger Nano X.
- Check Firmware: In the device settings, Ledger Live will display the current firmware version installed on your Ledger Nano X. Compare this version with the latest available version on the Ledger website or the official Ledger Live app.
- Update Firmware: If a firmware update is available, Ledger Live will prompt you to update your device. Follow the on-screen instructions and confirm the update process.
- Wait for Firmware Update: The firmware update process may take a few minutes. Allow the update to complete without disconnecting your Ledger Nano X from your iPhone or closing the Ledger Live app.
- Restart Ledger Nano X: After the firmware update is complete, Ledger Live will prompt you to restart your Ledger Nano X. Follow the instructions and restart your device.
Congratulations! You have successfully updated the firmware on your Ledger Nano X. Regularly checking for firmware updates and keeping your device up to date is crucial for maintaining the highest level of security for your cryptocurrencies. By staying updated, you can take advantage of new features and improvements while ensuring the utmost protection for your digital assets. Always follow the official instructions provided by Ledger to ensure a smooth and secure firmware update process.
Troubleshooting Common Issues with Ledger Nano X
While the Ledger Nano X is a reliable and secure hardware wallet, you may encounter some common issues during its usage. Below are troubleshooting steps to address these issues:
- Connection Problems: If you’re having trouble connecting your Ledger Nano X to your iPhone, ensure that Bluetooth is enabled on both devices. Try restarting your iPhone and Ledger Nano X, and make sure you have the latest version of the Ledger Live app installed.
- Unresponsive Device: If your Ledger Nano X becomes unresponsive, try disconnecting and reconnecting it to your iPhone. If that doesn’t work, force restart the device by pressing both buttons simultaneously for a few seconds.
- App Compatibility: Confirm that the cryptocurrency app you’re using on your Ledger Nano X is compatible with the device and has the latest version installed. You can check the Ledger website or Ledger Live app for a list of supported apps.
- Incorrect Balance: If you see an incorrect balance on your Ledger Live app, ensure that you are selecting the correct account and that the app is synchronized and up to date. You can manually refresh the account by pulling down on the account page.
- Failed Transaction: If a transaction fails or is stuck, check that you’ve entered the correct recipient address and have sufficient funds. Additionally, verify that you’re using the correct network and have selected an appropriate transaction fee.
- Forgotten PIN or Passphrase: If you forget your PIN or passphrase, it may lead to restricted access to your Ledger Nano X. Unfortunately, there is no way to recover this information, so it is essential to keep your recovery phrase safe and secure.
- Incompatible Cable or Device: Ensure you are using the original USB cable that came with your Ledger Nano X, as using a different cable may result in connection issues. Additionally, try connecting to a different USB port or iPhone to rule out any compatibility problems.
If you encounter persistent issues or are unable to resolve an issue with your Ledger Nano X, it is recommended to visit the Ledger Support website or contact their customer support for further assistance. They have a dedicated support team that can help troubleshoot and resolve any issues you may be facing.
Tips and Best Practices for Using Ledger Nano X with iPhone
Using the Ledger Nano X with your iPhone provides a secure way to manage your cryptocurrencies. To maximize the effectiveness and security of your setup, follow these tips and best practices:
- Keep Software Up to Date: Regularly update the Ledger Live app on your iPhone and the firmware on your Ledger Nano X to ensure you have the latest security features, bug fixes, and performance improvements.
- Store Recovery Phrase Securely: Safely store the recovery phrase for your Ledger Nano X in a secure location. Consider using a hardware wallet backup device or writing it down on durable material that will withstand the test of time.
- Verify Ledger Live URLs: When visiting the Ledger website or accessing Ledger Live, ensure that you’re on the official Ledger domain and not a phishing website. Always double-check the URL to prevent falling victim to scams.
- Use Trusted Sources: Only download apps and updates from trusted sources such as the App Store or official Ledger website. Avoid downloading any software or apps from unofficial third-party sources.
- Double-Check Addresses: Before sending or receiving cryptocurrencies, carefully verify the wallet address on both your Ledger Nano X and Ledger Live app. This helps prevent sending funds to incorrect or fraudulent addresses.
- Practice Device Hygiene: Keep your Ledger Nano X and iPhone free from malware and attacks by regularly scanning for viruses and keeping your devices password-protected. Avoid connecting your Ledger Nano X to untrusted or compromised devices.
- Backup and Test Recovery Phrase: After setting up your Ledger Nano X, test the recovery phrase by resetting the device and restoring it using the provided phrase. This ensures that you have correctly backed up your wallet and can successfully recover it if needed.
- Avoid Public Wi-Fi: When accessing the Ledger Live app or performing transactions, avoid using public Wi-Fi networks that may not be secure. Opt for a trusted and secure network to minimize the risk of interception and data theft.
- Educate Yourself: Stay informed about cryptocurrency security best practices and be vigilant of potential attack vectors. Keep up with the latest news and insights to protect your digital assets effectively.
By following these tips and best practices, you can ensure a secure and seamless experience when using your Ledger Nano X with your iPhone. By prioritizing security measures and practicing prudent device management, you can protect your cryptocurrencies and have peace of mind knowing your digital assets are safe and secure.