
Create a Gemini Account
Before you can transfer Bitcoin from Gemini to your Ledger Nano X, you need to create a Gemini account. Gemini is a trusted and secure cryptocurrency exchange platform.
To create a Gemini account, follow these steps:
- Go to the Gemini website (www.gemini.com) and click on the “Get Started” button.
- Fill out the registration form with your personal details, including your name, email address, and password. Make sure to choose a strong password to protect your account.
- Verify your email address by clicking on the verification link sent to your inbox. This step is essential to activate your account.
- Provide additional information, such as your phone number, date of birth, and a valid ID document, to complete the identity verification process. Gemini takes security seriously to ensure the safety of your funds and comply with regulatory standards.
- Set up two-factor authentication (2FA) for an added layer of security. Gemini supports various 2FA options, including SMS authentication and authenticator apps like Google Authenticator or Authy.
- Once your account is set up, you can log in to Gemini and explore its features. Familiarize yourself with the platform’s interface and navigation to make the transfer process easier.
Creating a Gemini account is a straightforward process, but it is crucial to follow the prescribed steps and provide accurate information to avoid any issues in the future. Once you have successfully created your Gemini account, you are ready to proceed with setting up your Ledger Nano X.
Set Up Your Ledger Nano X
The Ledger Nano X is a popular hardware wallet that provides a secure and convenient way to store your Bitcoin and other cryptocurrencies. Before you can transfer Bitcoin from Gemini to your Ledger Nano X, you need to set it up. Here’s how:
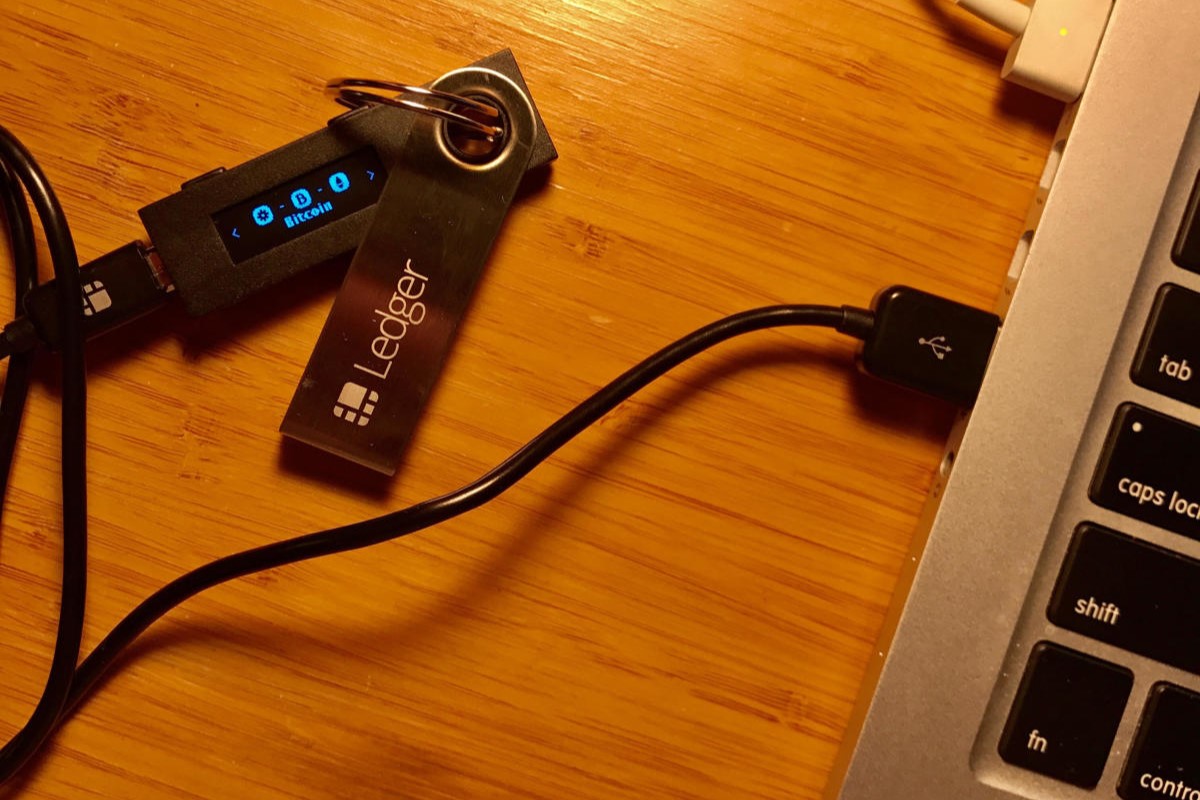
- Unbox your Ledger Nano X and connect it to your computer using the supplied USB cable.
- To start the setup process, press both buttons on the device simultaneously to power it on.
- Follow the instructions on the device screen. You will be asked to select a PIN code. Make sure to choose a strong and unique PIN that you can remember. This PIN will be needed every time you want to access your Ledger Nano X.
- Once your PIN is set, the device will generate a recovery phrase. This phrase is a crucial backup in case you forget your PIN or lose your device. Write down the recovery phrase on the provided recovery sheet. Make sure to store it in a secure location that is not easily accessible to others.
- The device will then prompt you to confirm the recovery phrase by asking you to select specific words in the correct order. This step ensures that you have properly recorded your recovery phrase.
- After confirming your recovery phrase, the device will ask you to install the Ledger Live app on your computer. Ledger Live is the official software for managing your Ledger device and cryptocurrencies.
- Visit the Ledger Live website (www.ledger.com/ledger-live) and download the app for your specific operating system.
- Install Ledger Live and complete the setup process by following the on-screen instructions. You will need to create a password for Ledger Live and may be asked to perform additional security steps, such as enabling two-factor authentication.
Setting up your Ledger Nano X is a crucial step to ensure the security of your Bitcoin holdings. It is essential to follow the instructions carefully and keep your PIN and recovery phrase safe. Once your Ledger Nano X is set up and connected to your computer, you can proceed with installing the Ledger Live app.
Install Ledger Live
After setting up your Ledger Nano X, the next step is to install Ledger Live on your computer. Ledger Live is the official software provided by Ledger to manage and interact with your Ledger device and cryptocurrencies. Follow these steps to install Ledger Live:
- Visit the Ledger Live website (www.ledger.com/ledger-live) and download the Ledger Live application for your operating system. Ledger Live supports Windows, macOS, and Linux.
- Once the download is complete, open the installation file and follow the on-screen instructions to install Ledger Live.
- If prompted, choose the installation path for the application, or simply use the default path provided.
- After the installation is complete, launch Ledger Live.
- Connect your Ledger Nano X to your computer using the supplied USB cable. Make sure your Ledger Nano X is powered on and unlocked using your PIN code.
- Once connected, Ledger Live will automatically detect your Ledger Nano X and display it in the device list.
- Follow the on-screen prompts in Ledger Live to complete the device setup process. This may involve confirming firmware updates or enabling additional security features.
- After the setup process is complete, you will be greeted with the Ledger Live dashboard, where you can manage your cryptocurrencies.
Installing Ledger Live is crucial to enable seamless communication between your Ledger Nano X and your computer. It provides a user-friendly interface to view your account balances, send and receive cryptocurrencies, and manage your portfolio. Ledger Live also ensures that your transactions are secure by verifying them on your Ledger Nano X device.
Now that you have Ledger Live installed and your Ledger Nano X connected, you are ready to proceed with transferring Bitcoin from your Gemini account to your Ledger Nano X.
Connect Your Ledger Nano X to Your Computer
Once you have installed Ledger Live, the next step is to connect your Ledger Nano X to your computer. This will allow you to manage your cryptocurrencies and facilitate the transfer of Bitcoin from your Gemini account. Here’s how to connect your Ledger Nano X:
- Ensure that your Ledger Nano X is powered on and has been set up with a PIN code as described in the previous section.
- Locate the USB cable that came with your Ledger Nano X and connect one end to the device. Then, connect the other end to an available USB port on your computer.
- Once connected, your computer should recognize the Ledger Nano X as a new device and install the necessary drivers automatically.
- On your Ledger Nano X, navigate through the menu using the buttons on the device until you see the screen that reads “Use wallet to view accounts.” Press both buttons simultaneously to enter the wallet mode.
- The device screen should now display a message that it is waiting for a connection.
- Open Ledger Live on your computer if it is not already open. The application should detect your Ledger Nano X automatically and display it in the device list on the left-hand side of the screen.
- Click on your Ledger Nano X in the device list to select it.
- If prompted, verify your device’s firmware version and follow any prompts to update the firmware if necessary. Keeping your device’s firmware up to date ensures optimal security and compatibility.
With your Ledger Nano X successfully connected to your computer, you are now ready to proceed with opening Ledger Live and initiating the transfer of Bitcoin from your Gemini account. Remember to keep your Ledger Nano X safe and secure, and never share your PIN code with anyone.
Open Ledger Live and Select Bitcoin
Now that your Ledger Nano X is connected to your computer, the next step is to open Ledger Live and select Bitcoin as the cryptocurrency you want to manage and transfer. Follow these steps to open Ledger Live and select Bitcoin:
- If you have not done so already, launch the Ledger Live application on your computer. It should automatically detect your connected Ledger Nano X and display it in the device list on the left-hand side of the screen.
- Click on your Ledger Nano X in the device list to select it.
- Upon selecting your Ledger Nano X, Ledger Live will verify the connection and display the available cryptocurrencies that are supported by your device.
- Locate and click on the Bitcoin icon in the list of supported cryptocurrencies. This will open the Bitcoin account associated with your Ledger Nano X.
- In the Bitcoin account view, you can see your Bitcoin balance, recent transactions, and other account details. Ledger Live provides a user-friendly interface for managing your Bitcoin holdings.
- If your Bitcoin balance does not appear immediately, click on the “Synchronize” button in Ledger Live to update the balance and transaction history.
- You can now use Ledger Live to send Bitcoin from your Gemini account to your Ledger Nano X. Keep in mind that you will need to provide your Ledger Nano X’s Bitcoin address to Gemini to initiate the transfer.
- Before proceeding with the transfer, make sure your Ledger Nano X is securely connected to your computer and that you are on the correct Bitcoin account screen in Ledger Live.
By opening Ledger Live and selecting Bitcoin, you have accessed the account associated with your Ledger Nano X. Ledger Live provides a comprehensive interface to manage your Bitcoin transactions and monitor your account activity. In the next steps, we will guide you through the process of selecting the account to receive Bitcoin and finding your Ledger Nano X’s Bitcoin address.
Choose the Account to Receive Bitcoin
When transferring Bitcoin from your Gemini account to your Ledger Nano X, you need to choose the specific account on your Ledger Nano X that will receive the Bitcoin. Ledger Live enables you to manage multiple accounts for various cryptocurrencies. Follow these steps to select the account to receive Bitcoin:
- Ensure that Ledger Live is open on your computer and your Ledger Nano X is connected and selected in the device list.
- In Ledger Live, navigate to the Bitcoin account by clicking on the Bitcoin icon in the list of supported cryptocurrencies, as mentioned in the previous section.
- Within the Bitcoin account view, you will see a list of sub-accounts (also known as “receive accounts”) associated with your Ledger Nano X.
- Choose the desired sub-account or create a new one to receive the Bitcoin. Each sub-account has a unique Bitcoin address associated with it.
- If you already have a sub-account specifically for receiving Bitcoin, you can select it from the list. If not, you can create a new sub-account by clicking on the “Add Account” or “Receive” button within the Bitcoin account view.
- If creating a new sub-account, Ledger Live will generate a new Bitcoin address for that account. Make sure to note or copy the Bitcoin address as you will need to provide it to Gemini for the transfer.
- Review the account details to ensure you have selected the correct account to receive the Bitcoin. Confirm that the bitcoin address associated with the account matches the one you will provide to Gemini.
- With the account selected or created, and the Bitcoin address noted or copied, you are now ready to proceed with the withdrawal of Bitcoin from Gemini.
Selecting the appropriate account to receive Bitcoin is crucial to ensure that the funds are credited to the correct address on your Ledger Nano X. Double-check the Bitcoin address before providing it to Gemini to avoid any errors in the transfer process. Once you have chosen the account, you can move on to the next steps of the transfer process, which include withdrawing Bitcoin from Gemini and pasting your Ledger Nano X’s Bitcoin address.
Find Your Ledger Nano X Bitcoin Address
Before you can proceed with transferring Bitcoin from Gemini to your Ledger Nano X, you need to find the Bitcoin address associated with your selected account on your Ledger device. This address is where you will receive the Bitcoin. Here’s how to find your Ledger Nano X Bitcoin address:
- Make sure your Ledger Nano X is connected to your computer and selected in Ledger Live, as explained in the previous sections.
- In Ledger Live, navigate to the Bitcoin account by clicking on the Bitcoin icon in the list of supported cryptocurrencies.
- Within the Bitcoin account view, locate the sub-account or receive account that you have chosen to receive the Bitcoin. This account should have a unique Bitcoin address associated with it.
- To find the Bitcoin address, click on the sub-account or receive account. The address will be displayed on the screen along with a QR code representation.
- You can either note down the Bitcoin address or use the copy button (usually designated by a symbol like two overlapping squares) to easily copy the address to your clipboard.
- It is crucial to ensure the accuracy of the Bitcoin address before proceeding with the transfer. Double-check that the copied address matches the one shown on Ledger Live to avoid any mistakes.
- Your Ledger Nano X Bitcoin address is a unique identifier that is specific to your device and account. It is important to note that this address can be used multiple times to receive Bitcoin.
- Keep in mind that Bitcoin transactions are irreversible, so it is essential to provide the correct Bitcoin address to Gemini to avoid the loss of your funds.
By finding your Ledger Nano X Bitcoin address, you are now ready to proceed with the next steps, which involve logging in to your Gemini account, withdrawing Bitcoin, and pasting your Ledger Nano X Bitcoin address. Safely store your Ledger Nano X and backup your recovery phrase to ensure the security of your Bitcoin holdings.
Log in to Your Gemini Account
Before you can transfer Bitcoin from your Gemini account to your Ledger Nano X, you need to log in to your Gemini account. Follow these steps to access your Gemini account:
- Open your preferred web browser and navigate to the Gemini website (www.gemini.com).
- Click on the “Log In” button located at the top right corner of the website. This will take you to the login page.
- Enter your registered email address and password in the provided fields on the login page.
- If you have enabled two-factor authentication (2FA), you will be prompted to provide the necessary verification code. This can be obtained via SMS, authenticator apps, or other approved 2FA methods.
- Once all the required information is provided, click on the “Log In” button to proceed.
- If the provided information is correct, you will be successfully logged in to your Gemini account.
- Take a moment to familiarize yourself with the dashboard and navigation of the Gemini platform. This will help you navigate through the withdrawal process smoothly.
It is important to ensure that you are accessing the official Gemini website and not a phishing site. Verify the website’s URL, look for the secure lock icon in the browser address bar, and exercise caution when entering your login credentials. Gemini takes security seriously and provides various measures to protect your account and funds.
After logging in to your Gemini account, you can proceed to the next steps, which involve withdrawing Bitcoin from Gemini and pasting your Ledger Nano X Bitcoin address to initiate the transfer.
Withdraw Bitcoin from Gemini
Now that you are logged in to your Gemini account, you can initiate the process to withdraw Bitcoin from Gemini and transfer it to your Ledger Nano X. Follow these steps to withdraw Bitcoin:
- On the Gemini dashboard, locate and click on the “Transfer” or “Withdraw” button. The exact wording may vary, but the goal is to initiate a withdrawal from your Gemini account.
- Select Bitcoin as the cryptocurrency you want to withdraw from the available options.
- Enter the amount of Bitcoin you wish to withdraw. You can either enter the precise amount or select from the available options, such as “Max” to withdraw the maximum amount available in your Gemini account. Make sure to leave enough balance in your Gemini account to cover any fees that may be charged.
- Paste the Bitcoin address associated with your selected account on your Ledger Nano X into the “Destination Address” or “Recipient Address” field. Double-check that the address is accurate to ensure that the Bitcoin is transferred to the correct account on your Ledger Nano X.
- Review the withdrawal details, including the amount, destination address, and any applicable fees. Ensure that all information is correct before proceeding.
- If you have enabled two-factor authentication (2FA) for your Gemini account, you will likely be prompted to enter the verification code generated by your 2FA method to authenticate the withdrawal.
- Once you have reviewed and confirmed all the withdrawal details, click on the “Withdraw” or “Confirm” button (or similar) to initiate the Bitcoin withdrawal from your Gemini account.
After initiating the withdrawal, Gemini will process the transaction and send the Bitcoin to the Bitcoin address you provided. The duration of the withdrawal process can vary depending on network congestion and other factors. You can monitor the progress of the transaction on the Gemini platform.
It is important to exercise caution when withdrawing Bitcoin and ensure the accuracy of the recipient address on your Ledger Nano X. Bitcoin transactions are irreversible, and any mistakes in the recipient address can result in the permanent loss of funds. Take the necessary time to verify all details before confirming the withdrawal.
In the next steps, we will guide you through the process of confirming the withdrawal on Gemini and checking the Bitcoin transaction on Ledger Live.
Paste Your Ledger Nano X Bitcoin Address
After initiating the withdrawal process on Gemini, the next step is to paste the Bitcoin address associated with your Ledger Nano X. This ensures that the Bitcoin you withdraw from Gemini is sent to the correct account on your Ledger Nano X. Follow these steps to paste your Ledger Nano X Bitcoin address:
- Ensure that you have the Bitcoin address copied or noted down from your Ledger Live account, as explained in the previous sections.
- In the withdrawal process on the Gemini platform, locate the field labeled “Destination Address” or “Recipient Address”. This is where you need to provide the Bitcoin address.
- Click on the field and right-click your mouse or use the keyboard shortcut for paste (Ctrl+V on Windows, Command+V on macOS) to insert the Bitcoin address.
- Double-check that the pasted address matches the Bitcoin address associated with your chosen account on your Ledger Nano X. This helps ensure that the Bitcoin is sent to the correct destination and avoids the risk of losing funds due to an incorrect address.
- Confirm that the Bitcoin address has been pasted accurately and looks identical to the address shown in Ledger Live. Verification is essential to prevent any mistakes in the withdrawal process.
- Review the withdrawal details once again to confirm the accuracy of the Bitcoin address and other information.
- If you are satisfied with the provided details and the pasted Bitcoin address, proceed to confirm the withdrawal on Gemini.
Pasting your Ledger Nano X Bitcoin address is a critical step in the withdrawal process from Gemini. It ensures that the Bitcoin is securely transferred to your Ledger Nano X’s designated account. Take the time to verify the accuracy of the pasted address to avoid any potential issues with the transfer.
After confirming the withdrawal on Gemini, you can proceed to the next steps, which involve checking the Ledger Live app for the Bitcoin transaction and verifying the transaction on your Ledger Nano X device.
Confirm the Withdrawal on Gemini
After pasting your Ledger Nano X Bitcoin address on Gemini, the next step is to confirm the withdrawal. This ensures that the Bitcoin is transferred from your Gemini account to your Ledger Nano X. Follow these steps to confirm the withdrawal on Gemini:
- Review the withdrawal details, including the amount of Bitcoin being transferred and the recipient address (the Bitcoin address associated with your Ledger Nano X).
- Double-check that the provided information is accurate, as Bitcoin transactions are irreversible once confirmed.
- If you are satisfied with the withdrawal details, click on the “Confirm” or “Withdraw” button (or a similar action) on the Gemini platform.
- Gemini may require additional forms of authentication or verification. Follow any prompts or instructions provided to complete the withdrawal process.
- Keep an eye on the confirmation message or screen on Gemini, which indicates that the withdrawal has been successfully confirmed.
- Wait for the withdrawal to be processed by Gemini. The time taken for processing can vary depending on network congestion and other factors. Gemini may also send you email notifications about the progress of your withdrawal.
It is important to carefully review the withdrawal details and confirm the transaction only when you are certain about the accuracy of the Bitcoin address and other information on Gemini. Once the withdrawal is confirmed, it cannot be reversed, so it is crucial to be attentive during this step.
After confirming the withdrawal on Gemini, the next steps involve checking the Ledger Live app for the Bitcoin transaction and verifying the transaction on your Ledger Nano X device. These steps ensure that the Bitcoin transfer is completed securely and effectively.
Check the Ledger Live App for the Bitcoin Transaction
After confirming the withdrawal on Gemini, the next step is to check the Ledger Live app to monitor the progress of the Bitcoin transaction. Ledger Live provides a convenient interface to view your account activity and track the status of your transactions. Follow these steps to check the Ledger Live app for the Bitcoin transaction:
- Ensure that Ledger Live is open on your computer and your Ledger Nano X is connected and selected in the device list.
- In Ledger Live, navigate to the Bitcoin account by clicking on the Bitcoin icon in the list of supported cryptocurrencies.
- Within the Bitcoin account view, you should be able to see the transaction history of your account, including the recent Bitcoin withdrawal you initiated from Gemini.
- Look for the specific transaction related to the withdrawal from Gemini. It should display details such as the transaction amount, date and time, transaction ID, and confirmation status.
- The transaction status will typically start as “Pending” and change to “Confirmed” once it has been successfully included in a block on the Bitcoin blockchain.
- You can click on the transaction to view more details, including the number of confirmations received. Each confirmation indicates that the Bitcoin transaction has been verified and added to subsequent blocks, increasing the security of the transaction.
- Keep in mind that the time it takes for a transaction to be confirmed can vary depending on network congestion and other factors. It may take several minutes to several hours for the transaction to receive the required number of confirmations.
- Continue monitoring the Ledger Live app for updates on the Bitcoin transaction until it reaches the desired number of confirmations.
Checking the Ledger Live app for the Bitcoin transaction allows you to stay informed about the status of the withdrawal from Gemini. Monitoring the confirmation status and the number of confirmations received gives you confidence that the Bitcoin transfer is progressing as expected.
In the next steps, we will guide you through the process of verifying the Bitcoin transaction on your Ledger Nano X device for an additional layer of security and peace of mind.
Verify the Transaction on the Ledger Nano X
After checking the Ledger Live app for the Bitcoin transaction, the next step is to verify the transaction on your Ledger Nano X device. Verifying the transaction on your hardware wallet adds an extra layer of security and ensures that the transaction hasn’t been tampered with. Follow these steps to verify the transaction on your Ledger Nano X:
- Ensure that your Ledger Nano X is connected to your computer and unlocked using your PIN code.
- On your Ledger Nano X device, navigate through the menu and open the Bitcoin app.
- In the Bitcoin app, look for the “Transactions” section or a similar option that allows you to view transaction details.
- Locate the transaction that corresponds to the withdrawal from Gemini. It should display details such as the transaction amount, date and time, and the recipient address.
- Verify that the transaction details on your Ledger Nano X match the information you previously confirmed on Ledger Live. Cross-check the transaction amount, the recipient address, and any other relevant details.
- Confirm that the verified transaction aligns with your expectations and matches the withdrawal you initiated from Gemini.
- If the transaction details on your Ledger Nano X match the information displayed on Ledger Live, you can be confident that the Bitcoin transaction has been successfully received by your Ledger Nano X.
- Keep in mind that the transaction status on your Ledger Nano X may initially show as “Unconfirmed” and change to “Confirmed” once it receives the required number of confirmations on the Bitcoin blockchain.
- Continue to monitor the transaction status on both Ledger Live and your Ledger Nano X until it is confirmed and reaches the desired number of confirmations.
Verifying the transaction on your Ledger Nano X enhances the security of your Bitcoin holdings. By confirming that the transaction details on the device align with the information displayed on the Ledger Live app, you can ensure that the Bitcoin transfer from Gemini to your Ledger Nano X was successful and without any tampering.
Once you have verified the transaction on your Ledger Nano X, you can proceed with safely storing your Ledger Nano X and backing up your recovery phrase to protect your Bitcoin and other cryptocurrencies.
Safely Store Your Ledger Nano X and Backup Your Recovery Phrase
After completing the Bitcoin transfer and ensuring the security of your funds, it is essential to take additional steps to safeguard your Ledger Nano X and protect your cryptocurrencies. Follow these important measures to safely store your Ledger Nano X and backup your recovery phrase:
- Keep your Ledger Nano X in a secure location that is safe from potential theft, damage, or loss. Consider using a safe or a lockable drawer to store your hardware wallet.
- Avoid storing your Ledger Nano X in easily accessible areas or leaving it unattended. Treat it with the same level of security as you would with valuable documents or cash.
- Consider using a protective case or sleeve to prevent any physical damage to your Ledger Nano X. This can help protect it from scratches, drops, or other accidents.
- Always maintain a backup of your recovery phrase. The recovery phrase is a crucial component of your Ledger Nano X and allows you to restore access to your cryptocurrencies in case your device is lost, stolen, or damaged.
- Write down your recovery phrase on the provided recovery sheet or a durable paper. Ensure that the backup is done manually and avoid saving it digitally or in cloud storage, as this can expose it to potential hacking or theft.
- Keep your recovery phrase in a separate secure location from your Ledger Nano X. This helps mitigate the risk of simultaneous loss or theft of both the device and the recovery phrase.
- Avoid sharing your recovery phrase with anyone or storing it in easily accessible places, such as on your computer or mobile device.
- Consider creating multiple copies of your recovery phrase and storing them in different secure locations. This provides redundancy in case one backup is compromised or inaccessible.
- Regularly verify the accessibility of your recovery phrase by restoring your Ledger Nano X using the provided process in Ledger Live. This helps ensure that your recovery phrase is valid and can be used to restore your funds if needed.
By securely storing your Ledger Nano X and backing up your recovery phrase, you add an extra layer of protection to your Bitcoin and other cryptocurrencies. These precautions ensure that even in unforeseen circumstances, you can retrieve and restore your funds, maintaining full control of your digital assets.
Remember to always exercise caution and follow best security practices when dealing with your Ledger Nano X and cryptocurrency holdings. Stay informed about any updates or security recommendations from Ledger and regularly check for firmware updates to maintain the highest level of security for your device.