
What is MyEtherWallet?
MyEtherWallet (MEW) is a popular, user-friendly, and open-source interface for creating and managing Ethereum wallets. It allows users to interact directly with the Ethereum blockchain, enabling them to store, receive, and send Ether (ETH) and various ERC-20 tokens. MEW is entirely client-side, which means it operates through the user’s web browser and does not store any user data on its own servers. This decentralized nature ensures enhanced security and gives users full control over their funds and private keys.
MEW offers a wide range of features and services that make it a versatile tool for Ethereum users. Along with basic wallet functions, such as creating and accessing wallets, it also provides features like token swaps, integration with hardware wallets, and the ability to participate in decentralized finance (DeFi) platforms.
One of the key advantages of using MEW is its simplicity and intuitive user interface. Even newcomers to the cryptocurrency world can quickly set up and start using MEW without extensive technical knowledge. While MEW has a web-based version, there is also a mobile app available for both Android and iOS devices, making it convenient for users to access their wallets on the go.
Furthermore, MEW allows users to interact with the Ethereum blockchain in a non-custodial manner. This means that MEW does not control or have access to users’ funds, private keys, or personal information. Users are in complete control of their assets, reducing the risk of hacks, theft, or unauthorized access.
Overall, MyEtherWallet serves as a robust and accessible wallet solution for Ethereum users. Whether you are a crypto enthusiast looking for a secure and user-friendly wallet or an investor exploring the world of DeFi, MEW can cater to your needs while ensuring the safety and control of your assets.
What is Ledger Nano S?
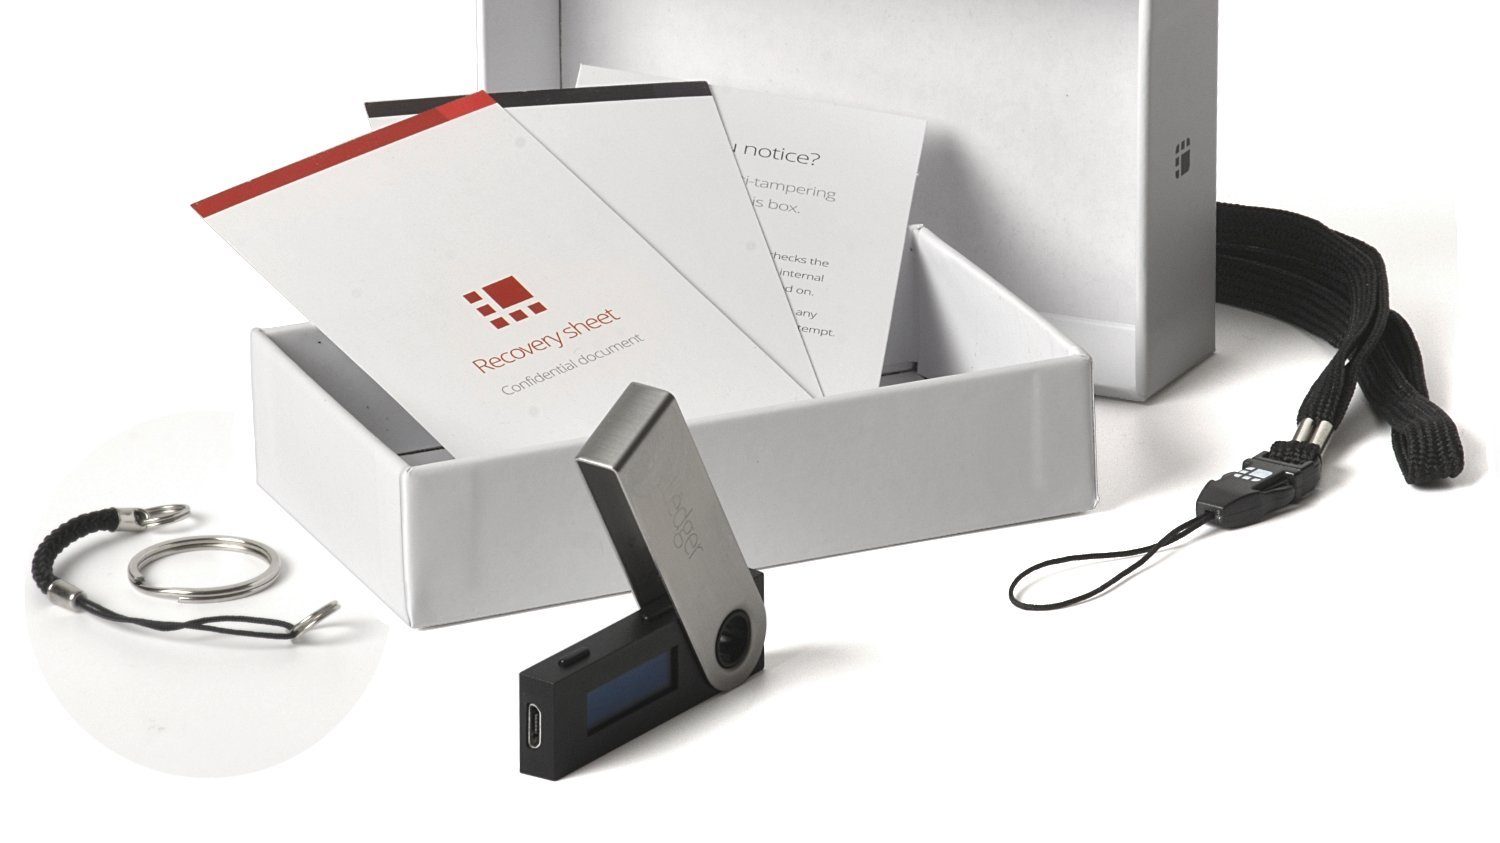
Ledger Nano S is a hardware wallet specifically designed to store and secure cryptocurrencies, including Ethereum and ERC-20 tokens. It is regarded as one of the most secure options available in the market, providing users with an offline storage solution to protect their digital assets from online threats.
The Ledger Nano S device resembles a small USB drive and features a small screen and buttons for navigation. It supports multiple cryptocurrencies and offers a secure chip that stores private keys and signs transactions within the device itself. This offline storage mechanism, commonly referred to as “cold storage,” ensures that the private keys never come into contact with the internet, significantly reducing the risk of hacking or unauthorized access.
In addition to its security features, the Ledger Nano S offers a user-friendly interface. It can be easily connected to a computer or mobile device via USB, allowing users to manage their crypto assets through Ledger’s official application, Ledger Live. The application provides a seamless and intuitive experience for users to access and manage their cryptocurrency holdings.
With the Ledger Nano S, users can securely store and manage their Ethereum and ERC-20 tokens. They can send, receive, and track their transactions without exposing their private keys to potential online vulnerabilities. Additionally, the device supports the integration of popular cryptocurrency wallets like MyEtherWallet, enabling users to access their wallets on various platforms and further enhancing the security of their digital assets.
Another noteworthy feature of Ledger Nano S is its robust backup and recovery system. Every Ledger device comes with a recovery phrase, also known as a “seed phrase,” consisting of 24 randomly generated words. This recovery phrase serves as a backup of the private keys and can be used to restore access to the wallet in the event of a lost or damaged device. It is vital that users keep their recovery phrase secure and never share it with anyone.
Why Use MyEtherWallet with Ledger Nano S?
Using MyEtherWallet (MEW) in conjunction with the Ledger Nano S brings together the best of both worlds: the user-friendly interface of MEW and the enhanced security provided by the Ledger hardware wallet. Let’s explore why this combination is a popular choice for Ethereum users.
1. Enhanced Security: The Ledger Nano S offers top-notch security by keeping your private keys offline within the device. This ensures that your keys are never exposed to potential online threats. By integrating MEW with the Ledger Nano S, you can enjoy the benefits of MEW’s user-friendly features while keeping your private keys secure on the hardware wallet.
2. Easy Access to MEW: Integrating the Ledger Nano S with MEW provides a secure and convenient way to access your Ethereum wallet. MEW functions as the user interface, allowing you to perform transactions and manage your assets while the Ledger Nano S takes care of storing and securing your private keys. It’s a seamless combination that simplifies the user experience.
3. Compatibility with DApps: MEW is compatible with various decentralized applications (DApps) within the Ethereum ecosystem. By using MEW with the Ledger Nano S, you can securely interact with DApps without compromising the safety of your private keys. This compatibility enables you to participate in decentralized finance (DeFi) platforms, token swaps, and other exciting blockchain applications.
4. Flexibility and Portability: MyEtherWallet can be accessed through multiple platforms, including web-based browsers and mobile devices. By integrating it with the Ledger Nano S, you can enjoy the flexibility to use MEW easily on different devices while maintaining the security provided by the hardware wallet. This portability ensures that you have access to your wallet and can manage your assets wherever you go.
5. Backup and Recovery: The Ledger Nano S provides a reliable backup and recovery mechanism through its seed phrase. This seed phrase acts as a backup of your private keys and can be used to restore access to your wallet in case your device is lost or damaged. It adds an extra layer of protection to your digital assets, giving you peace of mind.
By combining the features and benefits of MEW and the Ledger Nano S, you can take advantage of a user-friendly interface, extensive functionality, and enhanced security. Whether you are a beginner or an experienced cryptocurrency user, using MEW with the Ledger Nano S is a smart choice to manage and safeguard your Ethereum and ERC-20 tokens.
Setting up Ledger Nano S
Setting up your Ledger Nano S is a straightforward process that ensures the security and proper functioning of your hardware wallet. Follow these steps to get started:
Step 1: Unboxing and connecting the device: Open the Ledger Nano S package and connect the device to your computer or mobile device using the USB cable provided. Ensure that the device is properly connected and powered on.
Step 2: Initializing the device: Upon connecting the Ledger Nano S, you will be prompted to set up a new wallet or import an existing one. Choose the option to set up a new wallet and confirm your selection on the device.
Step 3: Setting a PIN: Follow the on-screen instructions to set a PIN code for your Ledger Nano S. Use the buttons on the device to navigate and confirm your PIN. Remember to choose a strong and unique PIN that you can easily remember.
Step 4: Writing down the recovery phrase: The Ledger Nano S will generate a recovery phrase consisting of 24 randomly generated words. This phrase acts as a backup of your private keys and is crucial for recovery purposes. Write down the recovery phrase on the provided recovery sheet and keep it in a safe place. It is essential to never share your recovery phrase with anyone.
Step 5: Confirming the recovery phrase: After writing down the recovery phrase, the Ledger Nano S will require you to confirm the words in a specific order. This step ensures that you have accurately recorded the recovery phrase and can successfully restore your wallet if needed.
Step 6: Installing the Ledger Live application: To manage your Ledger Nano S and interact with your cryptocurrencies, you will need to install the Ledger Live application on your computer or mobile device. Visit the official Ledger website and download the appropriate version of Ledger Live for your operating system.
Step 7: Completing the setup process: Once the Ledger Live application is installed, launch it and follow the on-screen instructions to set up your device. You will be guided through the process of adding accounts and accessing your cryptocurrencies.
With these steps, you can successfully set up your Ledger Nano S and start securely managing your cryptocurrencies. Remember to keep your device, PIN, and recovery phrase safe and avoid sharing them with anyone to ensure the utmost security for your digital assets.
Preparing MyEtherWallet
Before you can start using MyEtherWallet (MEW) with your Ledger Nano S, there are a few steps you need to follow to prepare your MEW account. Let’s go through the process together:
Step 1: Accessing the official MyEtherWallet website: Open your preferred web browser and navigate to the official MyEtherWallet website at www.myetherwallet.com.
Step 2: Ensuring a secure connection: Pay attention to the website’s URL to ensure that you are visiting the official MyEtherWallet website. Look for the padlock icon in the address bar, indicating a secure connection (HTTPS) between your browser and the website.
Step 3: Disconnecting from other wallets: Before connecting your Ledger Nano S to MyEtherWallet, make sure you are disconnected from any other wallet software or extensions that you may be using. This helps prevent potential conflicts during the connection process.
Step 4: Enabling browser support on Ledger Nano S: To use your Ledger Nano S with MEW, you need to enable browser support on your device. To do this, navigate to “Settings” on your Ledger Nano S, select “Security,” and then enable “Browser Support.”
Step 5: Installing the Ethereum app on Ledger Nano S: If you have not done so already, make sure you have installed the Ethereum app on your Ledger Nano S. This app is necessary to communicate with the Ethereum blockchain. You can install the app using the Ledger Live application on your computer.
Step 6: Connecting your Ledger Nano S to MyEtherWallet: Connect your Ledger Nano S to your computer using the USB cable. On the MyEtherWallet website, click on “Access My Wallet” and select “Hardware.” Choose “Ledger” as your hardware wallet option.
Step 7: Confirming device connection: Follow the on-screen prompts on the MyEtherWallet website to confirm the connection between your Ledger Nano S and MyEtherWallet. Verify that the device shown on the screen matches the one connected to your computer.
Step 8: Unlocking your Ledger Nano S: Unlock your Ledger Nano S by entering your device PIN and confirming on the device itself.
Step 9: Selecting an address: After successfully connecting your Ledger Nano S, you will be presented with a list of Ethereum addresses associated with your device. Choose the address you want to use or manage within MyEtherWallet.
Step 10: Accessing your MEW account: Congratulations! You are now connected to MyEtherWallet with your Ledger Nano S. You can access your MEW account, view your Ethereum balance, send and receive Ether, and interact with ERC-20 tokens securely using the integrated features of MyEtherWallet.
By following these steps, you can prepare your MyEtherWallet account to seamlessly integrate it with your Ledger Nano S hardware wallet. This combination offers enhanced security and control over your Ethereum holdings, ensuring peace of mind as you engage with the Ethereum blockchain.
Connecting Ledger Nano S to MyEtherWallet
Connecting your Ledger Nano S to MyEtherWallet (MEW) allows you to securely manage your Ethereum and ERC-20 tokens through MEW’s user-friendly interface. Here’s a step-by-step guide on how to connect your Ledger Nano S to MEW:
Step 1: Accessing the official MyEtherWallet website: Open a web browser and go to the official MyEtherWallet website at www.myetherwallet.com.
Step 2: Ensuring a secure connection: Verify that you are on the official MyEtherWallet website by checking the URL and looking for a padlock icon to ensure a secure connection (HTTPS).
Step 3: Disconnecting from other wallets: Before connecting your Ledger Nano S, disconnect from any other wallet software or extensions that may be open on your device to avoid conflicts.
Step 4: Enabling browser support on Ledger Nano S: If you haven’t done so already, enable browser support on your Ledger Nano S. To do this, go to “Settings” on your device, choose “Security,” and enable “Browser Support.”
Step 5: Installing the Ethereum app on Ledger Nano S: If you haven’t installed the Ethereum app on your Ledger Nano S, you need to do so using the Ledger Live application on your computer. The Ethereum app enables communication between your device and the Ethereum blockchain.
Step 6: Connecting Ledger Nano S to MyEtherWallet: Connect your Ledger Nano S to your computer using the USB cable. On the MyEtherWallet website, click on “Access My Wallet” and select “Hardware.” Choose “Ledger” as the hardware wallet option.
Step 7: Confirming device connection: Follow the on-screen instructions on the MyEtherWallet website to confirm the connection between your Ledger Nano S and MEW. Make sure the device displayed on the screen matches the Ledger Nano S connected to your computer.
Step 8: Unlocking your Ledger Nano S: Unlock your Ledger Nano S by entering your device PIN on the connected device and confirming it. This step ensures that you have physical control over the hardware wallet.
Step 9: Selecting an address: Once your Ledger Nano S is successfully connected and unlocked, you will see a list of Ethereum addresses associated with your Ledger device. Choose the address you want to manage and interact with within MyEtherWallet.
Step 10: Accessing your MEW account: Congratulations! You have successfully connected your Ledger Nano S to MyEtherWallet. You can now access your MEW account, view your Ethereum balance, send and receive Ether, and manage ERC-20 tokens using the provided features and functionalities of MyEtherWallet.
By following these steps, you can securely and seamlessly connect your Ledger Nano S to MyEtherWallet, ensuring the utmost control and safety of your Ethereum and ERC-20 tokens.
Confirming Transactions with Ledger Nano S
Confirming transactions with your Ledger Nano S is an essential step in ensuring the security and accuracy of your Ethereum transactions. When using MyEtherWallet (MEW) in combination with your Ledger Nano S, you can follow these steps to confirm your transactions:
Step 1: Initiating the transaction: Open MyEtherWallet and log in using your Ledger Nano S. Navigate to the “Send” or “Transfer” section to initiate the transaction. Fill in the required details, including the recipient’s address, the amount to send, and any additional transaction data.
Step 2: Connecting Ledger Nano S: After filling in the transaction details, MyEtherWallet will prompt you to connect your Ledger Nano S. Connect your device to your computer using the USB cable and unlock it with your PIN code.
Step 3: Confirming the transaction details: On the Ledger Nano S screen, carefully review the transaction details displayed. Confirm that the recipient address, amount, and gas fees are accurate and match your intended transaction. Use the device buttons to navigate through the transaction details.
Step 4: Verifying gas fees: Gas fees are required to process Ethereum transactions. MyEtherWallet will display the estimated gas fees for your transaction. Verify that the displayed fees are reasonable and acceptable to you. Keep in mind that higher fees may result in faster transaction confirmation, while lower fees may result in slower confirmation times.
Step 5: Confirming the transaction: Once you have reviewed the transaction details and verified the gas fees, use the buttons on your Ledger Nano S to confirm the transaction. Follow the on-screen instructions on the device, such as pressing the button to confirm or entering additional confirmation codes when required.
Step 6: Approving the transaction: After confirming the transaction on your Ledger Nano S, MyEtherWallet will prompt you to approve the transaction once again on the device. Verify the transaction details once more and follow the device prompts to approve and sign the transaction.
Step 7: Transaction confirmation: Once the transaction has been signed by your Ledger Nano S, MyEtherWallet will display a confirmation message on your computer’s screen. The transaction will be broadcasted to the Ethereum network for processing. You can view the transaction status and monitor its progress using various blockchain explorer websites.
Note: It is important to verify and double-check all transaction details on both your computer screen and the Ledger Nano S display to ensure accuracy and avoid any potential errors. This double confirmation process provides an extra layer of security for your transactions.
By following these steps, you can confidently confirm transactions using your Ledger Nano S and MyEtherWallet. The combination of these two tools ensures the security of your transactions and helps you retain full control over your Ethereum funds.
Sending and Receiving Funds with Ledger Nano S and MyEtherWallet
Using the combination of your Ledger Nano S and MyEtherWallet (MEW), you can easily send and receive funds within the Ethereum ecosystem. Here’s a step-by-step guide on how to do it:
Sending Funds:
Step 1: Accessing MyEtherWallet: Open the MyEtherWallet website and connect your Ledger Nano S to your computer using the USB cable. Unlock your Ledger Nano S with your PIN code.
Step 2: Selecting the sending option: On the MyEtherWallet dashboard, click on the “Send” or “Transfer” section to initiate the sending process.
Step 3: Entering recipient details: Fill in the recipient’s Ethereum address in the designated field. Take care to enter the address correctly to avoid sending funds to the wrong recipient.
Step 4: Specifying the amount: Enter the desired amount of Ether (ETH) or ERC-20 tokens you wish to send to the recipient.
Step 5: Confirming the transaction: Review the transaction details, including the recipient address and the amount to be sent. Verify that everything is correct, and then click on the “Send Transaction” button.
Step 6: Confirming the transaction on Ledger Nano S: On your Ledger Nano S device, verify the transaction details displayed on the screen. If everything appears correct, press the button to confirm and sign the transaction.
Step 7: Transaction confirmation: Once the transaction is signed by your Ledger Nano S, MyEtherWallet will display a confirmation message. The transaction will be broadcasted to the Ethereum network, and you can track its progress using a blockchain explorer.
Receiving Funds:
Step 1: Getting your Ethereum address: Access MyEtherWallet with your Ledger Nano S and navigate to the “Receive” or “Account” section to view your Ethereum address. This address is where you will receive funds.
Step 2: Sharing your Ethereum address: Copy your Ethereum address or use the QR code provided to share it with the sender. This address serves as your unique identifier for receiving funds.
Step 3: Verifying receipt of funds: Once the sender initiates the transaction, you can track the progress and confirmation of the transaction using a blockchain explorer. The funds will be deposited into your Ethereum address once the transaction is confirmed on the blockchain.
Note: Always double-check the accuracy of the recipient’s address when sending funds. Once a transaction is confirmed on the blockchain, it is irreversible and cannot be undone.
By following these steps, you can confidently send and receive funds using your Ledger Nano S and MyEtherWallet. The combination of these two tools ensures the security and reliability of your Ethereum transactions, providing you with peace of mind as you navigate the Ethereum ecosystem.
Managing ERC-20 Tokens with Ledger Nano S and MyEtherWallet
If you hold ERC-20 tokens on the Ethereum blockchain, you can efficiently manage them using the combination of your Ledger Nano S and MyEtherWallet (MEW). Here’s a step-by-step guide on how to manage your ERC-20 tokens:
Step 1: Accessing MyEtherWallet: Open the official MyEtherWallet website and connect your Ledger Nano S to your computer using the USB cable. Unlock your Ledger Nano S with your PIN code.
Step 2: Viewing your Ethereum address and token balances: On the MyEtherWallet dashboard, navigate to the “Accounts” or “Portfolio” section to view your Ethereum address and the list of tokens you hold. This will display the balances of your ERC-20 tokens associated with the connected Ledger Nano S.
Step 3: Adding custom tokens: If you have recently acquired a new ERC-20 token that is not automatically displayed, you can manually add it to your MyEtherWallet account. Click on the “Add Custom Token” option and provide the contract address, token symbol, and decimal places of your newly acquired ERC-20 token.
Step 4: Sending ERC-20 tokens: To send ERC-20 tokens from your Ledger Nano S, go to the “Send” or “Transfer” section in MyEtherWallet. Select the token you want to send from the drop-down menu, enter the recipient’s Ethereum address, specify the amount, and follow the confirmation process on the Ledger Nano S to authorize the transaction.
Step 5: Receiving ERC-20 tokens: To receive ERC-20 tokens into your Ledger Nano S, provide the sender with your Ethereum address associated with the specific token. You can find your Ethereum address in the “Accounts” or “Portfolio” section of MyEtherWallet. Once the sender initiates the transaction, the ERC-20 tokens will be sent to your associated Ethereum address.
Step 6: Tracking token balances: You can track the balances and transaction history of your ERC-20 tokens by accessing your Ethereum address on blockchain explorers such as Etherscan. Enter your Ethereum address and select the token of interest to view the token balance and transaction details.
Step 7: Interacting with decentralized exchanges (DEX): MyEtherWallet provides integration with various decentralized exchanges (DEX) like Uniswap and Sushiswap. You can leverage these platforms to trade your ERC-20 tokens directly from your Ledger Nano S without the need for a centralized exchange. Ensure that you have sufficient Ether in your account to cover gas fees for these transactions.
By following these steps, you can efficiently manage your ERC-20 tokens using your Ledger Nano S and MyEtherWallet. This combination provides secure storage, easy access, and seamless interaction with the Ethereum blockchain, enhancing your experience as you navigate the world of ERC-20 tokens.
Troubleshooting Common Issues
While using your Ledger Nano S with MyEtherWallet (MEW), you may encounter some common issues. Here are a few troubleshooting steps to address these issues:
1. Connection Issues:
- Ensure that you are using the official MyEtherWallet website and that you have a stable internet connection.
- Try connecting your Ledger Nano S to a different USB port or using a different USB cable to rule out any connectivity issues.
- If the device is not recognized, install or update the appropriate Ledger Live application and Ledger Nano S drivers on your computer.
2. Firmware and Software Updates:
- Check for firmware updates on your Ledger Nano S using the Ledger Live application. Keeping your device firmware up to date ensures the latest security patches and compatibility with MEW.
- Ensure that you are using the latest version of the MEW interface. Clear your browser cache and update your browser if necessary.
3. PIN Code and Recovery Phrase:
- If you have forgotten your PIN code, refer to the Ledger Nano S documentation or support resources for instructions on how to reset it.
- Never share your recovery phrase with anyone. If you suspect it may have been compromised, transfer your funds to a new wallet and generate a new recovery phrase.
4. Incorrect Address or Transaction Amount:
- Double-check the recipient’s Ethereum address before confirming a transaction. Once a transaction is confirmed, it cannot be reversed.
- Ensure that you enter the correct transaction amount for both Ether and ERC-20 tokens. Review the details carefully before confirming the transaction.
5. Transaction Delays or Failures:
- If a transaction is taking longer than expected, check the current network congestion and adjust the gas fees accordingly. Higher fees can prioritize transaction confirmation.
- In case of a failed transaction or an error message, cancel the transaction if possible and try again with adjusted gas prices or other recommended troubleshooting steps.
6. Contacting Support:
- If you have exhausted all troubleshooting steps, reach out to the official support channels of MyEtherWallet or Ledger for further assistance.
- Provide detailed information about the issue, including specific error messages, steps taken, and any relevant screenshots.
Remember, it is important to exercise caution and double-check all information before performing any transactions. Staying informed, following best practices, and referring to official resources can help resolve common issues and ensure a smooth experience with your Ledger Nano S and MyEtherWallet.
Final Thoughts and Additional Resources
Using MyEtherWallet (MEW) with the Ledger Nano S offers a powerful and secure way to manage your Ethereum and ERC-20 tokens. By following the steps outlined in this guide, you can confidently set up, connect, and utilize these tools to enhance your crypto experience.
Remember, security is paramount when dealing with cryptocurrencies. Always ensure that you are using the official MyEtherWallet website and have the latest firmware and software updates installed on your Ledger Nano S. Keep your PIN code and recovery phrase in a safe place and never share them with anyone.
For additional guidance and support, consider exploring the following resources:
- Official MyEtherWallet Website: Visit the official MyEtherWallet website for comprehensive guides, FAQs, and support documentation.
- Ledger Support: Access the Ledger Support center for troubleshooting, tutorials, and frequently asked questions related to the Ledger Nano S.
- Ethereum Community Forums: Engage with the vibrant Ethereum community on forums such as Ethereum Stack Exchange or r/ethereum subreddit to seek advice and learn from experienced users.
- Blockchain Explorers: Utilize blockchain explorers like Etherscan or Ethplorer to explore transaction history, token balances, and monitor the status of your transactions.
By leveraging the combined power of MyEtherWallet and the Ledger Nano S, you can securely interact with the Ethereum blockchain, manage your digital assets, and explore the exciting world of decentralized finance (DeFi) and ERC-20 tokens.
Always stay vigilant, practice good security measures, and continue to educate yourself to make the most of your Ethereum journey with these powerful tools.