
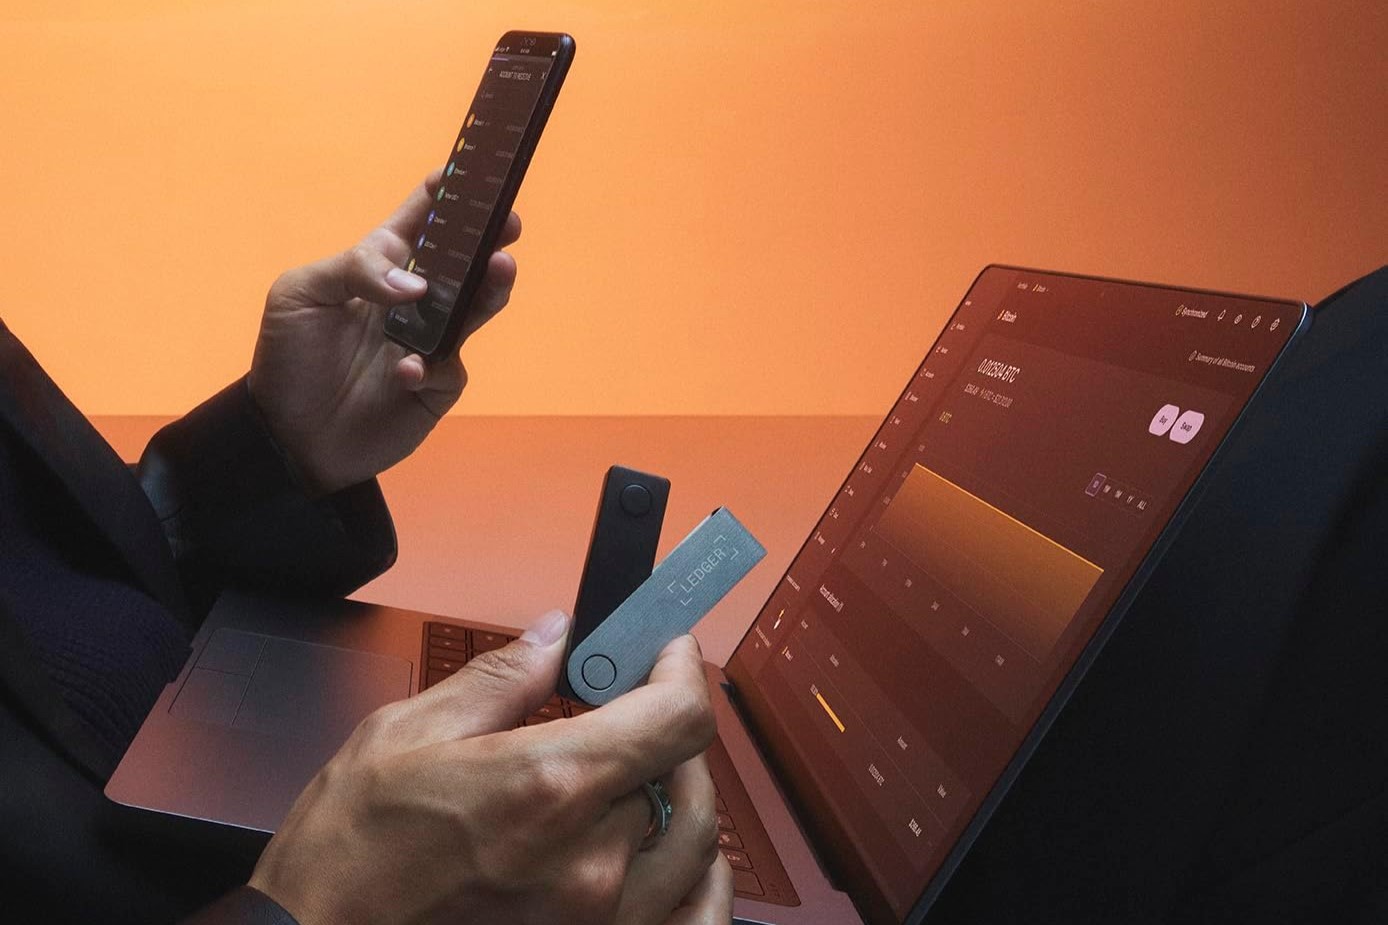
What is a Ledger Nano X?
The Ledger Nano X is a hardware wallet that provides a secure and convenient way to store and manage cryptocurrencies and NFTs (non-fungible tokens). It is the next-generation wallet from Ledger, a trusted and industry-leading company in the cryptocurrency space.
Unlike software wallets, which are vulnerable to hacking and online threats, a hardware wallet like the Ledger Nano X offers an offline storage solution. This means that your private keys, which are used to access and transfer your cryptocurrencies and NFTs, are stored securely on the device itself, rather than on a computer or online server.
The Ledger Nano X features state-of-the-art security measures, including a secure chip and a secure element operating system (BOLOS). This ensures that your private keys are never exposed to potential hackers or malware. Additionally, the device has a built-in display that allows you to review and verify transaction details before confirming them, adding an extra layer of security.
One of the standout features of the Ledger Nano X is its compatibility with a wide range of cryptocurrencies and NFTs. Whether you are holding Bitcoin, Ethereum, or other popular coins, or if you have invested in digital collectibles like CryptoKitties or NBA Top Shot Moments, the Ledger Nano X can securely store and manage them all.
In addition to its security and compatibility, the Ledger Nano X offers a user-friendly experience. It has a simple and intuitive interface, allowing even beginners to navigate and use the device easily. The device connects to your computer or mobile device via Bluetooth, providing wireless access to your cryptocurrencies and NFTs.
With its compact and portable design, the Ledger Nano X can be easily carried with you wherever you go. This means that you can have peace of mind knowing that your digital assets are safe and accessible at all times.
Getting Started with Ledger Nano X
If you’ve recently purchased a Ledger Nano X or are thinking of getting one, this section will guide you through the initial setup process. Follow these steps to get started:
- Unboxing: Once you receive your Ledger Nano X, carefully unbox it and ensure all the contents are present, including the device, USB cable, and any other accessories.
- Charge the device: Before initiating the setup, make sure the device is fully charged. Connect one end of the USB cable to the Ledger Nano X and the other end to a computer or USB charger. The device’s battery indicator should light up, indicating that it’s charging.
- Download Ledger Live: Ledger Live is the official software that allows you to manage your cryptocurrencies and NFTs on the Ledger Nano X. Visit the Ledger website and download the appropriate version of Ledger Live for your operating system.
- Install Ledger Live: Once the download is complete, follow the on-screen instructions to install Ledger Live on your computer.
- Connecting the device: Launch Ledger Live and choose the option to set up a new device. Connect your Ledger Nano X to your computer using the USB cable. Follow the prompts on Ledger Live and make sure to write down your recovery phrase, which is crucial for restoring access to your wallet if the device is lost or damaged.
- Setting up a PIN: Ledger Live will guide you through the process of setting up a PIN code for your device. Choose a PIN that is easy for you to remember but difficult for others to guess. Be sure to keep your PIN secure and avoid sharing it with anyone.
- Creating a wallet: Once you’ve set up your PIN, you can create a new wallet on your Ledger Nano X. Choose the cryptocurrency you want to manage and generate an address for that wallet. Repeat the process if you want to create wallets for multiple cryptocurrencies.
With these steps, you have successfully set up your Ledger Nano X and are ready to securely store and manage your cryptocurrencies and NFTs. Keep your device and recovery phrase in a safe place, and always double-check transaction details before confirming them.
Creating an Ethereum Wallet on Ledger Live
To manage your Ethereum-based cryptocurrencies and NFTs on your Ledger Nano X, you’ll need to create an Ethereum wallet on Ledger Live. Follow these steps to get started:
- Launch Ledger Live: Open the Ledger Live application on your computer.
- Connect your Ledger Nano X: Use the USB cable to connect your Ledger Nano X to your computer.
- Unlock your device: Enter your PIN on the Ledger Nano X to unlock it.
- Add an account: In the Ledger Live application, click on the “Add Account” option.
- Choose Ethereum: Select Ethereum from the list of available cryptocurrencies.
- Confirm account creation: On your Ledger Nano X, review and confirm the account creation details shown on the device’s screen. Make sure the information matches what is displayed in Ledger Live.
- Verify your address: Once the account is created, you will see an Ethereum address associated with your Ledger Nano X. Verify that the address shown on your device matches the one displayed in Ledger Live.
- Name your account: Give your Ethereum account a name to easily identify it within Ledger Live.
- Complete the setup: Follow the remaining on-screen instructions in Ledger Live to finalize the setup process.
After completing these steps, you have successfully created an Ethereum wallet on Ledger Live. Now you can use this wallet to send, receive, and manage your Ethereum-based cryptocurrencies and NFTs. Remember to keep your Ledger Nano X and recovery phrase secure, as they are crucial for accessing your wallet.
With a dedicated Ethereum wallet on Ledger Live, you can easily track your Ethereum transactions, view your account balance, and interact with decentralized applications (dApps). Enjoy the peace of mind knowing that your Ethereum assets are protected by the robust security features of the Ledger Nano X.
Setting up Metamask with Ledger Nano X
Metamask is a popular browser extension wallet that allows you to interact with Ethereum-based applications and manage your cryptocurrencies and NFTs. By connecting your Ledger Nano X to Metamask, you can enhance the security of your wallet and have a seamless experience. Follow these steps to set up Metamask with your Ledger Nano X:
- Install Metamask: Open your web browser and navigate to the Metamask website. Download and install the Metamask browser extension that is compatible with your browser.
- Open Metamask: Once Metamask is installed, click on the extension icon in your browser toolbar to open it.
- Create a new wallet: If you don’t have an existing Metamask wallet, click on the “Create a Wallet” option. Follow the prompts to set up a new wallet by providing a strong password and agreeing to the terms of use.
- Set up Ledger Nano X connection: In the Metamask interface, click on the account icon and then choose “Connect Hardware Wallet” from the drop-down menu.
- Choose Ledger: Select “Ledger” as the type of hardware wallet you want to connect to.
- Connect your Ledger Nano X: Use the USB cable to connect your Ledger Nano X to your computer. Follow the on-screen instructions in Metamask to connect your Ledger Nano X.
- Unlock your Ledger Nano X: On your Ledger Nano X, enter your PIN and select the Ethereum app.
- Authorize connection: In Metamask, follow the prompts to authorize the connection between Metamask and your Ledger Nano X. Confirm the connection on your Ledger Nano X when prompted.
- View your accounts: Once the connection is established, you will see your Ledger Nano X accounts listed in your Metamask wallet. Choose the account you want to use for your Ethereum transactions.
With Metamask connected to your Ledger Nano X, you can easily manage your Ethereum-based cryptocurrencies and NFTs directly from your browser. Metamask provides a user-friendly interface for interacting with dApps and conducting secure transactions using your Ledger Nano X’s private keys. Enjoy the enhanced convenience and security that comes with this powerful integration.
Adding an Ethereum Address to Metamask
In order to manage your Ethereum-based cryptocurrencies and NFTs in Metamask, you will need to add your Ethereum address to the wallet. This allows Metamask to display your account balance and facilitates easy sending and receiving of Ethereum assets. Follow these steps to add an Ethereum address to Metamask:
- Open Metamask: Make sure you have the Metamask wallet extension installed in your web browser and open it.
- Access account settings: Click on the account icon in the top-right corner of the Metamask interface and select “Account Details” from the drop-down menu.
- Choose “Add Account”: In the Account Details section, choose the option to “Add Account” to create a new account within Metamask.
- Choose import type: Select “Import Account” as the method for adding your Ethereum address to Metamask.
- Enter account details: Provide the necessary information to import your Ethereum address. This may include your account’s private key, JSON file, or mnemonic phrase.
- Confirm import: Once you have entered the correct details, click on “Import” to add your Ethereum address to Metamask.
- Verify account details: Metamask will display the newly imported Ethereum address. Verify that the address is correct and associated with the account you intend to add.
- Assign a label: To easily identify your Ethereum address within Metamask, you can assign it a custom label. This is helpful if you have multiple addresses or accounts.
Once you have added your Ethereum address to Metamask, you can view your account balance, send and receive Ethereum and ERC-20 tokens, interact with dApps, and manage your NFTs. Be sure to keep your account details and private keys secure to protect your funds and assets.
By adding your Ethereum address to Metamask, you can conveniently manage your Ethereum-based assets, track transactions, and stay connected to the vibrant Ethereum ecosystem.
Transferring NFTs to Ledger Nano X
If you own NFTs and want to keep them secure, transferring them to your Ledger Nano X is a wise choice. The Ledger Nano X provides a safe and reliable storage solution for your non-fungible tokens. Follow these steps to transfer your NFTs to your Ledger Nano X:
- Prepare your wallet: Ensure that your Ledger Nano X is set up and connected to a compatible wallet application, such as Metamask or MyEtherWallet.
- Access the NFT marketplace: Open the NFT marketplace or platform where your NFT is currently stored or listed for sale.
- Select the NFT: Locate the specific NFT that you want to transfer to your Ledger Nano X in your digital collection.
- Check wallet compatibility: Verify that the NFT marketplace or platform supports wallets like Metamask or MyEtherWallet for transferring NFTs. These wallets are compatible with the Ledger Nano X.
- Initiate the transfer: Begin the transfer process by selecting the option to transfer or send the NFT. The exact steps may vary depending on the platform or marketplace.
- Choose your wallet: When prompted to select a wallet for the transfer, choose the wallet connected to your Ledger Nano X, such as Metamask.
- Approve the transfer: Review the details of the transfer, including the NFT’s contract address and recipient address. Confirm the transfer, following any additional prompts or security checks.
- Confirm the transaction: On your Ledger Nano X’s display, verify the transaction details, such as the recipient address and gas fees. Use the device’s buttons to confirm the transaction.
- Wait for confirmation: Once the transaction is submitted, wait for the blockchain network to verify and confirm the transfer. This process can take some time, depending on the network congestion.
- Check your wallet: After the transfer is confirmed, check your wallet connected to the Ledger Nano X to ensure that the NFT now appears in your collection.
By transferring your NFTs to your Ledger Nano X, you have an added layer of security for your digital assets. Remember to keep your Ledger Nano X and recovery phrase safe, as they are essential for accessing your NFTs.
Enjoy the peace of mind knowing that your valuable and unique NFTs are securely stored on your Ledger Nano X, ready for you to admire or trade in the evolving NFT market.
Verifying NFT Transactions on Ledger Live
Once you have transferred your NFTs to your Ledger Nano X, it’s important to verify the transactions to ensure that they were successfully recorded on the blockchain. Ledger Live provides a convenient way to track and verify your NFT transactions. Here’s how you can do it:
- Open Ledger Live: Launch the Ledger Live application on your computer.
- Connect your Ledger Nano X: Use the USB cable to connect your Ledger Nano X to your computer.
- Unlock your device: Enter your PIN on the Ledger Nano X to unlock it.
- Access the Ethereum app: On your Ledger Nano X, navigate to the Ethereum app and open it.
- Launch Ledger Live: In the Ledger Live application, select the Ethereum account that is associated with your NFT transactions.
- View transaction history: Within the Ethereum account view, you will see a transaction history that includes both token transfers and NFT transactions. Look for the specific NFT transaction you want to verify.
- Check transaction details: Click on the NFT transaction to view detailed information, including the transaction hash, date and time of the transaction, the NFT contract address, and the recipient address.
- Verify on Etherscan: To further verify the NFT transaction, copy the transaction hash from Ledger Live and visit a blockchain explorer like Etherscan. Paste the transaction hash into the search bar to retrieve the transaction details on the Ethereum blockchain.
- Review the transaction on Etherscan: On Etherscan, you can see additional information about the NFT transaction, such as the block confirmation, gas fees, and the transaction’s status. Confirm that the NFT transaction is recorded and confirmed on the blockchain.
By verifying your NFT transactions on Ledger Live and blockchain explorers like Etherscan, you can have confidence in the accuracy and security of your NFT transfers. Monitoring your transaction history and checking the details on the blockchain ensure that your valuable NFTs are safely stored on your Ledger Nano X.
Remember to keep your Ledger Nano X and recovery phrase secure, as they are essential for accessing and managing your NFTs. With Ledger Live, you can always stay up to date with your NFT transactions and have peace of mind knowing that your digital collectibles are safe and accounted for.
Troubleshooting Tips for Sending NFTs to Ledger Nano X
While transferring NFTs to your Ledger Nano X is generally a straightforward process, you may encounter some issues along the way. Here are some troubleshooting tips to help you overcome common challenges:
- Ensure firmware is up to date: Check that your Ledger Nano X has the latest firmware installed. Update it if necessary using the Ledger Live application.
- Verify the NFT contract address: Double-check that you have entered the correct NFT contract address when initiating the transfer. Mistyping the address can lead to failed transactions.
- Sufficient gas fees: Make sure you have enough Ethereum in your wallet to cover the gas fees required for the NFT transaction. Insufficient fees can cause transaction failures.
- Confirm recipient address: Verify that the destination address for the NFT transfer is correct. Sending NFTs to the wrong address will result in the loss of your NFTs.
- Check network congestion: During times of high network congestion, Ethereum transactions can take longer to confirm. Be patient and allow sufficient time for the transaction to be processed.
- Resolving connectivity issues: If you encounter connectivity issues between your Ledger Nano X and the wallet application, try reconnecting the device, switching USB ports, or using a different USB cable. Restarting your computer can also help resolve connectivity problems.
- Clear cache and restart: If you face any unexpected issues with the wallet application, such as Metamask, try clearing the cache and restarting the application. This can often resolve minor glitches.
- Consult support documentation: If you’re experiencing persistent issues, consult the support documentation and forums provided by Ledger, Metamask, or the specific NFT marketplace. They may have solutions or guides tailored to the platform you’re using and the nature of the problem.
- Contact customer support: If all else fails, reach out to the customer support of the respective wallet application, NFT marketplace, or Ledger Nano X for further assistance. Their support teams are well-equipped to provide guidance and resolve any technical issues you may encounter.
By following these troubleshooting tips, you can overcome common obstacles encountered when sending NFTs to your Ledger Nano X. Remember to exercise caution and double-check all transaction details to ensure the safety and proper transfer of your valuable NFTs.
With patience and a systematic approach, you can resolve any issues that arise during the NFT transfer process, enabling you to securely store and manage your NFTs on your Ledger Nano X.