
Benefits of Setting Up Lights with Google Home
Setting up lights with Google Home offers numerous benefits and enhances your smart home experience. Here are a few key advantages:
Convenience: With Google Home, you can control your lights using just your voice. No more fumbling for light switches or searching for your smartphone to turn on/off the lights. Simply command Google Home, and the lights will respond.
Hands-free Operation: The ability to control lights with voice commands makes it incredibly convenient, especially when your hands are busy or when you’re simply feeling lazy. You can turn off the lights while lying in bed, adjust the brightness while cooking, or switch on the lights as you enter a room, all without lifting a finger.
Energy Efficiency: Smart light bulbs connected to Google Home allow you to easily monitor and manage your energy usage. You can schedule lights to turn off automatically when not in use or dim them to a lower brightness level during certain hours, helping you save on your energy bill.
Enhanced Security: Setting up lights with Google Home enables you to create the illusion of occupancy when you’re away from home. You can schedule lights to turn on and off at specific times, giving the impression that someone is home and deterring potential intruders.
Customization: Google Home offers a range of customization options to suit your preferences. You can create personalized lighting scenes for different moods or activities, such as “movie night” with dimmed lights or “party mode” for a vibrant ambiance.
Integration with Other Smart Devices: Google Home can seamlessly integrate with other smart devices in your home. You can create routines that activate multiple devices simultaneously, such as turning on the lights, adjusting the thermostat, and playing your favorite playlist with a single voice command.
Increased Accessibility: For individuals with mobility challenges or disabilities, setting up lights with Google Home provides greater accessibility and independence. They can easily control the lights without the need to physically reach for a switch or device.
Future-proof Technology: Investing in smart lights and Google Home ensures that you are prepared for the future of connected homes. As technology advances, you can easily integrate new smart devices and expand your home automation capabilities.
By setting up lights with Google Home, you can enjoy the convenience, energy efficiency, and customization that smart lighting offers. It’s a step towards creating a more modern and connected home that enhances your daily life.
Compatible Smart Light Bulbs
When setting up lights with Google Home, it’s essential to ensure that your chosen smart light bulbs are compatible with the Google Home ecosystem. Here are some popular options:
Phillips Hue: Phillips Hue is one of the most widely recognized brands in the smart lighting industry. Their range of smart bulbs, including white, color, and ambient options, seamlessly integrates with Google Home. You can control brightness, color, and create lighting scenes using voice commands with Google Assistant.
LIFX: LIFX offers a range of Wi-Fi enabled smart bulbs that do not require a separate hub. These bulbs are easy to set up and connect directly to Google Home. With LIFX bulbs, you can control brightness, color, and even adjust the temperature of the light using voice commands.
TP-Link Kasa Smart Bulbs: TP-Link’s Kasa smart bulbs are an affordable option that integrates well with Google Home. Their dimmable and tunable white light bulbs can be controlled using voice commands through Google Assistant. With the Kasa app, you can schedule when the lights turn on or off, creating a convenient lighting routine.
Sengled Element: Sengled Element smart bulbs offer a range of options, including white, tunable white, and color bulbs. These bulbs connect directly to your home’s Wi-Fi network and can be controlled through Google Home. Sengled Element bulbs are known for their affordability and reliability.
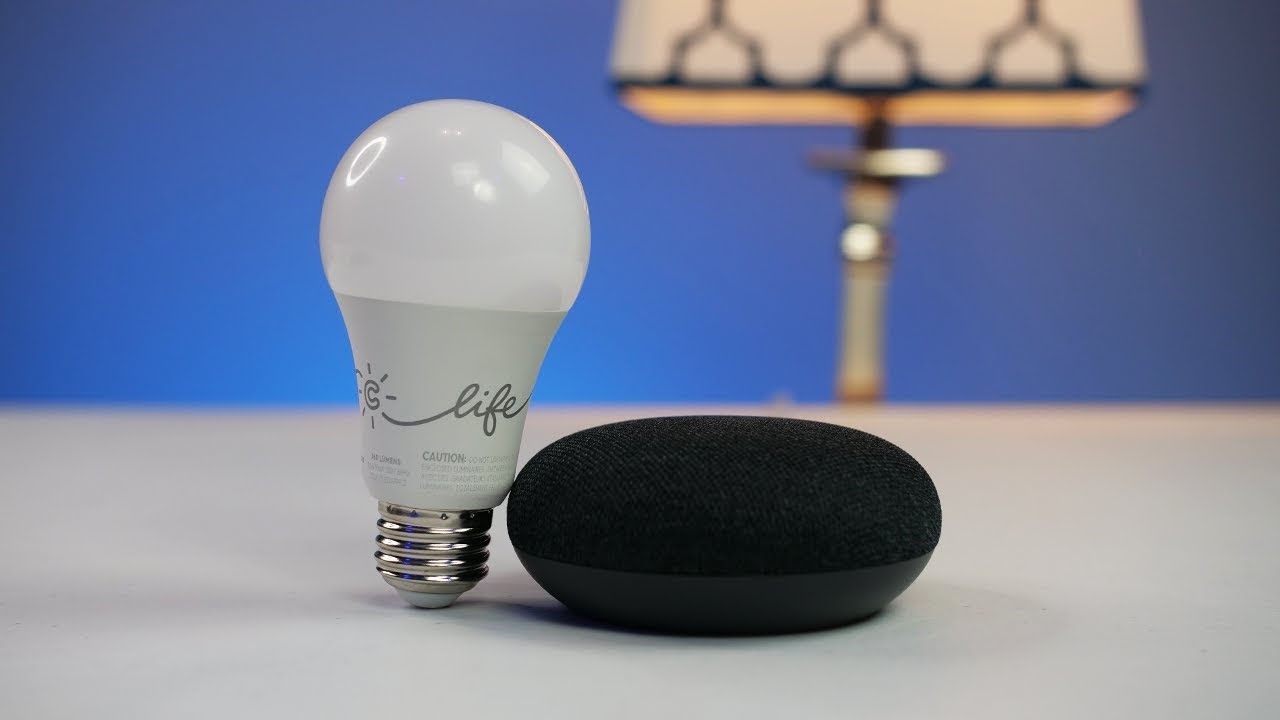
GE C-Life: GE’s C-Life smart bulbs are an excellent choice for those looking for simple, white LED bulbs that work with Google Home. These bulbs connect directly to your Wi-Fi network and can be controlled using the Google Home app or through voice commands with Google Assistant.
SmartThings Compatible Bulbs: Samsung’s SmartThings is a popular smart home platform that works with Google Home. With SmartThings compatible bulbs from various brands like Sylvania, Cree, and Osram, you can control your lights using Google Assistant and customize your lighting experience to suit your needs.
It’s important to note that the compatibility of smart light bulbs may vary depending on the specific model and features. Before purchasing, check the manufacturer’s compatibility information or consult the product packaging to ensure that the smart bulbs you choose are compatible with Google Home.
By selecting compatible smart light bulbs, you can seamlessly integrate them with Google Home and fully leverage the voice control capabilities for a smarter and more convenient lighting experience.
Setting Up Google Home with Smart Light Bulbs
Setting up Google Home with smart light bulbs is a straightforward process that can be completed in a few simple steps. Here’s a guide to help you get started:
1. Check Compatibility: Ensure that your smart light bulbs are compatible with Google Home. Refer to the manufacturer’s instructions or product packaging to confirm compatibility.
2. Set Up Your Google Home Device: Plug in your Google Home device and follow the setup instructions provided in the Google Home app. Make sure the device is connected to the same Wi-Fi network as your smart light bulbs.
3. Install Smart Light Bulbs: Install your smart light bulbs following the manufacturer’s instructions. Turn off the power to the light fixture before replacing the traditional bulbs with the smart bulbs.
4. Connect Smart Light Bulbs: Open the Google Home app on your smartphone or tablet. Tap on the “+” or “Add” button to add a new device. Select “Set up device” and follow the prompts to connect your smart light bulbs to Google Home.
5. Assign Bulbs to Rooms: Once the smart light bulbs are connected, assign them to specific rooms in the Google Home app. This step allows you to control each room’s lights separately using voice commands.
6. Test the Setup: After assigning bulbs to rooms, test the setup by using voice commands to control your lights. For example, say “Hey Google, turn on the living room lights” to see if the lights respond accordingly.
7. Customize and Explore Features: Take advantage of the various features offered by Google Home and your smart light bulbs. Experiment with adjusting brightness, changing colors (if applicable), and creating lighting scenes to suit your preferences.
8. Familiarize Yourself with Voice Commands: Learn the voice commands to control your lights effectively. Common commands include turning lights on/off, adjusting brightness (e.g., “set the lights to 50%”), and changing colors (e.g., “change the lights to blue”).
9. Connect to Other Smart Devices: If you have other smart devices, such as smart plugs or thermostats, consider integrating them with Google Home. This allows you to create routines and control multiple devices simultaneously with a single voice command.
10. Enjoy the Convenience: Once your Google Home is set up with smart light bulbs, enjoy the convenience of controlling your lights with voice commands. Say goodbye to manual switches and embrace the seamless control offered by your smart home ecosystem.
Setting up Google Home with smart light bulbs is an exciting step towards creating a smarter and more connected home. Follow the steps outlined above, and you’ll be on your way to enjoying the convenience and flexibility that voice-controlled lighting brings.
Connecting Google Home to Smart Light Bulbs
Connecting Google Home to your smart light bulbs allows you to control your lighting with voice commands. Here’s a step-by-step guide to help you connect your smart light bulbs to Google Home:
1. Ensure Wi-Fi Connectivity: Make sure your Google Home device and smart light bulbs are connected to the same Wi-Fi network. This is crucial for them to communicate with each other.
2. Open the Google Home App: Launch the Google Home app on your smartphone or tablet. If you don’t have the app, download and install it from the Google Play Store (for Android) or the App Store (for iOS).
3. Tap on the “+” Icon: Look for the “+” icon or “Add” button in the app’s home screen. Tap on it to add a new device to your Google Home ecosystem.
4. Select “Set Up Device”: From the available options, choose “Set up device” to begin the process of connecting your smart light bulbs.
5. Choose the Device Type: In the “Choose a category” section, select “Light” or “Bulb” as the device type you want to set up.
6. Follow the Prompts: The app will guide you through the steps to connect your smart light bulbs. This may include turning the bulbs on/off or pressing a button on the bulb to activate pairing mode. Follow the on-screen instructions carefully.
7. Authorize Access: Grant the necessary permissions and authorizations for the Google Home app to control your smart light bulbs. This allows the app to send commands to the bulbs for control and automation.
8. Assign to a Room: After successfully connecting the smart light bulbs, you’ll be prompted to assign them to a specific room in your home. This helps you group and control the lights within each room using voice commands.
9. Test the Connection: Once connected, test the connection by using voice commands to control your lights. For example, say “Hey Google, turn on the bedroom lights” and check if the bulbs respond accordingly.
10. Repeat for Other Bulbs: If you have multiple smart light bulbs, repeat the same process to connect them with Google Home. Assign each bulb to the appropriate room to easily control them separately.
Note: In some cases, you may need to use a specific app or hub provided by the manufacturer of your smart light bulbs to set them up initially. Make sure to follow the manufacturer’s instructions for any necessary pre-configuration before connecting them to Google Home.
By following these steps, you can easily connect your smart light bulbs to Google Home and enjoy the convenience of controlling your lighting with simple voice commands.
Controlling Lights with Voice Commands
Controlling your lights with voice commands through Google Home is a convenient and hands-free way to adjust your lighting settings. Here’s how to control your lights using voice commands:
1. Wake Word: Start by saying the wake word “Hey Google” or “Ok Google” to activate your Google Home device.
2. Basic Commands: Simply say the command to turn the lights on or off. For example, “Hey Google, turn on the living room lights” or “Ok Google, turn off the kitchen lights.”
3. Dimming the Lights: Adjust the brightness of your lights by saying commands like “Hey Google, set the living room lights to 50%” or “Ok Google, dim the bedroom lights.”
4. Changing Colors: If your smart bulbs support color changes, command Google Home to change the color. For instance, say “Hey Google, change the kitchen lights to blue” or “Ok Google, make the bedroom lights red.”
5. Controlling Specific Rooms: Assign your smart light bulbs to specific rooms in the Google Home app. This allows you to control lights in a particular room by mentioning the room name in your voice command. For example, say “Hey Google, turn off the lights in the bedroom.”
6. Grouped Commands: If you have created groups in the Google Home app, you can control multiple lights simultaneously. For instance, say “Hey Google, turn on the lights in the living room and kitchen.”
7. Light Scenes: If you have created lighting scenes, command Google Home to activate them. For example, say “Hey Google, activate movie night scene” or “Ok Google, set the lights to party mode.”
8. Custom Routines: Create custom routines in the Google Home app to automate lighting commands. For example, you can set a routine to turn on the lights at a specific time in the morning or dim the lights in the evening to create a cozy atmosphere.
9. Additional Commands: Explore other voice commands like adjusting the color temperature, setting timers for lights, or asking for the current status of lights. Google Home offers a wide range of voice control possibilities for your smart lights.
10. Voice Command Examples: Here are some examples of voice commands to control your lights with Google Home:
- “Hey Google, turn on/off all the lights.”
- “Ok Google, dim the lights to 30%.”
- “Hey Google, change the bedroom lights to cool white.”
- “Ok Google, set the dining room lights to blue.”
- “Hey Google, turn on the lights in the kitchen.”
- “Ok Google, activate the relaxing scene.”
With Google Home, controlling your lights with voice commands is quick, easy, and hands-free. Enjoy the convenience and flexibility of voice-controlled lighting in your smart home setup.
Using the Google Home App to Control Lights
In addition to voice commands, you can also control your lights through the Google Home app on your smartphone or tablet. Here’s how you can use the app to control your lights:
1. Open the Google Home App: Launch the Google Home app on your device. Make sure your Google Home device and smart light bulbs are connected and synced with the app.
2. Navigate to the Devices Tab: Tap on the “Devices” tab at the bottom of the screen. This will display a list of all the devices connected to your Google Home ecosystem, including your smart light bulbs.
3. Select the Light Bulb: Locate the smart light bulb you want to control from the list of devices. Tap on the bulb’s name or icon to access its control settings.
4. Adjust Brightness: Within the light bulb’s control settings, you’ll typically find a brightness slider. Slide it left or right to decrease or increase the brightness level of the light bulb. As you adjust, the bulb’s brightness will reflect the changes in real-time.
5. Toggle On/Off: In the control settings, you’ll also find a button or toggle switch to turn the light bulb on or off. Simply tap on the switch to toggle the bulb’s state.
6. Customize Color (If Applicable): If your smart light bulb supports color changes, there may be an additional color picker or color options within the control settings. Use these to customize the bulb’s color according to your preference.
7. Create Lighting Groups: If you have multiple smart light bulbs, you can create lighting groups within the Google Home app. This allows you to control multiple bulbs simultaneously. To create a group, navigate to the “Rooms” tab in the app and follow the instructions to set up a group with your desired bulbs.
8. Schedule Timers: The Google Home app also enables you to schedule timers for your smart light bulbs. You can set specific times for the lights to turn on or off, allowing for automated lighting control throughout the day.
9. Explore Advanced Settings: Delve into the advanced settings within the Google Home app to further customize your lighting experience. This may include options to adjust color temperature, create lighting scenes, or enable specific behaviors for your smart light bulbs.
10. Check Status and Updates: The Google Home app provides real-time status updates for your smart light bulbs. You can check whether the lights are on or off, monitor their brightness level, and receive firmware updates and notifications for your connected bulbs.
The Google Home app acts as a centralized hub for managing and controlling your smart light bulbs. It offers a visual interface that complements the voice commands, giving you additional flexibility and control over your home lighting.
Creating Lighting Scenes with Google Home
Google Home offers the ability to create customized lighting scenes, allowing you to set the perfect ambiance for any occasion. Here’s how you can create lighting scenes with Google Home:
1. Open the Google Home App: Launch the Google Home app on your smartphone or tablet and ensure that your Google Home device and smart light bulbs are connected and synced.
2. Navigate to the “Rooms” Tab: Tap on the “Rooms” tab at the bottom of the screen. This will display a list of the rooms in your home that are set up within the Google Home app.
3. Select the Room for the Scene: Choose the room where you want to create the lighting scene. Tap on the room’s name to access its settings.
4. Tap on the “+” Icon: Look for the “+” icon or “Add” button within the room settings, usually located at the top-right corner of the screen. Tap on it to add a new scene to the room.
5. Name the Scene: Give the lighting scene a descriptive name, such as “Movie Night” or “Relaxation Mode.” This name will be used to activate the scene using voice commands or within the Google Home app.
6. Adjust the Lights: Within the scene settings, you can individually or collectively adjust the brightness, color, or color temperature of the smart light bulbs in the selected room. Use the sliders or options provided to achieve the desired lighting effect.
7. Preview and Save: After making the necessary adjustments, preview the lighting scene by tapping on the “Preview” or “Test” button. This allows you to see how the lights will look before saving the scene. If satisfied, tap “Save” to finalize the scene.
8. Activate the Scene: Once the lighting scene is saved, you can activate it using voice commands with Google Home. Simply say a command like “Hey Google, activate movie night scene” or “Ok Google, set the lights to relaxation mode” to instantly set the scene in motion.
9. Customize and Edit: If you want to make changes to a scene, navigate back to the room settings in the Google Home app and select the scene. From there, you can adjust the lights’ settings or even delete the scene if desired.
10. Explore Advanced Options: The advanced settings in the Google Home app allow you to take your lighting scenes further by combining them with other actions or routines. For example, you can create a routine to simultaneously activate a specific lighting scene, play your favorite music, and adjust the thermostat.
Creating lighting scenes with Google Home adds a touch of personalization to your smart home. Whether you’re setting the mood for a romantic dinner or creating a vibrant party atmosphere, lighting scenes allow you to effortlessly transform your space with a simple voice command.
Automating Lights with Routines
Google Home offers the ability to automate your lights using routines, allowing you to create a set of actions that are triggered by a specific command or event. Here’s how you can automate your lights with routines in Google Home:
1. Open the Google Home App: Launch the Google Home app on your smartphone or tablet and ensure that your Google Home device and smart light bulbs are connected and synced.
2. Tap on the Settings Icon: Look for the settings icon, usually represented by three horizontal lines or dots, in the top-left corner of the app’s main screen. Tap on it to access the settings menu.
3. Select “More Settings”: From the settings menu, choose “More Settings.” This will open the advanced settings options for your Google Home device.
4. Navigate to the “Routines” Section: Scroll down until you find the “Routines” section, and tap on it. This is where you can create and manage your routines.
5. Tap on “Add a Routine”: Look for the “Add a Routine” button and tap on it to create a new routine for your lights.
6. Name Your Routine: Give your routine a descriptive name that corresponds to the action or event you want to trigger. For example, “Good Morning” or “Bedtime.” This name will be used to activate the routine using voice commands.
7. Choose the “Start” Trigger: Select the trigger that will initiate the routine. This can be a specific voice command, a scheduled time, or an event. Choose the appropriate option and set the conditions for the trigger.
8. Add Actions: In the actions section of the routine, tap on the “+” button to add an action. Select “Adjust lights, plugs, and more” to control your smart light bulbs.
9. Adjust Light Settings: Customize the light settings for the routine. You can choose to turn specific lights on or off, adjust the brightness or color, or activate a lighting scene. Use the available options to set your desired lighting configuration.
10. Save and Activate: Once you have set up the routine and configured the light actions, tap on “Save” to finalize your routine. You can now activate the routine using the designated trigger phrase or event, and your lights will automatically adjust accordingly.
Note: You can create multiple routines for different scenarios or times of the day. For example, you might have a routine to gradually dim the lights in the evening or a routine to turn on specific lights when you arrive home.
Automating your lights with routines adds a layer of convenience and efficiency to your smart home setup. With a simple command or event trigger, you can seamlessly control the lighting experience in your home without any manual intervention.
Troubleshooting Common Issues with Smart Lights and Google Home
While setting up and using smart lights with Google Home is generally a smooth process, you may encounter some common issues along the way. Here are some troubleshooting steps to help you resolve these issues:
1. Connection Problems: If your smart lights are not responding or are not connecting to Google Home, ensure that both your smart lights and Google Home device are connected to the same Wi-Fi network. Verify if your smart lights require a separate hub or bridge for connectivity and ensure it is properly set up.
2. Firmware Updates: Check for firmware updates for both your smart lights and the Google Home device. Updating to the latest firmware can often resolve compatibility issues and improve performance.
3. Restart Devices: Try restarting both your Google Home device and the smart lights. Simply unplug the devices from power, wait a few seconds, and plug them back in. This can help refresh the connection and resolve minor issues.
4. Reset Smart Lights: If the connection issues persist, try resetting your smart lights to factory settings. Refer to the manufacturer’s instructions for the specific reset process. Once reset, set up the lights again following the proper procedure.
5. Check Wi-Fi Signal: Ensure that your Wi-Fi signal strength is adequate near the smart lights and Google Home device. Weak Wi-Fi signals can lead to connectivity issues. Consider relocating the Google Home device or using a Wi-Fi range extender if needed.
6. Verify Account Linked: Double-check if the Google Home app is properly linked to your smart light manufacturer’s account. Ensure that you have authorized the necessary permissions for the app to control your lights.
7. Reconnect Devices: If the connection between your smart lights and Google Home is lost, you may need to reconnect them. Follow the manufacturer’s instructions to reconnect the lights to your Google Home ecosystem.
8. Voice Recognition Issues: If Google Home is not accurately recognizing your voice commands for controlling the lights, ensure that you are speaking clearly and using the proper command phrases. You can also train the voice model in the Google Home app for better recognition.
9. Interference: Avoid placing your smart lights or Google Home device near electronic devices that may cause interference, such as microwaves or cordless phones. These devices can disrupt the wireless connection between your smart lights and Google Home.
10. Contact Support: If none of the troubleshooting steps resolve the issue, reach out to the support channels of the smart light manufacturer or Google Home for further assistance. They can provide specific troubleshooting steps tailored to your setup.
Remember, troubleshooting steps may vary depending on the brand and model of your smart lights. Always refer to the manufacturer’s instructions and support resources for the most accurate troubleshooting guidance.