
Things to Consider Before Installing Smart Light Bulbs
Smart light bulbs have revolutionized the way we illuminate our homes. With their advanced features and connectivity options, they offer a new level of convenience and control. However, before diving into the world of smart lighting, there are a few important factors to consider. By taking these into account, you can ensure a seamless installation process and make the most out of your smart lighting experience.
1. Compatibility: One of the key considerations before installing smart light bulbs is ensuring compatibility with your existing lighting system. Smart bulbs come in different sizes, shapes, and bases, so it’s essential to check if they can fit into your existing fixtures. Additionally, make sure the smart bulbs you choose are compatible with the smart home platform or voice assistant you plan to use.
2. Wireless Connectivity: Most smart light bulbs rely on wireless connectivity to communicate with other devices and apps. Before installation, ensure that your home has a stable and reliable Wi-Fi network. This will ensure smooth control and operation of your smart bulbs, allowing you to adjust the lighting settings effortlessly from your smartphone or tablet.
3. Smart Home Ecosystem: Consider the ecosystem that your smart light bulbs will integrate into. If you already have other smart devices in your home, such as a smart thermostat or security system, ensure that the smart bulbs you choose are compatible with your existing setup. This way, you can create a cohesive and interconnected smart home experience.
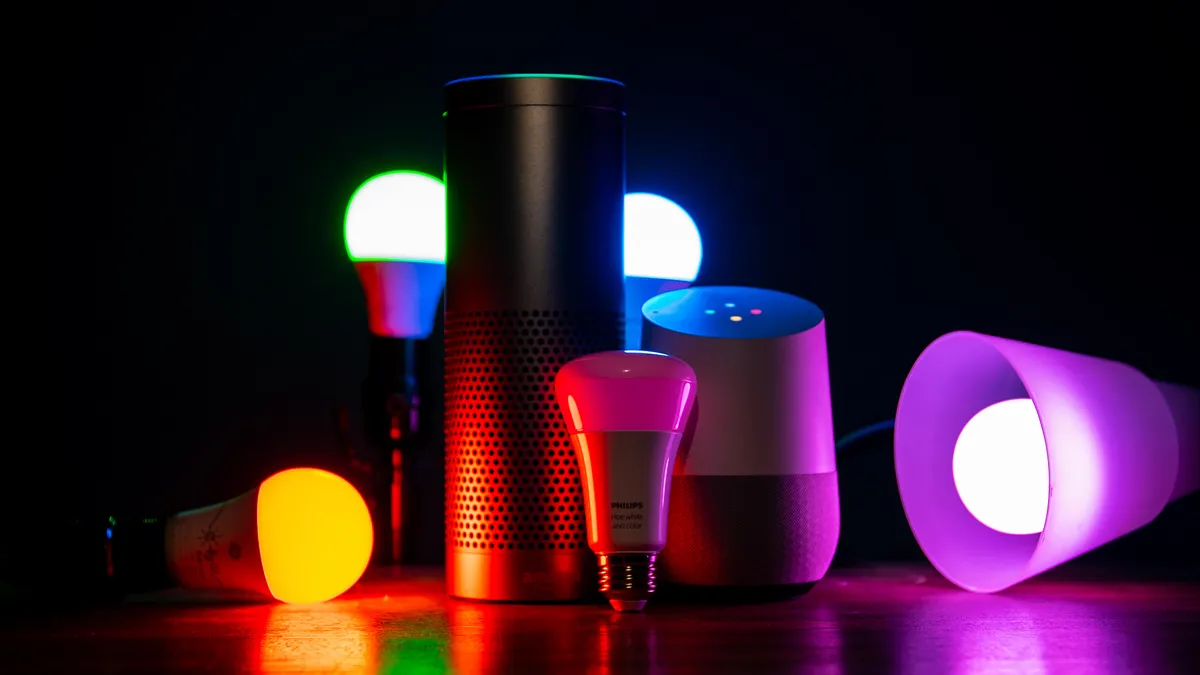
4. Lighting Needs: Take into account your specific lighting needs and preferences. Smart bulbs come in various colors and shades, allowing you to customize the ambiance of your space. Additionally, consider the brightness levels and dimming capabilities that are important to you. Some smart bulbs even offer features like color temperature adjustment, which can enhance the overall lighting experience.
5. Budget: Determine your budget before investing in smart light bulbs. Prices can vary depending on the brand, features, and functionality. While some smart bulbs may be more expensive, they often come with additional benefits like energy efficiency and longer lifespan. Consider your lighting requirements and long-term savings to make an informed decision.
By considering these factors before installing smart light bulbs, you can ensure a successful and satisfying experience. Take the time to assess compatibility, connectivity, and your specific lighting needs. With the right smart bulbs in place, you’ll be ready to embrace the convenience and flexibility that smart lighting has to offer.
Step 1: Choosing the Right Smart Light Bulb for Your Home
When it comes to choosing the right smart light bulb for your home, there are several factors to consider. With a wide range of options available in the market, finding the perfect fit can seem overwhelming. However, by understanding your needs and priorities, you can make an informed decision. Here’s a step-by-step guide to help you choose the right smart light bulb:
1. Compatibility: Ensure that the smart light bulb you choose is compatible with your existing lighting system. Look for information on the packaging or the manufacturer’s website regarding compatibility with different smart home platforms or voice assistants such as Amazon Alexa or Google Assistant. This will ensure seamless integration and control.
2. Bulb Type: Consider the type of bulb you want, such as LED or CFL. LED bulbs are known for their energy efficiency and long lifespan, making them a popular choice. CFL bulbs, on the other hand, are known for their affordability. Choose a bulb type that suits your preferences and requirements.
3. Lighting Features: Determine the lighting features you desire. Do you want the ability to adjust brightness levels? Or perhaps you’re interested in bulbs that offer color-changing capabilities? Some smart bulbs even have scheduling options, allowing you to automate when the lights turn on and off. Consider the features that enhance your lighting experience.
4. Color Temperature: Pay attention to the color temperature of the smart light bulb. Color temperature is measured in Kelvin and determines the warmth or coolness of the light emitted. Lower Kelvin values (around 2700K-3000K) produce warm, yellowish light, while higher values (around 5000K-6500K) produce cooler, bluish light. Choose the color temperature that aligns with your desired ambiance.
5. Brightness Level: Consider the brightness level you need in different areas of your home. Brightness is measured in lumens, with higher values indicating brighter light. Assess the lumens provided by the smart bulb to ensure it meets your lighting requirements. Dimmable bulbs are a great option as they allow you to adjust the brightness as needed.
6. Manufacturer Reputation: Research the reputation and reviews of the smart light bulb manufacturer. Look for reliable brands known for their quality and durability. Check if they offer good customer support and warranties, as this can provide peace of mind. Reading customer reviews can give you insights into the performance and reliability of the bulb.
By considering these factors when choosing a smart light bulb, you can find the perfect fit for your home. Take the time to assess compatibility, bulb type, lighting features, color temperature, brightness level, and the reputation of the manufacturer. With the right smart light bulb, you’ll be one step closer to enjoying enhanced lighting control and convenience in your home.
Step 2: Checking Compatibility with Your Existing Lighting System
Before purchasing smart light bulbs, it’s crucial to ensure their compatibility with your existing lighting system. This step is vital to ensure a smooth installation process and seamless integration with your smart home ecosystem. Here are some important considerations to check for compatibility:
1. Smart Home Platform: Determine the smart home platform or voice assistant you are using, such as Amazon Alexa, Google Assistant, or Apple HomeKit. Different smart light bulbs are compatible with specific platforms, so make sure the bulbs you choose are compatible with the platform you are using. This will allow you to control your smart bulbs using voice commands or through the respective app.
2. Communication Protocol: Check the communication protocol used by your existing lighting system. Smart light bulbs generally use protocols like Wi-Fi, Bluetooth, Zigbee, or Z-Wave to connect and communicate with other devices. Ensure that the smart light bulbs you choose are compatible with the communication protocol supported by your existing lighting system. This will ensure seamless communication between your smart bulbs and the rest of your smart home ecosystem.
3. Hub Requirement: Some smart light bulbs require a hub to connect and communicate with other devices. A hub acts as a central control unit for your smart home devices. If you already have a hub in your smart home setup, ensure that the smart light bulbs you choose are compatible with your existing hub. On the other hand, if you don’t have a hub, consider choosing smart bulbs that do not require a hub for connectivity.
4. Wattage and Dimmer Compatibility: Check the wattage and dimmer compatibility of your existing lighting system. While most smart bulbs work with standard dimmer switches, some may require specific dimmer compatibility. Ensure that your dimmer switch is compatible with the smart bulbs you plan to install. If not, consider replacing the dimmer switch or opting for smart bulbs that are compatible with your existing dimmer setup to avoid any functionality issues.
5. Existing Fixtures: Assess the types of fixtures you have in your home. Make sure the smart light bulbs you choose fit properly and securely into your existing fixtures. Consider the bulb shape, size, and base type to ensure a proper fit. Improperly fitting bulbs may not only cause installation difficulties but can also affect the overall appearance and functionality of your lighting setup.
By checking compatibility with your existing lighting system, you can avoid unnecessary complications and ensure a successful smart light bulb installation. Take the time to research and verify the compatibility of the bulbs with your smart home platform, communication protocol, hub requirements, dimmer switches, and existing fixtures. This will enable you to seamlessly integrate your smart light bulbs into your smart home ecosystem and enjoy the convenience and control they bring.
Step 3: Preparing Your Home for Smart Light Bulb Installation
Before you begin installing smart light bulbs in your home, it’s important to properly prepare your surroundings and setup. Taking the time to prepare will ensure a smooth and hassle-free installation process. Here are some essential steps to follow when preparing your home:
1. Gather the Necessary Tools: Before you start, gather the necessary tools for the installation. This typically includes a ladder or step stool, a screwdriver, and perhaps wire strippers or pliers, depending on your specific installation needs. Having these tools readily available will make the installation process more efficient.
2. Turn Off the Power: Prior to any electrical work, it is crucial to turn off the power to the specific light bulb or room where you will be installing the smart bulbs. Locate the appropriate circuit breaker in your electrical panel and switch it off to ensure your safety during the installation process.
3. Remove Existing Bulbs: Carefully remove the existing bulbs from the fixtures you plan to replace with smart bulbs. Allow the bulbs to cool down if they were recently in use. Take note of the bulb type and wattage for future reference or replacement purposes.
4. Clean the Fixtures: Take the opportunity to clean the fixtures, removing any accumulated dust or debris. A clean fixture will not only enhance the aesthetics of your smart bulbs but also ensure optimal light distribution once installed. Use a soft cloth or a gentle cleaning solution to avoid damaging the fixtures.
5. Check Wiring Connections: Inspect the wiring connections in the fixture to ensure they are secure and in good condition. Loose or damaged wiring can affect the performance of your smart bulb or pose a safety hazard. If you notice any issues, consult a professional electrician to address the wiring before proceeding with the installation.
6. Read the Smart Bulb Instructions: Familiarize yourself with the installation instructions provided by the smart bulb manufacturer. Each smart bulb model may have slightly different installation steps or requirements. Taking the time to read and understand the instructions will ensure that you install the smart bulbs correctly and maximize their functionality.
7. Consider Grouping and Placement: If you plan to use multiple smart bulbs in a room or area, consider the grouping and placement of the bulbs. Assess the lighting needs and desired ambiance of the space to determine the appropriate placement and configuration for your smart bulbs. This will help you achieve the desired lighting effects and maximize the convenience of controlling multiple bulbs at once.
By properly preparing your home for smart light bulb installation, you can ensure a safe and effective process. Gather the necessary tools, turn off the power, remove existing bulbs, clean the fixtures, check wiring connections, read the smart bulb instructions, and plan the grouping and placement of the bulbs. With these preparations in place, you can proceed confidently to the next step of installing your smart light bulbs.
Step 4: Installing the Smart Light Bulb
With your home prepared, it’s time to move on to the installation of your smart light bulbs. Installing a smart bulb is a straightforward process that can be completed in just a few simple steps. Follow these guidelines to ensure a successful installation:
1. Ensure Power is Off: Double-check that the power to the fixture is turned off before proceeding with the installation. This step is crucial for your safety and to avoid any electrical accidents during the process.
2. Remove Packaging and Protective Covers: Take the smart light bulb out of its packaging, keeping the protective covers intact until the bulb is properly installed. It’s important not to touch the bulb’s contacts or any exposed electrical parts while handling it.
3. Screw or Insert the Bulb: Depending on the type of fixture you have, either screw the smart bulb into the socket or insert it firmly until it is securely in place. Ensure that the bulb is properly aligned, and avoid over-tightening to prevent any damage.
4. Test the Bulb: After installing the smart bulb, turn on the power to the fixture and test the bulb’s functionality. If the bulb doesn’t illuminate or doesn’t respond to commands from the smart home system or app, double-check the installation and make sure the power is functioning properly.
5. Follow Additional Setup Instructions: Some smart bulbs may require additional setup steps to connect them to your smart home system or network. Refer to the manufacturer’s instructions or the accompanying app for specific guidance on the setup process. This may involve using a mobile app to scan for the bulb or pressing buttons on the bulb to initiate the pairing process.
6. Repeat the Process for Additional Bulbs: If you have multiple smart bulbs to install, repeat the above steps for each bulb. Ensure that each bulb is installed securely and functions as expected before moving on to the next one.
7. Dispose of Packaging Responsibly: After successfully installing the smart bulbs, dispose of the packaging materials responsibly. Recycle any cardboard boxes and dispose of any plastic or foam packaging in the proper waste receptacles.
By following these steps, you can easily install your smart light bulbs and prepare them for further setup and customization. Remember to handle the bulbs with care, ensure the power is switched off, test the bulb’s functionality, and follow any additional setup instructions provided by the manufacturer. With the installation complete, you’re ready to move on to the next step of connecting the smart bulbs to your Wi-Fi network.
Step 5: Connecting the Smart Light Bulb to Your Wi-Fi Network
Connecting your smart light bulb to your Wi-Fi network is an essential step in unlocking its full potential. This allows you to control the bulbs remotely using your smartphone or other smart home devices. Follow these steps to connect your smart light bulb to your Wi-Fi network:
1. Ensure Your Wi-Fi Network is Stable: Before you begin, ensure that your Wi-Fi network is stable and functioning properly. This will ensure a smooth and reliable connection between your smart bulb and your network.
2. Refer to the Manufacturer’s Instructions: Refer to the manufacturer’s instructions or the accompanying app for guidance on connecting your specific smart light bulb model to your Wi-Fi network. Different smart bulbs may have varying connection methods, so it’s important to follow the provided instructions.
3. Prepare Your Smartphone or Tablet: Ensure that your smartphone or tablet is connected to the same Wi-Fi network that you want to connect your smart bulb to. This ensures that the smart bulb can successfully communicate with your device via the network.
4. Put Your Smart Bulb into Setup Mode: Depending on the smart bulb model, you may need to put it into its setup or pairing mode. This mode enables the bulb to be discovered and connected to your Wi-Fi network. Consult the manufacturer’s instructions for the specific steps required to activate this mode.
5. Open the Smart Home App or Manufacturer’s App: Open the smart home app associated with your smart bulb or the app provided by the manufacturer. The app will typically guide you through the connection process and allow you to sync the bulb with your Wi-Fi network. Follow the on-screen prompts within the app to proceed.
6. Enter Your Wi-Fi Network Information: When prompted within the app, enter your Wi-Fi network name (SSID) and password to connect the smart bulb to your network. Ensure that you enter the correct information to establish a successful connection.
7. Wait for the Connection Confirmation: After entering your Wi-Fi network information, wait for the app to confirm that the smart bulb has successfully connected to your network. This may take a few moments, so be patient during this step.
8. Test the Smart Bulb Functionality: Once the connection is confirmed, test the functionality of the smart bulb by controlling it through the app. Turn the bulb on and off or adjust its brightness to ensure that the connection and control are working as expected.
9. Repeat for Additional Smart Bulbs: If you have multiple smart bulbs, repeat the above steps for each bulb to connect them individually to your Wi-Fi network. Connect one bulb at a time to ensure a proper connection and avoid any interference between bulbs.
Connecting your smart light bulb to your Wi-Fi network opens up a world of possibilities in terms of control and automation. Follow the manufacturer’s instructions, put your smart bulb into setup mode, use the appropriate app, enter your Wi-Fi network information, and confirm the successful connection. With your smart bulbs connected to your Wi-Fi network, you’re now ready to move on to the next step of downloading and setting up the smart bulb app.
Step 6: Downloading and Setting Up the Smart Light Bulb App
Once your smart light bulb is connected to your Wi-Fi network, the next step is to download and set up the smart bulb app. The app will enable you to control and customize your smart light bulb’s settings, such as brightness, color, scheduling, and automation. Follow these steps to download and set up the smart bulb app:
1. Identify the App: Check the manufacturer’s instructions or packaging to determine the name of the app associated with your smart light bulb. It may be a specific app created by the bulb manufacturer or a recognized smart home platform app, such as Philips Hue or LIFX.
2. Download the App: Open the app store on your smartphone or tablet (App Store for iOS devices or Google Play Store for Android devices) and search for the app by name. Download and install the app that corresponds to your smart light bulb brand or model.
3. Create an Account (if required): Some smart bulb apps may require you to create an account before you can use their full functionality. Follow the app’s instructions to create an account, providing the necessary information such as your email address and password.
4. Open the App: Once the app is downloaded and installed, open it on your smartphone or tablet. Allow the app to access the necessary permissions if prompted, such as location or camera access, to ensure full functionality.
5. Connect the App to Your Smart Bulb: The app will guide you through the process of connecting it to your smart light bulb. This typically involves scanning for your smart bulb or following a series of prompts within the app to establish the connection.
6. Follow App’s On-Screen Prompts: Once your smart bulb is detected, the app will provide on-screen prompts to help you set up and customize your smart bulb. This may include naming your bulb, setting brightness levels, adjusting colors, and exploring additional features like scheduling or automation options.
7. Explore App’s Features: Take the time to explore the app’s features and settings. Familiarize yourself with the different options available to customize your smart bulb’s behavior and integrate it with other smart home devices or platforms. Use the app to create scenes, schedules, or routines to enhance your lighting experience.
8. Connect Additional Smart Bulbs: If you have multiple smart bulbs, follow the same process to connect each bulb to the app. Most apps allow you to control and manage multiple bulbs within the same app, providing a centralized control system for all your smart lighting needs.
By downloading and setting up the smart bulb app, you gain full control over your smart light bulb’s customization and features. Download the appropriate app for your smart bulb brand or model, follow the app’s instructions to connect it to your bulb, create an account if necessary, and explore the app’s settings and features. With the app set up, you’re now ready to move on to the next step of setting up automation and customization options for your smart light bulb.
Step 7: Setting Up Automation and Customization Options
One of the key benefits of smart light bulbs is their ability to be automated and customized to suit your preferences. By setting up automation and customization options, you can create personalized lighting schedules, integrate with other smart home devices, and enhance the overall convenience and efficiency of your smart lighting system. Follow these steps to set up automation and customization options for your smart light bulb:
1. Explore App Features: Open the smart bulb app and explore its features for automation and customization. Look for options such as scheduling, scenes, routines, or automation rules, which allow you to set specific lighting behaviors based on time, events, or other triggers.
2. Set Lighting Schedules: Create lighting schedules within the app to automatically turn your smart bulbs on or off at specific times of the day. This can help simulate occupancy when you’re away or provide a gentle wake-up light in the morning.
3. Create Lighting Scenes: Utilize the app’s scene feature to create custom lighting scenes that affect multiple smart bulbs simultaneously. For example, you can create a “Movie Night” scene that dims the lights and sets a warm color temperature to enhance your viewing experience.
4. Integrate with Smart Home Automation: If you have other smart home devices or systems, explore the app’s options for integration. Connect your smart light bulbs with other devices like smart thermostats or motion sensors to trigger specific lighting actions based on different events and conditions.
5. Adjust Brightness and Color: Experiment with the app’s options to customize the brightness and color of your smart bulbs. Depending on their capabilities, you may be able to adjust the brightness level, select different color temperatures, or even change the color of the light to suit your mood or occasion.
6. Set Up Voice Control: If your smart light bulbs are compatible with voice assistants like Amazon Alexa or Google Assistant, enable voice control within the app. This allows you to control your lights through voice commands, adding another layer of convenience to your smart lighting system.
7. Experiment and Fine-Tune: Take the time to experiment with different automation and customization options offered by the app. Fine-tune the settings based on your preferences and daily routines to create a smart lighting system that suits your specific needs.
8. Stay Updated: Regularly check for app updates and firmware upgrades for your smart light bulbs. Manufacturers often release updates that bring new features or improvements to the functionality of the bulbs. Keeping your app and bulbs updated ensures you have access to the latest automation and customization options.
By setting up automation and customization options, you can fully harness the potential of your smart light bulbs. Use the app’s features to create lighting schedules, scenes, and routines, integrate with other smart home devices, adjust brightness and color, enable voice control, and regularly update the app and firmware. With these options in place, you can enjoy a personalized and convenient smart lighting experience in your home.
Step 8: Troubleshooting and Tips for Smart Light Bulb Installation
While installing smart light bulbs is generally a straightforward process, you may encounter a few challenges along the way. It’s helpful to be aware of common troubleshooting tips to address any issues that may arise during or after installation. Here are some troubleshooting and tips to ensure a successful smart light bulb installation:
1. Check the Wi-Fi Strength: If you’re having trouble connecting the smart light bulb to your Wi-Fi network, check the strength of your Wi-Fi signal in the installation area. Poor Wi-Fi signal strength can hinder the connection process. Consider moving the router closer to the bulb or using a Wi-Fi extender to improve the signal.
2. Reset the Bulb: If the smart bulb is not responding or is not connecting, try resetting it. Consult the manufacturer’s instructions for the specific reset process, as it varies depending on the brand. Typically, this involves turning the bulb on and off a certain number of times or using the app to initiate the reset.
3. Ensure Compatible Devices: Make sure that the devices you’re using to control the smart bulbs are compatible with the required specifications. Check the compatibility of your smartphone, tablet, or smart home hub with the smart bulb and app. Using incompatible devices may result in connectivity issues or limited functionality.
4. Check Power Supply: Verify that the power supply to the fixture is functioning correctly. Ensure the light switch is turned on and the circuit breaker is not tripped. If necessary, replace the fixture or consult an electrician to check for any wiring issues.
5. Avoid Overloading Circuits: Be mindful of the number of smart bulbs you install on a single circuit. Overloading the circuit with too many bulbs can cause flickering or inadequate power supply. Spread out the smart bulbs across different circuits or consider upgrading the circuit capacity if needed.
6. Keep Firmware Updated: Regularly check for firmware updates for your smart bulbs and associated apps. These updates often provide bug fixes, security enhancements, and new features. Keeping your firmware up to date ensures optimal performance and compatibility with the latest technologies.
7. Read Troubleshooting Guides: Consult the manufacturer’s troubleshooting guides or online forums for any specific issues you encounter. Manufacturers often provide detailed instructions on resolving common problems or offer customer support to address any technical difficulties.
8. Experiment and Explore: Once your smart light bulbs are installed and functioning correctly, take the time to experiment and explore the features and capabilities they offer. Familiarize yourself with the app settings, automation options, and customization features. This will help you maximize the potential of your smart lighting system.
By following these troubleshooting tips and recommendations, you can overcome common challenges and ensure a successful smart light bulb installation. Check the Wi-Fi strength, reset the bulb if needed, ensure device compatibility, verify the power supply, avoid circuit overloading, keep firmware updated, consult troubleshooting guides, and take time to explore and experiment with your smart light bulbs. With these tips in mind, you’ll be able to enjoy the convenience and enhanced control that smart lighting brings to your home.