
Enabling the “Send and Archive” feature in Gmail
Gmail is a powerful email client with a variety of useful features, including the “Send and Archive” option. This feature allows you to send a reply to an email while simultaneously archiving it, keeping your inbox clutter-free and organized. However, before you can use this convenient feature, you need to enable it in your Gmail settings.
To enable the “Send and Archive” feature, follow these simple steps:
- Access your Gmail account by signing in to your email.
- Click on the gear icon located at the top right corner of the screen. This will open the Gmail settings menu.
- Select “Settings” from the dropdown menu.
- Navigate to the “General” tab.
- Scroll down until you find the “Send and Archive” section.
- Click on the radio button next to “Show ‘Send & Archive’ button in reply.”
- Make sure to click the “Save Changes” button at the bottom of the page to apply the setting.
Now that you have successfully enabled the “Send and Archive” feature in Gmail, you can start using it to easily reply to emails and archive them in one simple step. This feature can save you time and make your inbox more organized, allowing you to focus on more important tasks.
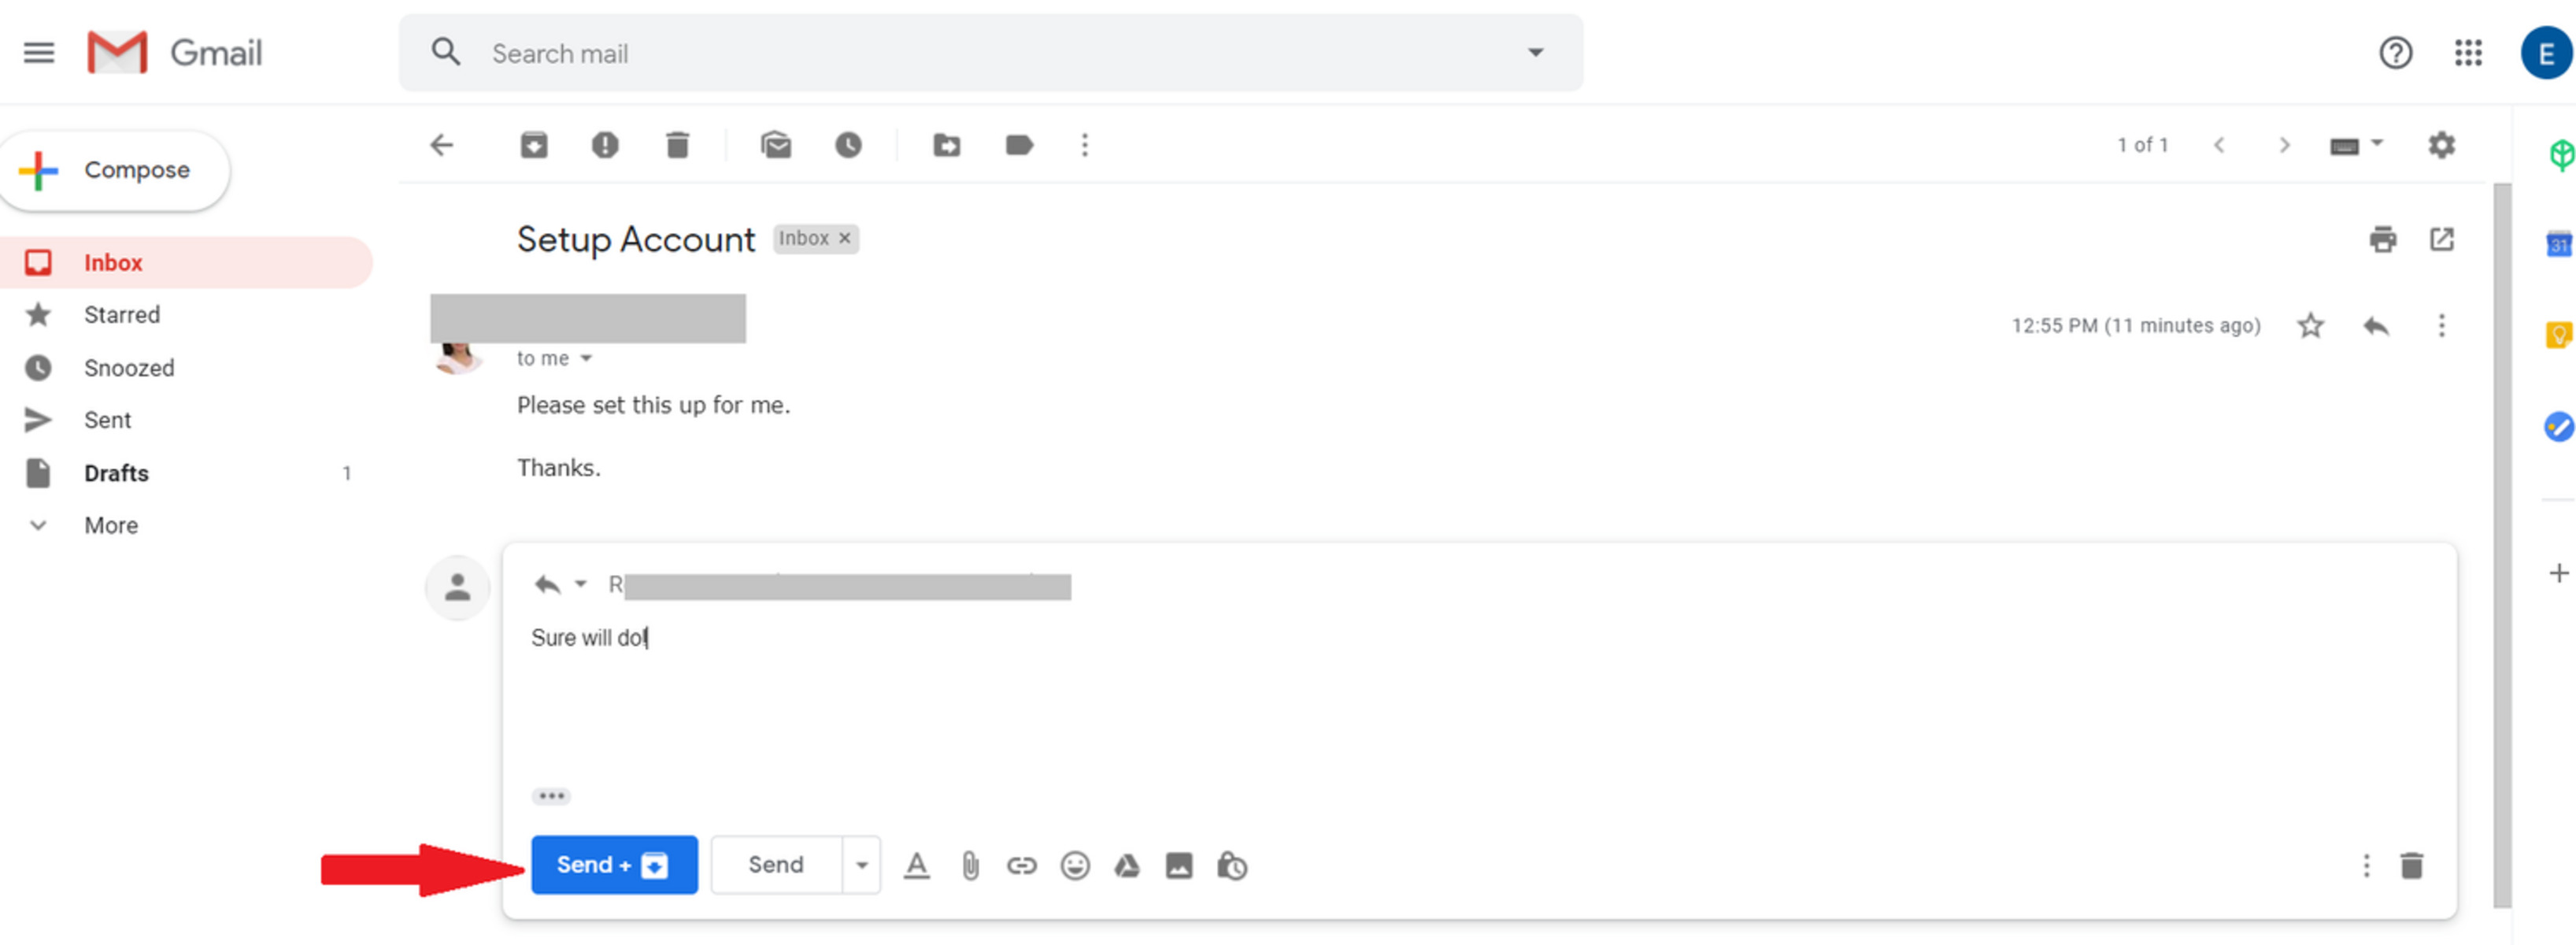
Once enabled, the “Send and Archive” button will appear in the composer window when you reply to an email. By clicking on this button, your response will be sent, and the original email will be archived, automatically removing it from your inbox.
Keep in mind that this feature will only work for individual emails, not for group conversations or threads. If you want to send a reply and archive multiple emails, we will cover that in detail in the next section.
Using the “Send and Archive” button for individual emails
Now that you have enabled the “Send and Archive” feature in Gmail, you can take advantage of the convenient “Send and Archive” button when responding to individual emails. This button allows you to send your response and immediately archive the original email, decluttering your inbox and keeping it organized.
To use the “Send and Archive” button for an individual email, follow these steps:
- Open the email you want to reply to by clicking on it in your Gmail inbox.
- Click on the “Reply” button to start composing your response.
- Once you have written your reply, take a moment to review it for accuracy and completeness.
- When you are ready to send your reply and archive the original email, click on the “Send and Archive” button.
- Your response will be sent, and the original email will be automatically archived, removing it from your inbox.
Using the “Send and Archive” button for individual emails can streamline your workflow and help you maintain a clutter-free inbox. It eliminates the need to manually archive each email after responding, saving you precious time and effort.
Keep in mind that the “Send and Archive” button is only available when you reply to an individual email, not when you reply to a group conversation or thread. In the next section, we will explore how to send a reply and archive multiple emails simultaneously.
Configuring the default action for the “Send and Archive” button
The “Send and Archive” button in Gmail allows you to quickly send a reply and archive the original email with a single click. By default, when you click on the “Send and Archive” button, Gmail will archive the email and take you back to your inbox. However, you have the option to configure the default action for this button to better suit your workflow.
To configure the default action for the “Send and Archive” button, follow these steps:
- Access your Gmail account and click on the gear icon at the top right corner of the screen to open the settings menu.
- Select “Settings” from the dropdown menu.
- Navigate to the “General” tab.
- Scroll down until you find the “Send and Archive” section.
- Click on the dropdown menu next to “When replying or forwarding a message” to reveal the available options.
- Select your preferred default action from the options: “Show ‘Send & Archive’ button,” “Archive the reply,” or “Do not auto-archive.”
- Once you have chosen your desired default action, click the “Save Changes” button at the bottom of the page to apply the setting.
By customizing the default action for the “Send and Archive” button, you can streamline your workflow and ensure that Gmail behaves according to your preferences. Whether you prefer to go back to your inbox, archive the reply, or not auto-archive at all, Gmail gives you the flexibility to choose the option that works best for you.
Remember that the default action you set will be applied every time you use the “Send and Archive” button, whether in a new email or when replying to an existing one.
In the next section, we will discuss how to send a reply and archive multiple emails at once, giving you even greater control over your inbox organization.
Sending a reply and archiving multiple emails at once
Gmail provides a practical solution for those times when you receive multiple emails that you need to reply to and archive. Instead of going through each email individually, you can use Gmail’s batch actions to send your replies and archive the emails in one go.
Here’s how to send a reply and archive multiple emails at once:
- Open your Gmail inbox and select the emails that you want to reply to and archive. You can do this by clicking the checkboxes next to each email.
- Once you have selected the desired emails, click on the “More” button located above your inbox.
- A dropdown menu will appear. Select the “Reply” option.
- Gmail will open a new compose window with your selected emails included as part of the conversation.
- Compose your reply in the new window just as you would for a regular email.
- When you are ready to send your reply and archive the selected emails, click on the “Send and Archive” button.
- Your replies will be sent, and the selected emails will be archived, removing them from your inbox in one swift action.
By using the batch action feature in Gmail, you can efficiently manage your email correspondence and keep your inbox organized. This method is particularly useful when dealing with multiple emails that require a similar response or when you want to quickly declutter your inbox.
Keep in mind that the “Send and Archive” button will apply the chosen default action for each email in the batch. If you have customized the default action in the Gmail settings, it will be followed when sending replies to multiple emails simultaneously.
In the next section, we will explore how you can archive a thread or conversation after replying in Gmail.
Archiving a thread or conversation after replying in Gmail
In Gmail, when you reply to an email within a thread or conversation, the default behavior is for the email to remain in your inbox. However, if you prefer to archive the entire thread or conversation after sending your reply, Gmail provides a simple way to do so.
Here’s how you can archive a thread or conversation after replying in Gmail:
- Open the thread or conversation that you want to reply to in your Gmail inbox.
- Click on the “Reply” button to compose your response.
- Write your reply in the compose window and review it for any necessary edits.
- Once you are ready to send your reply and archive the entire thread or conversation, click on the “Send and Archive” button.
- Your response will be sent, and the entire thread or conversation will be automatically archived, removing it from your inbox.
By archiving the entire thread or conversation, you can have a cleaner inbox and easily access the original email and your reply in the future by searching or navigating to the corresponding label or folder.
It’s important to note that archiving a thread or conversation does not delete it. The conversation will still be accessible in the “All Mail” label or by searching for specific keywords within Gmail.
Archiving a thread or conversation after replying can help you stay organized and streamline your email management process, ensuring that your inbox remains clutter-free.
In the next section, we will discuss how you can change the “Send and Archive” behavior on mobile devices.
Changing the “Send and Archive” behavior on mobile devices
Gmail offers a seamless experience across multiple devices, including mobile devices. If you primarily use Gmail on your smartphone or tablet, you can customize the “Send and Archive” behavior to suit your preferences and optimize your email workflow on the go.
To change the “Send and Archive” behavior on mobile devices, follow these steps:
- Open the Gmail app on your mobile device and sign in to your account if prompted.
- Tap on the hamburger menu icon (three horizontal lines) located in the top-left corner of the screen to open the main menu.
- Scroll down and tap on “Settings” to access the settings menu.
- Select your Gmail account from the list, if you have multiple accounts logged in.
- Tap on “General settings” to view and manage the general settings for your Gmail account.
- Scroll down until you find the “Send and Archive” section.
- Tap on the dropdown menu next to “When replying or forwarding a message” to reveal the available options.
- Select your preferred default action from the options: “Show ‘Send & Archive’ button,” “Archive the reply,” or “Do not auto-archive.”
- Once you have made your selection, tap on the back button to save the changes and exit the settings menu.
By customizing the “Send and Archive” behavior on your mobile device, you can ensure that Gmail behaves according to your preferences, just like on the desktop version. This allows you to have a consistent experience across all devices and tailor your email management to your liking, even when you are on the move.
Remember that the default action you set for “Send and Archive” will be applied every time you use the feature on your mobile device.
In the next section, we will discuss how to disable the “Send and Archive” feature in Gmail, in case you no longer wish to use it.
Disabling the “Send and Archive” feature in Gmail
If you have been using the “Send and Archive” feature in Gmail but find that it no longer aligns with your email workflow or preferences, you have the option to disable it. Disabling the “Send and Archive” feature will remove the corresponding button from the compose window and return Gmail to its default behavior of sending emails without archiving them automatically.
To disable the “Send and Archive” feature in Gmail, follow these steps:
- Access your Gmail account by signing in to your email.
- Click on the gear icon located at the top right corner of the screen to open the Gmail settings menu.
- Select “Settings” from the dropdown menu.
- Navigate to the “General” tab.
- Scroll down until you find the “Send and Archive” section.
- Click on the radio button next to “Hide ‘Send & Archive’ button in reply.”
- Remember to click the “Save Changes” button at the bottom of the page to apply the setting.
After disabling the “Send and Archive” feature, you will no longer see the corresponding button in the compose window when replying to emails. The original email will not be archived automatically, and you will need to manually archive it if you wish to declutter your inbox.
Disabling the “Send and Archive” feature can be beneficial if you prefer more control over when and how you archive your emails. It allows you to decide which emails to keep in your inbox and which ones to archive, based on your specific needs and organizational preferences.
If you ever change your mind and want to re-enable the “Send and Archive” feature, you can follow the earlier instructions to access the Gmail settings and switch the option back to “Show ‘Send & Archive’ button in reply.”