
Recover deleted emails from the trash folder
Accidentally deleting an important email can be a real nightmare. Luckily, Gmail has a safety net in the form of the trash folder. When you delete an email, it goes directly to the trash folder where it stays for a certain period of time before being permanently deleted. If you need to recover a deleted email, here’s how you can do it:
1. Open Gmail and navigate to the left-hand side panel where you’ll find various options. Click on “More” to expand the list.
2. Scroll down and locate the “Trash” folder. Click on it to open.
3. In the trash folder, you’ll see a list of deleted emails. You can either browse through them or use the search bar at the top to find a specific email.
4. Once you’ve found the email you want to recover, select it by checking the box next to it.
5. After selecting the email, click on the “Move to” button above the list of emails.
6. A dropdown menu will appear. Choose the folder or label where you want to move the email. If you want to restore it to the inbox, select “Inbox.”
7. The email will now be moved out of the trash folder and into the selected location.
It’s important to note that emails remain in the trash folder only for a limited time (usually 30 days). After this period, they will be automatically deleted and cannot be recovered. Therefore, it’s crucial to act promptly if you want to restore a deleted email.
Recovering deleted emails from the trash folder is a simple process that can save you from the stress of losing important information. Just remember to regularly check your trash folder and take the necessary steps to retrieve any accidentally deleted emails before it’s too late.
Retrieve emails from the spam folder
Spam emails can be quite annoying and overwhelming, often cluttering our inboxes with unwanted content. In an effort to protect users from potential threats, Gmail automatically filters suspected spam emails and redirects them to the spam folder. However, it’s possible for legitimate emails to end up in the spam folder by mistake. If you’re missing an important email and suspect it might be in the spam folder, follow these steps to retrieve it:
1. Open Gmail and navigate to the left-hand side panel where you’ll find various options. Click on “More” to expand the list.
2. Scroll down and locate the “Spam” folder. Click on it to open.
3. In the spam folder, you’ll see a list of emails that Gmail has identified as spam. Be sure to carefully review the emails before proceeding.
4. If you find an email that you believe is not spam, select it by checking the box next to it.
5. After selecting the email, click on the “Not spam” button above the list of emails.
6. Gmail will move the selected email to your inbox or the appropriate label/folder.
Gmail learns from your actions, so by marking legitimate emails as “not spam,” you’re helping the system improve its filtering accuracy for the future.
In some cases, emails from specific senders or domains may consistently end up in your spam folder. To prevent this from happening, you can add them to your contacts or create a filter to ensure their emails always land in your inbox.
Retrieving emails from the spam folder is a crucial step in ensuring you don’t miss out on important messages. Don’t forget to periodically check your spam folder and rescue any legitimate emails that may have been erroneously filtered as spam.
Undo sending an email
We’ve all been there – that moment of panic when you realize you’ve sent an email with a typo, an incorrect attachment, or to the wrong recipient. Fortunately, Gmail provides a feature that allows you to undo the sending of an email, giving you a chance to rectify your mistake before it’s too late. Here’s how you can undo sending an email:
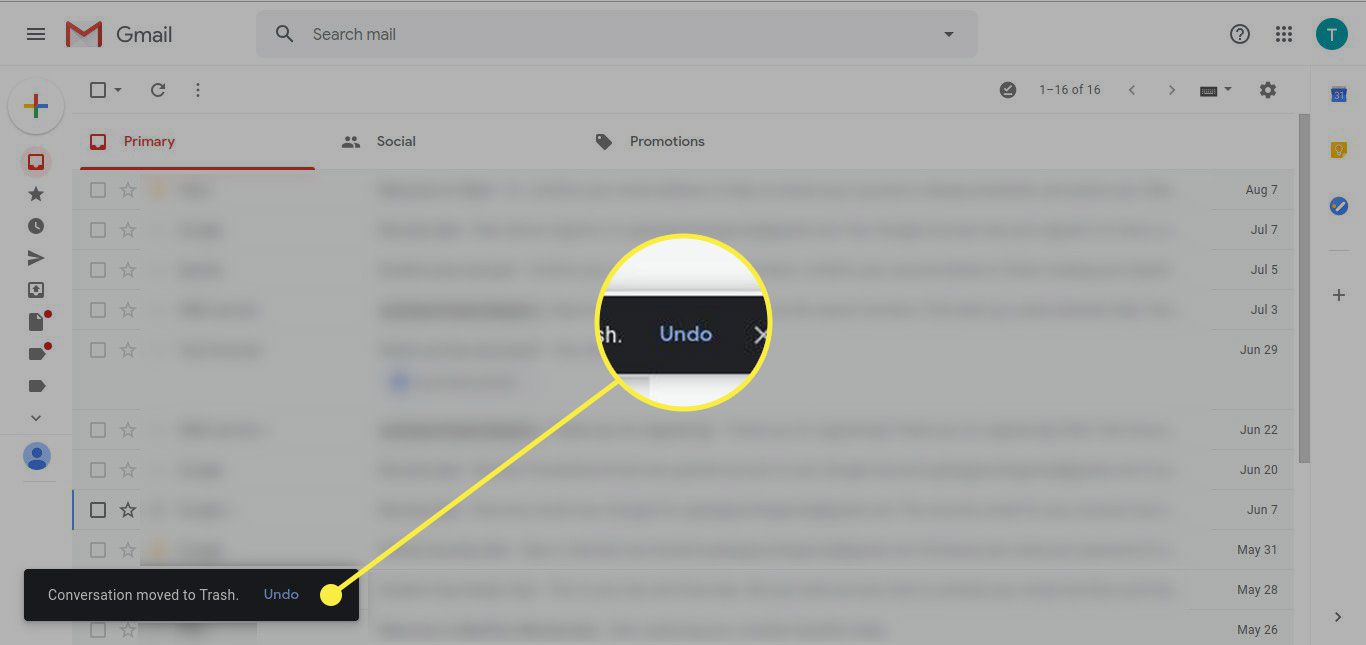
1. Immediately after hitting the “Send” button, look for the “Undo” option that appears at the bottom left of your Gmail screen. It will be visible for a few seconds.
2. Click on “Undo” to stop the email from being sent.
3. Once you click “Undo,” Gmail will retrieve the email from reaching its intended recipient, and it will reappear in the compose window.
4. Review the email, make any necessary changes or corrections, and then click “Send” again when you’re ready.
It’s important to note that the “Undo” option is only available for a limited time. By default, Gmail offers a 5-second window for undoing the send. However, you can extend this time frame by enabling the “Undo Send” feature in your Gmail settings. You can set it to allow for up to 30 seconds of grace period.
This convenient feature gives you a second chance to check your email before it’s permanently sent. It can save you from potential embarrassment and ensure that your emails are sent accurately and professionally.
Remember, though, that the “Undo” feature is not foolproof. Once the time window has passed, the email will be sent and cannot be retrieved. Therefore, it’s always a good practice to double-check your emails before clicking “Send.”
Undoing the sending of an email in Gmail is a valuable tool that can help you avoid mistakes and send out more polished communications. Make the most of this feature to maintain professionalism and accuracy in your email correspondence.
Recall or unsend a scheduled email
We’ve all been in situations where we’ve scheduled an email to be sent at a specific time, only to realize later that we need to make changes or even cancel it altogether. Fortunately, Gmail provides a feature that allows you to recall or unsend a scheduled email. Here’s how you can do it:
1. Open Gmail and go to the “Scheduled” folder on the left-hand side panel. This folder contains all the emails you’ve scheduled to be sent at a later time.
2. Locate the email you want to recall or unsend, and open it.
3. At the top right corner of the email, you’ll find the “Cancel send” option. Click on it.
4. Gmail will prompt you to confirm the cancellation. Choose “Yes” to proceed.
5. The scheduled email will be canceled, and it will no longer be sent at the designated time.
It’s important to note that the “Cancel send” option is only available for the duration of time before the scheduled email is sent. Once the email has been sent, it cannot be recalled or unsent. Therefore, it’s essential to act quickly if you need to make any changes or cancel a scheduled email.
This feature can be particularly useful when you’ve realized there’s an error in the recipient list, the subject line, or the content of the email. It allows you to avoid any potential misunderstandings or miscommunications by giving you the chance to correct or withdraw the email before it reaches its intended recipients.
Remember, however, that the success of recalling or unsending a scheduled email depends on various factors, including the destination email server and the recipient’s settings. While Gmail provides the option to cancel the send, there’s no guarantee that the email will be completely removed from the recipient’s inbox if it has already been delivered.
Recalling or unsending a scheduled email in Gmail provides a valuable opportunity to rectify any mistakes or make last-minute changes. Utilize this feature to ensure that your emails are always accurate, reliable, and appropriate.
Restore emails from the archive folder
Archiving emails is a great way to declutter your inbox while still keeping important messages easily accessible. When you archive an email in Gmail, it gets moved out of your inbox and into the “All Mail” folder. However, if you need to retrieve an archived email, you can easily restore it back to your inbox. Here’s how:
1. Open Gmail and look for the “All Mail” folder on the left-hand side panel. Click on it to open.
2. In the “All Mail” folder, you’ll find a list of all the emails in your Gmail account, including archived emails.
3. You can either browse through the emails or use the search bar at the top to find a specific email.
4. Once you’ve found the archived email you want to restore, open it.
5. At the top of the email, you’ll see various options. Click on the “Move to Inbox” button.
6. The email will now be moved from the archive folder back to your inbox, making it easily accessible.
Restoring emails from the archive folder is a simple process that allows you to bring back important messages that you may need to reference or act upon. By archiving less relevant emails, you can maintain a clutter-free inbox while still having the ability to retrieve them when necessary.
Remember, archived emails remain in the “All Mail” folder unless you delete them. This means that you can always restore archived emails from this folder, even if they were archived months or years ago. Gmail’s search function can be especially helpful in quickly locating specific archived emails based on criteria such as sender, subject, or keywords.
By taking advantage of the archive feature in Gmail and understanding how to restore archived emails, you can keep your inbox organized and ensure that important messages are never lost or forgotten.
Restore emails from the “All Mail” folder
The “All Mail” folder in Gmail serves as a comprehensive repository of all the emails in your account. It includes not only the emails in your inbox and sent folder, but also the emails you’ve archived, marked as spam, or deleted. If you need to retrieve an email that you’ve mistakenly deleted or accidentally moved to the “All Mail” folder, here’s how you can restore it:
1. Open Gmail and locate the “All Mail” folder on the left-hand side panel. Click on it to open.
2. In the “All Mail” folder, you’ll find a list of all the emails in your Gmail account.
3. You can either browse through the emails or use the search bar at the top to find a specific email.
4. Once you’ve found the email you want to restore, open it.
5. At the top of the email, you’ll see various options. Click on the appropriate action based on what you want to do with the email. For example:
- To move the email back to your inbox, click on the “Move to Inbox” button.
- To restore the email to a specific folder, click on the “Move to” button and choose the desired folder from the dropdown menu.
6. The email will now be restored to its new location, whether that’s your inbox or a specific folder.
Restoring emails from the “All Mail” folder provides a convenient way to recover emails that may have been accidentally misplaced or deleted. It serves as a safety net, ensuring that even if an email is removed from your inbox, you can still retrieve it from this folder.
Remember, emails in the “All Mail” folder will remain there unless you delete or archive them again. This means that you can always restore emails from this folder, regardless of when they were originally moved to the folder.
Gmail’s robust search functionality can be particularly useful in locating specific emails within the “All Mail” folder, especially if you have a large number of emails in your account.
By familiarizing yourself with the “All Mail” folder and knowing how to restore emails from it, you can ensure that you never permanently lose important messages or valuable information.
Undo marking an email as read
Mistakenly marking an email as read can be frustrating, especially when you want to keep track of unread emails or need a reminder to respond to a particular message. Fortunately, Gmail provides an option to undo marking an email as read, allowing you to revert the status back to unread. Here’s how you can do it:
1. Open Gmail and go to the inbox where the email you want to unmark as read is located.
2. Find the email that you accidentally marked as read and open it.
3. Once the email is open, you’ll notice a small notification at the top of your inbox that says “This conversation has been marked as read.” Next to that, you’ll see the option to “Undo.” Click on “Undo.”
4. Gmail will revert the email’s status back to unread, allowing you to keep track of it more easily.
It’s important to note that the “Undo” option for marking an email as read is time-sensitive. The duration for which you can undo the action may vary but is typically around a few seconds. Therefore, it’s crucial to act quickly if you want to revert the status of the email.
Undoing the marking of an email as read can be particularly helpful in situations where you accidentally click on an email or open it briefly without intending to fully read it. By unmarking the email as read, you can ensure that you don’t overlook or forget about important messages.
If you often find yourself accidentally marking emails as read, you can adjust your Gmail settings to disable the automatic marking of emails as read when you view them. This way, you’ll have more control over the read status of your emails.
By utilizing the “Undo” option to undo marking an email as read, you can maintain better organization and ensure that no important emails slip through the cracks or go unnoticed.
Undo marking an email as important
We’ve all had those moments when we accidentally mark an email as important, only to realize later that it was a mistake. Thankfully, Gmail provides a simple way to undo marking an email as important, allowing you to correct the categorization. Here’s how you can do it:
1. Open Gmail and go to the inbox where the email you marked as important is located.
2. Locate the email and open it.
3. Once the email is open, you’ll notice the yellow “Important” tag at the top. Next to it, you’ll see the option to “Undo.” Click on “Undo” to remove the important designation from the email.
4. Gmail will instantly remove the “Important” tag, reverting the email to its original status.
It’s important to note that the “Undo” option for marking an email as important is time-sensitive. The duration for which you can undo the action may vary but is typically around a few seconds. Therefore, it’s crucial to act quickly if you want to remove the important designation.
This feature is especially helpful when you accidentally mark an email as important and want to maintain the importance level accuracy in your inbox. By undoing the marking, you can ensure that only truly significant emails receive the important status.
If you find that you often mistakenly mark emails as important, you can consider adjusting your Gmail settings to disable the automatic marking of emails as important. This way, you’ll have more control over which emails you personally deem as important.
By utilizing the “Undo” option to undo marking an email as important in Gmail, you can maintain a more accurate categorization of your emails and ensure that the truly important messages stand out in your inbox.
Undo marking an email as starred
Starring an email is a useful way to flag it for easy reference or to mark it as important in Gmail. However, there may be times when you accidentally star an email and later realize that it was a mistake. Luckily, Gmail provides a feature that allows you to undo marking an email as starred, giving you the ability to correct the classification. Here’s how you can do it:
1. Open Gmail and navigate to the inbox where the starred email is located.
2. Locate the email that you mistakenly marked as starred and open it.
3. Once the email is open, you’ll see a star icon at the top, indicating that it has been marked as starred. Click on the star icon to unstar the email.
4. Gmail will remove the star from the email, reverting it to its original status.
It’s important to note that the ability to undo marking an email as starred is time-sensitive. The duration for which you can undo the action may vary, but typically lasts for a few seconds. Thus, it’s crucial to act promptly if you want to remove the star from the email.
This feature comes in handy when you accidentally starred an email and want to ensure that your starred emails reflect your intended priority or significance. By undoing the marking, you can maintain the accuracy and relevance of the starred emails in your Gmail account.
If you find that you frequently mistakenly star emails, you can modify your Gmail settings to disable the automatic starring of specific emails or adjust the criteria for emails that are automatically starred. This way, you can have more control over which emails are starred in your inbox.
By utilizing the “Undo” option to undo marking an email as starred, you can keep your Gmail inbox well-organized, maintain accurate email classifications, and effectively utilize the starring feature for important or reference-worthy messages.
Undo moving an email to a different folder
We’ve all experienced the moment when we accidentally move an email to a different folder in Gmail, only to realize later that it was not the intended action. Fortunately, Gmail provides a way to undo moving an email to a different folder, allowing you to easily rectify the mistake. Here’s how you can do it:
1. Open Gmail and navigate to the folder where the email is currently located. This could be your inbox, a label-specific folder, or any other custom folder you have created.
2. Locate the email that you accidentally moved to a different folder and open it.
3. Once the email is open, you’ll see options at the top. Look for the “Move to” button which typically looks like a folder icon with an arrow. Click on it.
4. In the dropdown menu that appears, you’ll see a list of folders including the folder where the email is currently located and the folder it was moved to. Select the original folder where the email was before it was mistakenly moved.
5. Gmail will move the email back to its original folder, undoing the unintended relocation.
It’s important to note that the ability to undo moving an email to a different folder is time-sensitive. The duration for which you can undo the action may vary, but it is usually limited to a few seconds or until you perform another action in Gmail. Therefore, it’s crucial to act promptly if you want to move the email back to its original folder.
This feature is especially helpful when you accidentally move an email to the wrong folder and want to ensure that it is in the correct location for easy reference and organization. By undoing the move, you can maintain the integrity of your folder structure and keep your emails organized according to your intended system.
If you frequently find yourself mistakenly moving emails to the wrong folders, you can consider adjusting your Gmail settings to disable the automatic movement of emails or refine the criteria for emails that are automatically sorted into specific folders.
By utilizing the “Move to” option to undo moving an email to a different folder in Gmail, you can ensure that your emails are properly organized, making them easier to find and manage.
Undo applying a label to an email
Labels in Gmail are a powerful tool for organizing and categorizing your emails. However, there may be times when you accidentally apply the wrong label to an email, causing confusion or disrupting your organizational system. Thankfully, Gmail provides a feature that allows you to easily undo applying a label to an email. Here’s how you can do it:
1. Open Gmail and navigate to the folder where the labeled email is located. This could be your inbox, a specific label folder, or any other custom folder.
2. Locate the email that you mistakenly applied a label to and open it.
3. Once the email is open, you’ll see the labels assigned to it displayed at the top. Click on the “x” next to the label you want to remove.
4. Gmail will remove the label from the email, undoing the previous application.
It’s important to note that the ability to undo applying a label is time-sensitive. The duration for which you can undo the action may vary, but it is usually a short window of a few seconds or until you perform another action in Gmail. Therefore, it’s crucial to act promptly if you want to remove the label from the email.
This feature can be particularly helpful when you accidentally apply the wrong label, leading to misplaced emails or cluttered labels. By undoing the label application, you can ensure that your emails are neatly organized according to your intended labeling system.
If you frequently find yourself mistakenly applying labels, you can consider adjusting your Gmail settings to disable the automatic labeling of emails or refine the criteria for emails that are automatically assigned specific labels.
By utilizing the label removal option in Gmail to undo applying a label to an email, you can maintain a well-organized inbox, making it easier to locate and manage your emails efficiently.
Undo deleting a label from an email
Labels in Gmail are a valuable tool for categorizing and organizing your emails. However, there may be instances when you accidentally delete a label from an email that you intended to keep. Fortunately, Gmail provides a feature that allows you to undo deleting a label from an email. Here’s how you can do it:
1. Open Gmail and navigate to the folder where the email with the deleted label is located. This could be your inbox, a specific label folder, or any other custom folder.
2. Locate the email from which you accidentally deleted the label and open it.
3. Once the email is open, you’ll see the labels that were previously assigned to the email. Click on the “Labels” button at the top of the email.
4. In the dropdown menu that appears, you’ll see a list of labels. Find the label that you want to restore and click on it to reapply it to the email.
5. Gmail will restore the label to the email, undoing the deletion.
It’s important to note that the ability to undo deleting a label is time-sensitive. The duration for which you can undo the action may vary, but it is typically a short window of a few seconds or until you perform another action in Gmail. Therefore, it’s crucial to act promptly if you want to restore the deleted label.
This feature can be particularly helpful when you accidentally remove a label, disrupting your organizational system or making it harder to locate specific emails. By undoing the label deletion, you can ensure that your emails are properly categorized, facilitating easier retrieval and management.
If you frequently find yourself mistakenly deleting labels from emails, you can consider adjusting your Gmail settings to disable the deletion of labels or refine the criteria for labels that are automatically assigned or removed.
By utilizing the label restoration option in Gmail to undo deleting a label from an email, you can maintain an organized and efficient email management system, ensuring that your emails are accurately labeled and easily accessible.
Undo adding an email address to your blocked senders list
Gmail’s blocked senders list is a useful feature for preventing unwanted emails from reaching your inbox. However, there may be instances when you accidentally add an email address to your blocked list, resulting in legitimate emails being filtered out. Luckily, Gmail provides a way to undo adding an email address to your blocked senders list. Here’s how you can do it:
1. Open Gmail and click on the gear icon in the top-right corner of the screen to access the settings menu.
2. From the settings menu, select “See all settings.”
3. In the settings page, navigate to the “Filters and Blocked Addresses” tab.
4. Under the “Blocked Addresses” section, you’ll find a list of email addresses or domains that are currently blocked.
5. Locate the email address that you want to unblock and click on the “Unblock” or “Remove” option next to it.
6. Gmail will remove the email address from your blocked senders list, allowing emails from that address to reach your inbox again.
It’s important to note that the unblocking of an email address is immediate, so the email address will no longer be blocked once you click “Unblock” or “Remove.” This means that any future emails from the unblocked address will be delivered to your inbox as usual.
This feature can be particularly helpful if you accidentally blocked an email address that you actually want to receive emails from, such as a client, colleague, or important contact. By undoing the addition to the blocked senders list, you ensure that you can receive their emails and maintain effective communication.
If you frequently find yourself accidentally blocking email addresses, you can take caution while reviewing the blocked senders list or consider using other filtering options, such as creating specific filters based on criteria that better suit your needs.
By utilizing the unblocking option in Gmail to undo adding an email address to your blocked senders list, you can prevent unintended consequences and ensure that important emails reach your inbox.
Undo blocking a sender’s email address
Gmail’s blocking feature is a powerful tool for filtering out unwanted emails and preventing them from cluttering your inbox. However, there may be times when you accidentally block an email address and later realize that it was a mistake. Fortunately, Gmail allows you to easily undo blocking a sender’s email address. Here’s how you can do it:
1. Open Gmail and click on the gear icon in the top-right corner of the screen to access the settings menu.
2. From the settings menu, select “See all settings”.
3. In the settings page, navigate to the “Filters and Blocked Addresses” tab.
4. Scroll down to the “Blocked Addresses” section, where you’ll find a list of email addresses or domains that are currently blocked.
5. Locate the email address of the sender that you want to unblock and click on the “Unblock” or “Remove” option next to it.
6. Gmail will remove the blocked status from the email address, allowing emails from that sender to reach your inbox again.
It’s important to note that the unblocking of a sender’s email address is immediate. Once you click “Unblock” or “Remove”, any future emails from that sender will no longer be treated as blocked. You will start receiving their emails in your inbox as usual.
This feature can be particularly helpful if you accidentally blocked someone’s email address that you want or need to receive emails from, such as a friend, colleague, or important contact. By undoing the blocking, you ensure that you can restore communication and prevent any unintended consequences of blocking their emails.
If you frequently find yourself accidentally blocking email addresses, it may be a good idea to review the list of blocked addresses more carefully or consider using other filtering options, such as creating custom filters or adjusting your spam settings, to better suit your needs.
By utilizing the unblocking option in Gmail to undo blocking a sender’s email address, you can maintain effective communication and ensure that important emails reach your inbox without any disruptions.
Undo creating a filter for specific emails or senders
Gmail’s filtering feature allows you to automatically organize and manage your incoming emails based on specific criteria. However, there may be times when you accidentally create a filter that affects the wrong emails or senders. Thankfully, Gmail provides a way to undo creating a filter and revert your inbox to its previous state. Here’s how you can do it:
1. Open Gmail and click on the gear icon in the top-right corner of the screen to access the settings menu.
2. From the settings menu, select “See all settings”.
3. In the settings page, navigate to the “Filters and Blocked Addresses” tab.
4. Scroll down to the “Filters” section and look for the filter that you want to undo. Select the checkbox next to that filter.
5. Once you’ve selected the filter, click on the “Delete” or “Remove” option.
6. Gmail will remove the selected filter, undoing its effects on your incoming emails.
It’s important to note that deleting a filter will immediately stop its impact on your inbox. Any emails that were previously affected by the filter will no longer be sorted or modified according to its criteria.
This feature can be particularly helpful when you accidentally create a filter that causes important emails to be mistakenly categorized or filtered out of your inbox. By undoing the creation of the filter, you can restore the normal flow of your incoming emails and prevent any unintended disruptions to your email management system.
If you frequently find yourself creating filters that yield unintended results, consider reviewing the filter creation process more carefully or ensuring that the filter criteria accurately match your intended sorting or categorization needs.
By utilizing the delete option in Gmail to undo creating a filter for specific emails or senders, you can maintain a more accurate and efficient email organization system that aligns with your preferences and prevents any unnecessary sorting or filtering of important messages.
Undo editing the subject line or recipients of an email
We’ve all experienced moments when we realized, only after hitting the send button, that we made a mistake in the subject line or recipients of an email. Thankfully, Gmail provides a feature that allows you to undo editing the subject line or recipients, giving you the chance to correct any errors before the email is sent. Here’s how you can do it:
1. Immediately after sending the email, look for the “Undo” option that appears at the bottom left of your Gmail screen. It will be visible for a few seconds.
2. Click on “Undo” to stop the email from being sent.
3. Gmail will retrieve the email, bringing it back to your compose window where you can make the necessary changes to the subject line or recipients.
4. Review the email, make any required corrections, and then click “Send” again when you’re ready.
It’s important to note that the “Undo” option is only available for a limited time immediately after sending the email. By default, Gmail offers a 5-second window to undo the send, but you can extend this time frame by enabling the “Undo Send” feature in your Gmail settings, allowing for up to 30 seconds of grace period.
This feature is particularly helpful in preventing potential embarrassments or misunderstandings caused by mistakes in the subject line or the intended recipients of an email. It gives you the opportunity to make changes or additions to ensure accuracy and proper communication before the email is delivered.
Remember, once the “Undo” time frame has passed, the email will be sent, and you will not be able to retrieve it to make any changes. Thus, it’s essential to double-check your emails before clicking “Send” to minimize the need for using the “Undo” option.
Using the “Undo” option to reverse editing changes in the subject line or recipients in Gmail allows you to maintain professionalism, accuracy, and effective communication in your email correspondence.
Undo changing the email formatting or theme
Email formatting and themes play a significant role in how your messages are presented to recipients. However, there may be times when you accidentally change the formatting or apply a new theme to an email and later realize it doesn’t align with your intended style or message. Thankfully, Gmail allows you to undo changing the email formatting or theme. Here’s how you can do it:
1. Open Gmail and compose a new email or open an existing draft.
2. Once you’re in the compose window, look for the “Undo” option that appears at the bottom left corner of your screen. It will be visible for a few seconds after making changes to the email formatting or theme.
3. Click on “Undo” to revert the email formatting or theme to its previous state.
4. Gmail will undo your recent changes and restore the email to its original formatting or theme.
It’s important to note that the “Undo” option is time-sensitive and allows you to revert the changes only within a short window of time. Therefore, it’s crucial to act promptly if you want to undo the changes.
This feature comes in handy when you accidentally apply an inappropriate or inconsistent formatting style or select an unsuitable theme that doesn’t match the purpose or tone of your email. By undoing the changes, you can ensure that your emails are presented in a coherent and professional manner.
Remember to always preview your emails before sending to avoid the need for using the “Undo” option. Taking a few moments to review the formatting and theme of your email can prevent accidental changes and maintain the intended visual impact of your message.
Utilizing the “Undo” option to reverse changes in email formatting or theme in Gmail allows you to maintain consistency and professionalism in your email communications, ensuring that your messages are visually appealing and effectively convey your intentions.
Undo changing the default reply or forwarding settings for an email
Gmail offers various settings and customization options to enhance your email experience, including the ability to adjust default reply or forwarding settings. However, there may be instances when you accidentally change these settings and need to revert to the original defaults. Luckily, Gmail allows you to undo changing the default reply or forwarding settings. Here’s how you can do it:
1. Open Gmail and click on the gear icon in the top-right corner of the screen to access the settings menu.
2. From the settings menu, select “See all settings”.
3. In the settings page, navigate to the tab related to the setting you want to undo. For instance, to undo changes to the default reply settings, go to the “General” tab.
4. Locate the specific setting you want to revert, such as the default reply behavior or the default forwarding options.
5. Change the setting back to its original state or choose the desired option that aligns with your preferences.
6. Once you have made the necessary changes, scroll down to the bottom of the settings page and click on the “Save Changes” button to apply the reverted default settings.
Undoing changes to the default reply or forwarding settings ensures that your email workflow and communication habits align with your preferences and needs. Whether you inadvertently modified the default reply behavior or forwarding settings, this feature allows you to restore them to their original state.
It’s important to note that occasionally exploring different settings or making adjustments is a normal part of personalizing your Gmail experience. However, if you find yourself frequently needing to undo changes, it may be helpful to familiarize yourself with the settings options to avoid unintended modifications in the future.
By utilizing the undo feature to revert changes made to the default reply or forwarding settings in Gmail, you can restore your preferred email behavior and streamline your communication process.
Undo changing the display density or inbox categories settings
Gmail provides users with the flexibility to customize their email interface by adjusting the display density and inbox categories settings. However, there may be instances when you accidentally change these settings and find that they no longer suit your preferences or workflow. The good news is that Gmail allows you to easily undo changes to the display density or inbox categories settings. Here’s how you can go about it:
1. Open Gmail and click on the gear icon located in the top-right corner of the screen to access the settings menu.
2. From the settings menu, select “See all settings”.
3. In the settings page, navigate to the section related to the setting you wish to undo. For example, to undo changes to the display density, locate the “Display Density” section.
4. Within the settings section, look for the option to revert changes or select the previous setting. It might be a dropdown menu or a selection button.
5. Choose the display density or inbox categories setting that you want to revert to, ensuring it aligns with your preferred layout.
6. Once you have selected the desired setting, scroll down to the bottom of the settings page and click on the “Save Changes” button to apply the reverted settings.
By using the undo feature, you can easily revert any accidental changes made to the display density or inbox categories settings in Gmail. This ensures that your email interface reflects your preferred level of information density and organization.
It’s important to note that Gmail offers different display density options to accommodate varying preferences. Whether you prefer a cozy view with more white space or a compact view to maximize screen usage, you can adjust the setting to meet your needs.
The inbox categories feature in Gmail allows you to automatically sort incoming emails into predefined tabs such as Primary, Social, Promotions, Updates, and Forums. By undoing changes to the inbox categories settings, you can revert back to your preferred way of organizing and filtering incoming emails.
If you find yourself frequently making unintended changes to display density or inbox categories, take the time to familiarize yourself with the different options and their corresponding functions. This will help you avoid unnecessary modifications in the future.
By utilizing the undo feature in Gmail to revert changes made to the display density or inbox categories settings, you can ensure that your inbox layout and email organization align with your preferred workflow and visual preferences.