
Benefits of Scheduling Emails in Gmail
Scheduling emails in Gmail can significantly improve your productivity and communication efficiency. Whether you’re a busy professional, a freelancer, or even a student, here are some key benefits of using the “Schedule send” feature in Gmail:
- Time Management: One of the greatest advantages of scheduling emails is the ability to control when your messages are sent. This feature allows you to compose emails at your convenience and have them delivered at a specific date and time that suits your recipients best. You no longer need to worry about interrupting someone’s workflow or remembering to send an email at a later time.
- Avoiding Distractions: By scheduling emails, you can avoid the temptation of constantly checking your inbox and engaging in back-and-forth conversations. Instead, you can set aside a dedicated time to compose and schedule your emails, allowing you to focus on other important tasks without interruptions.
- Global Collaboration: If you work with colleagues or clients in different time zones, scheduling emails ensures that your messages reach them during their working hours. This helps to establish effective communication and eliminates the risk of your email getting buried in an overflowing inbox.
- Optimal Timing: Timing is crucial when it comes to email communication. By analyzing recipient behavior and response patterns, you can determine the best time to schedule your emails for maximum engagement. This can increase the chances of your email being read and acted upon.
- Professionalism: Scheduling emails allows you to send messages at appropriate times, even outside of regular working hours. This demonstrates professionalism and respect for your recipients’ personal boundaries.
- Emergency Preparedness: In case of unexpected events or sudden changes in your schedule, scheduling emails in advance can ensure that your communication remains consistent and uninterrupted. This is particularly useful when you’re going on vacation, attending conferences, or experiencing any other situation that would otherwise hinder your ability to send emails.
- Reduced Stress: Finally, scheduling emails can alleviate the burden of last-minute deadlines and the need to remember to send important messages. By planning and scheduling your emails in advance, you can experience a sense of relief and enjoy a more organized workflow.
These benefits highlight the value of scheduling emails in Gmail, making it a powerful tool for efficient communication and improved productivity.
How to Enable the “Schedule Send” Feature in Gmail
The “Schedule send” feature in Gmail is not enabled by default, but it can be easily activated in just a few steps. To enable this feature, follow the instructions below:
- Open your Gmail account in a web browser.
- Click on the gear icon located in the top right corner of the screen to open the Settings menu.
- Select “See all settings” from the drop-down menu.
- Navigate to the “General” tab.
- Scroll down until you find the “Schedule send” section.
- Click on the checkbox next to “Enable schedule send” to activate the feature.
- Make sure to click on the “Save Changes” button at the bottom of the page to ensure that the setting is applied.
Once you have enabled the “Schedule send” feature, you will be able to schedule your emails for later delivery. The option to schedule emails will be available whenever you compose a new message or reply to an existing one.
Note that the “Schedule send” feature is only available in the web version of Gmail and not in the mobile app.
By following these simple steps, you can enable the convenient “Schedule send” feature in Gmail and gain access to the benefits of scheduling your emails for optimal timing and improved communication.
How to Schedule an Email in Gmail Using the Web Version
Scheduling an email in Gmail using the web version is a straightforward process. Follow the steps below to schedule your emails for future delivery:
- Open your Gmail account in a web browser and click on the “Compose” button to start a new email.
- Compose your email, including the recipient’s email address, subject, and content.
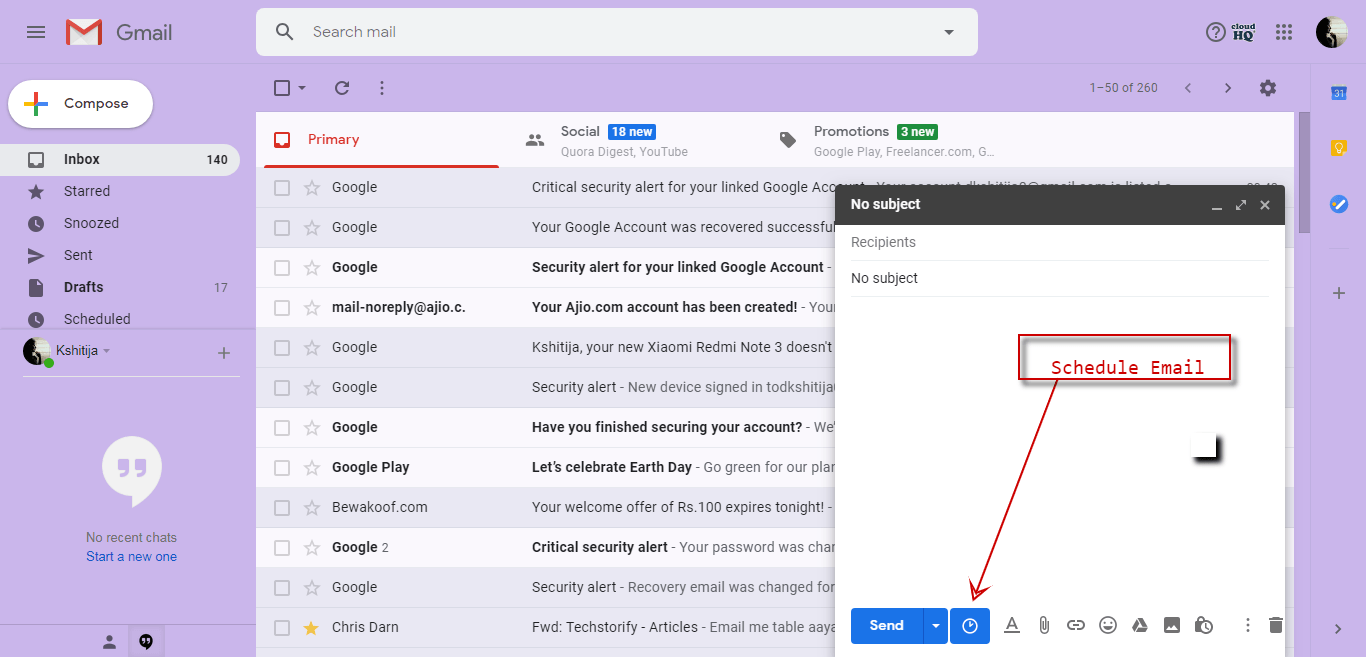
- Once you have finished composing the email, instead of clicking on the “Send” button, click on the small dropdown arrow next to it.
- In the dropdown menu, select the “Schedule send” option.
- A pop-up window will appear, offering several suggested timing options, such as “Tomorrow morning,” “Next week,” or “Pick date & time.” Alternatively, you can select “Custom” to set your own specific date and time.
- Choose the desired scheduling option that best suits your needs.
- If you select “Pick date & time” or “Custom,” a calendar will appear where you can select the date and time for delivery.
- Once you have selected the desired date and time, click “Schedule send” to confirm and schedule the email.
After scheduling the email, it will be saved in your “Scheduled” folder, which is located in the left sidebar of your Gmail interface. You can access this folder at any time to manage and edit your scheduled emails.
It’s important to note that the scheduled email will be sent automatically at the specified date and time, even if your computer is turned off or you are not logged into your Gmail account.
Scheduling emails using the web version of Gmail provides you with the flexibility and convenience to send messages at the most opportune moments, ensuring effective communication and improved productivity.
How to Schedule an Email in Gmail Using the Mobile App
If you prefer to use the mobile app for Gmail, you can still take advantage of the “Schedule send” feature. Here’s how to schedule an email using the Gmail mobile app:
- Launch the Gmail app on your mobile device and tap on the red “Compose” button to start a new email.
- Compose your email, including the recipient’s email address, subject, and content.
- After composing your email, instead of tapping on the “Send” button, tap on the three vertical dots located in the top right corner of the screen.
- In the menu that appears, select the “Schedule send” option.
- You will be presented with various suggested timing options, such as “Tomorrow morning,” “Next week,” or “Pick date & time.” You can also choose “Custom” to set your own specific date and time.
- Select the scheduling option that suits your needs.
- If you choose “Pick date & time” or “Custom,” a calendar and clock interface will appear where you can select the desired date and time for delivery.
- Once you have finalized the date and time, tap on the “Schedule send” button to confirm and schedule the email.
After scheduling the email, it will be saved in your “Scheduled” folder, which you can access from the main menu of the Gmail app. From there, you can manage and edit your scheduled emails as needed.
Just like with the web version, the scheduled email will be sent automatically at the specified date and time, regardless of whether your mobile device is powered on or you are actively using the Gmail app.
Scheduling emails using the Gmail mobile app provides you with the flexibility to manage your communication on the go, ensuring that your messages reach recipients at the most convenient and effective times.
Understanding the Options When Scheduling an Email in Gmail
When scheduling an email in Gmail, you have several options to choose from to ensure your message is delivered at the desired time. Here’s a breakdown of the available options:
- Suggested Timing: Gmail provides you with suggested timing options, such as “Tomorrow morning,” “Next week,” or “Pick date & time.” This is particularly useful if you want a quick and convenient way to schedule your email without specifying an exact date and time.
- Pick Date & Time: This option allows you to select a specific date and time for the delivery of your email. When you choose this option, a calendar and clock interface will appear, allowing you to customize the timing according to your preferences.
- Custom: The “Custom” option gives you the flexibility to set a specific date and time for your email. This is ideal if you have a specific time frame in mind or if you need to synchronize the delivery with a particular event or deadline.
- Scheduled Folder: Once you schedule an email, it will be saved in the “Scheduled” folder in your Gmail account. This folder acts as a centralized location to manage and edit all your scheduled emails. You can access this folder whenever you need to review or make any changes to your scheduled messages.
- Automatic Sending: Regardless of whether you are using the web version or the mobile app, Gmail will send your scheduled email automatically at the specified date and time. You don’t need to keep your computer or mobile device turned on or have the Gmail app actively running for the email to be sent.
Understanding these options enables you to take full advantage of the scheduling feature in Gmail. Whether you need a quick suggestion, a specific date and time, or the flexibility to customize the delivery, Gmail offers a range of options to suit your needs. Additionally, having your scheduled emails organized in a dedicated folder simplifies the management and editing process, ensuring seamless communication.
Managing and Editing Scheduled Emails in Gmail
Managing and editing scheduled emails in Gmail is easy and allows you to have full control over your scheduled communications. Here’s how you can effectively manage and make adjustments to your scheduled emails:
- Access the Scheduled Folder: To manage your scheduled emails, open your Gmail account and locate the “Scheduled” folder in the left sidebar. Clicking on this folder will display all of your scheduled emails.
- View Scheduled Emails: In the “Scheduled” folder, you can see a list of all your scheduled emails, including the subject, recipient, and scheduled delivery time. This overview provides a snapshot of your upcoming communications.
- Edit a Scheduled Email: If you need to make changes to a scheduled email, simply open the specific email from the “Scheduled” folder. Make the necessary edits to the recipient, subject, body, or the scheduling details such as the date and time of delivery.
- Reschedule a Scheduled Email: If you want to change the delivery time or date of a scheduled email, edit the scheduling details by adjusting the date and time in the email. Save the changes, and the email will be rescheduled accordingly.
- Cancel a Scheduled Email: If you decide that you no longer want to send a scheduled email, you have the option to cancel it. Open the email from the “Scheduled” folder and choose the option to cancel or delete the scheduled email. This will remove it from the scheduled list without sending it.
- Organize and Filter Scheduled Emails: You can organize your scheduled emails by applying labels or utilizing Gmail’s filters. This helps you keep track of different types of scheduled emails or group them based on specific criteria, making it easier to manage and locate them.
- Reviewing and Monitoring: Regularly reviewing your scheduled emails in the “Scheduled” folder allows you to stay on top of your communications. You can monitor upcoming deliveries, ensure accuracy, and make any necessary adjustments as needed.
By understanding how to manage and edit scheduled emails in Gmail, you can maintain control over your communication and make any necessary changes to ensure timely and effective delivery of your messages.
Troubleshooting Common Issues When Scheduling Emails in Gmail
While scheduling emails in Gmail is generally a smooth and reliable process, you may occasionally encounter some common issues. Here are some troubleshooting tips for resolving these issues:
- Scheduled Email Not Sending: If a scheduled email fails to send at the specified time, ensure that you have a stable internet connection. Check your internet connectivity or try scheduling the email again after reconnecting to the internet.
- Incorrect Timing: If you notice that your scheduled email was sent at an unexpected time, double-check the time zone settings in your Gmail account. It’s possible that the time zone settings are not aligned with your desired delivery time.
- Missing or Deleted Email: If you accidentally delete a scheduled email or it goes missing from your “Scheduled” folder, search for it in your Gmail account using relevant keywords, recipient, or subject. You can also check your “Trash” or “Bin” folder to see if the email was accidentally moved there.
- Defaulting to Regular Send: In some cases, Gmail may default to sending the email immediately instead of scheduling it. Double-check that you selected the “Schedule send” option before finalizing the email. If necessary, try rescheduling the email to ensure it is sent at the desired time.
- Conflicting Filters or Extensions: Certain Gmail filters or browser extensions may interfere with the scheduling feature. Disable any filters or extensions temporarily and attempt to schedule the email again. If successful, consider adjusting the settings or reinstalling the extensions one at a time to identify the conflicting element.
- Syncing Issues: If you are using multiple devices to access your Gmail account, ensure that they are all synced properly. Inconsistent syncing can cause discrepancies in scheduled emails, such as duplicates or missed deliveries.
- Outdated App Version: If you encounter any issues when scheduling emails using the mobile app, ensure that you have the latest version of the Gmail app installed on your device. Updates often include bug fixes and improvements that can address any scheduling-related issues.
If you continue to experience issues when scheduling emails in Gmail, contacting Gmail support or reviewing online forums can provide additional assistance and guidance specific to your situation. These troubleshooting tips should help you resolve most common issues and ensure smooth scheduling of your emails in Gmail.
Tips and Best Practices for Scheduling Emails in Gmail
Scheduling emails in Gmail can be a valuable tool for optimizing your communication and improving productivity. To make the most of this feature, here are some tips and best practices to keep in mind:
- Know Your Audience: Consider the time zones, working hours, and preferences of your recipients when scheduling emails. Sending emails at appropriate times increases the likelihood of prompt read and response.
- Set Reminders: Use scheduling to set reminders for yourself. Schedule emails to be sent to your own inbox as a way to prompt action or remind yourself of important tasks or follow-ups.
- Experiment with Timing: Pay attention to the response rates and engagement levels of your scheduled emails. Experiment with different delivery times to identify the optimal windows for maximum impact.
- Create Templates: If you frequently send similar types of emails, save time by creating email templates. This allows you to quickly populate the template, schedule the email, and send it without having to start from scratch each time.
- Proofread before Scheduling: Take the time to thoroughly review your email content, ensuring that it is error-free and conveys your intended message. Check for typos, grammatical errors, and clarity of information before scheduling the email.
- Avoid Scheduling Overload: Be mindful of not overwhelming recipients with too many scheduled emails in a short period. Space out your scheduled emails to maintain a balanced and respectful communication frequency.
- Keep Track of Scheduled Emails: Regularly review your “Scheduled” folder to stay organized and keep track of your scheduled emails. Delete or reschedule any emails that are no longer necessary to prevent clutter or confusion.
- Stay Mindful of Time Zones: If you frequently communicate with individuals or teams in different time zones, double-check the time zone settings and ensure that your scheduled emails align with their respective time zones.
- Revisit and Optimize: Periodically evaluate the effectiveness of your scheduled emails. Analyze response rates, open rates, and click-through rates to identify any areas for improvement and refine your email scheduling strategy.
- Combine with Follow-up Efforts: Take advantage of the scheduling feature to set up follow-up emails or reminders for important actions or meetings. This helps in maintaining a proactive approach and ensures that nothing falls through the cracks.
By following these tips and best practices, you can fully leverage the scheduling feature in Gmail to streamline your email workflows, enhance communication efficiency, and improve your overall productivity.