
Assess the Damage
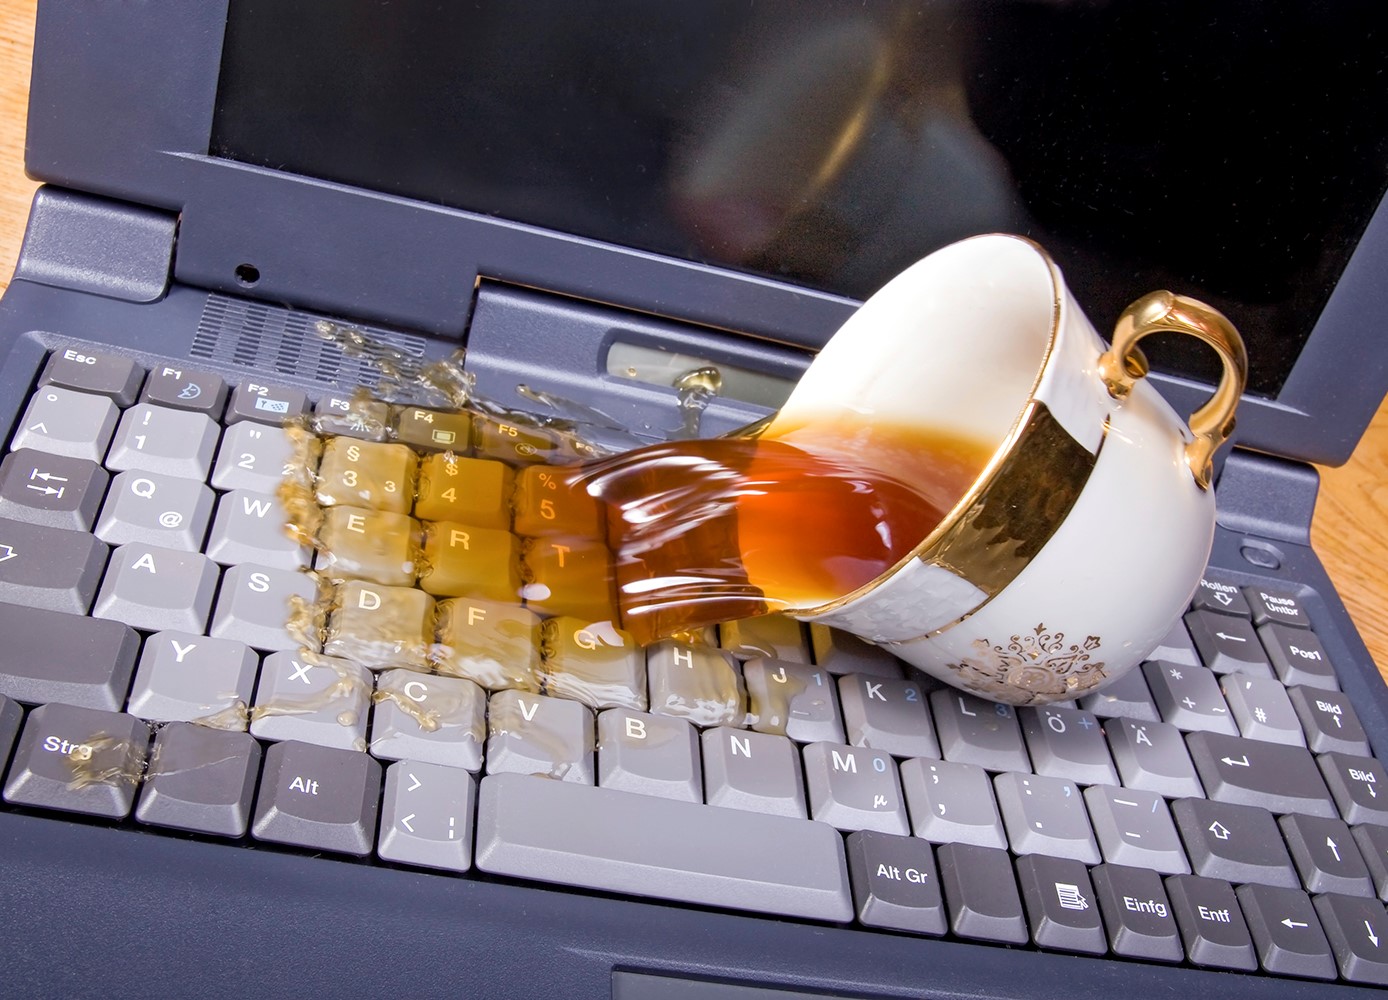
Spilling liquid on your laptop can be a panic-inducing moment. However, the first step towards saving your device is to assess the damage. Quick action can make a significant difference in the outcome.
Start by determining the type of liquid that was spilled. Water is the least damaging, while sugary or corrosive substances like soda or coffee can pose a greater risk. Assess the extent of the spill and whether it has reached the internal components.
Observe if your laptop is still functioning properly. Are there any abnormal sounds, flickering screens, or unresponsive buttons? Take note of these issues as they will help you gauge the severity of the damage.
Inspect the keyboard for any signs of liquid pooling on or between the keys. Check the ports, such as USB or headphone jacks, for any visible liquid residue. These indicators will help you determine the areas that require immediate attention.
Keep in mind that assessing the damage is not a guarantee of how much repair may be needed. It is merely a preliminary step to understand the initial effects of the spill. The next actions you take will greatly impact the chances of saving your laptop and minimizing any long-term consequences.
Power off your Laptop
After assessing the damage caused by the spill, the next crucial step is to power off your laptop immediately. Cutting off the power supply will prevent any further damage from occurring and improve the chances of saving your device.
Shutting down your laptop ensures that no current is flowing through the components, reducing the risk of short circuits or electrical damage. This step is especially important if the spill has reached the internal parts of the laptop.
To power off your laptop, hold down the power button until it completely shuts down. If you are unable to shut it down using this method, disconnect the power cord and remove the battery, if possible.
It is essential to act quickly when powering off your laptop. The longer the liquid remains in contact with the internal components, the higher the chance of irreversible damage. Remember, every second counts.
Once your laptop is powered off, resist the temptation to turn it back on to check if it still works. This could further damage the device. Instead, move on to the next steps to ensure the best chance of saving your laptop after a spill.
Remove any External Devices
After powering off your laptop, the next step is to remove any external devices that are connected to it. This precautionary measure will help prevent any additional damage caused by the spill.
Disconnect any USB drives, external hard drives, printers, or other peripherals that are attached to your laptop. This will minimize the risk of further liquid seeping into these devices and causing them harm.
Additionally, remove any cables, such as the power cord or charging cable, that are connected to your laptop. This will ensure that no electrical current is passing through the device, reducing the risk of electrical damage.
Be gentle when disconnecting the external devices to avoid any unnecessary force or accidents. Take your time and handle them carefully.
It is also important to remove any memory cards or SD cards from the laptop’s card reader. These small storage devices can be easily damaged by liquid and should be removed promptly to prevent data loss.
By removing all external devices, you can focus on treating and assessing the damage to your laptop itself. This step will help isolate the spill and minimize potential complications caused by peripheral devices.
Wipe up any Excess Liquid
Once you have powered off your laptop and removed any external devices, the next step is to carefully wipe up any excess liquid on the surface. This will help prevent further damage and potential corrosion to the device.
Start by using a soft, lint-free cloth or paper towel to gently blot the affected areas. Do not rub the liquid as it could spread or push it deeper into the device. Instead, dab the cloth or towel on the surface, absorbing as much liquid as possible.
Pay attention to the keyboard area, as this is usually the most vulnerable and prone to liquid penetration. If the spill is significant, you may need to lift the laptop and tilt it gently to allow the excess liquid to drain away from the keyboard.
Ensure that the cloth or towel you are using is clean and free from any abrasive substances or chemicals. Avoid using tissues or rough materials, as they may scratch the surface of your laptop.
If the liquid has reached the ports or crevices, use a cotton swab or a soft-bristle brush to carefully clean these areas. Be gentle and thorough, removing any residue or moisture that may have accumulated.
Remember, time is of the essence. The sooner you can wipe up the excess liquid, the better chances you have of preventing further damage to your laptop. Take your time and be meticulous in this step.
Turn your Laptop Upside Down
After wiping up any excess liquid, the next step to salvage your laptop after a spill is to turn it upside down. This simple technique can help drain out any remaining liquid and prevent it from seeping deeper into the device.
Carefully flip your laptop over so that the keyboard is facing downwards. Prop it up on a stable surface, using books or other objects if needed, to ensure that it remains in an inverted position.
By turning your laptop upside down, gravity will assist in pulling the liquid away from the internal components. This reduces the risk of further damage and allows the liquid to evaporate more easily.
Leave your laptop in this inverted position for at least a few hours. Depending on the severity of the spill, you may need to leave it overnight or even up to 48 hours. The goal is to give the liquid ample time to drip out and the internal components to dry.
Make sure that the surface you place your laptop on is clean, dry, and free from any potential hazards that could cause further damage or accidents.
While your laptop is upside down, avoid touching or turning on the device. This can disrupt the drying process or cause the liquid to spread to other areas. Patience is key at this stage.
Once the recommended drying time has passed, gently lift your laptop back to its normal position and proceed to the next steps to ensure the best chance of saving your device.
Remove the Battery (if possible)
If your laptop has a removable battery, the next step in saving your device after a spill is to remove it. Taking out the battery can help prevent any power surges or short circuits caused by the liquid.
Before proceeding, ensure that your laptop is turned off and unplugged from any power source. This is critical for your safety and to avoid any potential electrical damage.
Locate the battery compartment on the back or bottom of your laptop. Most models will have a latch or release button that needs to be pressed to unlock and remove the battery.
Carefully follow the manufacturer’s instructions or consult the user manual if you’re unsure about the proper way to remove the battery for your specific laptop model.
Gently slide the latch or push the release button in the designated direction to unlock the battery. Once unlocked, carefully lift and remove the battery from its compartment.
Inspect the battery for any signs of liquid or residue. If you notice any, wipe it gently with a clean, dry cloth. Ensure that the battery is completely dry before attempting to reinsert it.
Keep the removed battery in a safe and dry place until you are confident that your laptop is fully recovered. Avoid exposing the battery to extreme temperatures or harsh conditions.
If your laptop does not have a removable battery, skip this step and proceed to the next ones as outlined. The remaining steps will still help in minimizing the damage caused by the spill.
Allow your Laptop to Dry Naturally
After taking the necessary steps to remove excess liquid and disconnect the battery (if applicable), it’s crucial to allow your laptop to dry naturally. Patience is key in this process, as rushing could lead to further damage.
Find a well-ventilated area with low humidity to place your laptop. Avoid exposing it to direct sunlight or extreme temperatures, as these can adversely affect the internal components.
Leave your laptop untouched for at least 24 to 48 hours, allowing the liquid to evaporate. This timeframe may vary depending on the severity of the spill and the type of liquid involved.
Avoid using external heat sources such as hair dryers or heaters to speed up the drying process. Excessive heat can cause components to overheat or warp, leading to irreparable damage.
During the drying period, you may notice condensation forming on the surfaces of your laptop. This is normal and indicates that moisture is evaporating. However, refrain from touching or turning on the device until it is completely dry.
Use this time to clean any external surfaces that may have been exposed to the liquid. Using a soft, lint-free cloth, gently wipe down the outer casing, keyboard, and touchpad. Do not apply excessive pressure or use cleaning agents unless specifically recommended by the laptop manufacturer.
Once the drying time has passed, perform a visual inspection to ensure that there is no remaining moisture before proceeding to the next steps. Any signs of moisture should prompt you to extend the drying period.
Remember, allowing your laptop to dry naturally gives it the best chance of fully recovering from the spill. Rushing the process could result in permanent damage, so exercise patience and caution throughout this stage.
Use Rice or Silica Gel Packets
In addition to allowing your laptop to dry naturally, using rice or silica gel packets can help absorb moisture and speed up the drying process. These household items are known for their moisture-absorbing properties and can be effective in saving your laptop after a spill.
If you choose to use rice, find a container large enough to accommodate your laptop. Fill the container with uncooked rice and bury your laptop in it, ensuring that it is completely submerged. Rice acts as a desiccant and can help draw out moisture from your device.
Alternatively, if you have access to silica gel packets (often found in shoeboxes or electronic packaging), place them in a sealed plastic bag with your laptop. Silica gel is highly absorbent and can help remove moisture from the surrounding environment.
Seal the container or plastic bag tightly to prevent dust or particles from getting inside. Leave your laptop in this setup for at least 24 to 48 hours, or as recommended by the manufacturer of the moisture-absorbing agent.
Keep in mind that while rice or silica gel can aid in drying your laptop, they are not guaranteed solutions. The effectiveness may vary depending on the severity of the spill and the amount of moisture present.
After the designated time has passed, carefully remove your laptop from the rice or silica gel and inspect it for any remaining moisture. If you notice any, wipe it gently with a clean, dry cloth.
Remember, using rice or silica gel is an additional drying method and should be used in conjunction with allowing your laptop to dry naturally. It is essential to exercise caution and patience throughout the entire process.
Clean up any Residue
Once your laptop is fully dry, it’s important to clean up any residue left behind by the spill. This residue can potentially cause further damage or affect the performance of your device if not properly addressed.
Start by using a soft, lint-free cloth or cotton swabs dampened with isopropyl alcohol or water (if recommended by the laptop manufacturer) to gently clean the affected areas. Be sure to wring out any excess liquid from the cloth or swabs to avoid saturating the laptop.
Focus on cleaning the keyboard, touchpad, and other areas that came into direct contact with the spill. Gently wipe these surfaces, removing any residue or sticky substances. Pay close attention to the spaces between the keys, as residue can accumulate there.
If necessary, use a small brush with soft bristles to dislodge any stubborn residue. Take care not to apply excessive pressure or scrub too vigorously, as this may damage the keys or other components.
For stubborn residue that is harder to remove, you can dip the cloth or swab in a small amount of isopropyl alcohol or a cleaning solution specifically designed for electronics. However, always refer to the manufacturer’s recommendations and exercise caution to avoid damaging your laptop.
Once you have cleaned the affected areas, allow them to dry before using your laptop. This will ensure that there is no lingering moisture or cleaning solution residue that could potentially harm the device.
Regularly cleaning your laptop, even without a spill, is essential for maintaining its performance and longevity. Consider using screen cleaners and disinfectant wipes specifically formulated for electronics as part of your routine cleaning.
By thoroughly cleaning up any residue left by the spill, you can help ensure that your laptop remains in optimal condition and minimize any potential issues that may arise in the future.
Test your Laptop
After completing the previous steps to save your laptop from a spill, the next crucial step is to test your device to ensure that it is functioning properly. Testing will help you identify any lingering issues and allow you to address them promptly.
Start by reinserting the battery (if it was removable) and connecting your laptop to a power source. Press the power button to turn on your device and observe the startup process. Pay attention to any abnormal sounds, error messages, or unusual behavior.
Once your laptop has booted up, test all the essential functionalities. Check if the keyboard keys are working correctly and register your inputs. Test the touchpad or external mouse for responsiveness. Verify that all the ports, such as USB and headphone jacks, are functioning as expected.
Open various applications and programs to ensure they run smoothly without any issues. If you notice any crashes, freezing, or slow performance, it could indicate residual damage from the spill.
If your laptop has a built-in webcam or microphone, test them to ensure they are working properly. Conduct a video call and record a short audio clip to verify their functionality.
Check the display for any abnormalities such as flickering, dead pixels, or discoloration. Adjust the brightness and contrast settings to ensure they are working correctly.
Test the battery life to see if it holds a charge and functions as expected. Unplug the power cord and use the laptop on battery power alone. Monitor the battery level and assess how long it lasts under typical usage.
Run a thorough scan with your antivirus software to check for any malware or viruses that could have been inadvertently introduced during the spill. Ensure that your laptop’s security software is up to date.
If you notice any lingering issues or further damage during the testing process, it is recommended to seek professional help from a qualified technician. They will be able to diagnose and address any underlying issues that may require specialized repair.
By conducting a comprehensive test of your laptop’s functionality, you can have confidence in its performance and identify any ongoing issues that may need to be resolved.
Seek Professional Help if Necessary
If you have gone through the previous steps to save your laptop after a spill and are still experiencing problems or are unsure about the extent of the damage, it is advisable to seek professional help. A professional technician can provide expert assistance and guidance to resolve any lingering issues.
Professional technicians have the experience and knowledge to diagnose and repair a wide range of laptop issues. They can conduct a thorough assessment of your device and provide a more accurate understanding of the damage caused by the spill.
If you are uncertain about disassembling your laptop or working with its internal components, seeking professional help is highly recommended. Attempting repairs without the necessary expertise can lead to further damage and potentially void any existing warranty.
A professional technician can also perform specialized cleaning procedures to remove any residual liquid or corrosion within the laptop. They have access to specialized cleaning solutions and tools to ensure thorough cleaning without causing additional harm.
Additionally, if parts need to be replaced or repairs need to be made to fully restore your laptop, a professional can source the necessary components and perform the repairs with precision.
When seeking professional assistance, choose a reputable repair center or service provider. Read reviews, inquire about their expertise, and ensure they have experience in dealing specifically with laptop spills and repairs.
Keep in mind that professional repair services may come at a cost, but it is an investment in restoring your laptop’s functionality and prolonging its lifespan.
Overall, if you are experiencing persistent issues or are uncertain about how to proceed, consulting with a professional technician is the best course of action. They can provide the necessary expertise to fully assess and repair your laptop after a spill.