
Diagnose the water damage
When faced with a water-damaged laptop, the first step is to assess the extent of the damage. Water can cause various issues, such as short circuits, corrosion, and damage to internal components. By diagnosing the water damage, you can determine the necessary steps to fix your laptop and prevent further damage.
Start by examining the laptop for any signs of water infiltration. Look for water droplets, wet spots, or any other visible signs of moisture. Additionally, check for any unusual behavior, such as flickering screens, unresponsive buttons, or strange noises, which may indicate water damage.
If you spilled a large amount of liquid on the laptop or if it was submerged in water, the chances of significant damage may be higher. On the other hand, minor spills or splashes might result in less severe damage.
It’s important to remember that laptops are delicate electronic devices, and water damage can be devastating if not addressed promptly. For severe cases, it’s recommended to consult a professional technician for repairs. However, if the damage appears to be relatively minor, you can attempt to fix it yourself following the appropriate steps.
By diagnosing the water damage accurately, you can proceed with the necessary steps to salvage your laptop and restore its functionality. Let’s move on to the next step of the repair process.
Shut down the laptop and disconnect all power sources
As soon as you discover water damage on your laptop, it is crucial to take immediate action to prevent further damage. The first step is to shut down the laptop and disconnect all power sources.
Water and electricity do not mix well, and leaving the laptop powered on can increase the risk of short circuits and irreversible damage to internal components. Therefore, it is vital to turn off the laptop as soon as possible.
To shut down the laptop properly, save all your work and close any open applications. Then, click on the “Start” menu and select the “Shut Down” option. Alternatively, you can use the keyboard shortcut by pressing and holding the power button until the laptop powers off.
Once the laptop is off, disconnect all power sources, including the power cord and any connected peripherals. Unplugging the power cord from the electrical outlet and removing the battery, if possible, will further reduce the risk of electrical damage.
Remember to handle the power cord and battery with care, ensuring that your hands are dry. Avoid twisting or pulling forcefully, as this could cause damage to the connectors or cables.
By shutting down the laptop and disconnecting all power sources, you effectively cut off the electrical supply and minimize the potential for further damage. This step sets the foundation for the subsequent actions required to repair the water-damaged laptop.
Remove any external devices and accessories
When dealing with a water-damaged laptop, it is essential to remove any external devices and accessories connected to it. This step is crucial for multiple reasons, such as preventing additional damage and ensuring easier access to the affected areas.
Start by unplugging any external devices, such as USB drives, external hard drives, or printers. Additionally, disconnect any peripherals, such as a mouse, keyboard, or monitor. These devices can harbor moisture or may have been directly exposed to water, which can lead to further damage if left connected.
Gently remove the cables from their respective ports, taking care not to apply excessive force or cause any additional strain. If you encounter any resistance, double-check to ensure that the connectors are dry and free of any debris or moisture.
Next, remove any accessories attached to your laptop, such as memory cards, DVDs, or SD cards. These items can trap moisture and potentially cause harm to the laptop’s internal components if left inside during the repair process.
Keep in mind that some laptops may have additional accessories, such as a docking station or port replicator. If your laptop is connected to one of these devices, disconnect it carefully and set it aside.
By removing external devices and accessories, you minimize the risk of further damage and create a clear workspace for the repair process. With these items safely disconnected, you can now proceed to the next steps of fixing your water-damaged laptop.
Wipe off any visible water or liquid
After shutting down the laptop and disconnecting all power sources, the next step in repairing a water-damaged laptop is to wipe off any visible water or liquid from the device. This immediate action helps minimize the moisture that could seep further into the internal components.
Start by gently patting the laptop dry using a soft and absorbent cloth. Avoid using paper towels or tissue paper as they may leave behind lint or fibers. Ensure that the cloth is clean and free from any debris or dirt that could scratch the laptop’s surface.
Begin by wiping the exterior of the laptop, paying close attention to the areas around the keyboard, trackpad, and ports. Carefully dab any wet or damp spots, making sure not to drag the cloth across the surface so as not to spread the moisture.
For areas that are harder to access or have crevices, you can use a cotton swab or a soft-bristled brush to gently absorb and remove water. Be cautious not to apply excessive pressure that could potentially damage delicate components.
Take your time to thoroughly inspect the laptop for any remaining moisture. Check the screen, hinges, and any other crevices where water may have seeped in. It’s essential to be thorough during this step, as even small amounts of water left behind can lead to further damage.
Once you have wiped off visible water or liquid from the laptop, allow it to air dry for a few minutes before moving on to the next steps. This step sets the stage for further moisture absorption techniques to aid in the restoration of your water-damaged laptop.
Use dry rice or silica gel packets to absorb moisture
After wiping off any visible water or liquid from your water-damaged laptop, the next step is to employ moisture absorption techniques. Two commonly used methods are using dry rice or silica gel packets to absorb the remaining moisture inside the device.
Dry rice is a readily available household item that can help absorb moisture effectively. Place the laptop in a container and cover it with dry rice. Make sure the laptop is completely submerged in the rice, which will act as a natural desiccant, drawing out the moisture from the internal components.
Alternatively, you can use silica gel packets, which are small packets containing moisture-absorbing silica gel beads. These packets are often found in shoeboxes, electronics packaging, or can be purchased in stores. Place multiple silica gel packets inside a container and position the laptop on top of them.
Seal the container and let the laptop sit with the rice or silica gel packets for at least 24 to 48 hours. This duration allows the absorption process to take place effectively. Avoid opening the container during this time to prevent the introduction of additional moisture into the environment.
Both dry rice and silica gel packets can absorb moisture effectively, but the choice ultimately depends on what you have readily available. Remember to handle the silica gel packets with care and keep them away from children or pets, as they can be harmful if ingested.
By utilizing these moisture absorption techniques, you enhance the chances of restoring your water-damaged laptop. Once the allotted time has passed, proceed to the next steps to thoroughly clean the laptop components and ensure they are free from any residual moisture.
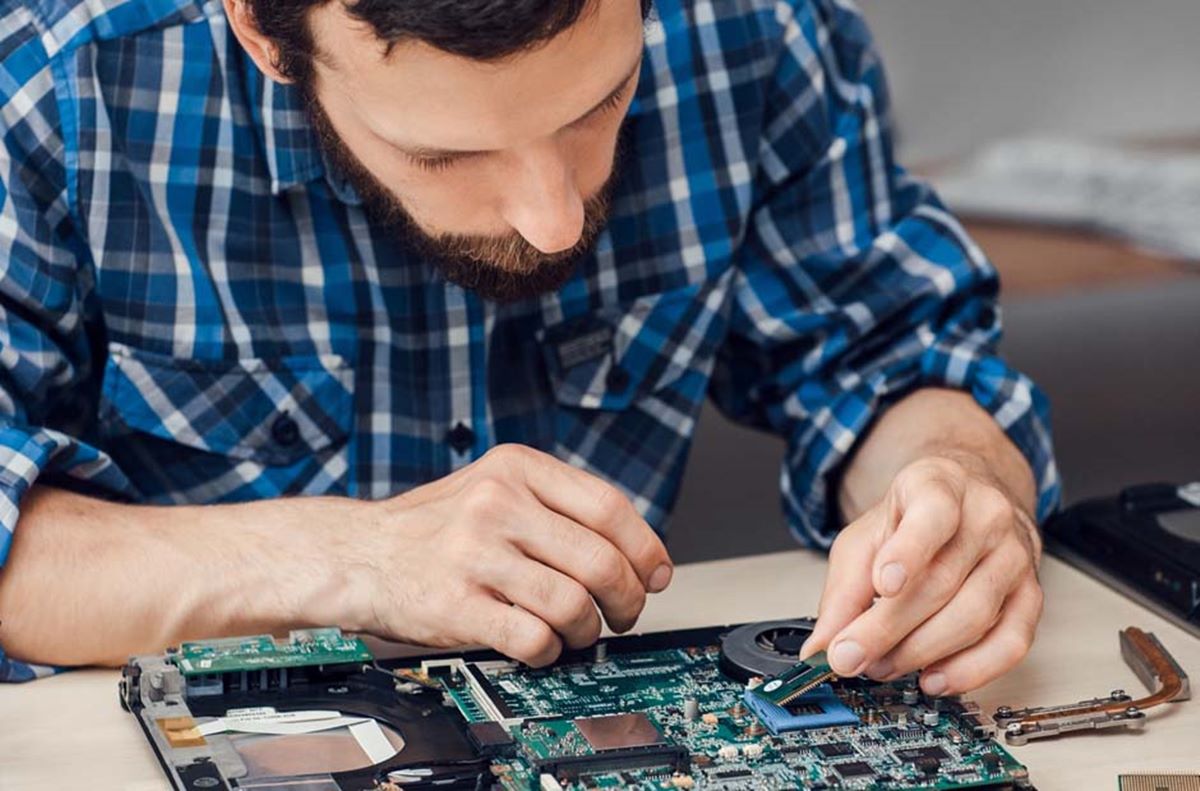
Properly clean the laptop components
After absorbing the moisture using rice or silica gel packets, it’s important to properly clean the laptop components to remove any remaining residue or contaminants. Cleaning the internal and external parts of the laptop will help ensure its optimal performance and prevent any potential damage.
Start by using a can of compressed air to blow out any dust or debris from the keyboard, ports, and other crevices. Hold the can upright and use short bursts of air to dislodge any particles. Be careful not to tilt the can or use excessive force, as this can damage the delicate components.
Next, use a soft-bristled brush or a clean, lint-free cloth to gently clean the exterior surfaces of the laptop. Wipe down the screen, keyboard, and body of the laptop, ensuring that you remove any smudges or fingerprints. For stubborn stains, lightly dampen the cloth with a mixture of water and mild detergent, and gently wipe the surface.
To clean the keyboard, you can also use a handheld vacuum cleaner or a small brush to remove any dust or debris that may have accumulated between the keys. Take your time and be thorough, paying attention to each individual key and the spaces in between.
For the screen, it’s best to use a microfiber cloth or a screen cleaning solution specifically designed for electronics. Spray the solution onto the cloth, not directly onto the screen, and gently wipe the screen in a circular motion. Avoid applying excessive pressure to prevent damage to the display.
As you clean the laptop components, be mindful of the moisture levels. Ensure that the cloth or brush you use is dry or only slightly damp, as excess moisture can cause harm. Take extra care when cleaning delicate areas, such as the touchpad or the laptop’s ports.
By properly cleaning the laptop components, you remove any residual dirt or contaminants that may have accumulated due to the water damage. This step sets the stage for the next crucial phase – allowing the laptop to air-dry completely.
Let the laptop air-dry for at least 48 hours
After cleaning the laptop components, it is crucial to allow the device to air-dry thoroughly. Air drying is an essential step in the repair process, as it ensures that any remaining moisture evaporates completely, reducing the risk of further damage.
Find a clean and dry area with good air circulation to place the laptop. Avoid placing it near sources of heat or direct sunlight, as excessive heat can cause warping or other damage to the components. It’s also important to keep the laptop in a horizontal position to promote even drying.
Patience is key during this step. Resist the temptation to power on the laptop or rush the drying process. It is recommended to let the laptop air-dry for a minimum of 48 hours, or even longer if necessary. The drying time can vary depending on factors such as humidity levels, the severity of the water damage, and the specific laptop model.
If you live in a particularly humid environment, you may consider using a dehumidifier to help expedite the drying process. However, be cautious when using any additional equipment and ensure proper ventilation to avoid any potential electrical hazards.
During the drying period, periodically check the laptop for any signs of condensation or moisture. If you notice any, gently wipe it off with a dry cloth and continue the air-drying process. Remember, thorough drying is crucial to prevent further damage and ensure a successful repair.
Once the designated drying time has passed and you are confident that the laptop is completely dry, you can proceed to reassembling the components and testing the device. Patience and thoroughness in the drying process will greatly increase the chances of a successful laptop repair.
Reassemble the laptop and test it
After allowing the laptop to air-dry for the recommended duration, it’s time to reassemble the components and test the device to ensure it functions properly. The reassembling process requires careful attention to detail to ensure all parts are correctly placed.
Begin by reconnecting any external devices or accessories, such as the power cord, peripherals, and storage devices. Double-check that cables are securely connected and properly inserted into their respective ports. Take your time to ensure each connection is secure and snug.
If you had removed the laptop’s battery during the repair process, reinsert it now, ensuring it is correctly aligned and snaps into place. Once the battery is securely in position, you can proceed to power on the laptop.
Press the power button and observe the startup process. Listen for any unusual sounds or observe any abnormal behavior, such as flickering screens or error messages. Pay close attention to the laptop’s performance, responsiveness, and functionality.
If the laptop powers on without issue and operates normally, it indicates a successful repair. However, it’s essential to thoroughly test all aspects of the laptop, including the keyboard, touchpad, USB ports, and any other peripherals you regularly use. Open various applications and check for any errors or glitches.
If you notice any persistent issues or abnormalities, despite your repair efforts, it may be necessary to seek professional assistance. A certified technician can provide further diagnosis and repair options to address any underlying damage that may require specialized attention.
Remember, the success of the repair depends on meticulous reassembly and thorough testing. Take your time during this step to ensure everything is in order, allowing you to resume using your laptop with confidence.
If the laptop still doesn’t work, consult a professional technician
If, after following the previous steps, your water-damaged laptop still doesn’t work or exhibits persistent issues, it may be time to consult a professional technician. While DIY repairs can be effective in many cases, there are instances where professional expertise is necessary to diagnose and address the underlying problems.
A professional technician has the necessary knowledge, experience, and tools to properly assess the extent of the damage. They can perform advanced diagnostics and repairs that may not be possible or safe for an inexperienced individual. Attempting further repairs without the proper expertise could potentially worsen the damage or void any remaining warranty.
When seeking a professional technician, ensure that you choose a reputable and certified service provider. Look for technicians with experience in laptop repairs, particularly those with expertise in handling water-damaged devices. Reading reviews and asking for recommendations from trusted sources can help you find a reliable technician.
Before visiting a technician, it’s a good idea to have a clear understanding of the issues you have encountered and any steps you have already taken to address the problem. This information will assist the technician in diagnosing the problem more efficiently and avoid unnecessary duplication of efforts.
Keep in mind that professional repairs may come with a cost, especially if your laptop is out of warranty. Request an estimate of the repairs and discuss any potential fees or charges before proceeding. This allows you to make an informed decision regarding the repair options available to you.
By consulting a professional technician, you can benefit from their expertise and increase the chances of a successful repair. They can provide you with guidance, recommendations, and solutions tailored to your specific situation, helping you get your laptop back in working order.
Tips to prevent water damage in the future
Experiencing water damage to your laptop can be a frustrating and costly experience. To avoid such mishaps in the future, it’s important to implement preventive measures. Here are some tips to help you protect your laptop from water damage:
- Keep liquids away from your laptop: Avoid placing drinks or other liquids near your laptop. Accidental spills are one of the most common causes of water damage.
- Use a protective laptop case: Invest in a sturdy laptop case or sleeve that provides water resistance. This adds an extra layer of protection in case of accidental spills or exposure to damp environments.
- Be cautious in humid environments: Humidity can contribute to moisture buildup in your laptop. Try to work in well-ventilated areas, and consider using a dehumidifier to control the humidity levels.
- Protect your laptop during travel: When carrying your laptop in a backpack or bag, make sure it has its own compartment and is properly secured. Avoid packing liquids or other potentially damaging items together with your laptop.
- Unplug and disconnect: Before cleaning your laptop or performing any maintenance, remember to shut it down and disconnect all power sources. This reduces the risk of electrical damage in case of accidental liquid exposure.
- Backup your data regularly: In the event of water damage or any other unforeseen circumstances, having a recent backup of your important files and data ensures that you won’t lose valuable information.
- Invest in spill-resistant keyboards: Consider purchasing a laptop that has a spill-resistant keyboard. These keyboards have drainage channels that help direct liquid away from the internal components, providing an added layer of protection.
- Be mindful of your surroundings: Whether you’re working in a coffee shop, at home, or in an office, be aware of potential hazards. Keep an eye out for open drinks, water sources, and other potential risks.
- Establish a laptop usage policy: If you frequently lend your laptop to others, set guidelines for proper usage. Educate others about the importance of keeping liquids away from the laptop and treating it with care.
- Consider laptop insurance: If you use your laptop in high-risk environments or are prone to accidents, it may be worth considering laptop insurance. This provides financial protection in case of accidental damage, including water damage.
By following these preventive tips, you can significantly reduce the risk of water damage to your laptop. Prevention is key when it comes to safeguarding your valuable device and ensuring its longevity and optimal performance.