
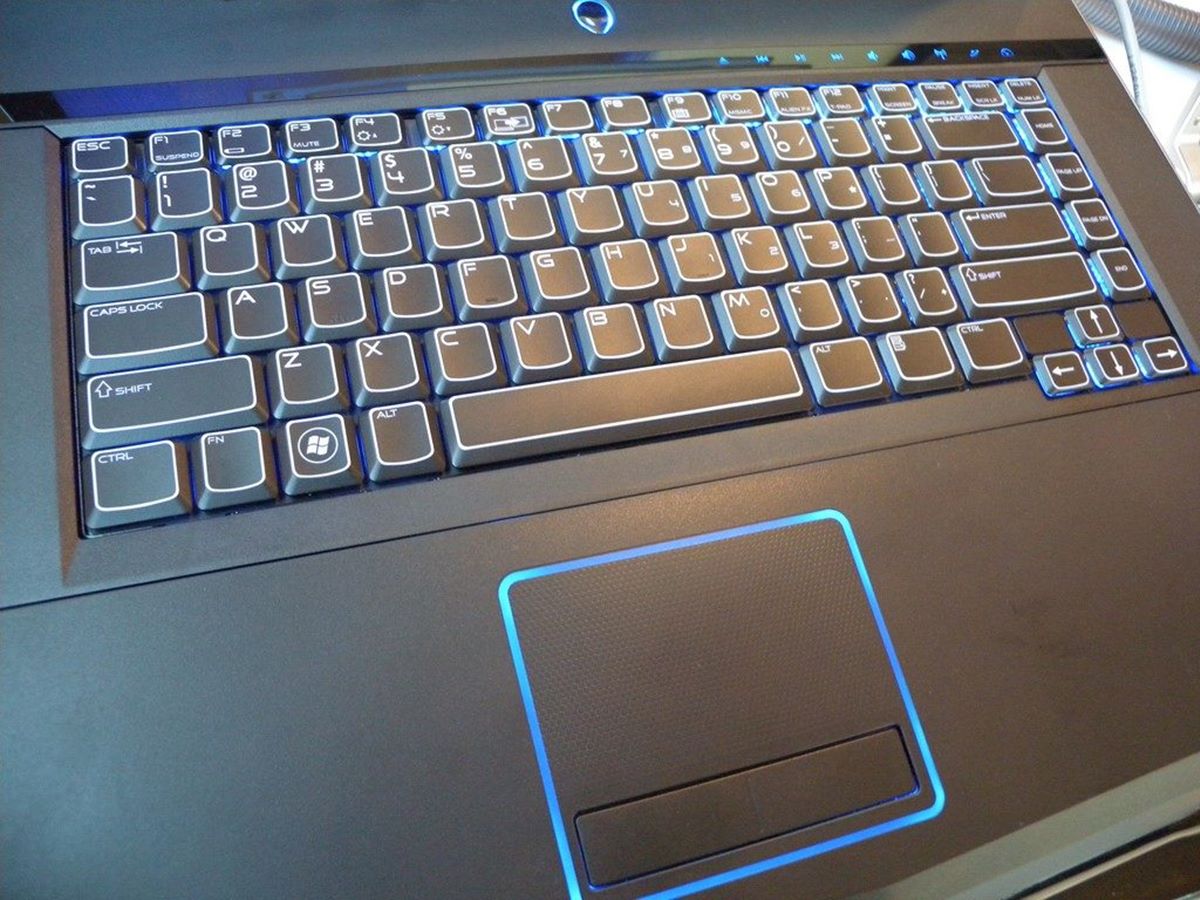
Clean the Touchpad
The touchpad is one of the most frequently used components of a laptop, which means it is susceptible to dirt, sweat, and other debris. Over time, these contaminants can interfere with the smooth functioning of the touchpad. Cleaning the touchpad is a simple yet effective solution to address various touchpad issues. Here are some steps to help you clean your touchpad and restore its performance:
- Start by powering off your laptop and disconnecting it from any power source. This prevents any accidental input during the cleaning process and reduces the risk of damage.
- Gently wipe the touchpad surface with a soft, lint-free cloth. Make sure the cloth is slightly damp with water or rubbing alcohol. Avoid using excessive moisture as it can damage the touchpad.
- Use a cotton swab dipped in rubbing alcohol to clean the edges of the touchpad and the areas surrounding the touchpad buttons, if applicable. Be careful not to apply too much pressure to prevent any damage.
- If you notice stubborn stains or grime on the touchpad, you can prepare a mixture of water and mild soap and apply it to the cloth. Make sure the cloth is damp, not soaked, and gently scrub the touchpad surface in circular motions.
- After cleaning, use a dry cloth to remove any excess moisture from the touchpad.
Once you have completed the cleaning process, allow the touchpad to air dry for a few minutes before turning on your laptop. This ensures that the touchpad is free from moisture, which could potentially cause erratic behavior.
Regularly cleaning your touchpad helps maintain its sensitivity and responsiveness. You can incorporate touchpad cleaning as part of your routine laptop maintenance to prevent future touchpad issues. If cleaning the touchpad doesn’t resolve the problem, you can move on to the next troubleshooting steps to further diagnose and fix the touchpad on your laptop.
Check the Touchpad Settings
Before diving into more advanced troubleshooting steps, it’s important to check the touchpad settings on your laptop. Sometimes, the touchpad issues can be due to incorrect or disabled settings. Here’s how you can check the touchpad settings:
- Click on the Start button and select “Settings” or press the Windows key + I to open the Settings menu.
- In the Settings menu, click on “Devices” to access the device settings.
- From the left-hand side menu, select “Touchpad”.
- Review the touchpad settings. Ensure that the touchpad is enabled and all the required features, such as scrolling, gestures, and tap-to-click, are turned on.
- If the touchpad is disabled, toggle the switch to enable it.
- Make any necessary adjustments to the sensitivity or other settings based on your preference.
After adjusting the settings, test the touchpad and see if the issue persists. Sometimes, a simple tweak in the settings can resolve the problem and restore the functionality of the touchpad.
If you are unable to locate the touchpad settings in the Settings menu, you can also try accessing the touchpad settings through the Control Panel. Simply search for “Control Panel” in the Windows search bar, then open it and navigate to “Hardware and Sound” > “Mouse” to access the touchpad settings.
Checking and adjusting the touchpad settings is a quick and straightforward step to troubleshoot touchpad issues. However, if the problem continues, you can proceed to the next troubleshooting steps to further address the touchpad issues on your laptop.
Update or Reinstall the Touchpad Driver
Outdated or malfunctioning touchpad drivers can cause various issues with the touchpad functionality on your laptop. Updating or reinstalling the touchpad driver can help resolve these problems. Here’s how you can proceed:
- Press the Windows key + X or right-click on the Start button to open the Quick Access menu. From the menu, select “Device Manager”.
- In the Device Manager window, expand the “Mice and other pointing devices” category.
- Right-click on the touchpad driver and select either “Update driver” or “Uninstall device”.
- If you choose to update the driver, follow the on-screen instructions to search for the latest driver updates online and install them. Windows will automatically download and install the updated driver.
- If you select to uninstall the driver, confirm the action and proceed.
- Once the driver is uninstalled, restart your laptop. Windows will automatically reinstall the touchpad driver.
After updating or reinstalling the touchpad driver, test the touchpad to see if the issues have been resolved. If the touchpad is still not functioning correctly, you can also visit the website of your laptop manufacturer to manually download and install the latest touchpad driver specific to your laptop model.
Updating or reinstalling the touchpad driver ensures that you have the most up-to-date and compatible driver for your touchpad, which can significantly improve its performance and address any software-related issues. If this step does not fix the touchpad problem, there are still additional troubleshooting methods to try and resolve the issue.
Disable the Touchpad Delay
If you experience a delay or lag when using the touchpad on your laptop, it can be quite frustrating. This delay is often referred to as “palm check” or “touchpad delay” and is designed to prevent accidental inputs when typing. However, it can sometimes interfere with the responsiveness of the touchpad. Disabling the touchpad delay can help improve its performance. Here’s how to do it:
- Open the Control Panel by searching for it in the Windows search bar.
- In the Control Panel, select “Hardware and Sound”.
- Under “Devices and Printers”, click on “Mouse” to access the mouse properties.
- In the Mouse Properties window, navigate to the “Touchpad” tab.
- Look for an option related to touchpad delay, palm detection, or similar. The wording may vary depending on the touchpad driver and laptop manufacturer.
- Uncheck or adjust the settings to disable the touchpad delay or reduce its sensitivity.
- Click “Apply” and then “OK” to save the changes.
Once you have disabled the touchpad delay, test the touchpad to see if the delay has been eliminated. Now, you should be able to use the touchpad without experiencing frustrating delays.
Keep in mind that disabling the touchpad delay may increase the likelihood of accidental inputs when typing. If you find that the touchpad is interfering with your typing experience, you can re-enable the touchpad delay or adjust its sensitivity level to find the right balance between responsiveness and accidental inputs.
Disabling the touchpad delay is a useful troubleshooting step to address touchpad lag or delay issues. If the delay persists or if you encounter other touchpad problems, continue to the next troubleshooting methods to further diagnose and resolve the issues.
Adjust the Touchpad Sensitivity
If you find that your laptop’s touchpad is too sensitive or not responsive enough, adjusting the touchpad sensitivity settings can help improve your user experience. Here’s how you can adjust the touchpad sensitivity:
- Open the Control Panel by searching for it in the Windows search bar.
- In the Control Panel, select “Hardware and Sound”.
- Under “Devices and Printers”, click on “Mouse” to access the mouse properties.
- In the Mouse Properties window, navigate to the “Touchpad” tab.
- Look for the touchpad sensitivity or speed option. The wording may vary depending on the touchpad driver and laptop manufacturer.
- Move the slider to adjust the touchpad sensitivity. Moving it towards “Low” will make the touchpad less sensitive, while moving it towards “High” will increase the sensitivity.
- Test the touchpad after each adjustment to find the optimal sensitivity for your preferences.
- Click “Apply” and then “OK” to save the changes.
By adjusting the touchpad sensitivity, you can customize it to your liking, ensuring that it responds accurately to your touch. Finding the right balance between sensitivity and responsiveness can greatly enhance your overall touchpad experience.
Keep in mind that the touchpad sensitivity settings may vary depending on your laptop model and touchpad driver. If you are unable to locate the touchpad sensitivity option in the Mouse Properties window, refer to the user manual or the support website of your laptop manufacturer for guidance on adjusting touchpad settings or consult the touchpad settings within the Windows settings menu.
Adjusting the touchpad sensitivity is a helpful step in troubleshooting touchpad issues. However, if the touchpad problems persist, continue exploring the next troubleshooting steps to resolve the touchpad issues on your laptop.
Enable Tap-to-Click Functionality
If the tap-to-click feature on your laptop’s touchpad is not working, you may need to enable it in the touchpad settings. Tap-to-click allows you to simply tap on the touchpad instead of clicking the physical buttons to perform a click. Here’s how you can enable tap-to-click functionality:
- Open the Control Panel by searching for it in the Windows search bar.
- In the Control Panel, select “Hardware and Sound”.
- Under “Devices and Printers”, click on “Mouse” to access the mouse properties.
- In the Mouse Properties window, navigate to the “Touchpad” tab.
- Look for an option related to tap-to-click or tapping. The wording may vary depending on the touchpad driver and laptop manufacturer.
- Check the box or toggle the switch to enable tap-to-click functionality.
- Adjust any additional settings related to tap-to-click, such as sensitivity or multi-finger tapping, if available.
- Click “Apply” and then “OK” to save the changes.
After enabling tap-to-click functionality, test the touchpad by tapping on it to perform a click. The touchpad should now register your taps as clicks, making it more convenient to navigate and interact with your laptop.
If you do not see the tap-to-click option within the Mouse Properties window, it is possible that your touchpad does not support this feature or that it is controlled by a different touchpad driver. In such cases, you may need to consult the user manual or the support website of your laptop manufacturer for specific instructions on enabling tap-to-click functionality.
Enabling tap-to-click functionality streamlines the mouse input process and can greatly enhance the usability of your touchpad. If the tap-to-click feature remains unresponsive or if you are experiencing other touchpad issues, continue with the next troubleshooting steps to address and resolve the issues.
Disable Palm Check
If you find that your laptop’s touchpad is unresponsive or erratic when you rest your palms on the surrounding area while typing, it may be due to the “palm check” feature. Palm check is designed to prevent accidental inputs from your palms while typing, but it can sometimes be too sensitive and interfere with the touchpad’s functionality. Disabling palm check can help resolve this issue. Here’s how:
- Open the Control Panel by searching for it in the Windows search bar.
- In the Control Panel, select “Hardware and Sound”.
- Under “Devices and Printers”, click on “Mouse” to access the mouse properties.
- In the Mouse Properties window, navigate to the “Touchpad” tab.
- Look for an option related to palm check or palm detection. The wording may vary depending on the touchpad driver and laptop manufacturer.
- Adjust the palm check sensitivity or disable it completely by moving the slider or deselecting the checkbox.
- Click “Apply” and then “OK” to save the changes.
After disabling palm check, test the touchpad to see if it is now more responsive and accurate while you are typing. Rest your palms on the laptop without interfering with the touchpad’s operation. You should notice improved touchpad performance and reduced interference from accidental inputs.
If you are unable to locate the palm check option in the Mouse Properties window, it is possible that your touchpad driver does not support this feature. In such cases, you may need to consult the user manual or the support website of your laptop manufacturer for further guidance.
Disabling palm check allows you to type and use the touchpad simultaneously without any interference. If you continue to experience touchpad issues or want to explore additional troubleshooting steps, proceed to the next methods to further address and resolve the touchpad issues on your laptop.
Perform a Power Drain
Performing a power drain can help reset the electrical components of your laptop, including the touchpad. It can often resolve temporary glitches or issues that may be affecting the touchpad’s functionality. Here’s how you can perform a power drain:
- Shut down your laptop and disconnect it from any power source, including the charger.
- Remove the battery, if possible. If you have a non-removable battery, proceed to the next step.
- Press and hold the power button for about 15-20 seconds. This will discharge any residual power from the laptop.
- Reconnect the battery, if you removed it earlier.
- Plug your laptop back into a power source and turn it on.
After the power drain, your laptop should start up normally. Test the touchpad to see if it is now functioning properly. Performing a power drain can often resolve temporary issues with the touchpad and restore its functionality.
It’s worth noting that performing a power drain resets the laptop’s hardware components, but it will not affect any software settings or configurations you have made. If the touchpad problems persist, you can move on to the next troubleshooting steps to further diagnose and resolve the touchpad issues on your laptop.
Performing a power drain is a simple and non-invasive troubleshooting step that can often help resolve touchpad issues. However, if the problems persist, it’s time to explore additional solutions to get your touchpad back in optimal working condition.
Check for Hardware Issues
If you have exhausted software-related troubleshooting methods and are still experiencing touchpad issues on your laptop, it’s worth checking for any potential hardware problems. Here are some steps to help you identify and address hardware-related touchpad issues:
- Inspect the touchpad surface for any physical damage, such as scratches or cracks. Physical damage can affect the touchpad’s functionality and may require professional repair or replacement.
- Check the touchpad buttons for proper actuation. Press each button individually to ensure they are responsive and not sticking.
- Ensure that the touchpad is securely connected to the laptop’s motherboard. In some cases, loose connections can cause touchpad issues. If you are comfortable doing so, you can refer to the laptop’s service manual to locate and reseat the touchpad connector.
- Connect an external mouse to your laptop and see if it works without any issues. If the external mouse functions correctly, it suggests that the touchpad itself may be faulty.
- If your laptop has a removable touchpad, such as in some gaming laptops, consider removing and reinserting the touchpad module. Be cautious and refer to your laptop’s service manual for instructions.
If you identify any hardware issues during the above checks, it is recommended to contact the manufacturer’s technical support or a professional technician for further assistance. They can provide guidance on troubleshooting or repairing the specific touchpad hardware problem.
It’s important to note that diagnosing and fixing hardware issues may require specialized tools and expertise. If you are not comfortable with hardware troubleshooting, it is best to seek professional assistance to avoid causing further damage to your laptop.
Checking for hardware issues is a crucial step in troubleshooting touchpad problems when software-related solutions do not resolve the issues. By identifying and addressing any hardware-related problems, you can ensure that your touchpad functions optimally and provides a seamless user experience.
Consult the Laptop Manufacturer’s Support
If you have tried all the previous troubleshooting steps and are still facing persistent touchpad issues on your laptop, it may be time to seek professional assistance from the laptop manufacturer’s support team. Here’s how you can reach out to them:
- Visit the laptop manufacturer’s official website and look for the “Support” or “Contact” section.
- Search for the support options specific to your laptop model. This could include live chat, phone support, or an online support form.
- Provide detailed information about the touchpad issues you are experiencing. Include any specific error messages, symptoms, and the troubleshooting steps you have already taken.
- Follow the instructions provided by the support team. They may ask you to perform additional troubleshooting steps or provide guidance on how to send in your laptop for repair if necessary.
- Be prepared to provide your laptop’s serial number, model number, and any warranty information if applicable.
The laptop manufacturer’s support team has the expertise and resources to diagnose and resolve complex touchpad issues. They can provide personalized assistance and recommend the best course of action based on your specific situation.
Remember to remain patient and polite when interacting with the support team. They are there to help you, and providing clear and accurate information will assist them in finding the most effective solution for your touchpad problems.
In some cases, if your laptop is still under warranty, the manufacturer may cover the repair or replacement of the touchpad. If the warranty has expired, they may provide you with alternative options, such as paying for repairs or suggesting authorized service centers.
Consulting the laptop manufacturer’s support is often the best step to take when you have exhausted all other troubleshooting methods. They can offer professional guidance and resolutions to ensure your touchpad is fully functional and meets your expectations.