How to Enable Live Photos on iPhone
Live Photos is a fantastic feature on iPhone that brings your captured moments to life. It allows you to not only capture a still photo but also a few seconds of video and audio before and after the picture. This immersive feature adds depth and emotion to your memories, making them more vibrant and engaging. However, before you can start capturing Live Photos, you need to make sure the feature is enabled on your iPhone.
Here’s how you can enable Live Photos on your iPhone:
- Unlock your iPhone and open the Camera app.
- Tap on the circular icon at the top of the screen to switch to Photo mode.
- Look for a set of concentric circles called the Live Photos icon. It’s located at the top of the screen, just below the flash and timer options.
- If the Live Photos icon is yellow, it means Live Photos is already enabled. You can start capturing Live Photos right away.
- If the Live Photos icon is white, tap on it once to enable the feature. It will turn yellow, indicating that Live Photos is now enabled.
Once Live Photos is enabled, you will see the Live Photos icon on the Camera app’s interface every time you open it. You can now start capturing captivating Live Photos and relive those moments whenever you want.
Note that enabling Live Photos on your iPhone might affect the storage space used by your photos. Live Photos utilize both a photo and a short video clip, which takes up more space on your device. If you have limited storage, consider managing and optimizing your photo library to free up space periodically.
With Live Photos enabled, you’re now ready to capture those precious moments that come alive with motion and sound. Keep in mind that Live Photos work best with subjects that are in motion or have a story to tell. Experiment with different angles, lighting, and compositions to make your Live Photos truly memorable. So, grab your iPhone, enable Live Photos, and start capturing the magic of moments in a whole new way!
How to Capture Live Photos on iPhone
Capturing Live Photos on your iPhone is incredibly simple and allows you to seize the essence of a moment by capturing a few seconds of motion and sound around a still photo. Whether it’s a smile, a laugh, or a spontaneous gesture, Live Photos enable you to relive those cherished memories in an immersive way.
Here’s how you can capture Live Photos on your iPhone:
- Open the Camera app on your iPhone.
- Ensure that Live Photos is enabled by checking if the Live Photos icon at the top of the screen is yellow. If it’s not, tap on it to enable Live Photos.
- Aim your camera at the subject or moment you want to capture as a Live Photo. Keep in mind that Live Photos work best for capturing dynamic scenes or when your subject is in motion.
- Press the shutter button to take the photo. As you do so, your iPhone will automatically record a few seconds of motion and sound before and after the photo is taken.
- When you’re finished capturing the Live Photo, you can view it by tapping on the thumbnail that appears in the lower-left corner of the Camera app. This allows you to relive the moment and experience the magic of the captured motion and sound.
It’s important to note that Live Photos are different from regular photos, as they include the elements of motion and sound. Hence, it’s crucial to consider the context and subject matter when deciding to capture a Live Photo. Experiment with different compositions, angles, and settings to maximize the impact of your Live Photos.
Additionally, be mindful of the available storage space on your iPhone, as Live Photos require more space than regular photos due to the additional video and audio components. To avoid running out of storage, consider transferring your Live Photos to your computer or utilizing cloud storage options to keep them safely stored while freeing up space on your device.
With Live Photos, you can capture the essence of a moment in a unique and captivating way. So, grab your iPhone and start immortalizing those special memories as Live Photos to relive and share with others in a whole new dimension!
How to View Live Photos on iPhone
Once you’ve captured your cherished moments as Live Photos on your iPhone, it’s time to relive them and experience the magic they offer. Viewing Live Photos not only allows you to see the still image but also brings them to life with motion and sound. Here’s how you can view Live Photos on your iPhone:
- Open the Photos app on your iPhone.
- Navigate to the album or folder where your Live Photos are located. Live Photos are indicated by the Live Photos icon, which looks like concentric circles in the bottom-right corner of the thumbnail.
- Tap on the Live Photo you want to view. It will open in fullscreen mode.
- Hold your finger on the photo to activate the Live Photo’s motion and sound. You will see the photo come alive, capturing the magical moments before and after the still image.
- Release your finger, and the Live Photo will stop playing. To resume playback, simply tap on the photo.
While viewing a Live Photo, you can also take advantage of additional features:
- Swipe left or right on the photo to view other Live Photos in the same album or folder.
- Use pinch-to-zoom gestures to zoom in or out on the photo.
- Tap on the Share button to instantly share the Live Photo with friends and family via messaging apps, social media, or email.
- Tap on the Edit button to access various editing options such as cropping, adjusting the exposure, applying filters, and more. Note that editing a Live Photo will affect both the still image and the motion/video components.
Keep in mind that viewing Live Photos is not limited to your iPhone. You can also enjoy these dynamic images on other Apple devices, such as your iPad, Mac, or Apple TV, or even share them with friends and family who use Apple devices.
With the ability to view Live Photos, you can relive and share your favorite moments in a truly interactive and captivating way. So, dive into your Photos app, explore your collection of Live Photos, and let the magic unfold before your eyes!
How to Edit Live Photos on iPhone
One of the great advantages of Live Photos on iPhone is the ability to edit them and enhance their visual appeal. Editing Live Photos allows you to refine the still image, adjust the video component, and apply creative effects to make them even more stunning. Here’s how you can edit Live Photos on your iPhone:
- Open the Photos app on your iPhone and navigate to the Live Photo you want to edit.
- Tap on the Live Photo to open it in fullscreen mode.
- Tap on the “Edit” button, which looks like three horizontal lines with sliders, located at the bottom-right corner of the screen.
- You will now see various editing options available:
- Enhance: Tapping on the wand icon will automatically adjust the exposure, color, and other settings to improve the overall appearance of the Live Photo.
- Crop: Use the crop tool to adjust the framing and composition of the still image. Keep in mind that cropping will affect both the still image and the video component.
- Filters: Apply different filters to enhance the mood and tone of your Live Photo. Swipe left or right to preview and select the desired filter.
- Adjust: Fine-tune the brightness, contrast, saturation, and other settings individually to achieve the desired look for your Live Photo.
- Rotate and Flip: If needed, you can rotate the Live Photo or flip it horizontally using these options.
- Mute: Tap on the speaker icon to mute the sound associated with the Live Photo.
- After making the desired edits, tap on the “Done” button at the bottom-right corner of the screen to save your changes.
- Your edited Live Photo will now replace the original in your Photos library. The changes are non-destructive, meaning you can revert back to the original at any time.
By taking advantage of the editing options available for Live Photos, you can bring out the best in your captured moments. Remember to experiment with different adjustments and effects to create truly unique and visually stunning Live Photos.
Keep in mind that the editing options for Live Photos may vary slightly depending on the version of iOS and the capabilities of your iPhone. Newer iPhones tend to have additional features such as Portrait mode, which allows for more advanced editing and background blurring effects.
Now that you know how to edit Live Photos, unleash your creativity and transform your captured moments into masterpieces that truly stand out!
How to Convert Live Photos to Video on iPhone
Converting Live Photos to video format on your iPhone allows you to easily share and enjoy the moments captured in a more universally compatible way. By converting a Live Photo to a video, you can preserve the motion and sound while ensuring it can be played on devices or platforms that may not support Live Photos. Here’s how you can convert Live Photos to video format on your iPhone:
- Open the Photos app on your iPhone and navigate to the Live Photo you want to convert.
- Tap on the Live Photo to open it in fullscreen mode.
- Swipe up on the screen to reveal various options and additional details about the Live Photo.
- Scroll down on the options panel and find the “Live” section.
- Tap on the “Save as Video” option.
- A progress indicator will appear as your iPhone converts the Live Photo to a video. The duration of the conversion process depends on the length and complexity of the Live Photo.
- Once the conversion is complete, a new video file will be created and saved in your Photos library.
You can then locate the converted video by going back to the album or folder where the original Live Photo is located or by searching for it in the Photos app. The converted video will have the same name as the original Live Photo but with the “.mov” file extension.
It’s worth noting that once a Live Photo is converted to a video, you will no longer be able to access the full Live Photo experience with motion and sound within the Photos app. However, the converted video can be played on any device or platform that supports the video file format, making it more versatile for sharing and playback.
Converting Live Photos to video format is especially useful when sharing your memories with others who may not have an iPhone or compatible device. It allows you to preserve the essence of the Live Photo while ensuring it can be enjoyed by a wider audience.
So, if you want to convert your Live Photos to video format, follow these steps on your iPhone and share those captivating moments with ease!
How to Save a Live Photo as a Video on iPhone
Saving a Live Photo as a video on your iPhone allows you to preserve the dynamic moments captured in a format that can be easily shared and enjoyed. By converting a Live Photo to a video, you can retain the motion and sound while ensuring it can be played on various devices and platforms. Here’s how you can save a Live Photo as a video on your iPhone:
- Open the Photos app on your iPhone and locate the Live Photo you want to save as a video.
- Tap on the Live Photo to open it in fullscreen mode.
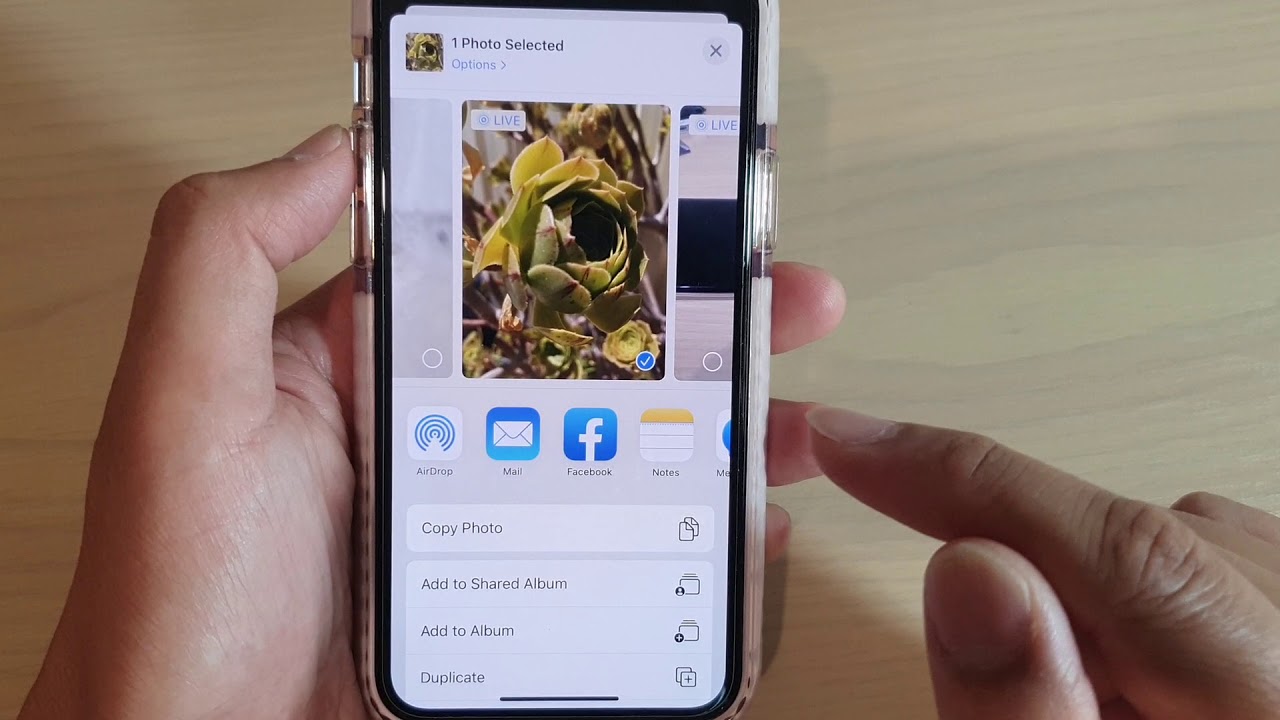
- Tap on the “Share” icon, which is represented by a square with an upward arrow.
- Swipe left on the row of sharing options at the bottom and select the “Save as Video” option.
- Your iPhone will now convert the Live Photo into a video format.
- Once the conversion is complete, the video file will be saved in your Photos library.
You can then find the saved video by going back to the album or folder where the original Live Photo is located or by going to the “Videos” album in the Photos app. The video will have the same name as the original Live Photo but with the “.mov” file extension.
It’s important to note that when you save a Live Photo as a video, you are essentially freezing the dynamic elements and creating a video file. This means you will no longer have access to the motion and sound features of the Live Photo in the Photos app.
By saving Live Photos as videos, you can easily share and enjoy the captured moments on any device or platform that supports video playback. Whether you’re sharing it on social media, sending it via messaging apps, or transferring it to other devices, the video format ensures compatibility and seamless playback.
So, if you want to save your Live Photos as videos on your iPhone, follow these steps and preserve those unforgettable moments in a format that’s easily accessible and shareable!
How to Share a Live Photo Video on iPhone
Sharing a Live Photo video on your iPhone allows you to spread the joy and excitement of your captured moments with friends, family, and followers. By converting a Live Photo to a video format, you can easily share it via messaging apps, social media platforms, email, or any other platforms that support video sharing. Here’s how you can share a Live Photo video on your iPhone:
- Open the Photos app on your iPhone and locate the Live Photo video you want to share.
- Tap on the Live Photo video to open it in fullscreen mode.
- Tap on the “Share” icon, represented by a square with an upward arrow.
- You will now see various sharing options. Select the platform or app you want to use to share the Live Photo video. Some common options include Messages, Mail, AirDrop, Facebook, Instagram, and more.
- Depending on the chosen platform or app, you may be prompted to add captions, tags, or customize the video settings before sharing.
- Follow the prompts and confirm the sharing action. The Live Photo video will be shared through the selected platform or app.
When sharing a Live Photo video, keep in mind that some platforms or apps may have limitations on video duration or file size. Therefore, it’s advisable to ensure that your video falls within the supported limits for optimal sharing.
In addition, it’s worth mentioning that not all platforms or apps support Live Photos or the Live Photo video format. In such cases, the Live Photo video will be shared as a regular video, without the ability to experience the motion and sound of the original Live Photo. However, the essence and beauty of the moment captured in the Live Photo will still be visible.
Sharing Live Photo videos allows you to showcase your creativity and the memorable moments you’ve captured in a dynamic and engaging way. By sharing them with your loved ones or on social media platforms, you can bring joy and inspiration to others.
So, grab your iPhone, choose your favorite Live Photo video, and share it with the world to spread the magic of those special moments!
How to Export a Live Photo Video from iPhone to Other Devices
Exporting a Live Photo video from your iPhone to other devices allows you to access and enjoy your captured moments on a wider range of platforms. Whether you want to transfer the Live Photo video to a computer, a tablet, or another smartphone, the process is simple and versatile. Here’s how you can export a Live Photo video from your iPhone to other devices:
- Open the Photos app on your iPhone and locate the Live Photo video you want to export.
- Tap on the Live Photo video to open it in fullscreen mode.
- Tap on the “Share” icon, represented by a square with an upward arrow.
- Scroll through the sharing options and select the method you want to use to export the Live Photo video. Some common options include AirDrop, Messages, Mail, or saving to cloud storage platforms like iCloud or Google Drive.
- If you choose AirDrop, make sure the receiving device is nearby and AirDrop is enabled. Select the device you want to transfer the Live Photo video to from the list of available devices.
- If you choose Messages or Mail, enter the recipient’s contact information and follow the prompts to send the Live Photo video.
- If you choose to save to a cloud storage platform, select the desired cloud storage app from the list of options and follow the prompts to save the Live Photo video to your preferred cloud storage location.
- If you’re transferring the Live Photo video to a computer, you can connect your iPhone to the computer using a USB cable. Then, follow the appropriate steps to transfer the file to your computer’s storage or use software like iTunes or Photos to manage the transfer.
Once you have exported the Live Photo video from your iPhone to the desired device, you will be able to access it and enjoy the dynamic moments you captured. Keep in mind that if the receiving device does not support Live Photos, the video will be treated as a regular video without the motion and sound features of the Live Photo. However, the visual essence and beauty of the moment will still be preserved.
By exporting Live Photo videos, you can share your memories with others and access them on different devices that may not have the same compatibility as an iPhone. This versatility allows you to enjoy your captured moments wherever you go.
So, explore the export options on your iPhone and transfer those precious Live Photo videos to other devices, ensuring your memories are accessible and enjoyable no matter where you are!
Tips for Working with Live Photos on iPhone
Working with Live Photos on your iPhone allows you to capture and relive moments with an immersive experience. To make the most out of this feature, here are some helpful tips and tricks to enhance your Live Photo experience:
- Capture in the right moments: Live Photos work best when you capture subjects in motion or during moments with dynamic actions. Look for opportunities to capture movement, laughter, or spontaneous gestures to bring your Live Photos to life.
- Experiment with different angles: Play around with different angles and perspectives to make your Live Photos more visually captivating. Try shooting from low angles, overhead, or from unique vantage points to add depth and interest to your photos.
- Use natural lighting: Good lighting is essential for any photograph. Find natural light sources or experiment with different lighting conditions to make your Live Photos more vibrant and visually appealing.
- Combine Live Photos with burst mode: Utilize burst mode to capture a series of photos in quick succession. This can help you capture the perfect Live Photo by giving you a range of images to choose from.
- Explore editing options: Take advantage of the editing features built into the Photos app. Adjust the exposure, apply filters, crop, and enhance your Live Photos to make them even more striking.
- Utilize Live Photos effects: iOS offers various Live Photos effects, such as Long Exposure, Loop, Bounce, and more. Experiment with these effects to add a unique touch to your Live Photos and create different visual styles.
- Share and collaborate: Share your Live Photos with friends and family to create a shared album or collaborate on special projects. This can enhance the storytelling aspect of your Live Photos and create meaningful memories together.
- Optimize storage: Live Photos can take up more storage space on your iPhone. Make sure to regularly manage and optimize your photo library to free up space while keeping your favorite Live Photos safely stored in the cloud or on your computer.
By following these tips, you can make the most out of your Live Photos on your iPhone. Capture the essence of the moment, experiment with different techniques, and share the magic with others.
Remember, Live Photos allow you to turn static moments into dynamic memories, so embrace your creativity, explore the possibilities, and enjoy the unique experience of reliving your captured moments with Live Photos on your iPhone!