
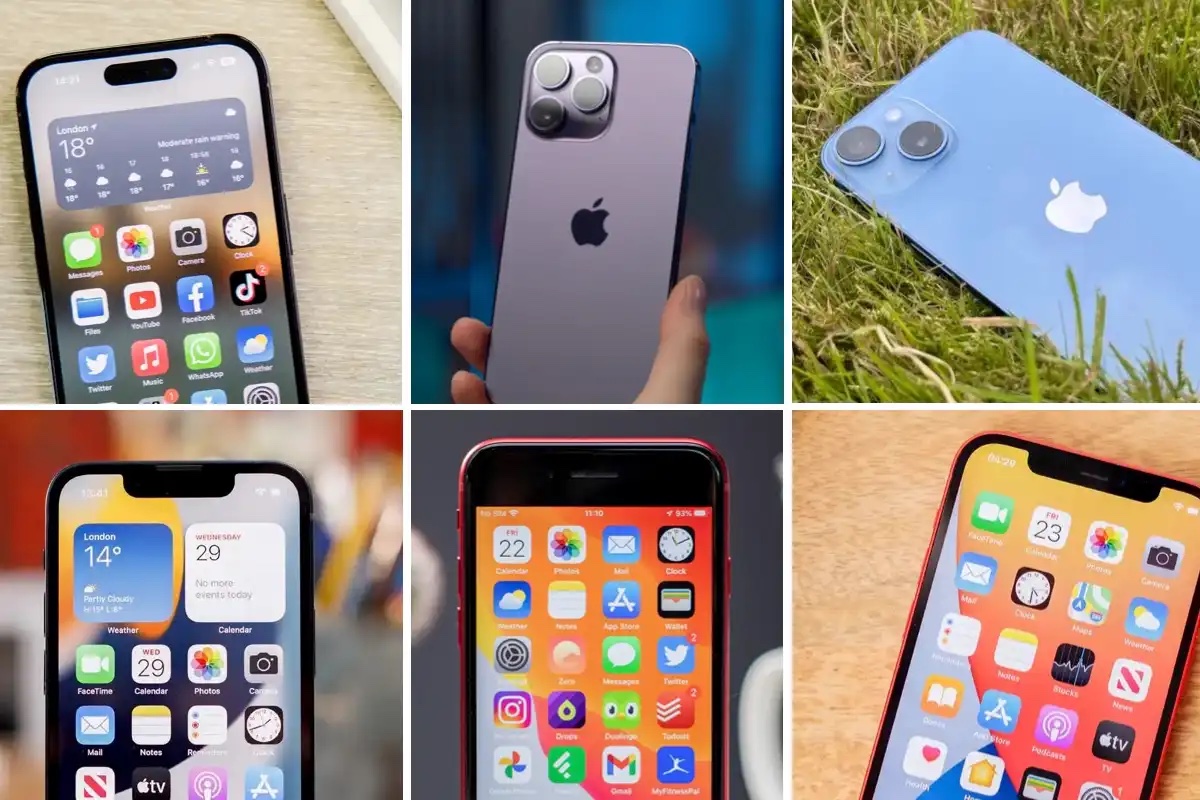
Understanding the different iPhone models
When it comes to choosing an iPhone, it can be overwhelming to navigate through the various models available. Each model offers different features, specifications, and price points. Understanding the differences between the iPhone models is crucial in selecting the one that best suits your needs. Let’s break down the different iPhone models and explore their key characteristics.
1. iPhone SE:
The iPhone SE is a compact and budget-friendly option. It combines the power of Apple’s latest technology with a smaller form factor. It features a 4.7-inch Retina display, Touch ID, and a single camera system. The iPhone SE is ideal for those who prefer a more pocketable device without compromising on performance.
2. iPhone 11:
The iPhone 11 is a stellar choice for those who prioritize an excellent camera system. It boasts a dual-camera setup, including an ultra-wide-angle lens, giving you more creative freedom in your photography. With its 6.1-inch Liquid Retina display, powerful A13 Bionic chip, and all-day battery life, the iPhone 11 offers incredible value for its price.
3. iPhone 11 Pro and iPhone 11 Pro Max:
The iPhone 11 Pro and iPhone 11 Pro Max are the flagship models, designed for users who demand exceptional performance and cutting-edge technology. These models feature a triple-camera system, including an ultra-wide, wide, and telephoto lens, allowing for professional-grade photography. With their stunning Super Retina XDR displays, A13 Bionic chips, and enhanced battery life, the iPhone 11 Pro models are perfect for power users and photography enthusiasts.
4. iPhone XR:
The iPhone XR offers a balance of affordability and features. It features a 6.1-inch Liquid Retina display, single-camera system, and the powerful A12 Bionic chip. The iPhone XR comes in a variety of vibrant colors, making it a popular choice for those who want to express their personal style.
5. iPhone XS and iPhone XS Max:
The iPhone XS and iPhone XS Max were the predecessors to the iPhone 11 Pro models. They feature a dual-camera system, OLED Super Retina display, and the A12 Bionic chip. While no longer the latest models, they still offer excellent performance and advanced features.
6. iPhone X:
The iPhone X introduced a revolutionary design with its edge-to-edge display and Face ID technology. It features a dual-camera system, OLED Super Retina display, and the A11 Bionic chip. While no longer in the current lineup, the iPhone X remains a compelling choice for those who want a modern and premium iPhone.
When selecting an iPhone model, consider your budget, desired features, and intended usage. Each model offers its own unique advantages, ranging from affordability to cutting-edge technology. Hopefully, this overview has helped you gain a better understanding of the different iPhone models and will assist you in making an informed decision for your next iPhone purchase.
Choosing the right iPhone for your needs
With a wide range of iPhone models available, choosing the right one for your needs can be a daunting task. Whether you’re a tech enthusiast, a photography lover, or simply looking for a reliable smartphone, there’s an iPhone that’s perfect for you. Here are some factors to consider when selecting the right iPhone model:
1. Budget: Determine your budget before making a decision. Apple offers a range of iPhones with varying price points, allowing you to choose one that fits your budget without sacrificing performance or features.
2. Features: Consider the features that are important to you. Are you primarily interested in a robust camera system, a large and vibrant display, or powerful performance? Different iPhone models offer different features, so assess your needs and priorities to find the right fit.
3. Size and Design: iPhones come in various sizes and designs. Some users prefer compact phones that are easy to handle with one hand, while others prefer larger screens for multimedia and gaming. Take into account your preferences for size, weight, and aesthetics when making your decision.
4. Camera Capabilities: If photography is a priority for you, consider the camera capabilities of each iPhone model. Look for models with advanced camera systems and features such as optical image stabilization, Night mode, and ProRAW support for professional-grade photography.
5. Battery Life: Battery life is a crucial factor to consider, especially if you rely heavily on your phone throughout the day. Evaluate the battery capacity and the estimated talk-time and internet usage provided by each iPhone model to ensure it meets your needs.
6. Storage Capacity: Determine how much storage space you require for your apps, photos, videos, and other files. Choose an iPhone with an appropriate storage capacity that will accommodate your needs without running out of space.
7. Future-proofing: Apple introduces new software updates annually, so consider the longevity of the iPhone model you’re considering. Opting for a newer model with a more powerful processor and more RAM ensures you’ll be able to run the latest software smoothly for a longer period.
8. Carrier Compatibility: Check the compatibility of the iPhone models with your preferred carrier. While most iPhones are compatible with major carriers, it’s always wise to double-check to avoid any compatibility issues.
By carefully considering these factors, you can narrow down your choices and select the iPhone model that best aligns with your needs, preferences, and budget. Remember, while having the latest and greatest iPhone may be tempting, selecting the right iPhone that suits your unique requirements will provide the best user experience in the long run.
Getting started with your new iPhone
Congratulations on your new iPhone! Whether you’re a first-time iPhone user or upgrading from a previous model, getting started with your new device is an exciting adventure. To help you make the most of your iPhone from the get-go, here are some essential steps to follow:
1. Power on your iPhone: Press and hold the side button (or the Sleep/Wake button) until the Apple logo appears on the screen. Follow the on-screen instructions to set up your iPhone.
2. Activate your iPhone: If you’re a new iPhone user, you’ll need to activate your device. Follow the prompts to connect to a Wi-Fi network, sign in with your Apple ID or create a new one, and agree to the terms and conditions.
3. Set up Face ID or Touch ID: Depending on your iPhone model, you can set up either Face ID or Touch ID for secure and convenient authentication. Follow the on-screen instructions to enroll your face or fingerprint.
4. Restore from backup or set up as new: If you’re upgrading from a previous iPhone, you can restore your data (apps, settings, and content) from an iCloud or iTunes backup during the setup process. Alternatively, you can choose to set up your iPhone as new if you prefer a fresh start.
5. Customize your settings: Take some time to customize your iPhone settings to suit your preferences. This includes adjusting display settings, setting up notifications, configuring privacy options, and selecting your preferred language and region.
6. Explore the App Store: The App Store offers a vast selection of apps to enhance your iPhone experience. Open the App Store, browse through the various categories, and download your favorite apps. Don’t forget to check out the top charts and featured apps for inspiration.
7. Sync your content: If you have media, such as music, photos, or videos, that you want to transfer to your new iPhone, you can do so by syncing it with iTunes or using iCloud. Connect your iPhone to your computer and follow the prompts to transfer your content.
8. Set up iCloud: iCloud is Apple’s cloud-based service that allows you to store and access your data across all your Apple devices. Enable iCloud on your iPhone to automatically back up your data, access your files, and sync your settings across devices.
9. Install essential apps: Install essential apps such as messaging apps, email clients, social media applications, and productivity tools that you use regularly. This will help you stay connected and organized right from the start.
10. Explore the iPhone features: Take the time to familiarize yourself with the various features and capabilities of your iPhone. This includes learning about gestures, using Siri, exploring the camera features, and discovering hidden gems such as shortcuts and accessibility options.
By following these steps, you’ll be well on your way to making the most of your new iPhone. Don’t be afraid to explore and experiment with the features and apps to find what works best for you. Enjoy your new iPhone and all the exciting possibilities it brings!
Navigating the home screen and using iPhone gestures
The home screen is the central hub of your iPhone, allowing you to access apps, widgets, and settings with ease. Understanding how to navigate the home screen and utilize iPhone gestures will enhance your overall user experience. Here’s a guide to help you navigate the home screen and make the most of iPhone gestures:
1. Unlock your iPhone: To unlock your iPhone, simply swipe up from the bottom of the screen (or press the side button or Home button, depending on your iPhone model) and enter your passcode or use Face ID/Touch ID if enabled.
2. Home screen: After unlocking your iPhone, you’ll be taken to the home screen. This is where you’ll find all your apps and widgets. Swipe left or right to navigate between different home screens, or use the search bar at the top of the screen to quickly find specific apps.
3. App icons: Tap on an app icon on the home screen to open the app. To rearrange app icons, press and hold an app until it starts to jiggle, then drag it to a new location. You can also create folders by dragging one app icon onto another to group them together for easier organization.
4. Control Center: To access the Control Center, swipe down from the top-right corner (on iPhone X and later models) or swipe up from the bottom of the screen (on older iPhone models). The Control Center provides quick access to commonly used settings like Wi-Fi, Bluetooth, brightness, and more.
5. Notification Center: Swipe down from the top of the screen to access the Notification Center. Here, you’ll find notifications from apps, widgets, and other information. Swipe up to dismiss a notification or tap on it to open the corresponding app.
6. Multitasking: On iPhone models with Face ID, swipe up from the bottom of the screen and pause to access the app switcher. On models with a Home button, double-press the Home button to access the app switcher. This allows you to quickly switch between recently used apps.
7. AssistiveTouch: If you find it challenging to perform certain gestures, you can enable AssistiveTouch. This feature adds a virtual button that floats on the screen and provides quick access to various functions, such as accessing the home screen, control center, and notifications.
8. Siri: To activate Siri, simply say “Hey Siri” or press and hold the side button (or Home button, depending on your iPhone model). Siri is your virtual assistant that can perform tasks, answer questions, and provide information using voice commands.
9. Back gesture: On iPhone models without a Home button, swipe from the left edge of the screen towards the center to go back to the previous screen or app. This gesture replaces the function of the previous “Back” button.
10. Scroll and zoom: To scroll through a webpage, email, or any other scrollable content, swipe up or down using your finger. Pinch your fingers together or apart to zoom in or out on photos, webpages, or maps.
By mastering these home screen navigation and iPhone gesture techniques, you’ll be able to effortlessly navigate your device and access the features and apps you need. Practice and explore these gestures to become a pro at using your iPhone in no time!
Setting up and personalizing your iPhone
Setting up and personalizing your iPhone is an exciting process that allows you to customize your device to suit your preferences and make it truly yours. From adjusting accessibility settings to customizing wallpapers, here’s a guide to help you set up and personalize your iPhone:
1. Language and Region: During the initial setup, choose your preferred language and region. This ensures that your iPhone displays information in the language you’re comfortable with and adjusts other settings accordingly, such as date and time formats.
2. Apple ID and iCloud: Sign in with your Apple ID or create a new one. Your Apple ID allows you to access various Apple services, such as the App Store, iCloud, and Apple Music. Set up iCloud to seamlessly sync your data across devices and enable features like Find My iPhone.
3. Wallpaper and Display: Personalize your iPhone’s appearance by selecting a wallpaper that reflects your style. Open the Settings app, go to Wallpaper, and choose from the available options or use your own photo. You can also adjust the brightness and display settings to your preference.
4. Sounds and Haptics: Customize the sounds and vibration settings of your iPhone. In Settings, navigate to Sounds & Haptics to change ringtones, vibration patterns, and other sound-related settings. You can also enable or disable keyboard clicks, lock screen sounds, and notification sounds.
5. Accessibility: iPhone offers a wide range of accessibility features to cater to different needs. Visit the Accessibility settings to enable features such as VoiceOver, Display Zoom, Magnifier, and more to enhance usability and make your iPhone more accessible to you.
6. Siri and Search: Configure Siri, Apple’s virtual assistant, to better suit your needs. In Settings, you can train Siri to recognize your voice, customize the activation phrase, and enable or disable specific Siri features. You can also adjust search settings to prioritize certain apps or control the content shown in search results.
7. Control Center: Customize the Control Center to have quick access to the functions you use most. In Settings, go to Control Center to add, remove, or rearrange the toggles and shortcuts available. This allows you to have quick access to essential settings like Wi-Fi, Bluetooth, flashlight, and more.
8. App Notifications: Manage app notifications to control which apps can send you notifications and how they are displayed. Visit the Notification settings to enable or disable notifications, customize alert styles, and configure notification preferences for individual apps.
9. Privacy and Security: Prioritize your privacy and security by managing app permissions, location services, and other privacy settings. In Settings, navigate to Privacy to control which apps have access to your contacts, photos, location, microphone, and more. Consider enabling features like Face ID or Touch ID for secure authentication.
10. Keyboard and Text Replacement: Fine-tune your typing experience by customizing the keyboard settings. In Settings, go to General and then Keyboard to adjust keyboard settings like auto-correction, predictive text, and keyboard shortcuts. You can also set up text replacement shortcuts to save time when typing frequently used phrases.
By following these steps, you can set up and personalize your iPhone to your liking. Take the time to explore these settings and make adjustments as needed to create a personalized and tailored iPhone experience that suits your unique preferences and needs.
Managing apps and organizing your home screen
As you download and use apps on your iPhone, it’s important to effectively manage and organize them to keep your home screen clutter-free and easily accessible. Here are some tips to help you manage your apps and organize your home screen:
1. Rearrange app icons: To rearrange app icons on your home screen, press and hold any app until they all start jiggling. From there, you can drag app icons anywhere on the screen to rearrange them. You can also move app icons to other home screens or drag them to the edges to create new app folders.
2. Create app folders: App folders are a great way to group similar apps together and keep your home screen more organized. To create a folder, drag one app icon onto another. After the folder is created, you can rename it and add more apps by dragging and dropping them into the folder.
3. Delete unnecessary apps: If you have apps that you no longer use or need, it’s a good idea to delete them to free up space and declutter your home screen. Press and hold an app icon until they all start jiggling, then tap the ‘X’ icon that appears on the corner of the app you want to remove. Confirm the deletion when prompted.
4. Offload unused apps: If you want to keep the app data but temporarily remove an app from your device, you can offload it. This option is useful for apps that you rarely use but want to keep the data for when you need it again. Go to Settings > General > iPhone Storage and tap on the app you want to offload. Select the “Offload App” option.
5. Utilize app folders and page organization: You can further organize your apps by creating multiple home screen pages or using separate app folders for specific categories. For example, you can have a page dedicated to productivity apps, another for games, and another for social media. Swipe left or right to navigate between different home screen pages.
6. Search for apps: If scrolling through multiple home screens or folders feels overwhelming, simply swipe down on the home screen to bring up the search bar. Start typing the name of the app you’re looking for, and it will appear in the search results. Tap on the app to open it.
7. Use app suggestions: On the right side of your home screen, you’ll find the App Library, which automatically categorizes and organizes your apps into folders. This feature intelligently displays suggested apps based on your usage patterns, making it easier to find and access apps you need in the moment.
8. Update apps regularly: It’s essential to keep your apps up to date to ensure they’re running smoothly and have the latest features and bug fixes. Enable automatic app updates in Settings > App Store or manually update apps by going to the App Store, tapping on your profile picture, and then selecting “Update All” or updating the desired apps individually.
Taking the time to manage and organize your apps will help you navigate your home screen more efficiently and save time searching for specific apps. Experiment with different organization strategies to find the one that works best for you and remember to regularly declutter and update your apps to maintain an optimized and streamlined home screen experience.
Exploring the built-in apps and features
Your iPhone comes preloaded with a variety of built-in apps and features that offer a wide range of functionalities, from communication and productivity to entertainment and creativity. Let’s explore some of these apps and features to help you get the most out of your iPhone:
1. Messages: The Messages app allows you to send and receive text messages, photos, videos, and more. Take advantage of features like iMessage, which enables you to send messages to other Apple devices using Wi-Fi or cellular data, and the ability to customize message effects and notifications.
2. Phone: Use the Phone app for making and receiving calls. It includes features such as Favorites, Voicemail, and the ability to block spam calls. Explore options like Wi-Fi calling and call forwarding for more convenience.
3. Mail: The Mail app allows you to manage all your email accounts in one place. Set up your email accounts and customize settings like email signatures, notifications, and swipe actions to efficiently manage your inbox on the go.
4. Safari: Safari is the default web browser on iPhone. Use it to browse the internet, bookmark your favorite websites, open multiple tabs, and utilize features like Reader View and Private Browsing for a more streamlined and secure browsing experience.
5. Calendar: The Calendar app helps you stay organized and manage your schedule. Create events, set reminders, enable notifications, and sync your calendars across devices using services like iCloud or other integrated calendars like Google Calendar or Microsoft Outlook.
6. Maps: Explore the world and navigate with confidence using the Maps app. Get directions, search for locations, find nearby points of interest, and even use features like Flyover and AR navigation for an immersive experience.
7. Photos: Capture and store your precious moments with the Photos app. It offers various features like editing tools, smart photo organization, Memories, and the ability to sync and access your photos across all your Apple devices using iCloud Photo Library.
8. Camera: Discover the powerful camera capabilities of your iPhone with the Camera app. Experiment with different shooting modes, such as Photo, Video, Portrait, and Night modes. Explore additional features like Live Photos, Filters, and the ability to adjust exposure, focus, and other settings manually.
9. Health: Stay mindful of your health and fitness goals with the Health app. It collects data from various fitness trackers, apps, and devices, providing insights into your activity, sleep patterns, nutrition, and more. Set up health-related preferences and enable features like Emergency SOS for peace of mind.
10. App Store: Access the App Store to discover and download a vast selection of apps, games, and utilities. Browse through different categories, explore top charts and curated collections, and read user reviews to find new and exciting apps that cater to your interests.
These are just a few examples of the many built-in apps and features on your iPhone. Take the time to explore and experiment with them to fully utilize the capabilities of your device and enhance your daily life with productivity, entertainment, and efficiency.
Using Siri and voice commands
Siri, Apple’s virtual assistant, is a powerful feature on your iPhone that allows you to perform various tasks and access information using voice commands. Whether you need help with daily tasks, want to get answers to questions, or control your device hands-free, Siri is here to assist you. Here’s a guide to using Siri and voice commands effectively:
1. Activating Siri: There are two ways to activate Siri. First, on newer iPhone models, simply say “Hey Siri” followed by your command without pressing any buttons. Second, on all iPhone models, press and hold the side button (or Home button on older models) until Siri appears on the screen.
2. Basic commands: Start by using basic commands with Siri. Ask Siri for the weather forecast, set timers and alarms, and schedule appointments with voice commands like “Hey Siri, what’s the weather like today?” or “Hey Siri, set an alarm for 7 AM tomorrow.”
3. Sending messages and making calls: Use Siri to send messages and make calls effortlessly. Simply say “Hey Siri, send a message to [contact name]” or “Hey Siri, call [contact name].” Siri will prompt you for the message content or initiate the call immediately.
4. Finding information: Siri is a great tool for finding information quickly. Ask Siri questions like “Hey Siri, who won the last NBA game?” or “Hey Siri, what’s the capital of France?” Siri will provide you with the most relevant answers based on the information available.
5. Controlling your device: Siri can help you control various settings and perform actions on your iPhone. For example, you can use Siri to adjust your device’s brightness, turn on Wi-Fi, enable Airplane Mode, or activate Do Not Disturb. Just say “Hey Siri, turn on Wi-Fi” or “Hey Siri, increase the brightness.”
6. App commands: Siri can interact with specific apps on your iPhone. For example, you can ask Siri to play music on Apple Music, open a specific app, or set reminders. Try commands like “Hey Siri, play some relaxing music” or “Hey Siri, remind me to buy milk when I leave home.”
7. Language translation: Siri can help you with language translations. Simply ask Siri to translate a phrase or word into a different language. For example, say “Hey Siri, how do you say ‘thank you’ in Spanish?” Siri will provide you with the translation.
8. Home automation: If you have smart home devices connected to your iPhone, you can control them using Siri. Use voice commands like “Hey Siri, turn on the living room lights” or “Hey Siri, set the thermostat to 72 degrees.”
9. Personalizing Siri: Customize Siri to suit your needs and preferences. In Settings, you can adjust Siri’s voice, language, and enable or disable specific capabilities. You can also teach Siri how to pronounce names correctly by providing pronunciation examples.
10. CarPlay integration: Siri can be accessed in your car with Apple CarPlay. Use voice commands to make calls, get directions, play music, and send messages while keeping your hands on the wheel and eyes on the road.
Remember to speak clearly and provide specific instructions when interacting with Siri for the best results. Siri is continuously improving and evolving, so don’t hesitate to explore and experiment with its capabilities to make the most of this powerful voice assistant on your iPhone.
Understanding the iPhone camera and photography features
The camera on your iPhone is more than just a tool for taking photos; it’s a powerful and versatile photography device. Apple has continuously improved iPhone camera capabilities, making it easier than ever to capture stunning images and videos. Here’s a guide to help you understand the iPhone camera and make the most of its photography features:
1. Camera modes: The iPhone offers various camera modes to suit different scenarios. Explore modes like Photo, Video, Portrait, and Night modes. Each mode has specific settings and features designed to optimize your photography experience in different lighting conditions and for different subjects.
2. Quick access camera: You can quickly access the camera from the lock screen by swiping left or swiping up from the bottom-right corner, depending on your iPhone model. This allows you to capture spontaneous moments without any delay.
3. Focus and exposure: To adjust the focus and exposure in the Camera app, simply tap on the area of the screen where you want to focus. A yellow box will appear to indicate the focus area. You can then slide your finger up or down to adjust the exposure.
4. Live Photos: Live Photos bring your photos to life with a few seconds of video and audio. Capture a Live Photo by tapping the Live Photo icon (it looks like a set of concentric circles) in the Camera app. You can view and play back Live Photos by pressing and holding on the image in the Photos app or on the lock screen.
5. Portrait mode: Portrait mode creates professional-looking photos with blurred backgrounds, also known as the bokeh effect. It’s perfect for capturing portraits or creating artistic shots. Enable Portrait mode in the Camera app and follow the on-screen prompts to take stunning portrait photos.
6. Depth Control: When using Portrait mode, you can adjust the level of background blur (depth of field) after capturing the photo. Open the photo in the Photos app, tap on “Edit,” and use the Depth Control slider to adjust the amount of background blur to your liking.
7. HDR (High Dynamic Range): HDR mode enhances photos taken in high-contrast lighting situations. It combines multiple exposures to create a single well-exposed image with balanced highlights and shadows. Enable HDR in the Camera app for stunning photos in challenging lighting conditions.
8. Panorama: Use the Panorama mode to capture wide-angle scenes. Enable Panorama in the Camera app, then hold your iPhone horizontally and follow the on-screen arrow as you move the device in a steady motion to capture the scene. You can capture sweeping landscapes or wide group shots with ease.
9. Editing tools: The Photos app offers a range of editing tools to enhance your photos. Crop, adjust brightness, color, and contrast, apply filters, and experiment with other advanced editing options. Explore the editing tools to make your photos stand out even more.
10. iCloud Photo Library: iCloud Photo Library syncs your photos and videos across all your Apple devices. Enable it in the settings to ensure your photos are automatically backed up and accessible on your iPad, Mac, or iCloud.com.
By familiarizing yourself with the iPhone camera and its features, you can capture stunning photos and unleash your creativity. Experiment with different modes, settings, and editing tools to create unique images that reflect your personal style. The camera on your iPhone is a powerful tool waiting to be explored.
Using FaceTime and making video calls
FaceTime is Apple’s video and audio calling service that allows you to connect with friends, family, and colleagues in a personal and convenient way. With FaceTime, you can make high-quality video calls using your iPhone, iPad, or Mac. Here’s a guide to help you use FaceTime and make video calls:
1. Register your Apple ID: FaceTime requires an Apple ID to function. Ensure that you are signed in with your Apple ID on your device. If you don’t have an Apple ID, you can easily create one by visiting the Apple ID account page or during the initial setup of your device.
2. FaceTime settings: Open the Settings app on your iPhone and scroll down to FaceTime. In the FaceTime settings, ensure that FaceTime is enabled, and check your phone number and email addresses under “You can be reached by FaceTime at.” This will determine how others can contact you using FaceTime.
3. Making a FaceTime call: There are multiple ways to initiate a FaceTime call. Open the FaceTime app and tap the plus (+) button in the top-right corner to enter the contact’s name, email address, or phone number manually. Alternatively, you can open the Contacts or Phone app, find the contact you want to call, and tap the FaceTime button.
4. Group FaceTime: With the Group FaceTime feature, you can have video calls with multiple people simultaneously. Open the FaceTime app, start a FaceTime call with one person, then tap the “+” button and add more participants. You can also start a Group FaceTime call from a group chat in the Messages app.
5. FaceTime audio calls: If you prefer voice-only calls, you can also make FaceTime audio calls. Simply follow the same steps to initiate a FaceTime call, and instead of tapping the video camera button, tap the phone button to switch to an audio call. This can be useful when you have limited internet bandwidth or prefer not to use video.
6. Call controls and features: During a FaceTime call, you can access various controls and features. Swipe up from the bottom of the screen to access the call controls, including options to mute your microphone, switch cameras, enable or disable video, and adjust the volume. You can also use other apps while on a FaceTime call by minimizing the call window.
7. FaceTime on other Apple devices: FaceTime is not limited to just the iPhone. You can also make video calls using FaceTime on your iPad, iPod touch, and Mac. Ensure that you are signed in with the same Apple ID across all your devices for a seamless FaceTime experience.
8. FaceTime audio and video quality: FaceTime provides high-quality audio and video, but the quality of the call can depend on factors such as your internet connection speed and the quality of the front or rear camera on your device. Ensure that you have a stable internet connection for the best experience.
9. International calls with FaceTime: FaceTime can be a convenient option for making international video calls. Since FaceTime uses an internet connection, it can be a more affordable alternative to traditional phone calls or international calling plans. However, note that data charges may apply if you are not connected to Wi-Fi.
10. Privacy and security: FaceTime calls are encrypted and secure, providing a private communication channel. Additionally, you have control over who can call you on FaceTime. In the FaceTime settings, you can specify who can contact you using FaceTime by selecting “Allow Calls From” and choosing from options like Everyone, Contacts Only, or specific groups of people.
FaceTime is a fantastic tool for staying connected with loved ones, conducting virtual meetings, or catching up with friends across the globe. Explore its features, experiment with group calls, and enjoy the convenience and personal touch of face-to-face conversations, even when miles apart.
Utilizing iCloud for storing and backing up your data
iCloud is Apple’s cloud-based service that offers a range of features to securely store and access your data across all your Apple devices. By utilizing iCloud, you can effortlessly back up your important files, photos, and documents, as well as sync your data across devices. Here’s a guide to help you make the most of iCloud for storing and backing up your data:
1. iCloud backup: Enable iCloud backup on your iPhone, iPad, or iPod touch to automatically back up your device. This includes app data, device settings, photos, contacts, messages, and more. To enable iCloud backup, go to Settings > [Your Name] > iCloud > iCloud Backup, and toggle the switch to enable it.
2. Backing up photos and videos: iCloud Photos automatically syncs your photos and videos across all your Apple devices. To enable it, go to Settings > [Your Name] > iCloud > Photos, and toggle “iCloud Photos” to enable it. This ensures that your photos and videos are backed up and accessible on any device connected to your iCloud account.
3. iCloud Drive: iCloud Drive allows you to store and access your documents, presentations, spreadsheets, and other files across all your Apple devices. Simply save your files to iCloud Drive, and they will be available on your Mac, iPhone, iPad, or even on iCloud.com.
4. Desktop and Documents syncing: With iCloud Drive, you can also sync the contents of your Desktop and Documents folders across devices. Enable this feature in iCloud Drive settings to effortlessly access and edit your files on any device.
5. Find My: Use the Find My app to locate your Apple devices, share your location with family and friends, and remotely erase your device if it’s lost or stolen. Enable this feature in Settings > [Your Name] > Find My > Find My [Device] to ensure your devices are protected.
6. iCloud Keychain: iCloud Keychain securely stores your passwords, credit card information, Wi-Fi credentials, and other sensitive data across all your devices. It autofills this information for you, making it convenient and secure. Enable iCloud Keychain in Settings > [Your Name] > iCloud > Keychain to get started.
7. Optimized Storage: If you’re running low on storage on your device, you can enable Optimized Storage in iCloud settings. This feature automatically removes older files and infrequently used items, keeping them in iCloud while freeing up space on your device.
8. iCloud.com: Access your iCloud data and files from any web browser by visiting iCloud.com. Sign in with your Apple ID and explore the different web apps, including Mail, Contacts, Calendar, Notes, Pages, Numbers, and Keynote.
9. Family Sharing: With iCloud Family Sharing, you can share iCloud storage, app purchases, Apple Music, and more with up to six family members. Set up Family Sharing in Settings > [Your Name] > Family Sharing and enjoy the benefits of sharing content and managing purchases together.
10. Data security and privacy: iCloud ensures the security and privacy of your data by encrypting it and storing it on Apple’s secure servers. Your data is protected with end-to-end encryption, and Apple does not access or share your data with third parties.
By utilizing iCloud, you can easily store and back up your important data, access it across devices, and enjoy the convenience of syncing and sharing with your family and friends. Take advantage of these features to keep your data safe and accessible, no matter where you are.
Managing your notifications and privacy settings
Managing notifications and privacy settings on your iPhone is essential for maintaining control over how your device interacts with you and protects your privacy. By customizing your notification preferences and adjusting privacy settings, you can ensure a seamless and secure user experience. Here’s a guide to help you manage your notifications and privacy settings effectively:
1. Notification Center: Customize how notifications appear in the Notification Center by going to Settings > Notifications. Here, you can manage the order of notifications, choose which apps can show notifications, and determine whether notifications are grouped or delivered individually.
2. Lock screen notifications: Control which notifications appear on your lock screen by going to Settings > Notifications > Show Previews. You can choose to show previews always, only when unlocked, or never. This helps protect your privacy and ensures that sensitive information is not visible to anyone when your device is locked.
3. Do Not Disturb: Use the Do Not Disturb feature to silence incoming calls, messages, and notifications temporarily or on a schedule. Access Do Not Disturb options in Settings or quickly enable it from the Control Center. Customize when and how you want to use this feature to stay focused or enjoy uninterrupted sleep.
4. Privacy settings: Take control over your privacy by managing app permissions in Settings > Privacy. Review which apps have access to your location, camera, microphone, contacts, and other sensitive data. Disable access for apps that you don’t trust or don’t need to use those features.
5. App tracking transparency: iOS 14 introduced the App Tracking Transparency feature, which allows you to control which apps can track your activity across other apps and websites. Enable or disable tracking for individual apps in Settings > Privacy > Tracking. This feature gives you more control over your data privacy.
6. Safari privacy settings: In Safari settings (Settings > Safari), you can enhance your privacy by enabling features like Prevent Cross-Site Tracking, which restricts cross-site user tracking by blocking cookies and other website data. You can also customize settings for camera and microphone access, content blockers, and more.
7. Location services: Manage which apps can access your location information in Settings > Privacy > Location Services. You can choose to allow location access always, only while using the app, or never. Consider granting location access only to apps that truly require it for their functionality.
8. Contacts and calendar access: Grant or revoke access to your contacts and calendar data for individual apps in Settings > Privacy > Contacts or Settings > Privacy > Calendars. Ensure that apps you trust have appropriate access to your contacts and calendars while limiting access for apps that don’t need it.
9. Background app refresh: Control which apps can refresh their content in the background to conserve battery life and reduce data usage. Go to Settings > General > Background App Refresh to enable or disable background app refresh for individual apps or adjust the overall setting to suit your preferences.
10. Privacy labels: Keep an eye out for privacy labels in the App Store. Apple now requires developers to provide information about their app’s privacy practices, including data collection and use, in an easy-to-understand format. Take into consideration these privacy labels when downloading apps to make informed decisions about your privacy.
By managing your notifications and privacy settings, you take control of your device’s behavior and safeguard your privacy. Regularly review and adjust these settings to align with your preferences and ensure a secure and personalized user experience on your iPhone.
Exploring the App Store and downloading new apps
The App Store is a treasure trove of apps that can enhance your iPhone experience and cater to your diverse interests and needs. From productivity tools to games, educational apps to entertainment, there is something for everyone. Here’s a guide to help you explore the App Store and download new apps:
1. Accessing the App Store: The App Store is pre-installed on your iPhone, and you can access it by tapping the blue icon with a white “A” on your home screen. Open the App Store to start discovering new apps.
2. App categories: Browse through the various app categories available, such as Games, Productivity, Education, Health & Fitness, Social Networking, and many more. Tap on a category to explore apps specific to that genre.
3. Top charts and featured apps: Check out the Top Charts to see the most popular apps at the moment. The Top Charts are divided into categories like Free Apps, Paid Apps, and Top Grossing Apps. Also, explore the “Featured” section to discover apps handpicked by the App Store editors.
4. App search: If you have a specific app in mind or want to find an app for a particular purpose, use the search bar at the top of the App Store. Type in keywords related to the app or its function to get relevant search results.
5. App details and reviews: When you find an app that interests you, tap on it to view the app details. Here, you can see screenshots, read the app description, check user ratings and reviews, and get more information about the app’s features and functionality. Take some time to read reviews to get an idea of other users’ experiences with the app.
6. App compatibility and requirements: Make sure to check the app’s compatibility and requirements before downloading it. Some apps may require a specific iOS version or certain device capabilities. Ensure that your iPhone meets the requirements for optimal performance.
7. Installing apps: Once you’ve found an app you want to download, tap the “Get” or “Download” button. If the app is free, it will start downloading immediately. If it has a price, you’ll need to complete the purchase process using your Apple ID and payment method.
8. App updates: Keep your apps up to date by regularly checking for updates in the App Store. App updates often introduce new features, bug fixes, and performance improvements. Go to the “Updates” tab in the App Store to view and install available updates for your installed apps. You can also enable automatic updates in your device settings.
9. App subscriptions: Some apps offer subscriptions to unlock additional features or content. Before subscribing, review the subscription details, including pricing and duration. You can manage and cancel subscriptions in your Apple ID settings.
10. Family Sharing: If you’re part of a Family Sharing group, you can share purchased apps with your family members. Enable Family Sharing in your device settings, and any apps purchased by one family member can be downloaded by other family members at no additional cost.
The App Store is a dynamic marketplace with millions of apps waiting to be explored. Use its vast selection, user ratings, and reviews to find apps that align with your interests and needs. Downloading new apps can transform your iPhone into a personalized and powerful tool for productivity, entertainment, and more.
Maximizing your iPhone battery life
The battery life of your iPhone is crucial for keeping your device running smoothly and ensuring that you can stay connected throughout the day. To get the most out of your iPhone’s battery, it’s essential to adopt good battery management practices. Here are some tips to help you maximize your iPhone’s battery life:
1. Optimize display settings: Adjust your iPhone’s display settings to minimize battery drain. Reduce the brightness level or enable auto-brightness in Settings > Display & Brightness. Also, consider shortening the auto-lock time so that your screen turns off quickly when not in use.
2. Use Wi-Fi instead of cellular data: Whenever possible, connect to a Wi-Fi network instead of relying solely on cellular data. Using Wi-Fi uses less power and ensures a more stable connection, saving battery life in the process.
3. Enable low power mode: Activate low power mode in Settings > Battery when your battery level is running low or when you know you’ll be away from a charger for an extended period. Low power mode conserves battery life by temporarily reducing or disabling background app refresh, email fetch, automatic downloads, and other power-hungry features.
4. Manage app background activity: Disable or limit background app refresh for apps that don’t require real-time updates. Go to Settings > General > Background App Refresh to control which apps can refresh content in the background. This helps prevent unnecessary battery drain caused by apps running in the background.
5. Turn off push email: Instead of allowing your email accounts to push new messages as they arrive, set your email accounts to fetch data manually or at specific intervals. This prevents your iPhone from constantly checking for new mail, which can significantly save battery life.
6. Monitor location services: Limit the use of location services to apps that truly require it. Go to Settings > Privacy > Location Services to manage permissions for individual apps. You can choose to allow location access always, only while using the app, or never.
7. Disable unnecessary notifications: Review your notification settings in Settings > Notifications and disable notifications for apps that you don’t need or find distracting. Fewer notifications mean fewer interruptions and less battery consumption.
8. Close unused apps: When you’re done using an app, swipe up from the bottom of the screen (or double-click the home button on older models) to access the app switcher and swipe each app window upward to close it. Keeping fewer apps running in the background helps conserve battery life.
9. Avoid extreme temperatures: Extreme heat or cold can have adverse effects on your iPhone’s battery life. Avoid exposing your device to extreme temperatures, as they can reduce battery efficiency and shorten overall battery life.
10. Update iOS and apps: Keep your iOS and apps up to date with the latest software updates. Updates often include bug fixes, performance improvements, and battery optimizations, which can help maximize your iPhone’s battery life.
By following these tips, you can significantly extend your iPhone’s battery life and enhance your device’s overall performance. Adopting good battery habits and managing power-hungry settings can make a noticeable difference in your iPhone’s battery longevity, ensuring that it lasts throughout your busy day.
Tips and tricks to enhance your iPhone experience
Your iPhone is a powerful device with numerous features and capabilities. By exploring some tips and tricks, you can enhance your iPhone experience and discover new ways to make the most of your device. Here are some tips to help you maximize your iPhone’s potential:
1. Quick access to camera: On the lock screen, swipe left from the right edge or swipe up from the camera icon to instantly access the camera. This allows you to capture spontaneous moments without any delay.
2. Quick text editing: Press and hold the space bar on the keyboard to easily move the cursor within the text and make precise edits. This feature is especially helpful when trying to correct or delete specific parts of a message or document.
3. One-handed keyboard: To make typing with one hand easier on larger iPhone models, tap and hold the globe or emoji icon on the keyboard, then select the left or right-hand keyboard layout. This will resize the keyboard and make it more accessible with a single hand.
4. Shake to undo: If you make a mistake while typing or editing a text, shake your iPhone to quickly undo the action. This is a convenient way to undo multiple edits without having to tap multiple times on the screen.
5. Custom keyboard shortcuts: Save time by creating custom keyboard shortcuts for frequently used phrases or words. Go to Settings > General > Keyboard > Text Replacement and add your custom shortcuts. When you type the shortcut, your iPhone will automatically replace it with the full phrase or word.
6. Swipe typing: Take advantage of the built-in swipe typing feature, known as QuickPath, on the iPhone keyboard. Instead of tapping each individual letter, swipe your finger from one letter to another without lifting it, and the keyboard will intelligently predict the word you’re typing.
7. Spotlight search: Swipe down on your home screen or tap the center of the home screen to access Spotlight search. Use this feature to quickly search for apps, contacts, messages, emails, and more. You can even use it as a calculator or to search the web.
8. Siri shortcuts: Customize Siri shortcuts in the Shortcuts app to perform complex tasks with a single voice command. Create a series of steps for Siri to follow, combining multiple actions from different apps to automate tasks and streamline your workflow.
9. Accessibility features: Explore the Accessibility settings to personalize your iPhone experience. Enable features like VoiceOver for spoken feedback, Magnifier for zooming in on small text, or Dark Mode for a more visually comfortable experience in low-light environments.
10. Taking screenshots: Quickly capture a screenshot by pressing the side button and the volume up button simultaneously. You’ll hear a camera shutter sound, and the screenshot will be saved in your Photos app.
These tips and tricks can help you make daily tasks more efficient, customize your iPhone experience, and discover hidden features. Explore and experiment with your device to unlock its full potential and make it truly yours.
Troubleshooting common iPhone issues
While iPhones are reliable and user-friendly devices, you may encounter occasional issues that can disrupt your experience. Fortunately, many common iPhone issues can be resolved with simple troubleshooting steps. Here are some tips to help you troubleshoot and resolve common iPhone problems:
1. Frozen or unresponsive screen: If your iPhone becomes unresponsive or doesn’t respond to touch, try a force restart. On iPhone models with Face ID, press and quickly release the volume up button, press and quickly release the volume down button, then hold the side button until you see the Apple logo. On iPhone models with a home button, hold the side (or top) button and the home button together until the Apple logo appears.
2. Battery draining quickly: If you notice that your iPhone’s battery is draining faster than usual, start by checking which apps are consuming the most battery. Go to Settings > Battery to view battery usage statistics. If a specific app is causing excessive battery drain, consider force closing or deleting the app or adjusting its settings to minimize power usage.
3. Wi-Fi or cellular connection issues: If you’re experiencing problems with your Wi-Fi or cellular connection, start by disconnecting and reconnecting to the network. If that doesn’t help, toggle Airplane Mode on and off in the Control Center. You can also try resetting your network settings by going to Settings > General > Reset > Reset Network Settings.
4. App crashing or freezing: If an app is crashing frequently or freezing, try force quitting the app and reopening it. Double-press the home button (or swipe up from the bottom on newer iPhone models) to access the app switcher, then swipe up on the problematic app to close it. If the problem persists, consider updating the app to the latest version or reinstalling it from the App Store.
5. Slow performance: If your iPhone is running slowly or feels sluggish, it may benefit from a restart. Additionally, try clearing unnecessary data and files to free up storage space. Go to Settings > General > iPhone Storage to view and manage your storage. You can offload unused apps, delete old files and photos, and clear cached data to improve performance.
6. Touch ID or Face ID issues: If you’re having trouble with Touch ID or Face ID, ensure that the sensor or camera is clean and free from any dirt or smudges. If the issue persists, consider resetting your biometric data by going to Settings > Face ID & Passcode or Touch ID & Passcode and removing then re-adding your fingerprints or facial data.
7. App update or installation issues: If you’re experiencing problems updating or installing apps from the App Store, check your internet connection and ensure you have sufficient storage space. If the issue persists, sign out of your Apple ID, restart your iPhone, and sign in again. This can help resolve temporary authorization or connectivity issues.
8. No sound or audio issues: If you’re not getting sound from your iPhone or encountering audio issues, ensure that the volume is turned up and that you haven’t accidentally enabled silent mode. Also, check if headphones or Bluetooth devices are connected and disconnect them to see if that resolves the problem. If not, try restarting your iPhone or resetting the device’s settings.
9. Syncing or connectivity issues: If you’re having trouble connecting your iPhone to your computer or other devices, start by checking the physical connections and cables. Ensure that you’re using an Apple-certified cable and that it’s properly connected. Also, try updating your computer’s operating system and iTunes to their latest versions and restarting both your iPhone and computer.
10. Persistent issues: If you encounter persistent issues that can’t be resolved through troubleshooting, it may be necessary to restore your iPhone to factory settings. Before doing so, make sure to back up your data to iCloud or iTunes. You can then perform a restore by going to Settings > General > Reset > Erase All Content and Settings. Keep in mind that this will erase all data and settings on your device.
If you continue to experience issues with your iPhone after troubleshooting, it may be necessary to seek assistance from Apple Support or visit an Apple Store for further assistance. They can provide specialized guidance and help resolve complex problems with your device.