
Unplug and Replug the Cables
One of the common solutions for resetting the view on your Oculus Rift is to unplug and replug the cables. This simple step can often resolve any connectivity issues that may be causing the problem.
To begin, you’ll need to locate the cables on your Oculus Rift headset. There are two main cables that you’ll need to disconnect: the HDMI cable and the USB cable. The HDMI cable is responsible for transmitting the audio and video signals to your device, while the USB cable is used for data transfer and power.
Start by gently unplugging the HDMI cable from both ends; one end is connected to the headset itself, and the other end is connected to your computer or gaming console. Be cautious and avoid pulling on the cable directly, as this can potentially damage the connectors.
Next, disconnect the USB cable in the same manner. Ensure that you safely unplug it from both ends, one from the headset and the other from your device. Take care not to yank the cable forcefully, as this can lead to damage.
After you’ve unplugged both cables, wait for a few seconds before reconnecting them. This brief pause allows any residual electrical charge to dissipate, ensuring a fresh start when you plug the cables back in.
Begin by reconnecting the HDMI cable to the appropriate ports, ensuring a secure fit on both ends. Then, proceed to reconnect the USB cable, making sure it’s fully inserted on both ends.
Once you’ve successfully reconnected the cables, give your Oculus Rift headset a moment to establish the connection with your computer or gaming console. In some cases, you may need to wait for your device to recognize the headset and configure it accordingly.
If you still find that the view on your Oculus Rift is not resetting properly, consider moving on to the next troubleshooting step.
Restart the Oculus App and Services
If unplugging and replugging the cables didn’t resolve the issue with resetting the view on your Oculus Rift, the next step is to restart the Oculus app and associated services. This simple yet effective solution can help refresh the software and potentially fix any software-related issues.
To begin, make sure you have your Oculus app closed. You can do this by navigating to the system tray on your computer’s taskbar and right-clicking on the Oculus icon. From the drop-down menu, select the “Close Oculus” option.
After ensuring that the Oculus app is closed, it’s time to restart the Oculus Runtime Service. To do this, press the Windows key + R on your keyboard to open the Run dialog box. Type in “services.msc” (without quotes) and hit Enter.
In the Services window that appears, scroll down and locate the “Oculus VR Runtime Service” entry. Right-click on it and select “Restart” from the context menu. Wait a few seconds for the service to restart.
Once the Oculus Runtime Service has restarted, open the Oculus app again. You can do this by clicking on the Oculus icon on your desktop or by searching for it in the Start menu.
After launching the Oculus app, navigate to the settings menu. You can access this by clicking on the gear icon in the top right corner of the app.
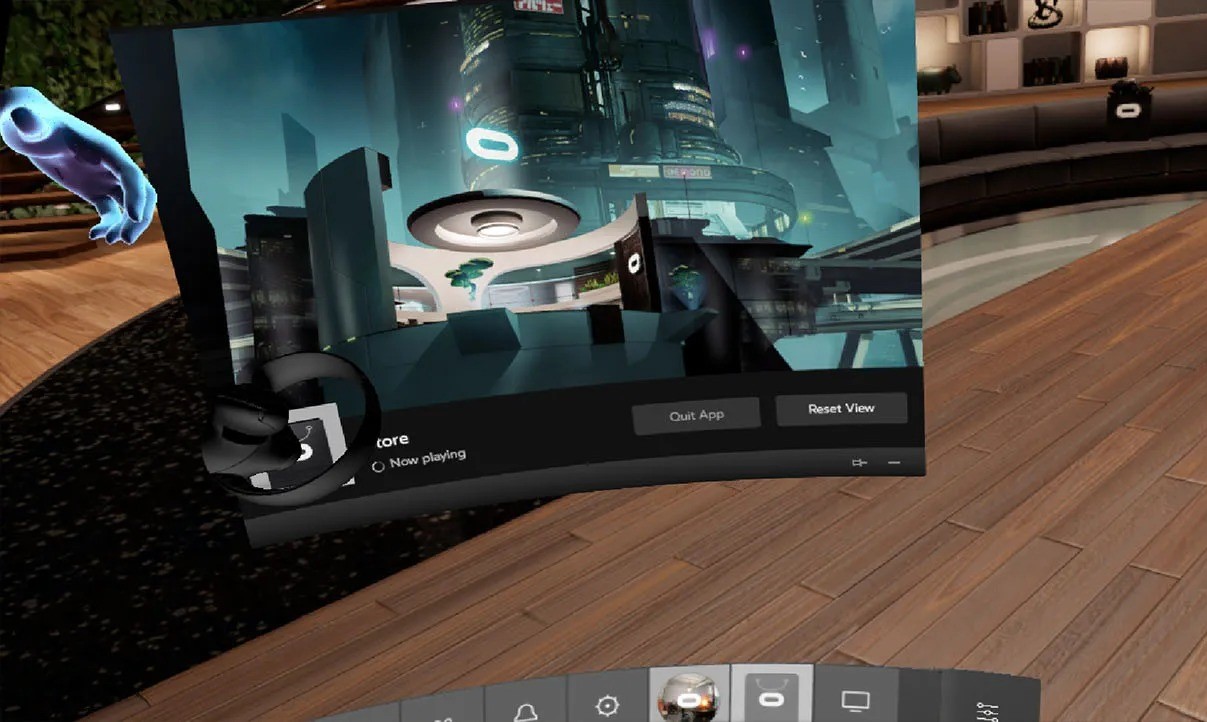
In the settings menu, find the section related to your Oculus Rift headset. Look for an option to reset the view or recenter the headset. Click on this option to initiate the reset process.
Follow any on-screen instructions provided by the Oculus app to complete the view reset. Once the process is finished, put on your Oculus Rift headset and check if the view has reset to the desired position.
If restarting the Oculus app and services didn’t fix the issue, don’t worry. There are still other troubleshooting steps you can try to get your Oculus Rift view back to normal.
Reset the Sensors
If you’re experiencing persistent issues with resetting the view on your Oculus Rift, it might be necessary to reset the sensors. The sensors are responsible for tracking the position and movement of your headset, so any calibration issues can affect the view reset process. Follow the steps below to reset the sensors and improve the accuracy of your Oculus Rift.
Start by navigating to the Oculus app on your computer and opening it. Make sure your Oculus Rift headset is connected and turned on.
In the Oculus app, click on the gear icon in the top right corner to access the settings menu. From there, select the “Devices” tab.
Under the Devices tab, you should see a list of connected devices. Find your Oculus Rift headset and click on it to access the headset settings.
In the headset settings, look for an option to reset the sensors. This option may be labeled as “Reset Tracking” or “Recenter Sensor”. Click on this option to initiate the sensor reset process.
Follow any on-screen instructions provided by the Oculus app to complete the sensor reset. This usually involves moving your headset in specific patterns or orientations to calibrate the sensors.
Once the sensor reset process is finished, put on your Oculus Rift headset and check if the view has reset to the desired position. You may need to manually recenter the view using the controls or by following the on-screen prompts.
If the view is still not resetting properly, consider checking the sensor placement and ensure that they are positioned correctly. Make sure that there are no obstructions or light sources directly interfering with the sensors. Adjust the sensor angles and distances if necessary.
Additionally, it’s recommended to keep the area around your Oculus Rift clear of any reflective surfaces, as they can interfere with the sensor’s tracking capabilities.
By resetting the sensors and ensuring their proper positioning, you can improve the accuracy of the view reset process and fully enjoy your VR experience with the Oculus Rift.
Perform a Full Oculus Rift System Restart
If you’re still having trouble resetting the view on your Oculus Rift, performing a full system restart can help resolve any underlying software or hardware issues that may be causing the problem. By restarting your entire system, you’ll be giving your Oculus Rift a fresh start and the opportunity to reset the view successfully.
To begin, close all applications and processes running on your computer. Save any unsaved work and make sure you’re ready to proceed with the system restart.
Once you’re ready, click on the Start menu on your desktop and select the Power option. From the drop-down menu, choose Restart.
Wait for your computer to shut down completely and then start up again. This may take a few minutes depending on your system’s speed.
After your computer has restarted, open the Oculus app. Make sure your Oculus Rift headset is connected and turned on.
In the Oculus app, navigate to the settings menu by clicking on the gear icon in the top right corner.
Under the settings menu, find the section related to your Oculus Rift headset and look for an option to reset the view or recenter the headset. Click on this option to initiate the reset process.
Follow any on-screen instructions provided by the Oculus app to complete the view reset. Once the process is finished, put on your Oculus Rift headset and check if the view has reset to the desired position.
If restarting the entire system didn’t fix the issue, there may be other factors contributing to the problem. Consider checking for updates for both your Oculus app and the firmware of your Oculus Rift headset. Updating to the latest versions can often resolve compatibility issues and improve performance.
If the problem persists, you may need to reach out to Oculus Support for further assistance. They can provide specific troubleshooting steps tailored to your situation and help you resolve any persistent view reset issues.
Update Graphics Card Drivers
If you’re encountering difficulties with resetting the view on your Oculus Rift, outdated or incompatible graphics card drivers could be the culprit. It’s crucial to ensure that your graphics card drivers are up to date, as they play a vital role in delivering smooth and accurate virtual reality experiences. Follow the steps below to update your graphics card drivers and potentially resolve any issues with view resetting.
First, you need to identify the make and model of your graphics card. You can typically find this information by right-clicking on your desktop and selecting “Graphics Properties” or “Graphics Options”. Alternatively, you can access the System Information tool by pressing the Windows key + R, typing “msinfo32”, and hitting Enter. Look for the “Display” or “Graphics” section to find the details of your graphics card.
Once you have determined the make and model of your graphics card, visit the official website of the manufacturer. Common graphics card manufacturers include NVIDIA, AMD, and Intel.
Navigate to the support or drivers section of the manufacturer’s website and search for the appropriate drivers for your graphics card model and operating system.
Download the latest version of the graphics card driver and save it to a location on your computer.
Before installing the new driver, it’s advisable to uninstall the current graphics card driver to prevent any conflicts. You can do this by opening the Device Manager in Windows, locating the Display Adapters category, right-clicking on your graphics card, and selecting “Uninstall”. Follow the on-screen prompts to complete the uninstallation.
Once the current driver is uninstalled, locate the downloaded graphics card driver installer and run it. Follow the installation wizard’s instructions to install the updated driver.
After the installation is complete, restart your computer to apply the changes.
Once your computer has restarted, open the Oculus app and ensure that your Oculus Rift headset is connected and turned on.
Navigate to the settings menu in the Oculus app by clicking on the gear icon in the top right corner.
In the settings menu, find the section related to your Oculus Rift headset and look for an option to reset the view or recenter the headset. Click on this option to initiate the reset process.
Follow any on-screen instructions provided by the Oculus app to complete the view reset. Put on your Oculus Rift headset and check if the view has reset to the desired position.
If updating your graphics card drivers doesn’t resolve the view reset issue, there may be other factors at play. Consider exploring additional troubleshooting steps or contacting Oculus Support for further assistance.
Disable Power Management on USB Ports
Another solution to address view reset issues on your Oculus Rift is to disable power management on your USB ports. Power management settings can sometimes interfere with the proper functioning of your VR headset, causing connectivity problems and hindering the view reset process. Follow the steps below to disable power management on your USB ports.
Begin by right-clicking on the Start menu on your desktop and selecting “Device Manager” from the context menu. This will open the Device Manager window.
In the Device Manager, locate the “Universal Serial Bus Controllers” category and expand it by clicking on the arrow next to it. This will display a list of USB devices and controllers on your computer.
Right-click on each “USB Root Hub” entry and select “Properties” from the context menu. This will open the Properties window for the selected USB Root Hub.
Navigate to the “Power Management” tab in the Properties window. You should see an option that says “Allow the computer to turn off this device to save power.” Make sure this option is unchecked or disabled.
If you have multiple USB Root Hubs listed, repeat the process for each of them by right-clicking, selecting “Properties,” and disabling power management.
Once you have disabled power management on all the USB Root Hubs, click “OK” to save the changes.
Restart your computer to apply the updated USB power management settings.
After your computer has restarted, open the Oculus app and ensure that your Oculus Rift headset is connected and turned on.
Navigate to the settings menu in the Oculus app by clicking on the gear icon in the top right corner.
In the settings menu, find the section related to your Oculus Rift headset and look for an option to reset the view or recenter the headset. Click on this option to initiate the reset process.
Follow any on-screen instructions provided by the Oculus app to complete the view reset. Put on your Oculus Rift headset and check if the view has reset to the desired position.
Disabling power management on your USB ports can help ensure a stable and uninterrupted connection between your Oculus Rift headset and your computer, improving the view reset process and overall VR experience.
If the issue persists, there may be other factors contributing to the problem. Consider exploring additional troubleshooting steps or contacting Oculus Support for further assistance.
Check for Physical Damage
Physical damage to your Oculus Rift headset or its components can interfere with the proper functioning of the device, including the view reset process. It’s important to regularly inspect your headset for any signs of damage and address them promptly. Follow the steps below to check for physical damage on your Oculus Rift and take the necessary actions to resolve any issues.
Start by examining the exterior of your Oculus Rift headset. Look for any cracks, scratches, or dents on the body or lenses.
If you notice any visible damage, it’s advisable to contact Oculus Support for further guidance. They can provide specific instructions on how to proceed depending on the extent of the damage.
Next, check the cables and connectors for any signs of wear or damage. Inspect the HDMI and USB cables for frayed wires, loose connections, or bent pins.
If you find any issues with the cables, it’s recommended to replace them with new ones. Oculus provides official replacement cables that are compatible with your headset. Contact Oculus Support or visit their official website to purchase the appropriate replacement cables.
Additionally, check the sensors on your Oculus Rift for any damage. Ensure that they are securely attached to the headset and that the lenses are clean and free from debris or scratches.
If you find any issues with the sensors, you can try cleaning them gently using a microfiber cloth. Avoid using abrasive materials or substances that could damage the lenses.
Furthermore, make sure the straps and headband on your Oculus Rift headset are in good condition. Check for any fraying, tears, or loose attachments.
If you notice any issues with the straps or headband, consider contacting Oculus Support for assistance. They can provide guidance on how to repair or replace these components.
Regularly inspecting your Oculus Rift headset for physical damage is crucial for maintaining optimal performance and ensuring a seamless view reset process. By addressing any physical issues promptly and following the recommended actions, you can maximize your VR experience and enjoy your Oculus Rift to its fullest.
If the view reset problem persists despite no physical damage, there may be other factors at play. Consider exploring additional troubleshooting steps or contacting Oculus Support for further assistance.
Reinstall the Oculus App
If you’ve exhausted all other troubleshooting options and are still unable to reset the view on your Oculus Rift, reinstalling the Oculus app may help resolve any lingering software issues. By reinstalling the app, you’ll be starting with a fresh installation, which can often solve problems related to the software and its settings. Follow the steps below to reinstall the Oculus app.
First, ensure that your Oculus Rift headset is disconnected from your computer.
Next, open the Control Panel on your computer. You can do this by searching for “Control Panel” in the Start Menu.
In the Control Panel, navigate to the “Programs” or “Programs and Features” section.
Locate the Oculus app in the list of installed programs and select it.
Click on the “Uninstall” or “Remove” button to begin the uninstallation process.
Follow the on-screen prompts to complete the uninstallation process. Make sure to select any options to remove all associated data and settings, if prompted.
Once the uninstallation is complete, restart your computer.
After your computer has restarted, navigate to the official Oculus website and download the latest version of the Oculus app.
Run the installer for the Oculus app and follow the on-screen instructions to install the app on your computer.
Once the installation is complete, reconnect your Oculus Rift headset to your computer.
Launch the Oculus app and follow any prompts to complete the setup process for your Oculus Rift headset.
In the Oculus app, navigate to the settings menu by clicking on the gear icon in the top right corner.
Under the settings menu, find the section related to your Oculus Rift headset and look for an option to reset the view or recenter the headset. Click on this option to initiate the reset process.
Follow any on-screen instructions provided by the Oculus app to complete the view reset. Put on your Oculus Rift headset and check if the view has reset to the desired position.
Reinstalling the Oculus app can often resolve stubborn issues with resetting the view on your Oculus Rift. However, if the problem persists, it’s recommended to contact Oculus Support for further guidance and assistance.