
Check if your Yahoo! Mail account is still active
If you haven’t used your Yahoo! Mail account for a while, there is a chance that it may have been deactivated due to inactivity. Reactivating your account is a straightforward process, but before you begin, it’s important to check if your account is still active.
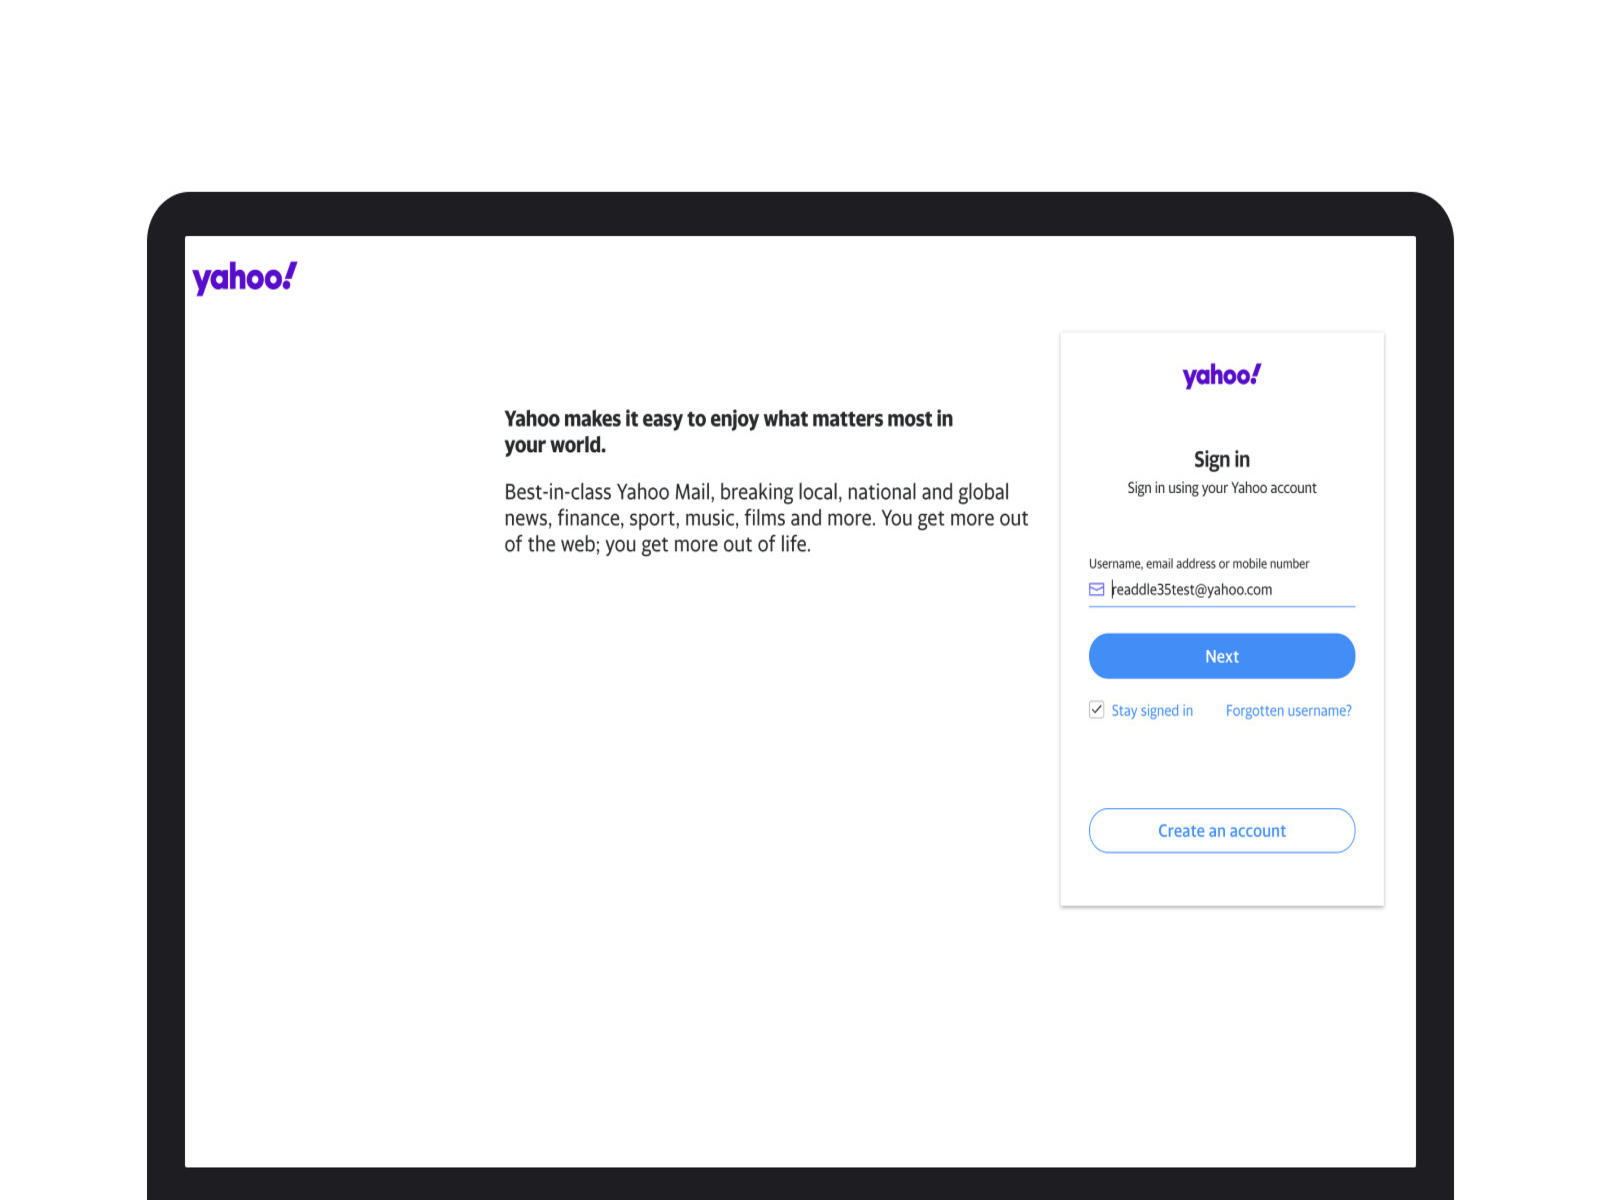
The first step is to visit the Yahoo! Mail login page and attempt to sign in with your credentials. If your account is still active, you will be able to log in successfully. However, if you encounter an error message stating that your account has been deactivated or disabled, then it’s time to proceed with the reactivation process.
Another way to confirm if your account is still active is by reaching out to Yahoo! support. You can visit the Yahoo! Help Center or contact their customer support for assistance. Provide them with your account details, and they will be able to check the status of your account and guide you accordingly.
Remember that Yahoo! Mail accounts are generally deactivated after a prolonged period of inactivity. This is done to ensure the security of your account and prevent unauthorized access. If your account has been dormant for an extended period, it’s essential to reactivate it to regain access to your emails, contacts, and other important data.
Now that you have verified the status of your Yahoo! Mail account, it’s time to understand the consequences of account inactivity and how to avoid future deactivation.
Understand the consequences of account inactivity
Account inactivity can have certain consequences for your Yahoo! Mail account. It’s important to be aware of these consequences to understand the significance of keeping your account active. Here are a few things you should know:
1. Loss of access to emails: When your Yahoo! Mail account is deactivated due to inactivity, you will no longer be able to access your emails. This means you could lose important messages, attachments, and any other data stored in your account.
2. Disruption of communication: Inactive accounts can cause communication gaps, as people might receive bounce-back messages when trying to reach you through your Yahoo! Mail address. This can create inconvenience and potentially lead to missed opportunities or important information.
3. Potential loss of contacts and data: Your Yahoo! Mail account serves as a hub for your contacts, calendar events, and other data. If your account is deactivated, you may lose access to this information, making it challenging to reconnect with people and stay organized.
4. Risk of account deletion: While Yahoo! Mail usually deactivates accounts after a period of inactivity, there is a possibility that your account could be permanently deleted if it remains inactive for an extended period. This means you will not be able to retrieve any data associated with the account.
5. Impact on other Yahoo! services: Inactive accounts can also affect other Yahoo! services you may have used, such as Yahoo! Answers, Yahoo! Groups, and Yahoo! Finance. Reactivating your Yahoo! Mail account can help ensure seamless access to these services as well.
Understanding these consequences underscores the importance of keeping your Yahoo! Mail account active. Now that you grasp the potential implications of account inactivity, let’s move on to the next step: finding out the reasons for deactivation.
Find out the reasons for deactivation
If your Yahoo! Mail account has been deactivated due to inactivity, it’s crucial to understand the reasons behind it. By identifying the factors that led to the deactivation, you can take steps to prevent it from happening again in the future. Here are a few common reasons for account deactivation:
1. Long period of inactivity: Yahoo! Mail deactivates accounts that have not been actively used for an extended period. This is done to ensure the security of the account and to free up resources on their servers. If you haven’t logged into your account for several months, it’s likely that inactivity is the reason for deactivation.
2. Incomplete account setup: In some cases, if you haven’t completed the setup process or have left certain account details incomplete, Yahoo! Mail may deactivate your account. Make sure you have provided all the necessary information during the account setup to avoid potential deactivation.
3. Violation of Yahoo! Mail terms of service: Yahoo! Mail has specific terms of service that users are expected to adhere to. If you engage in activities that go against these terms, such as sending spam emails or engaging in malicious behavior, your account may be deactivated. It’s essential to review and follow the terms of service to prevent account deactivation.
4. Security concerns: Yahoo! Mail prioritizes the security of user accounts. If there are indications of unauthorized access or suspicious activities associated with your account, Yahoo! Mail may deactivate it to protect your personal information. Keeping your account secure by using a strong password and enabling two-factor authentication can help prevent security-related deactivation.
5. Account closure/request: Sometimes, account deactivation can occur at the user’s request. If you have initiated the closure of your Yahoo! Mail account, the deactivation process will take place according to Yahoo!’s policies and timeline.
By evaluating these reasons, you can gain a better understanding of why your Yahoo! Mail account was deactivated. This knowledge will be useful in taking proactive measures to avoid future deactivation. Now, let’s move on to the next section, where we will explore the reactivation process for your Yahoo! Mail account.
Understand the reactivation process
Reactivating your Yahoo! Mail account is a relatively straightforward process. By following a few simple steps, you can regain access to your emails and other account features. Here’s what you need to know about the reactivation process:
1. Access the Yahoo! Mail reactivation page: To begin the reactivation process, visit the official Yahoo! Mail reactivation page. This page is specifically designed to handle account reactivations and will guide you through the necessary steps.
2. Enter your Yahoo! Mail login credentials: On the reactivation page, you will be prompted to enter your Yahoo! Mail login credentials. This includes your Yahoo! Mail email address and the associated password. Make sure to enter the correct information to proceed with the reactivation process.
3. Verify your account ownership: To ensure the security of your account, Yahoo! Mail requires you to verify your ownership before reactivating your account. You will be given a choice between verification through a recovery email or a phone number linked to your Yahoo! Mail account.
4. Complete the reactivation process: Once you have successfully verified your account ownership, you can proceed with the reactivation process. Follow the on-screen instructions provided by Yahoo! to complete the process. This may involve updating your account settings, agreeing to any new terms of service, or providing additional information if required.
5. Update your account settings and preferences: After reactivating your Yahoo! Mail account, take the time to review and update your account settings and preferences. This includes checking your security settings, updating your contact information, and reviewing any filters or rules you may have in place.
6. Ensure regular activity: To avoid future deactivation, it’s essential to keep your Yahoo! Mail account active. Regularly log in, send and receive emails, and engage with your account to demonstrate activity. This will help ensure that your account remains active and accessible.
Understanding the reactivation process will help you regain access to your Yahoo! Mail account effectively. Now that you know how to reactivate your account, let’s move on to the next section, where we will guide you through the steps of accessing the Yahoo! Mail reactivation page.
Access the Yahoo! Mail reactivation page
To begin the process of reactivating your Yahoo! Mail account, you will need to access the official Yahoo! Mail reactivation page. Follow these steps to reach the reactivation page:
Step 1: Open your web browser: Launch the web browser of your choice on your computer or mobile device. Ensure that you have a stable internet connection.
Step 2: Visit the Yahoo! Mail website: In the address bar of your browser, enter “www.yahoo.com” or “mail.yahoo.com” and press Enter. This will take you to the Yahoo! Mail website.
Step 3: Navigate to the reactivation page: On the Yahoo! Mail website, locate the “Sign In” button and click on it. This will take you to the Yahoo! Mail login page.
Step 4: Select the “Trouble signing in?” option: On the Yahoo! Mail login page, look for the “Trouble signing in?” link located below the “Sign In” button. Click on this link to proceed with the account recovery options.
Step 5: Choose the “Recover your account” option: On the account recovery page, you will be presented with various options. Select the “Recover your account” option to initiate the reactivation process.
Step 6: Follow the prompts: Yahoo! Mail will guide you through the reactivation process by providing step-by-step instructions. Read the on-screen prompts carefully and follow them to access the specific page for reactivating your account.
Step 7: Enter your Yahoo! Mail login credentials: Once you are on the reactivation page, you will be prompted to enter your Yahoo! Mail email address and password. Provide the correct login credentials associated with your deactivated account.
Step 8: Proceed with verification: After entering your login credentials, Yahoo! Mail may require you to verify your account ownership through a recovery email address or phone number. Follow the instructions provided to complete the verification process.
Step 9: Complete the reactivation process: Once your account ownership has been verified, you can proceed with the reactivation process. Follow the on-screen instructions, review any terms or settings that need attention, and complete the process as guided by Yahoo! Mail.
By accessing the Yahoo! Mail reactivation page and following these steps, you will be on your way to regaining access to your Yahoo! Mail account. In the next section, we will discuss the process of entering your Yahoo! Mail login credentials for reactivation.
Enter your Yahoo! Mail login credentials
Once you have reached the Yahoo! Mail reactivation page, the next step is to enter your Yahoo! Mail login credentials. This includes your email address and password associated with the deactivated account. Follow these steps to enter your login credentials:
Step 1: Locate the login fields: On the reactivation page, you will find the login fields where you need to enter your Yahoo! Mail email address and password. These fields are typically labeled as “Email” or “Username” and “Password.”
Step 2: Enter your Yahoo! Mail email address: In the respective field, enter the full email address of your Yahoo! Mail account that you want to reactivate. Ensure that you enter the correct email address to proceed.
Step 3: Enter your Yahoo! Mail password: In the password field, enter the password associated with your Yahoo! Mail account. This is the password you used when the account was active. Ensure that you enter the correct password to proceed with the reactivation process.
Step 4: Verify the accuracy of your login credentials: Before proceeding, double-check that you have entered the correct email address and password. Make sure there are no typing errors or mistakes, as incorrect login credentials will prevent you from reactivating your Yahoo! Mail account.
Step 5: Click on the login or sign-in button: Once you have entered your Yahoo! Mail email address and password, look for the login or sign-in button on the page. It is usually labeled as “Sign In” or “Log In.” Click on this button to proceed.
Step 6: Wait for authentication: After clicking the login button, Yahoo! Mail will authenticate your login credentials. This process may take a few moments as the system verifies your account details and checks for any deactivation status.
Step 7: Follow any additional prompts: Depending on the account status and the reactivation process, there may be additional prompts or steps you need to follow. These may include verifying your account ownership or agreeing to terms and conditions. Follow these prompts as instructed to continue the reactivation process.
By entering your Yahoo! Mail login credentials accurately, you are one step closer to successfully reactivating your account. In the next section, we will discuss the verification process to establish your ownership of the account.
Verify your account ownership through a recovery email or phone number
As part of the reactivation process for your Yahoo! Mail account, you will need to verify your ownership. Yahoo! Mail offers two common methods for account verification: through a recovery email or a phone number associated with your account. Here’s how you can verify your account ownership:
Recovery Email Verification:
Step 1: Choose the recovery email option: On the reactivation page, you will be given the option to choose the recovery email verification method. Select this option to proceed.
Step 2: Check your recovery email inbox: Once you have selected the recovery email method, Yahoo! Mail will send a verification email to your recovery email address. Access your recovery email inbox and look for the email from Yahoo! Mail.
Step 3: Open the verification email: Open the verification email from Yahoo! Mail. It typically has a subject line like “Verify Your Yahoo! Account” or something similar.
Step 4: Click on the verification link: Within the verification email, you will find a link that allows you to confirm your ownership of the Yahoo! Mail account. Click on this link to verify your account.
Step 5: Follow any additional prompts: After clicking the verification link, Yahoo! Mail may prompt you to confirm your identity further or provide additional information. Follow any on-screen instructions to complete the verification process.
Phone Number Verification:
Step 1: Choose the phone number option: On the reactivation page, select the phone number verification method. This will prompt Yahoo! Mail to send a verification code to your associated phone number.
Step 2: Receive the verification code: Wait for the verification code to be sent to your phone number via SMS or phone call. Ensure that your phone is within reach and ready to receive the verification code.
Step 3: Enter the verification code: Once you receive the code, enter it in the provided field on the reactivation page. This will verify your ownership of the Yahoo! Mail account.
Step 4: Follow any additional prompts: Yahoo! Mail may present you with additional prompts or steps to complete the verification process. Follow these instructions as directed to successfully verify your account ownership.
By verifying your account ownership through a recovery email or phone number, you are taking the necessary steps to secure your Yahoo! Mail account and complete the reactivation process. In the next section, we will discuss the final steps of the reactivation process.
Complete the reactivation process by following the on-screen instructions
Once you have successfully verified your ownership of the Yahoo! Mail account, it’s time to complete the reactivation process by following the on-screen instructions provided by Yahoo! Mail. These instructions will guide you through the remaining steps to fully reactivate your account. Here’s what you need to do:
Step 1: Read the on-screen instructions: Carefully read the instructions displayed on the reactivation page. These instructions will outline the remaining steps you need to follow to complete the reactivation process.
Step 2: Review any updates or changes: Yahoo! Mail may have made updates or changes to its services or terms of service since your account was deactivated. Take the time to review and familiarize yourself with any new updates or changes.
Step 3: Agree to the terms and conditions: If there are any new terms and conditions that you need to agree to, follow the prompts to read and accept them. Failure to agree to the terms and conditions may prevent you from completing the reactivation process.
Step 4: Provide additional information (if required): Depending on your specific account and the reactivation process, Yahoo! Mail may request additional information from you. This could include updating your contact details, security settings, or providing any other necessary information. Follow the on-screen prompts to provide the required information.
Step 5: Confirm the reactivation: Once you have followed the on-screen instructions and completed any necessary steps, confirm the reactivation of your Yahoo! Mail account. This may involve clicking on a confirmation button or submitting the required information.
Step 6: Wait for the reactivation to complete: After confirming the reactivation, Yahoo! Mail will process the request and reactivate your account. This process may take a few moments to complete. Do not close the reactivation page or navigate away from it until the process is finished.
Step 7: Verify the reactivation status: Once the reactivation process is complete, try logging in to your Yahoo! Mail account using your reactivated credentials. If successful, you have fully reactivated your account and regained access to your emails and other features.
Following the on-screen instructions provided by Yahoo! Mail is crucial to ensuring a successful reactivation process. By completing these steps, you can regain control of your Yahoo! Mail account and continue using it for your communication needs. In the next section, we will explore the importance of updating your account settings and preferences after reactivation.
Update your account settings and preferences
After successfully reactivating your Yahoo! Mail account, it’s important to take the time to review and update your account settings and preferences. This will help ensure that your account is optimized for your needs and that you have control over your account’s security and functionality. Here’s what you should consider when updating your account settings:
1. Security settings: Start by reviewing and updating your account’s security settings. Enable two-factor authentication if you haven’t already, as this provides an extra layer of protection for your account. You may also want to change your password to a strong and unique one to further enhance security.
2. Contact information: Verify that all your contact information, such as your email address and phone number, is up to date. This is important for account recovery purposes and for receiving important notifications from Yahoo! Mail.
3. Privacy settings: Take the time to review your account’s privacy settings. Adjust the visibility of your profile and email address according to your preferences. You can choose to display your information publicly, only to contacts, or keep it completely private.
4. Filters and rules: Review any filters or rules you have set up in your Yahoo! Mail account. Make sure they are still relevant and serving their intended purpose. Update or delete any filters that are no longer needed.
5. Spam and junk mail settings: Check your spam and junk mail settings to ensure that they are properly configured. Yahoo! Mail has built-in mechanisms to filter and redirect spam emails, so make sure these settings are optimized to your preferences.
6. Email signature: Consider updating or personalizing your email signature. A well-crafted signature can add a professional touch to your emails and provide additional information about yourself or your business.
7. Notification settings: Review how you receive notifications from Yahoo! Mail. You can choose to receive email notifications for new messages, calendar events, or other activities related to your account. Adjust these settings based on your preferences.
8. Organization and folder settings: Take the opportunity to review your folder structure and organization. Create or delete folders as needed and ensure that your emails are organized in a way that suits your workflow.
9. Auto-reply or vacation response: If you anticipate being away or unable to respond to emails for a period of time, set up an auto-reply or vacation response. This will inform senders that you are currently unavailable and provide them with an alternative means of contact if necessary.
By updating your account settings and preferences, you can customize your Yahoo! Mail experience and ensure that it aligns with your needs and preferences. Take the time to review these settings after reactivating your account to optimize your Yahoo! Mail usage. In the next section, we will discuss the importance of maintaining regular activity in your Yahoo! Mail account to prevent future deactivation.
Ensure regular activity to avoid future deactivation
Once you have successfully reactivated your Yahoo! Mail account, it’s important to maintain regular activity to prevent future deactivation. Yahoo! Mail accounts are typically deactivated due to prolonged periods of inactivity, so staying active and engaged with your account is crucial. Here are some steps you can take to ensure regular activity:
1. Check your Yahoo! Mail regularly: Make it a habit to regularly log in to your Yahoo! Mail account. Set a schedule for checking your emails and stick to it, ensuring that you are actively engaging with your account.
2. Send and receive emails: Actively send and receive emails using your Yahoo! Mail account. Respond to important messages promptly and engage in email conversations to demonstrate ongoing activity.
3. Organize your inbox: Stay organized by managing your inbox effectively. Archive or delete unnecessary emails, use folders to categorize your messages, and take advantage of labels or tags to easily locate important information.
4. Use Yahoo! Mail features and services: Explore and make use of the various features and services offered by Yahoo! Mail. This includes utilizing the calendar, creating and managing contacts, accessing Yahoo! News, and more. By actively using these features, you demonstrate engagement and ongoing activity.
5. Update your account regularly: Keep your account details up to date. This includes maintaining accurate contact information, reviewing and updating security settings, and adjusting any preferences as needed.
6. Enable account recovery options: Ensure that you have set up account recovery options, such as a recovery email address and phone number. This will help you regain access to your account in case you ever forget your password or encounter any issues.
7. Be mindful of Yahoo! Mail policies and guidelines: Familiarize yourself with Yahoo! Mail’s policies and guidelines. Adhere to their terms of service, avoid engaging in spamming activities, and respect the privacy of others when using your account.
8. Stay informed about Yahoo!’s updates and announcements: Yahoo! Mail occasionally introduces new features, updates, and changes. Stay informed by reading Yahoo!’s updates and announcements to ensure that you are aware of any important information or modifications to their services.
By maintaining regular activity in your Yahoo! Mail account, you can help prevent future deactivation. Stay engaged, be proactive, and make the most of the features and services provided. Regularly use and check your account to ensure its ongoing functionality and availability.
Now that you’re equipped with the knowledge to keep your Yahoo! Mail account active, you can confidently enjoy using your account without the risk of deactivation.