
Check the Compatibility of Your MacBook and Amazon Echo
Before attempting to pair your Amazon Echo with your MacBook, it is crucial to ensure that your devices are compatible. While Amazon Echo is primarily designed to work with Alexa voice commands and the Alexa app, it can also be connected to other devices using Bluetooth.
To check the compatibility, make sure that your MacBook supports Bluetooth connectivity. Most MacBook models released in recent years come equipped with Bluetooth capabilities, but it’s always a good idea to double-check. To do this, go to the Apple menu, select “About This Mac,” and click on the “System Report” option. Under the Hardware section, look for the “Bluetooth” tab and confirm that your MacBook has Bluetooth technology.
If your MacBook is Bluetooth-enabled, you should be able to proceed with the pairing process. However, if you find that your MacBook does not have Bluetooth capabilities, you will not be able to connect it to your Amazon Echo wirelessly.
It’s worth noting that while Bluetooth connectivity is the most common method for connecting Amazon Echo with a MacBook, there are other ways to establish a connection. For instance, you can connect your MacBook and Amazon Echo using an auxiliary cable if your MacBook has an audio output jack and your Echo has an audio input port. However, this method may not provide the same level of convenience as wireless Bluetooth pairing.
Once you have verified the compatibility of your MacBook and confirmed that it supports Bluetooth connectivity, you can proceed to the next steps to connect your Amazon Echo to your MacBook.
Connect the Amazon Echo to a Power Source
Before you start the pairing process, make sure your Amazon Echo is properly connected to a power source. The Amazon Echo device requires a constant power supply to function effectively. To connect your Amazon Echo to a power source, follow these steps:
- Locate the power adapter that came with your Amazon Echo device.
- Plug the power adapter into a nearby electrical outlet. Ensure that the outlet is easily accessible and not obstructed.
- Connect the other end of the power adapter to the power port located on the back of your Amazon Echo device.
- Once the power adapter is securely connected, you should see the Amazon Echo’s light ring illuminate. This indicates that the device is receiving power.
- Wait for the light ring to turn blue and then orange. This indicates that your Amazon Echo is preparing to connect to the internet.
- Once the light ring turns orange and Alexa says, “Hello, your Amazon Echo is ready for setup,” you can proceed with the next steps for pairing your Echo with your MacBook.
It’s important to note that the initial setup process may take a couple of minutes, depending on your internet connection speed. During this time, it’s best to avoid interrupting the setup by disconnecting the power supply or pressing any buttons on your Amazon Echo device.
By ensuring that your Amazon Echo is properly connected to a power source, you can avoid any interruptions during the pairing process and ensure that your device is ready for a seamless connection with your MacBook.
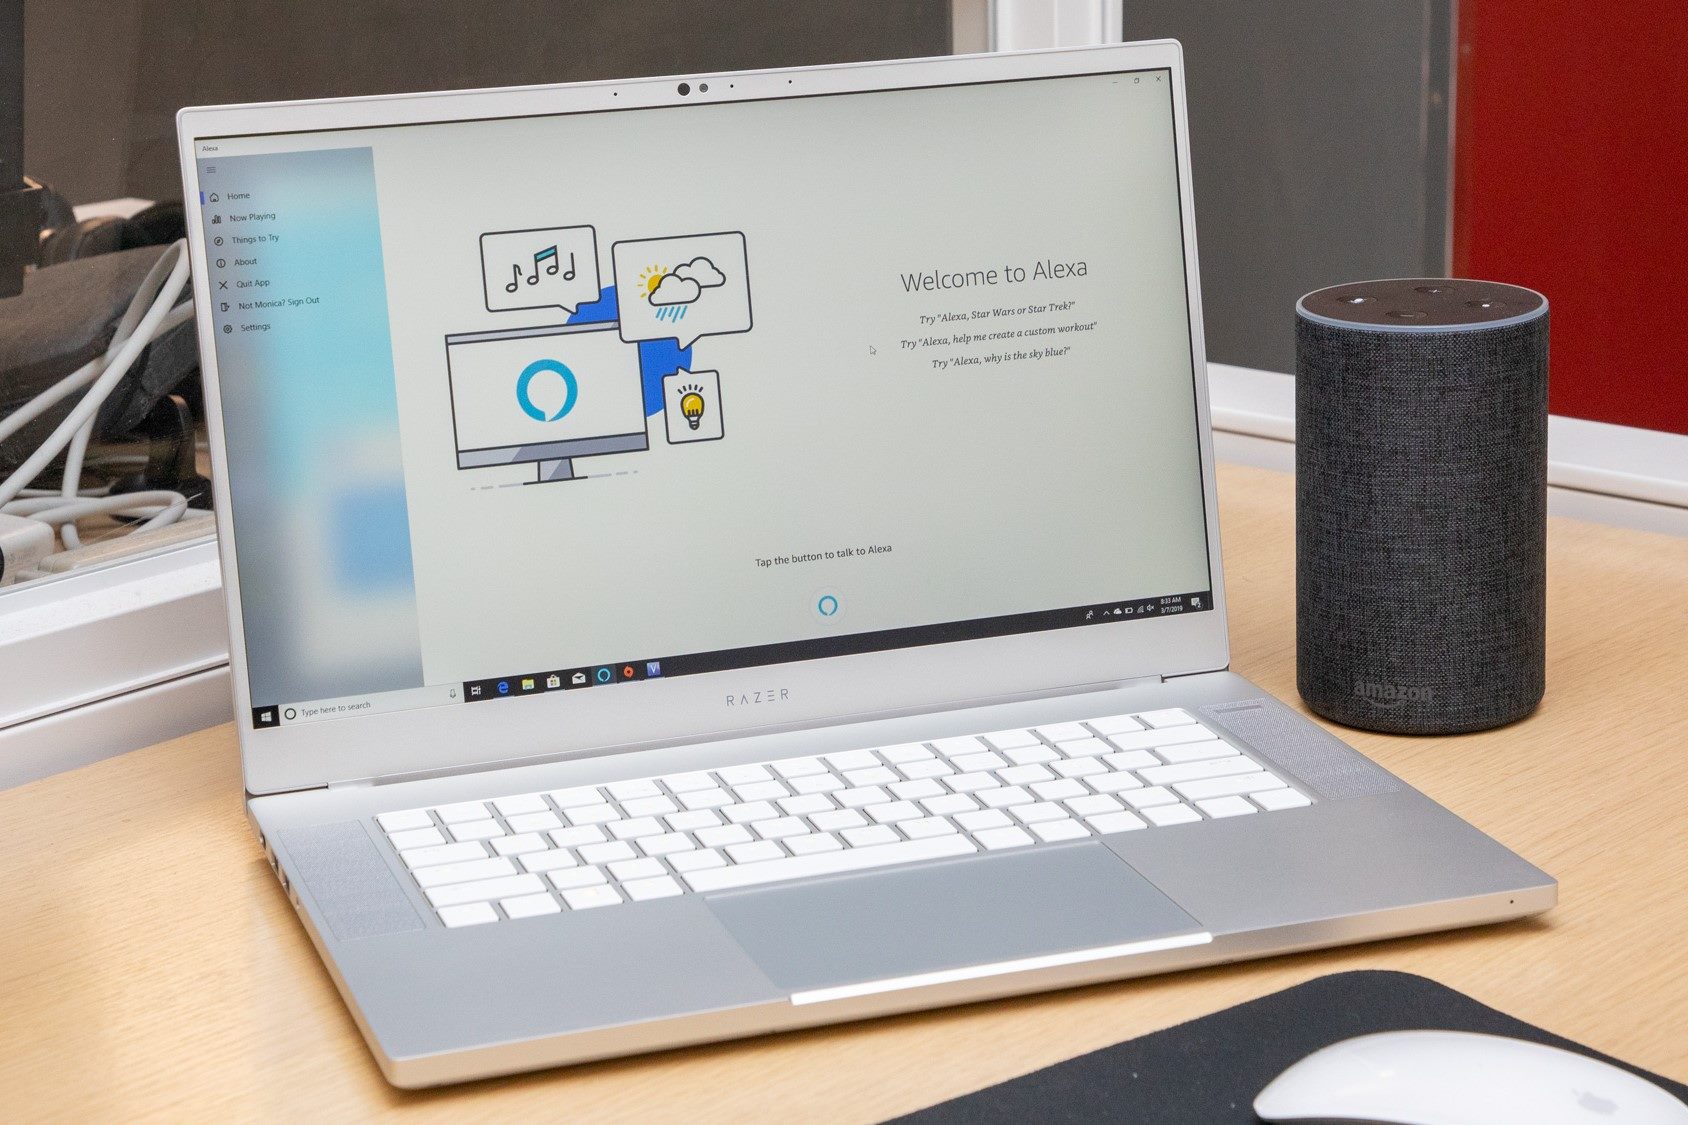
Download and Install the Alexa App on Your MacBook
In order to successfully pair your Amazon Echo with your MacBook, you need to download and install the Alexa app. The Alexa app is available for free in the App Store, so you can easily access it from your MacBook. Here’s how to download and install the Alexa app:
- Open the App Store on your MacBook. You can find it in the Applications folder or by using Spotlight search.
- In the search bar, type “Alexa” and press Enter.
- Look for the official Amazon Alexa app in the search results. It should be listed under the category of “Apps.”
- Click on the app to view its details.
- Click the “Get” or “Download” button to initiate the installation process.
- Depending on the size of the app and your internet connection speed, the download and installation may take a few moments.
- Once the installation is complete, you will find the Alexa app in your Applications folder.
- Double-click on the app to launch it.
You are now ready to proceed with setting up the Alexa app and connecting it to your Amazon Echo device.
Downloading and installing the Alexa app on your MacBook is a crucial step as it provides you with the necessary interface to control your Amazon Echo and access its features. Once the app is successfully installed on your MacBook, you can move forward with the pairing process and enjoy the convenience of using your Echo device with your MacBook.
Sign in to the Alexa App with Your Amazon Account
In order to establish a connection between your MacBook and Amazon Echo, you need to sign in to the Alexa app using your Amazon account. This allows the app to access your account information, personalize your experience, and enable seamless communication between your devices. Here’s how to sign in to the Alexa app:
- Open the Alexa app on your MacBook by clicking on its icon in the Applications folder.
- On the welcome screen, click on the “Sign in” button.
- You will be redirected to the Amazon login page. If you already have an Amazon account, enter your email address and password in the designated fields. Click on the “Sign-In” button to proceed.
- If you do not have an existing Amazon account, click on the “Create your Amazon account” button to create a new one. Follow the prompts to enter your personal information and create a password for your account.
- After signing in or creating your Amazon account, you will be prompted to grant permissions to the Alexa app. These permissions allow the app to access your contacts, calendars, and other relevant information to provide a personalized experience. Review the permissions and click on the “Allow” or “Grant” button to proceed.
- Once you have successfully signed in to the Alexa app, you will be greeted with a welcome message and a brief overview of the app’s features.
By signing in to the Alexa app with your Amazon account, you establish a secure connection between your MacBook and Amazon Echo. This allows you to seamlessly control your Echo device, access your personalized settings, and enjoy the full range of features available through the Alexa app.
Connect Your MacBook to the Same Wi-Fi Network as Amazon Echo
In order for your MacBook to communicate with your Amazon Echo, it is essential that both devices are connected to the same Wi-Fi network. This allows them to establish a reliable and seamless connection, ensuring smooth communication between your devices. Here’s how to connect your MacBook to the same Wi-Fi network as your Amazon Echo:
- Click on the Wi-Fi icon in the menu bar of your MacBook, typically located in the top-right corner of the screen. This will display a dropdown menu that shows the available Wi-Fi networks in your vicinity.
- Select the Wi-Fi network to which your Amazon Echo is already connected. You can identify this network by its name, which should be displayed on the Echo device itself or in the Alexa app on your MacBook.
- If the network requires a password, enter it in the prompted field. Make sure to enter the correct password to avoid any connectivity issues.
- Once you have successfully connected your MacBook to the same Wi-Fi network as your Amazon Echo, you should see a confirmation message or an indication that you are connected to the network.
By connecting both your MacBook and Amazon Echo to the same Wi-Fi network, you ensure that they are on the same communication channel, making it easier for your devices to discover and connect with each other. This step is crucial for the successful pairing and usage of your Amazon Echo with your MacBook.
Open the Alexa App and Access Settings
Once your MacBook is connected to the same Wi-Fi network as your Amazon Echo, you can proceed to open the Alexa app and access its settings. The settings within the app allow you to customize and control various aspects of your Amazon Echo device. Here’s how to open the Alexa app and access its settings:
- Locate and click on the Alexa app icon in your Applications folder on your MacBook to open the app.
- Once the app is open, you will be greeted with the Alexa app home screen. Here, you will find a variety of options and features to explore.
- To access the settings, look for the menu icon (typically represented by three horizontal lines) in the top-left corner of the screen.
- Click on the menu icon to expand a dropdown menu with different options. Look for and select the “Settings” option.
- Within the settings menu, you will have access to a range of options to customize your Amazon Echo experience.
- You can modify settings such as the device name, language preferences, music services, and more.
- Take some time to navigate through the settings and explore various options to customize your Amazon Echo experience to your liking.
By opening the Alexa app and accessing its settings, you gain control over the various features and settings of your Amazon Echo device. This allows you to personalize your experience and fine-tune the functionality of your device to meet your specific needs and preferences.
Select the Add a Device Option in the Alexa App
After accessing the settings menu in the Alexa app on your MacBook, the next step is to select the “Add a Device” option. This will initiate the process of pairing your Amazon Echo with your MacBook. Here’s how to select the “Add a Device” option in the Alexa app:
- With the Alexa app open on your MacBook and the settings menu displayed, look for the “Devices” option. This may be represented by an icon or a text label.
- Click on the “Devices” option to access the device management page within the Alexa app.
- On the device management page, you will find various options and settings related to your Amazon Echo devices.
- Look for and select the “Add a Device” option. This option may be displayed as a button or a text link, depending on the app version and layout.
- After clicking on the “Add a Device” option, the Alexa app will start searching for available devices to add.
- Ensure that your Amazon Echo device is in a pairing mode and ready to be discovered by the Alexa app.
- The Alexa app will display a list of available devices to add. Choose your Amazon Echo device from the list.
By selecting the “Add a Device” option in the Alexa app, you initiate the process of locating and connecting your Amazon Echo device to your MacBook. This step is crucial for establishing a secure and seamless connection between the two devices, enabling them to work together effectively.
Choose Amazon Echo from the List of Available Devices
After selecting the “Add a Device” option in the Alexa app on your MacBook, the app will start searching for available devices to add. Once the search is complete, the Alexa app will display a list of devices that it has detected. Here’s how to choose your Amazon Echo from the list of available devices:
- From the list of available devices displayed in the Alexa app, locate your Amazon Echo device.
- The device name or model number should be listed next to each device on the list, making it easier to identify your specific Echo device.
- Click on your Amazon Echo device to select it from the list. This will prompt the app to begin the pairing process.
- Once you have selected your Amazon Echo device, the Alexa app will establish the connection between the app and the device. This process may take a few moments.
- Ensure that your Amazon Echo device is still in pairing mode and ready to be connected.
- The Alexa app will provide on-screen instructions to guide you through the pairing process. Follow these instructions to successfully connect your Amazon Echo with your MacBook.
- Once the pairing process is complete, you will receive a confirmation message on the Alexa app, indicating that your device has been successfully added to the app and is now connected to your MacBook.
By choosing your Amazon Echo from the list of available devices in the Alexa app, you establish the connection between your Echo device and your MacBook. This allows for seamless communication and enables you to control your Echo device using your MacBook, giving you access to the full range of Alexa features and functionalities.
Enable Bluetooth on Your MacBook
In order to pair your Amazon Echo with your MacBook, it’s important to ensure that Bluetooth is enabled on your MacBook. Bluetooth technology allows for wireless communication between devices, making it possible for your Echo and MacBook to connect and interact with each other seamlessly. Here’s how to enable Bluetooth on your MacBook:
- Click on the Apple menu located in the top-left corner of the screen.
- From the dropdown menu, select “System Preferences.”
- In the System Preferences window, click on the “Bluetooth” icon.
- In the Bluetooth settings, you will see a toggle switch labeled “Turn Bluetooth On.” Click on this switch to enable Bluetooth.
- Once Bluetooth is enabled, your MacBook will start scanning for nearby Bluetooth devices, including your Amazon Echo.
- Ensure that your Amazon Echo is in pairing mode and ready to be discovered by your MacBook.
- After a few moments, your Echo device should appear in the list of available Bluetooth devices on your MacBook.
- If your Echo does not appear in the list, try turning Bluetooth off and on again, or restart your MacBook and repeat the process.
- Click on your Amazon Echo device in the Bluetooth devices list to select it.
By enabling Bluetooth on your MacBook, you allow it to communicate and establish a connection with your Amazon Echo. This enables you to control your Echo device using your MacBook, enhancing your overall experience and expanding the ways in which you can interact with Alexa.
Put Amazon Echo in Pairing Mode
In order to pair your Amazon Echo with your MacBook, you need to put your Echo device in pairing mode. Pairing mode enables your Echo device to be discovered by your MacBook’s Bluetooth settings, allowing them to establish a connection. Here’s how to put your Amazon Echo in pairing mode:
- Locate the Action button on your Amazon Echo device. The location of the button may vary depending on the model, but it is typically found on the top or side of the device.
- Press and hold the Action button for about 5-10 seconds. You will see the light ring on your Echo device start flashing blue.
- The flashing blue light indicates that your Echo device is now in pairing mode and ready to be discovered by other devices.
- Make sure that Bluetooth is enabled on your MacBook and that it is scanning for nearby devices.
- Once your Echo device is in pairing mode and your MacBook is scanning for devices, your Echo should appear in the list of available Bluetooth devices on your MacBook.
- Keep in mind that the pairing mode on your Echo device will only last for a limited time, typically a minute or two. If you are unable to find and connect to your Echo device during this time, you may need to repeat the steps and put your Echo back into pairing mode.
By putting your Amazon Echo in pairing mode, you make it discoverable by your MacBook’s Bluetooth settings. This allows the devices to establish a secure connection, enabling you to control your Echo device from your MacBook and enjoy the range of features and capabilities provided by Alexa.
Pair Amazon Echo with Your MacBook via Bluetooth
After ensuring that both your Amazon Echo and MacBook are in the appropriate settings and modes, it’s time to pair them via Bluetooth. This process establishes a wireless connection between the two devices, enabling seamless communication and control. Here’s how to pair your Amazon Echo with your MacBook via Bluetooth:
- On your MacBook, click on the Bluetooth icon located in the menu bar, typically found in the top-right corner of the screen.
- In the dropdown menu, you should see your Amazon Echo device listed under “Devices.” Click on its name to select it.
- If prompted, confirm the pairing request on your MacBook. You may also need to enter a pairing code displayed on your Echo device.
- Wait for the pairing process to complete, which might take a few moments. During this time, your MacBook and Amazon Echo establish a secure connection.
- Once the pairing is successful, you will typically see a confirmation message on your MacBook, indicating that it is connected to your Amazon Echo.
- At this point, your Amazon Echo and MacBook are paired via Bluetooth, allowing them to exchange data and interact with each other.
Pairing your Amazon Echo with your MacBook via Bluetooth enables you to control your Echo device from your MacBook, including using Alexa voice commands and accessing various features. It opens up possibilities for hands-free interactions and enhanced convenience, making your Echo and MacBook work together seamlessly.
Confirm the Pairing on Both Devices
After pairing your Amazon Echo with your MacBook via Bluetooth, it is crucial to confirm the connection on both devices to ensure a successful pairing. By doing so, you can verify that the devices are communicating effectively and ready to be used together. Here’s how to confirm the pairing on both devices:
- On your MacBook, navigate to the Bluetooth settings by clicking on the Bluetooth icon in the menu bar, typically found in the top-right corner of the screen.
- Check the list of connected devices and ensure that your Amazon Echo is shown as connected and listed correctly.
- If you see your Echo device listed as “Connected,” this confirms that the pairing was successful.
- On your Amazon Echo device, make sure that the light ring is displaying a solid blue color. This indicates that the Echo is connected to your MacBook.
- You can also perform a quick test to confirm the pairing by giving a command to your Echo device using your MacBook, such as asking Alexa a question or requesting to play music.
- If you receive a response from your Echo device and it performs the requested action, it confirms that the pairing between your Echo and MacBook is working correctly.
By confirming the pairing on both your Amazon Echo and MacBook, you ensure that the devices are successfully connected and ready for seamless interaction. This step provides reassurance that your Echo device will respond to your commands via your MacBook and allows you to utilize the capabilities of Alexa to their fullest extent.
Test the Connection Between Amazon Echo and MacBook
Once you have confirmed the pairing between your Amazon Echo and MacBook, it is essential to test the connection to ensure that both devices are communicating effectively. Testing the connection allows you to verify that the setup was successful and that you can seamlessly control your Echo device using your MacBook. Here’s how to test the connection between your Amazon Echo and MacBook:
- Make sure that both your Amazon Echo and MacBook are powered on and in proximity to each other.
- On your MacBook, open the Alexa app and ensure that it is connected to the internet.
- Try issuing a voice command to your Echo device using your MacBook. For example, say “Alexa, what’s the weather today?”
- Observe if your Amazon Echo responds to the voice command and provides the requested information through its built-in speaker.
- If you receive a response from your Echo device, it indicates that the connection and communication between your Echo and MacBook are working correctly.
- Experiment with different voice commands to control your Echo device, such as playing music, setting timers, or accessing information.
- Monitor if your Echo device consistently responds and performs the requested actions through your MacBook.
By testing the connection between your Amazon Echo and MacBook, you can ensure that the devices are functioning together seamlessly. It allows you to verify the responsiveness of your Echo device to voice commands issued from your MacBook and provides reassurance that you can control and utilize your Echo to its full potential using your MacBook.
Use Amazon Echo with Your MacBook to Stream Music or Make Calls
Now that your Amazon Echo is paired with your MacBook, you can take advantage of its capabilities to stream music and make calls directly from your MacBook. This integration allows for seamless control and enhanced convenience. Here’s how to use your Amazon Echo with your MacBook for music streaming and calls:
Streaming Music:
- Open a music streaming service, such as Spotify or Apple Music, on your MacBook.
- Ensure that your Amazon Echo is connected to the same Wi-Fi network as your MacBook.
- In the music streaming service’s app on your MacBook, select a song or playlist to play.
- Specify that you want the music to play on your Amazon Echo device. You can do this by selecting your Echo device as the audio output source within the music streaming app.
- Once you have set the audio output to your Echo, the music will start playing through your Echo’s speakers, providing a high-quality audio experience.
Making Calls:
- Open a communication app, such as Skype or FaceTime, on your MacBook.
- Ensure that your Amazon Echo is connected to the same Wi-Fi network as your MacBook.
- Select the contact you want to call from your MacBook’s communication app.
- Set the audio output to your Amazon Echo device for the call. This will route the call audio to your Echo’s speakers.
- You can then make the call from your MacBook, and the audio will be transmitted through your Amazon Echo, offering a hands-free communication experience.
By using your Amazon Echo with your MacBook for music streaming and calls, you can enjoy enhanced functionality and control. This integration allows you to harness the power of your Echo device while leveraging the capabilities of your MacBook, enabling you to streamline your music listening experience and make hands-free calls with ease.