
Understanding Excel Columns
Excel is a powerful spreadsheet software that allows you to organize and manipulate data effectively. One essential feature in Excel is the ability to work with columns. Understanding how columns function is crucial for managing your data efficiently. Let’s dive into the key aspects of Excel columns.
A column in Excel is identified by a letter at the top of each column, starting from “A” and progressing through the alphabet. Columns extend vertically, and they contain cells that hold data in a tabular format.
Each column has a specific purpose in organizing your data. You can use columns to categorize information, such as names, dates, or numerical values. Additionally, columns allow you to perform calculations, apply formulas, and create charts to analyze your data conveniently.
Excel provides various options to manipulate and rearrange columns effectively. Understanding these techniques will enhance your productivity and enable you to work more efficiently.
Stay tuned for the next sections, where we will explore different methods for moving columns in Excel.
Selecting Columns in Excel
Before you can move columns in Excel, you need to know how to select them. Excel offers several ways to select columns, depending on your requirements:
1. Select a single column: To select a single column, click on the letter at the top of the column. For example, to select column B, click on the letter “B”.
2. Select contiguous columns: If you want to select multiple columns that are adjacent to each other, click and drag your cursor across the letters of the desired columns. For example, to select columns C, D, and E, click and drag from the “C” to the “E” letters.
3. Select non-contiguous columns: To select non-contiguous columns, hold down the “Ctrl” key on your keyboard and click on the letters of the columns you want to select. This allows you to select columns that are not next to each other.
4. Select all columns: If you need to select all columns in your worksheet, simply click on the column header at the top-left corner where column A and row 1 intersect. This will select the entire sheet.
Once you have selected the desired columns, you can proceed to move them using one of the methods we will explore in the following sections.
Remember, understanding how to select columns efficiently will save you time and effort when working with Excel spreadsheets. Experiment with these different selection techniques to find the method that works best for you.
Moving Columns with Cut and Paste
In Excel, one of the simplest ways to move columns is by using the cut and paste method. This technique allows you to relocate columns quickly:
1. Select the column(s) you want to move: Use one of the column selection methods mentioned earlier to select the desired column(s) you wish to move.
2. Cut the selected column(s): Right-click on the selected column(s) and choose “Cut” from the context menu. Alternatively, you can press “Ctrl+X” on your keyboard to cut the column(s).
3. Select the destination: Navigate to the location where you want to move the column(s).
4. Paste the column(s): Right-click on the selected destination cell and choose “Paste” from the context menu. Alternatively, you can press “Ctrl+V” on your keyboard to paste the column(s).
After pasting the column(s), Excel will insert them at the new location, shifting any existing columns to the right. This method is useful for moving a single column or multiple columns at once. It preserves the content, formatting, and formulas associated with the selected column(s).
Remember to ensure that the destination location has enough space to accommodate the moved column(s) without overwriting existing data. Additionally, be cautious when moving columns that contain references to other cells as it may affect the accuracy of calculations and formulas within your worksheet.
With the cut and paste method, you can easily rearrange columns in Excel, enabling you to organize your data effectively and analyze it in the desired order.
Moving Columns using Drag and Drop
Another simple method to move columns in Excel is by using the drag and drop functionality. This technique allows you to rearrange columns with a few mouse movements:
1. Select the column(s) you want to move: Use one of the column selection methods mentioned earlier to select the column(s) you wish to move.
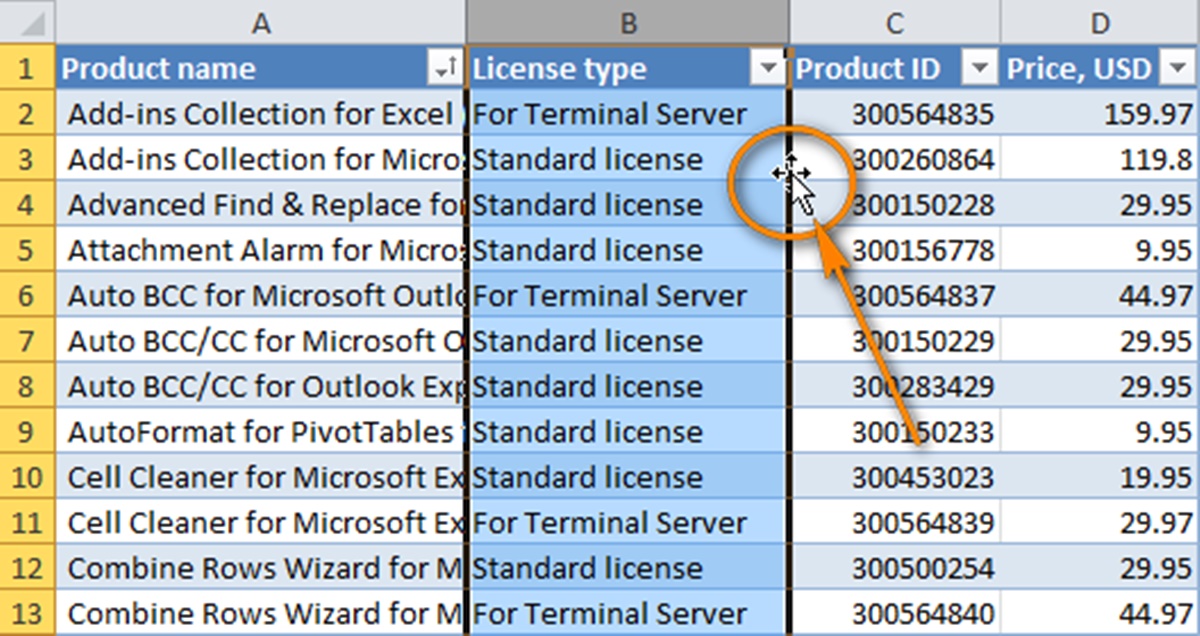
2. Drag the selected column(s) to the new location: Position your mouse cursor over the selected column(s), click and hold the left mouse button, and drag the column(s) to the desired location. As you drag, you will see a small outline or insertion indicator showing where the column(s) will be placed.
3. Release the mouse button to drop the column(s): Once you have positioned the column(s) at the desired location, release the mouse button to drop the column(s).
Excel will automatically move the column(s) to the new location, adjusting the order of the columns accordingly. Existing columns will shift to accommodate the moved column(s).
It’s important to note that when using the drag and drop method, Excel will only move the contents of the column(s), including any formatting and formulas associated with the data. However, any references or formulas pointing to the moved column(s) will not be automatically adjusted, so you may need to update those references manually.
This method works well when you need to rearrange columns within the same worksheet quickly. It gives you flexibility and allows you to visually position the column(s) precisely where you want them.
Make sure to review the changes made after using drag and drop to ensure that your data and calculations are accurate in the new column arrangement.
Moving Columns with the Insert and Delete Function
Excel provides a convenient way to move columns using the Insert and Delete functions. These functions offer more control over column rearrangement and can be useful in specific scenarios:
1. Select the column(s) you want to move: Use one of the column selection methods mentioned earlier to select the column(s) you wish to move.
2. Insert a new column: Right-click on the selected column(s) and choose “Insert” from the context menu. This will insert a new column to the left of the selected column(s).
3. Delete the old column: Once the new column is inserted, right-click on the original column and choose “Delete” from the context menu. Alternatively, you can press the “Delete” key on your keyboard. Make sure to select the option to “Shift cells left” or similar, to ensure that data is not lost.
By inserting a new column and deleting the original column, you effectively move the contents of the selected column(s) to the new location.
This method is particularly useful when you want to insert the moved column(s) and shift the existing columns in a specific order. It allows you to control the exact position of the moved columns and ensures that any references or formulas associated with the data are automatically adjusted.
It’s important to note that when using the Insert and Delete function, the formatting and formulas associated with the original column(s) will also be transferred to the new location.
Using the Insert and Delete function gives you precision and control when rearranging columns in Excel, allowing you to maintain the integrity of your data and calculations. However, make sure to review the changes made to ensure the accuracy of your worksheet.
Moving Columns using the Cut and Insert Method
Another method to move columns in Excel is by using the cut and insert function. This technique allows you to insert a column into a specific location while shifting the existing columns to accommodate the moved column:
1. Select the column(s) you want to move: Use one of the column selection methods mentioned earlier to select the column(s) you wish to move.
2. Cut the selected column(s): Right-click on the selected column(s) and choose “Cut” from the context menu. Alternatively, you can press “Ctrl+X” on your keyboard to cut the column(s).
3. Select the destination column: Click on the column letter of the destination location where you want to insert the cut column(s).
4. Insert the column(s): Right-click on the selected destination column letter and choose “Insert Cut Cells” from the context menu. Alternatively, you can press “Ctrl++” (plus sign) on your keyboard.
Excel will insert the cut column(s) to the left of the destination column and shift the existing columns to the right. This ensures that no data is overwritten or lost during the move.
By using this method, you can precisely position the moved column(s) within your worksheet without affecting any formulas or references associated with the data. The formatting, formulas, and other attributes associated with the cut column(s) will be preserved at the new location.
Remember to ensure that the destination column has enough space to accommodate the moved column(s) and that you are not overwriting existing data or merging with adjacent columns by mistake.
The cut and insert method provides you with control and accuracy when moving columns in Excel, allowing you to arrange your data in the desired order easily.
Moving Columns with the Copy and Insert Function
In Excel, you have the option to move columns by using the copy and insert function. This method allows you to duplicate a column and insert it into a new location:
1. Select the column(s) you want to move: Use one of the column selection methods mentioned earlier to select the column(s) you wish to move.
2. Copy the selected column(s): Right-click on the selected column(s) and choose “Copy” from the context menu. Alternatively, you can press “Ctrl+C” on your keyboard to copy the column(s).
3. Select the destination column: Click on the column letter of the destination location where you want to insert the copied column(s).
4. Insert the column(s): Right-click on the selected destination column letter and choose “Insert Copied Cells” from the context menu. Alternatively, you can press “Ctrl++” (plus sign) on your keyboard.
Excel will duplicate the copied column(s) and insert them to the left of the destination column. The existing columns will shift to the right to accommodate the inserted column(s).
Using the copy and insert function allows you to replicate a column and move it to a new location while preserving the original column. This method is helpful when you want to keep a copy of the column in its original position.
It’s important to note that the copied column(s) will retain the formatting, formulas, and other attributes of the original column. However, any references or formulas in the copied column(s) will remain the same and continue to reference the original column(s).
Ensure that the destination column has sufficient space to accommodate the copied column(s) without overwriting existing data or merging with adjacent columns unintentionally.
By using the copy and insert function, you can conveniently move columns in Excel while retaining the integrity of your data and preserving the original column(s).
Moving Columns using the Cut and Insert Function
Excel provides a simple and effective method to move columns using the cut and insert function. This technique allows you to seamlessly relocate columns within your worksheet:
1. Select the column(s) you want to move: Use one of the column selection methods mentioned earlier to select the column(s) you wish to move.
2. Cut the selected column(s): Right-click on the selected column(s) and choose “Cut” from the context menu. Alternatively, you can press “Ctrl+X” on your keyboard to cut the column(s).
3. Select the destination column: Click on the column letter of the destination location where you want to insert the cut column(s).
4. Insert the column(s): Right-click on the selected destination column letter and choose “Insert Cut Cells” from the context menu. Alternatively, you can press “Ctrl++” (plus sign) on your keyboard.
Excel will insert the cut column(s) to the left of the destination column, shifting any existing columns to the right. The cut column(s) will be seamlessly integrated into the new location, preserving the formatting, formulas, and other attributes associated with the data.
This cut and insert function ensures that no data is lost during the move and maintains the integrity of your worksheet. It also automatically adjusts any formulas or references that may be affected by the column movement.
It is important to note that the insert operation may affect other cells in your worksheet if there is data in the destination location. Ensure that the destination column has enough space to accommodate the moved column(s) without overwriting existing data or merging with adjacent columns mistakenly.
By using the cut and insert function, you can effortlessly rearrange your columns in Excel, allowing you to organize your data in the desired order for effective analysis and presentation.
Moving Multiple Columns at Once
Excel provides various methods for moving multiple columns at once, allowing you to reposition and rearrange data efficiently within your worksheet:
1. Selecting multiple columns:
To move multiple columns simultaneously, you need to first select them. There are several ways to select multiple columns:
- Selecting contiguous columns: Click and drag your cursor across the column letters to select a range of contiguous columns. For example, click and drag from the “A” to the “C” letters to select columns A, B, and C.
- Selecting non-contiguous columns: Hold down the “Ctrl” key on your keyboard and click on the column letters to select multiple columns that are not adjacent to each other.
- Selecting all columns: Click on the column letter of the first column, “Ctrl+Shift+Right Arrow” to select all columns to the right, or press “Ctrl+Shift+Left Arrow” to select all columns to the left.
2. Moving the selected columns:
Once you have selected multiple columns, you can use any of the previously mentioned methods to move them:
- Method 1: Cut and Paste: Right-click on any of the selected columns and choose “Cut” from the context menu. Then, select the desired location and right-click to choose “Paste” from the context menu.
- Method 2: Drag and Drop: Click on any of the selected columns, hold down the left mouse button, and drag the columns to the new location.
- Method 3: Insert and Delete: Right-click on any of the selected columns and choose “Insert” from the context menu. This will shift the existing columns to the right, creating space for the selected columns. To remove the original columns, right-click and choose “Delete” from the context menu.
- Method 4: Cut and Insert: Right-click on any of the selected columns and choose “Cut” from the context menu. Then, select the destination column and right-click to choose “Insert Cut Cells” from the context menu.
Using these methods, you can effortlessly move multiple columns at once, whether they are adjacent or non-contiguous. This allows you to reorganize and restructure your data effectively, making it more convenient for analysis and presentation.
Remember to review the changes made after moving the columns to ensure the accuracy and integrity of your data. Additionally, be mindful of any formulas, references, or conditional formatting associated with the moved columns, as adjustments may be required to maintain functionality.
By leveraging Excel’s capabilities to move multiple columns simultaneously, you can optimize your workflow and improve the efficiency of data management.
Tips and Tricks for Moving Columns in Excel
Moving columns in Excel can be a fundamental task when organizing and analyzing data. To make the process smoother and more efficient, consider the following tips and tricks:
1. Use keyboard shortcuts: Utilize keyboard shortcuts to speed up the column-moving process. For instance, use “Ctrl+X” to cut a column, “Ctrl+V” to paste it, “Ctrl++” (plus sign) to insert cells, and “Ctrl+-” (minus sign) to delete cells.
2. Maintain data integrity: Before moving columns, ensure that any formulas or references pointing to the data in those columns are updated accordingly. This will prevent errors and maintain data integrity throughout your worksheet.
3. Freeze panes: If you have a large dataset and want to keep specific columns visible even when scrolling horizontally, consider freezing panes. This feature allows you to lock certain columns in place while others can still be moved.
4. Use AutoFit: After moving columns, use the “AutoFit” feature to automatically adjust the column width to fit the data. This ensures that your data remains readable and visually appealing.
5. Create a backup: Before making any significant changes to your worksheet, including moving columns, it’s always a good idea to create a backup copy. This way, you can easily revert to the previous version if anything goes wrong.
6. Group and outline: If you need to move a set of columns together frequently, consider grouping and outlining them. This feature allows you to collapse or expand the group, making it easier to manage and move related columns as a unit.
7. Take advantage of the Format Painter: The Format Painter tool allows you to copy the formatting of one column and apply it to another. This can be useful when moving columns and wanting to maintain consistent formatting throughout your worksheet.
8. Utilize the “Undo” command: If you make a mistake while moving columns, don’t panic. Excel provides the “Undo” command (Ctrl+Z) to revert back to the previous state, allowing you to correct any accidental moves or changes.
9. Plan and visualize your desired layout: Before moving columns, take a moment to envision the layout you want to achieve. Plan the arrangement and consider the impact on calculations, formulas, and charts to ensure a smooth transition.
10. Test and verify: After moving columns, thoroughly test your spreadsheet to validate that all data, calculations, and references are accurate in the new column arrangement. This will help catch any issues or discrepancies that may have occurred during the moving process.
By incorporating these tips and tricks into your column-moving workflow, you can streamline the process, avoid errors, and maintain the integrity of your data in Excel. Experiment with these techniques to find the methods that work best for your specific needs and enhance your overall efficiency and productivity.