
How to Access the Settings Menu
Accessing the settings menu on your Apple Watch is a straightforward process that allows you to customize and personalize your device. Whether you want to adjust the brightness, change the watch face, or manage notifications, the settings menu is where you’ll find all the options. Here’s how you can access it:
1. Wake up your Apple Watch by tapping the screen or raising your wrist.
2. From the watch face, swipe down from the top to access the Control Center.
3. Tap on the Settings icon, which looks like a gear. This will take you to the settings menu.
Alternatively, you can also access the settings menu by pressing the Digital Crown (the wheel on the side of the watch) to go to the app grid, and then tapping on the Settings app.
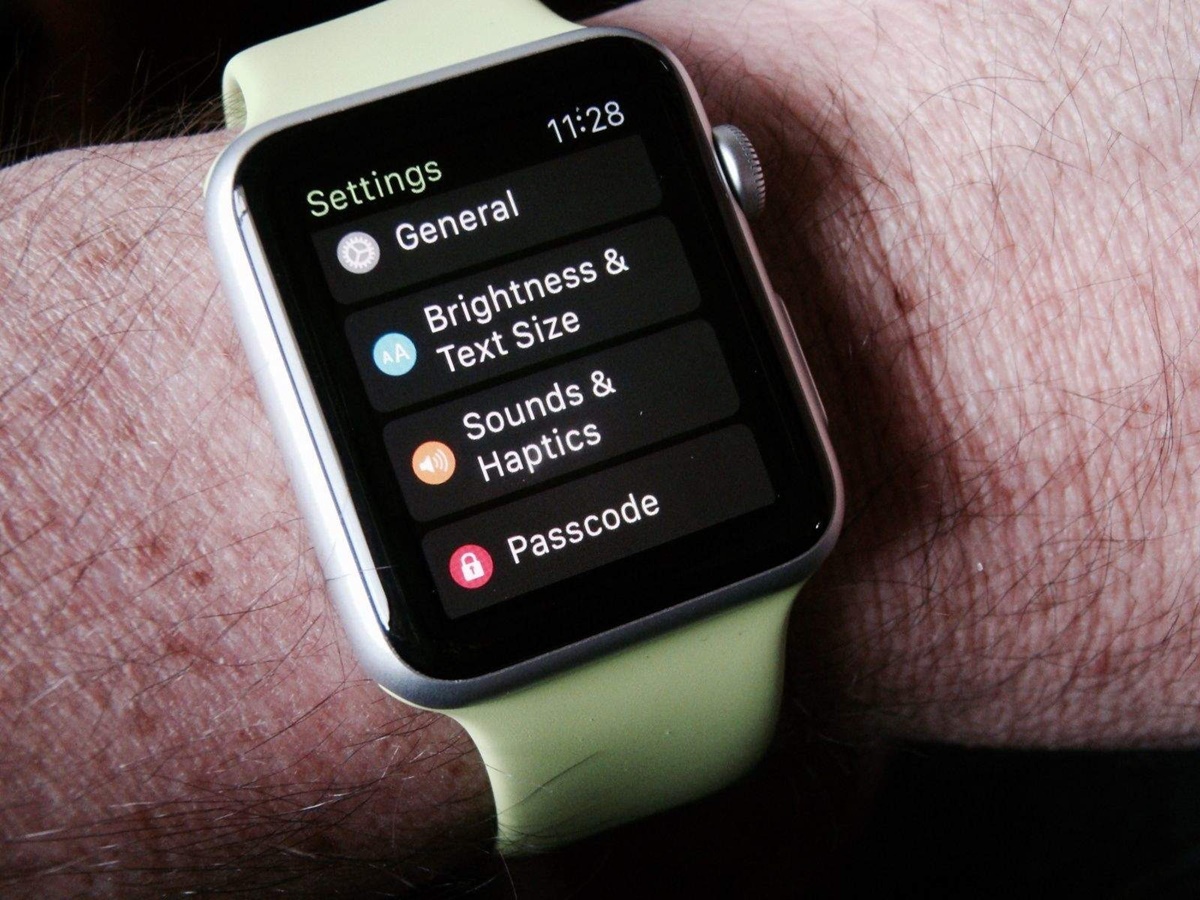
Once you’re in the settings menu, you’ll see a list of options that you can explore and customize. Simply tap on a setting to access its sub-menu and make the desired changes.
It’s important to familiarize yourself with the different sections of the settings menu, as they provide access to various features and functionalities of your Apple Watch. From here, you can personalize your watch to suit your preferences and make it truly your own.
Now that you know how to access the settings menu, let’s explore some of the key customization options available to you.
Customizing Watch Faces
The ability to customize watch faces on your Apple Watch allows you to personalize the look and feel of your device. With a wide range of watch face options available, you can choose from different designs, complications, and colors. Here’s how you can customize your watch face:
1. From the settings menu, tap on “Face Gallery” to explore the available watch face options.
2. Scroll through the gallery and tap on a watch face that catches your eye. You can choose from a variety of styles such as Modular, Infograph, Utility, and more.
3. Once you’ve selected a watch face, you can further customize it by tapping on “Customize” or swiping right. This will give you access to a range of customization options.
4. To add complications to your watch face, swipe right or left to select the area where you want to add a complication. Complications are small widgets that provide quick access to information, such as weather, activity, or calendar events. Tap on the area and select the complication you want to add.
5. You can also customize the color scheme of your watch face. Some watch faces offer multiple color options, allowing you to choose a palette that matches your style. Swipe left or right to browse the available color options and tap to select your preferred one.
6. To further personalize your watch face, you can adjust the position, size, and style of complications. Tap on a complication that you’ve added, and use the Digital Crown or touch gestures to make the desired adjustments.
7. Once you’re satisfied with your customizations, tap on “Set as Current Watch Face” to apply your changes.
With the ability to customize watch faces, you can create a unique and personalized look for your Apple Watch. Whether you prefer a minimalist style, a vibrant and colorful design, or a face that showcases your favorite complications, the customization options are endless.
Take some time to explore the different watch faces and experiment with different complications and colors to find the combination that best suits your preferences and needs.
Adjusting Brightness and Text Size
Being able to adjust the brightness and text size on your Apple Watch is essential for a comfortable and personalized viewing experience. Whether you want to increase text size for better readability or adjust the brightness to suit different lighting conditions, here’s how you can make these adjustments:
Adjusting Brightness:
1. From the settings menu, tap on “Display & Brightness”.
2. In the “Display & Brightness” menu, you’ll find the “Brightness” option. Tap on it to access the brightness settings.
3. To manually adjust the brightness, use the Digital Crown or swipe up and down on the slider. You can make the display brighter for better visibility in well-lit environments or lower the brightness to conserve battery life in dimmer settings.
4. If you prefer automatic brightness adjustments, toggle on the “Auto-Brightness” option. With this feature enabled, your Apple Watch will automatically adjust the brightness based on its surroundings.
By adjusting the brightness settings to your preference, you can ensure optimal visibility and comfort while using your Apple Watch.
Changing Text Size:
1. From the settings menu, tap on “Display & Brightness”.
2. Scroll down to find the “Text Size” option and tap on it.
3. In the text size menu, you’ll see a slider that allows you to adjust the size of the text on your Apple Watch. Swipe left or right to make the text smaller or larger, respectively.
4. As you adjust the text size, a preview will appear at the top to give you an idea of how the text will look on your Apple Watch.
5. Once you’re satisfied with the text size, tap on the back arrow to save the changes.
By customizing the text size, you can make it easier to read notifications, messages, and other text-based information on your Apple Watch.
It’s important to find a brightness level and text size that are comfortable for your eyes and suit your personal preferences. Experiment with different settings to find the optimal combination that enhances your viewing experience on your Apple Watch.
Changing the Watch Face Color
The color of your watch face is an important aspect of personalizing your Apple Watch. With a variety of colors available, you can easily change the watch face color to match your style or mood. Here’s how you can do it:
1. From the settings menu, tap on “Face Gallery”.
2. Scroll through the available watch face options and select the one you want to customize.
3. Once you’ve selected a watch face, swipe left or right to access the color options.
4. Tap on the color you prefer to apply it to the watch face. You may see a variety of color options, ranging from vibrant hues to more subtle tones.
5. Some watch faces may offer additional customization options, such as changing the color of specific elements or complications. Explore the options available for the watch face you’ve chosen and make any desired adjustments.
6. Once you’re satisfied with the changes, tap on “Set as Current Watch Face” to apply the new color to your watch face.
Changing the watch face color is a simple yet effective way to personalize your Apple Watch and make it uniquely yours. Whether you prefer bold and vibrant colors or more subdued and elegant tones, you can easily find a color that suits your style and preferences.
Keep in mind that some color options may be limited to specific watch face styles, so take the time to explore different watch faces to find the color options that are available for each one.
By changing the watch face color, you can give your Apple Watch a fresh and customized look that reflects your personal sense of style.
Sound and Haptic Feedback Settings
Customizing the sound and haptic feedback settings on your Apple Watch can enhance your user experience by allowing you to personalize the audio and tactile feedback you receive from the device. Whether you want to adjust the volume of notifications, enable haptic alerts, or customize the sound of alarms, here’s how you can make these settings your own:
Adjusting Sound Settings:
1. From the settings menu, tap on “Sounds & Haptics”.
2. In the “Sounds & Haptics” menu, you’ll find a variety of options to customize the audio settings on your Apple Watch.
3. To adjust the volume of your notifications, use the slider under “Ringer and Alerts”. Slide it to the left to decrease the volume or to the right to increase it.
4. You can also toggle on or off the “Silent Mode” option to mute all sounds from your Apple Watch.
5. To customize the sound of alarms, timers, and alerts, tap on the respective options and select the desired sound from the list.
Enabling Haptic Feedback:
1. Still in the “Sounds & Haptics” menu, you’ll find the “Haptic Strength” option.
2. Tap on “Haptic Strength” to access the haptic feedback settings.
3. Slide the haptic strength slider to the left to decrease the intensity of the haptic feedback or to the right to increase it.
4. You can also toggle on or off the “Prominent Haptic” option. When enabled, this feature provides a stronger haptic feedback for certain alerts and notifications.
Customizing the sound and haptic feedback settings allows you to adapt your Apple Watch to your personal preferences and needs. You can adjust the volume of notifications to ensure they are audible but not disruptive, enable or disable haptic alerts based on your preference for tactile feedback, and even customize the sound of alarms and other alerts to match your style.
Experiment with different sound and haptic feedback settings to find the combination that enhances your overall user experience on the Apple Watch.
Managing Notifications
Managing notifications on your Apple Watch allows you to stay informed and in control of the notifications you receive. Whether you want to customize the types of notifications that appear on your watch, adjust the notification settings for specific apps, or enable or disable notifications altogether, here’s how you can manage your notifications:
1. From the settings menu, tap on “Notifications”.
2. In the “Notifications” menu, you’ll find a list of apps that can send notifications to your Apple Watch.
3. Tap on the app for which you’d like to adjust the notification settings.
4. In the app’s notification settings, you can toggle on or off the “Allow Notifications” option to enable or disable notifications for that app on your Apple Watch.
5. You can also customize the type of notifications you receive from the app by selecting “Notification Privacy”. This allows you to choose whether you want the notification to appear on your watch or if you only want to receive a discreet haptic alert.
6. Additionally, you can use the “Notification Grouping” option to control how notifications from the app are grouped together. You can choose to have them grouped by app, by thread, or not grouped at all.
7. To further customize the behavior of notifications on your Apple Watch, you can tap on “Customize” and adjust settings like sound, haptic alerts, and whether the notification should appear as a banner, in the notification center, or as a red dot on the app icon.
By managing notifications, you can ensure that your Apple Watch keeps you informed without overwhelming you with unnecessary interruptions. You can choose to receive notifications only from the apps that matter most to you and tailor the settings to match your preferences.
Remember to regularly review and update your notification settings to ensure that you are receiving the information you need and minimizing distractions.
With effective management of notifications, your Apple Watch becomes a powerful tool for staying connected and informed, keeping you in control of the information that matters most to you.
Setting up and Customizing Watch Complications
Watch complications are small widgets that provide quick access to information and app shortcuts right on your Apple Watch face. They offer a convenient and customizable way to personalize your watch and enhance its functionality. Here’s how you can set up and customize watch complications:
1. From the settings menu, tap on “Face Gallery” to choose a watch face that supports complications.
2. Select a watch face that you like and tap on “Customize” to enter the customization mode.
3. Swipe left or right on the watch face or turn the Digital Crown to highlight the area where you want to add a complication.
4. Tap on the highlighted area to access the list of available complications. You’ll see a variety of complications, ranging from weather and calendar to fitness and music.
5. Scroll through the complications and tap on the one you want to add. It will instantly be added to the chosen area on your watch face.
6. To customize a complication, tap and hold on it until the customization screen pops up. From there, you can choose options such as the specific data or app to display, adjust the color, or choose a different style.
7. You can also rearrange or remove complications by tapping and holding on them in the customization screen. Drag them to a new location or swipe up to remove them from the watch face.
8. Once you’re satisfied with the arrangement and customization of complications, tap on the done button to save your changes.
By setting up and customizing watch complications, you can have at-a-glance access to the information and shortcuts you find most useful. Whether it’s checking the weather, monitoring your fitness goals, or quickly accessing your favorite apps, complications allow you to tailor your watch face to best suit your needs and preferences.
It’s worth noting that not all watch faces support all types of complications, so be sure to explore different watch faces to find the ones that provide the complications you desire. Experiment with different combinations to create a watch face that reflects your unique style and provides the most relevant and useful information at a glance.
Customizing watch complications is a powerful way to make your Apple Watch work for you, giving you easy access to important information and app shortcuts right from your wrist.
Adjusting Wi-Fi and Cellular Settings
Being able to adjust your Apple Watch’s Wi-Fi and cellular settings is important for staying connected and ensuring the best networking performance. Whether you want to connect to a Wi-Fi network, manage cellular data usage, or control the behavior of your Apple Watch’s connectivity, here’s how you can adjust these settings:
Connecting to Wi-Fi:
1. From the settings menu, tap on “Wi-Fi”.
2. In the Wi-Fi settings, you’ll see a list of available Wi-Fi networks. Tap on the network you want to connect to.
3. If the network is password-protected, enter the password using the on-screen keyboard.
4. Once connected, your Apple Watch will remember the network and automatically connect when it’s within range.
Managing Cellular Data:
1. From the settings menu, tap on “Cellular”.
2. In the Cellular settings, you can toggle the “Cellular” switch on or off to enable or disable cellular data on your Apple Watch.
3. If you have a cellular data plan, you can also manage the behavior of different apps and services under the “Cellular Data” section. Toggle the switches to allow or disallow individual apps from using cellular data.
4. To monitor your cellular data usage, scroll down to the “Cellular Data Usage” section. Here, you can see the amount of data used by various apps and services.
Controlling Connectivity:
1. From the settings menu, tap on “Airplane Mode”.
2. In the Airplane Mode settings, you can toggle the switch on or off to enable or disable Airplane Mode on your Apple Watch. When Airplane Mode is enabled, Wi-Fi and cellular connections will be disabled.
3. Additionally, under the Wi-Fi and Cellular settings, you can enable/disable the “Automatically” switch to allow your Apple Watch to automatically connect to known Wi-Fi networks or automatically switch to the best available cellular network when your selected network is not available.
Adjusting Wi-Fi and cellular settings on your Apple Watch gives you the flexibility to stay connected the way you want. Whether you prefer the convenience of Wi-Fi or the freedom of cellular connectivity, these settings allow you to tailor your watch’s networking behavior to match your needs and preferences.
Take the time to explore and adjust these settings to ensure that your Apple Watch is connected to the networks you desire and that it’s making the most efficient use of your cellular data plan.
By managing Wi-Fi and cellular settings, you can optimize your Apple Watch’s connectivity and ensure a seamless and reliable networking experience.
Managing Do Not Disturb Mode
Do Not Disturb mode on your Apple Watch allows you to minimize distractions and interruptions during specific times or activities. It’s a useful feature that ensures you can focus, relax, or sleep without being disturbed by incoming notifications or calls. Here’s how you can manage Do Not Disturb mode on your Apple Watch:
1. From the settings menu, tap on “Do Not Disturb”.
2. In the Do Not Disturb settings, you’ll find various options to customize the behavior of this mode.
3. Toggle the “Do Not Disturb” switch on or off to activate or deactivate this mode. When it is enabled, you’ll see a crescent moon icon in the upper-left corner of your watch face.
4. By default, Do Not Disturb mode is set to “On”. You can either configure a specific schedule for when you want this mode to be automatically activated, or enable it manually whenever you need it.
5. If you choose to set a schedule, tap on “Scheduled”, and then set a start and end time for when you want Do Not Disturb mode to automatically turn on and off each day.
6. You can also choose to allow certain notifications to break through the Do Not Disturb mode by selecting “Allow Calls From” and “Repeated Calls”. This ensures that important calls can still reach you if needed.
7. Additionally, in the Do Not Disturb settings, you can toggle on or off options like “Silent Mode”, “Mirror iPhone”, and “Workout Do Not Disturb”. These options allow you to further tailor the behavior of Do Not Disturb mode based on your preferences and needs.
By managing the Do Not Disturb mode settings on your Apple Watch, you have control over when you want to minimize distractions and interruptions. Whether you’re in a meeting, going to bed, or simply need some focused time, activating Do Not Disturb mode can ensure you’re not constantly bothered by notifications.
Remember to review and adjust these settings periodically to ensure they align with your schedule and preferences. You can activate Do Not Disturb mode manually through the Control Center or configure it to activate automatically on a schedule that works best for you.
Managing Do Not Disturb mode allows you to strike a balance between staying connected and having uninterrupted moments of peace and focus on your Apple Watch.
Personalizing the App Layout
Personalizing the app layout on your Apple Watch allows you to organize and access your favorite apps more efficiently. With the ability to customize the app layout, you can make sure that the apps you use most frequently are easily accessible and arranged according to your preferences. Here’s how you can personalize the app layout:
1. From the settings menu, tap on “App View”.
2. In the App View settings, you’ll find different options for organizing and customizing the app layout on your Apple Watch.
3. Tap on “List View” to switch to a vertically scrolling list of apps, or tap on “Grid View” to revert to the default grid-style layout.
4. To rearrange the app icons, tap and hold on an app icon until it starts to wiggle. Then, drag it to the desired position. You can move apps around within the same page or even drag them to different pages.
5. If you have multiple app pages, swipe left or right to access them, and repeat the drag and drop process to rearrange apps on each page.
6. To add new apps to your watch, simply open the Apple Watch app on your iPhone, go to the “My Watch” tab, and under the “Installed on Apple Watch” section, tap on “Add” next to the app you want to install.
7. To remove apps from your watch, tap and hold on an app icon until it starts to wiggle, then tap on the ‘X’ that appears on the top left corner of the app icon.
By personalizing the app layout, you can create a customized interface that prioritizes the apps you use the most and eliminates clutter. This allows for quick and easy access to your favorite apps, enhancing your overall experience with the Apple Watch.
Remember to review and adjust your app layout periodically to ensure it aligns with your changing needs and preferences. As you discover new apps or shift your focus to different activities, you can easily rearrange the layout to accommodate those changes.
Personalizing the app layout allows you to optimize the use of your Apple Watch, putting the apps you need right at your fingertips and making your watch experience more personalized and streamlined.
Changing Accessibility Settings
Changing accessibility settings on your Apple Watch allows you to customize your device to meet your specific needs and preferences. Accessibility features are designed to enhance the usability and inclusivity of the Apple Watch, ensuring that everyone can fully utilize its capabilities. Here’s how you can change accessibility settings on your Apple Watch:
1. From the settings menu, tap on “Accessibility”.
2. In the Accessibility settings, you’ll find a range of options to adjust various aspects of the user interface and interaction on your Apple Watch.
3. Tap on an accessibility feature that you want to enable or configure. Some notable accessibility features include:
-
VoiceOver: Enables spoken feedback for everything on your Apple Watch screen, making it accessible for visually impaired users.
-
Zoom: Allows you to magnify the content on your Apple Watch display by double-tapping the screen with two fingers.
-
Reduce Motion: Minimizes the motion effects on the watch face and apps, which can be helpful for individuals who experience motion sickness or visual discomfort.
-
Haptic Crown Prominence: Enhances the haptic feedback when using the Digital Crown, making it easier to perceive and navigate through content.
4. For each accessibility feature, you can toggle the switch on or off to enable or disable it. Some features may also have additional settings that you can configure for a more personalized experience.
5. Additionally, under the Accessibility settings, you can adjust settings like “Display Accommodations” to modify color filters, text size, and other visual settings, as well as “Audio Accommodations” to customize sound and audio playback.
By changing accessibility settings, you can ensure that your Apple Watch caters to your specific needs, allowing for a more comfortable and user-friendly experience. Whether you require assistance with vision, hearing, or physical dexterity, the accessibility features can help you interact with your Apple Watch in a way that suits you best.
Take the time to explore and experiment with the different accessibility settings to find the ones that work best for you. Adjusting these settings can have a significant impact on your ability to use and enjoy your Apple Watch to its fullest potential.
Changing accessibility settings demonstrates Apple’s commitment to inclusivity and ensuring that the Apple Watch is accessible to all users, regardless of their individual needs and abilities.
Resetting Your Apple Watch
Resetting your Apple Watch can be necessary in various situations, such as preparing it for sale, troubleshooting issues, or starting fresh with a clean slate. When you reset your Apple Watch, it erases all content and settings, returning it to its original factory condition. Here’s how you can reset your Apple Watch:
1. From the settings menu, tap on “General”.
2. Scroll down and tap on “Reset”.
3. In the Reset menu, you’ll find different options to reset specific aspects of your Apple Watch.
4. Tap on “Erase All Content and Settings”. This will delete all media, data, and settings from your Apple Watch and restore it to its original factory state.
5. If you have a cellular-enabled Apple Watch, you’ll have the option to choose whether you want to keep or remove the cellular plan associated with it.
6. Enter your passcode if prompted, and then confirm the reset by tapping on “Erase All”.
7. Your Apple Watch will now go through the reset process. This may take a few minutes to complete.
Once the reset is finished, your Apple Watch will restart as if it were brand new. You’ll need to go through the setup process again, including pairing it with your iPhone and configuring your preferences and settings.
It’s important to note that resetting your Apple Watch is a permanent action and cannot be undone. Therefore, make sure to back up any important data or settings before performing a reset, as you won’t be able to recover them after the reset is complete.
Resetting your Apple Watch can be a valuable troubleshooting step if you’re experiencing persistent issues or want to start fresh. It can also be necessary if you’re preparing your Apple Watch for a new owner or need to return it for service or repair.
Remember to only reset your Apple Watch when necessary and follow the steps carefully to ensure a smooth reset process.
Resetting your Apple Watch is a powerful tool that helps you restore it to its factory settings, resolving issues and giving you a clean slate to start anew.