
Sign up for a Gmail account
Gmail is a popular and reliable email service offered by Google. If you don’t already have a Gmail account, you’ll need to create one to migrate your Yahoo Mail and contacts. Follow these steps to sign up:
- Visit the Gmail website at www.gmail.com.
- Click on the “Create account” button to start the sign-up process.
- Fill in the required information, including your preferred email address and password. Choose a unique and secure password to protect your account.
- Enter your personal information, such as your name and phone number. This information will be used to verify your account and enhance security.
- Agree to the terms of service and privacy policy by checking the respective boxes.
- Complete the sign-up process by clicking on the “Next” button and following any additional prompts.
Once you have created your Gmail account, you will have access to a wide range of Google services, including Gmail, Google Drive, Google Docs, and more. Your new Gmail account will be the destination for your migrated Yahoo Mail and contacts.
It’s important to note that you can also create a Google Account using an existing non-Gmail email address. Simply visit the Gmail website and click on the “Sign in” link. From there, select “Create account,” and follow the steps to create a Google Account using your preferred email address.
Now that you have your Gmail account set up, you’re ready to start the migration process and transfer your Yahoo Mail and contacts to Gmail.
Enable the POP access in your Yahoo Mail settings
Before you can start migrating your Yahoo Mail to Gmail, you need to enable POP access in your Yahoo Mail settings. POP (Post Office Protocol) allows you to retrieve your Yahoo Mail messages using third-party email clients or services like Gmail. Follow these steps to enable POP access:
- Sign in to your Yahoo Mail account using your existing login credentials.
- Click on the “Settings” icon, which resembles a gear, located at the top-right corner of the Yahoo Mail interface.
- In the dropdown menu, click on “More Settings” to access the advanced settings.
- In the left-hand sidebar, click on “Pop & Forwarding” to open the POP and forwarding settings.
- Under the “Access your Yahoo Mail elsewhere” section, locate the “POP” option.
- Toggle the switch to enable POP access and choose the desired option for “When messages are accessed with POP.”
- Click on “Save” to apply the changes and enable POP access for your Yahoo Mail account.
By enabling POP access, you now have the ability to fetch your Yahoo Mail messages using a third-party email client or service like Gmail. This is a crucial step to ensure a smooth migration process from Yahoo Mail to Gmail.
Keep in mind that enabling POP access might have certain implications for your Yahoo Mail account, such as the messages being marked as read and moved to a “POP” folder. Please review the POP settings carefully and make sure they align with your preferences before proceeding with the migration.
Now that you have enabled POP access in your Yahoo Mail settings, you can move on to the next step of importing your contacts from Yahoo Mail to Gmail.
Import your contacts from Yahoo Mail to Gmail
One of the essential aspects of transitioning from Yahoo Mail to Gmail is ensuring that your contacts are seamlessly transferred. Follow these steps to import your contacts from Yahoo Mail to Gmail:
- Sign in to your Gmail account using your login credentials.
- Click on the “App” button, represented by 9 small squares, located at the top-right corner of the Gmail interface. Then, click on the “Contacts” app to open your Gmail contacts.
- Next, click on the “More” button with three vertical dots, located in the left-hand sidebar.
- In the dropdown menu, select “Import” to open the import contacts dialog box.
- In the import contacts dialog box, click on the “Select File” button and navigate to the location where you saved the exported contacts file from Yahoo Mail.
- Select the file and click on the “Open” button to import the contacts into Gmail.
- You might have to map the fields in the imported contacts file to ensure that the corresponding information is correctly placed in Gmail. Follow the prompts and instructions provided by the import wizard to complete this process.
- Once the contacts are imported, Gmail will display a confirmation message. You can now access your Yahoo Mail contacts in Gmail.
Importing your contacts ensures that you have all the necessary information readily available when you start using Gmail. This includes names, email addresses, phone numbers, and other relevant details associated with your contacts.
It’s important to note that after importing your contacts into Gmail, any changes or updates you make to the contact information will only be reflected in your Gmail account. The imported contacts from Yahoo Mail will remain separate and unaffected.
With your contacts successfully imported to Gmail, you can now move on to the next steps, which involve retrieving your Yahoo Mail messages and setting up forwarding to Gmail.
Use Gmail Mail Fetcher to retrieve your Yahoo Mail
Gmail provides a convenient feature called Mail Fetcher that allows you to retrieve your Yahoo Mail messages directly into your Gmail account. This eliminates the need to switch between multiple email platforms. Follow these steps to set up Mail Fetcher:
- Sign in to your Gmail account using your login credentials.
- Click on the “Settings” icon, represented by a gear, located at the top-right corner of the Gmail interface.
- In the dropdown menu, select “See all settings” to access the Gmail settings page.
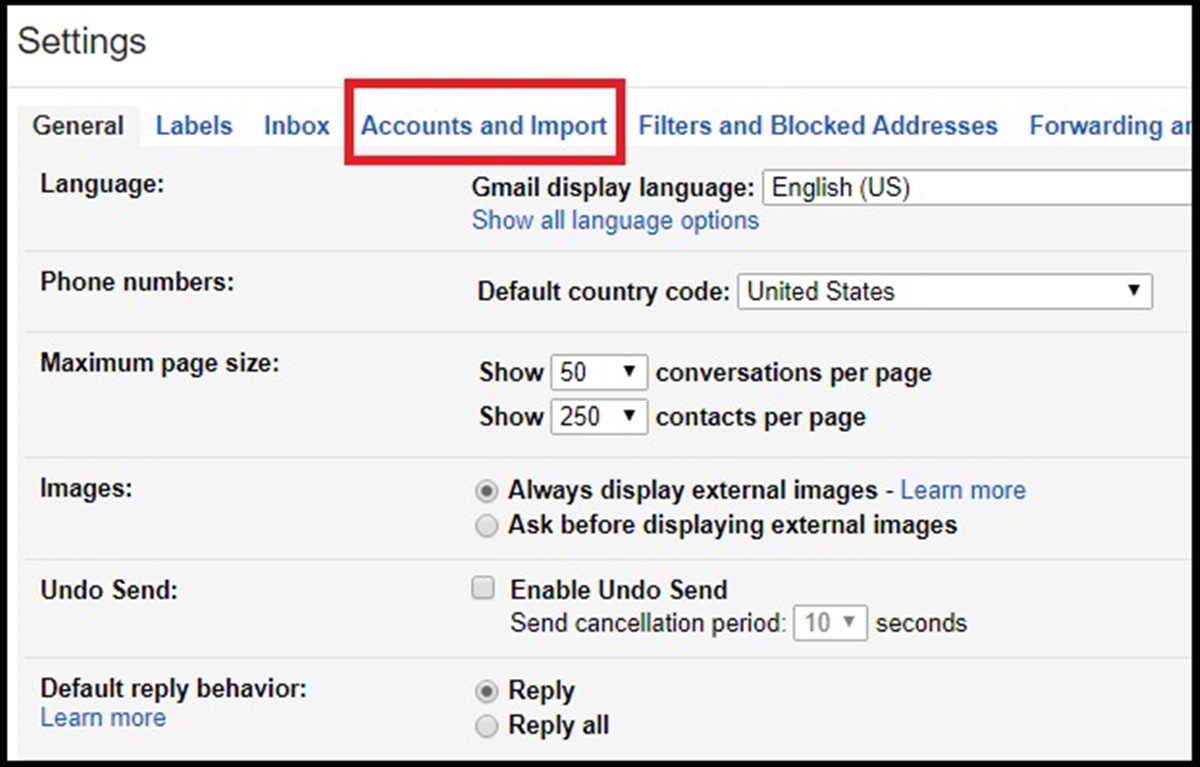
- Navigate to the “Accounts and Import” tab, which is the fourth option from the left.
- Under the “Check mail from other accounts” section, click on the “Add a mail account” button.
- In the pop-up window, enter your Yahoo Mail email address and click on the “Next” button.
- Choose the option “Import emails from my other account (POP3)” and click on the “Next” button.
- In the “Username” field, enter your Yahoo Mail email address. Then, enter your Yahoo Mail password in the “Password” field.
- Configure the remaining settings based on your preferences. You can choose whether to leave a copy of retrieved messages on the server, label incoming messages, and more.
- Click on the “Add Account” button to complete the Mail Fetcher setup.
Gmail will now start retrieving your Yahoo Mail messages and importing them into your Gmail inbox. Depending on the amount of data to be fetched, this process may take some time. You can track the progress on the “Accounts and Import” tab in the Gmail settings page.
Mail Fetcher retrieves your Yahoo Mail messages using the POP3 protocol. This means that any changes made to the messages in Gmail, such as marking them as read or deleting them, will not be reflected in your Yahoo Mail account. It is recommended to review and manage your emails primarily in Gmail after setting up Mail Fetcher.
With Mail Fetcher successfully set up, you can now access your Yahoo Mail messages directly in your Gmail account, making it easier to manage all your emails in one central location.
Set up forwarding from Yahoo Mail to Gmail
To ensure that you don’t miss any incoming emails while transitioning from Yahoo Mail to Gmail, it’s important to set up forwarding so that all your Yahoo Mail messages are automatically forwarded to your Gmail account. Here’s how you can do it:
- Sign in to your Yahoo Mail account using your login credentials.
- Click on the “Settings” icon, represented by a gear, located at the top-right corner of the Yahoo Mail interface.
- In the dropdown menu, select “More Settings” to access the advanced settings.
- In the left-hand sidebar, click on “Mailboxes.”
- Under the “Sending Messages” section, click on “Forwarding.”
- Toggle the switch next to “Disable forwarding” to enable forwarding.
- Enter your Gmail email address in the provided field for “Forward your email to.”
- Choose the desired option for “Store and forward,” which allows you to keep a copy of forwarded messages in your Yahoo Mail account if desired.
- Click on the “Save” button to save the forwarding settings.
- Yahoo Mail will send a verification email to your Gmail address to confirm the forwarding setup. Follow the instructions provided in the email to complete the verification process.
Once forwarding is set up and verified, any new emails received in your Yahoo Mail account will be automatically forwarded to your Gmail account. You can then access and manage all your emails in one central location.
It’s important to note that while forwarding forwards new incoming emails, it does not forward existing emails in your Yahoo Mail account. To migrate your existing emails to Gmail, you can use specialized migration tools or manually forward individual emails as needed.
With forwarding established, you can move on to the next step of setting up your Gmail account to send emails from your Yahoo Mail address.
Set up your Gmail account to send from your Yahoo Mail address
If you want to continue sending emails from your Yahoo Mail address using your Gmail account, you can easily set up Gmail to send emails as if they are coming from your Yahoo Mail address. This allows you to maintain consistency and ensure that recipients recognize your emails. Follow these steps to set it up:
- Sign in to your Gmail account using your login credentials.
- Click on the “Settings” icon, represented by a gear, located at the top-right corner of the Gmail interface.
- In the dropdown menu, select “See all settings” to access the Gmail settings page.
- Navigate to the “Accounts and Import” tab, which is the fourth option from the left.
- Under the “Send mail as” section, click on the “Add another email address” link.
- A pop-up window will appear, prompting you to enter the display name and Yahoo Mail email address that you want to send emails from. Fill in the required information accordingly.
- Make sure the “Treat as an alias” option is checked. This ensures that replies to messages sent from your Gmail account will be received in your Gmail inbox.
- Click on the “Next Step” button to continue.
- Configure the SMTP server settings for your Yahoo Mail account. Enter the Yahoo Mail SMTP server details, which are “smtp.mail.yahoo.com” for the SMTP server and “465” for the port number.
- Enter your Yahoo Mail email address in the “Username” field and your Yahoo Mail password in the “Password” field for authentication.
- Check the box next to “Secured connection using SSL” to ensure a secure connection when sending emails.
- Click on the “Add Account” button to complete the setup process.
- Once added, Gmail will send a verification email to your Yahoo Mail address. Follow the instructions in the email to verify that you own the Yahoo Mail address.
After completing these steps, you can select your Yahoo Mail address as the “From” address when composing a new email in Gmail. This allows you to send emails as if they were being sent directly from your Yahoo Mail account, even though you are using Gmail as your email client.
Keep in mind that when sending emails from your Yahoo Mail address via Gmail, the sent emails will be saved in your Gmail account’s “Sent Mail” folder, rather than in your Yahoo Mail account.
With your Gmail account now set up to send emails from your Yahoo Mail address, you can proceed to the next step of importing your Yahoo Mail folders to Gmail.
Import your Yahoo Mail folders to Gmail
When migrating from Yahoo Mail to Gmail, you may have organized your emails into various folders and want to preserve that organizational structure. Luckily, Gmail allows you to import your Yahoo Mail folders and their contents, making it easier to navigate and manage your emails. Follow these steps to import your Yahoo Mail folders to Gmail:
- Sign in to your Gmail account using your login credentials.
- Click on the “Settings” icon, represented by a gear, located at the top-right corner of the Gmail interface.
- In the dropdown menu, select “See all settings” to access the Gmail settings page.
- Navigate to the “Accounts and Import” tab, which is the fourth option from the left.
- Under the “Check mail from other accounts” section, click on “Add a mail account” if you haven’t already added your Yahoo Mail account to Gmail.
- In the pop-up window, provide your Yahoo Mail email address and follow the prompts to authenticate and connect your Yahoo Mail account to Gmail. If you have already added your Yahoo Mail account to Gmail, skip to the next step.
- Once your Yahoo Mail account is added to Gmail, scroll down to the “Grant access to your account” section and ensure that access is enabled for your Yahoo Mail account.
- Return to the Gmail interface and click on the “Folders and Labels” tab, located at the top of the Gmail settings page.
- Under the “Import mail” section, click on the “Import folders” button.
- Gmail will scan your Yahoo Mail account for any available folders. Tick the checkboxes next to the folders you want to import, or select “Import all” to import all folders.
- Click on the “Add Folder” button to initiate the import process. Gmail will start importing the selected Yahoo Mail folders and their contents into your Gmail account.
- The import process may take some time, depending on the size and number of folders being imported. You can track the progress in the Gmail interface.
- Once the import is complete, you will find the imported Yahoo Mail folders listed in the left-hand sidebar of your Gmail account.
By importing your Yahoo Mail folders to Gmail, you can maintain your email organization and easily access your emails within the corresponding folders. This streamlines the transition process and ensures a seamless experience while using Gmail.
It’s important to note that any new emails received in your Yahoo Mail account after the import may not be automatically synced with Gmail. To ensure you don’t miss any new emails, set up forwarding and use Mail Fetcher to retrieve your Yahoo Mail messages directly into your Gmail account.
With your Yahoo Mail folders successfully imported into Gmail, you can now proceed to the next steps of updating your email signatures and filters in Gmail.
Update your email signatures and filters in Gmail
As you migrate from Yahoo Mail to Gmail, it’s essential to update your email signatures and filters in Gmail to maintain consistent branding and efficient email management. Here are the steps to update your email signatures and filters:
- Sign in to your Gmail account using your login credentials.
- Click on the “Settings” icon, represented by a gear, located at the top-right corner of the Gmail interface.
- In the dropdown menu, select “See all settings” to access the Gmail settings page.
- Navigate to the “General” tab, which is the first option from the left.
- Scroll down to the “Signature” section, where you can create or modify your email signature.
- Update your signature as desired, incorporating your name, contact information, and any other details you want to include.
- You can format your signature using various styling options, such as bold or italic text, links, and images.
- Save your changes by scrolling down to the bottom of the settings page and clicking on the “Save Changes” button.
- Next, navigate to the “Filters and Blocked Addresses” tab, located at the fourth position from the left.
- Review any existing filters that you have set up in Yahoo Mail and recreate them in Gmail if needed.
- Click on the “Create a new filter” button to start setting up a new filter.
- In the filter creation dialog box, define the criteria for the filter based on specific senders, subjects, keywords, or other attributes.
- Select the action you want Gmail to perform when an email matches the filter criteria, such as applying a label, marking as important, archiving, etc.
- Configure additional options, such as applying the filter to existing emails, creating a forwarding rule, or excluding certain emails.
- Click on the “Create filter” button to create the filter and save your changes.
- Repeat the above steps to create any additional filters you need.
Updating your email signatures and filters in Gmail allows you to customize how your emails appear and how they are organized. It ensures that your outgoing emails are personalized and professional, while filters help manage incoming emails more efficiently.
Remember to test and review your email signatures to ensure they display correctly in the recipients’ email clients. Regularly check and adjust your filters as needed to maintain an organized inbox and prioritize important emails.
With your email signatures and filters updated, you’re well on your way to fully integrating your Yahoo Mail account with Gmail.
Notify your contacts about your email migration
When transitioning from Yahoo Mail to Gmail, it’s crucial to inform your contacts about your email migration to ensure a smooth transition and minimize any disruptions in communication. Follow these steps to notify your contacts about your email migration:
- Draft a concise and informative email explaining that you are migrating from Yahoo Mail to Gmail.
- In the email, highlight the benefits of the transition, such as improved features, better spam filtering, or enhanced security.
- Explain the reason behind the migration, whether it’s to streamline your email management or take advantage of Google’s suite of services.
- Provide the timeline for the migration, including the date when you will stop using your Yahoo Mail account and exclusively use Gmail.
- Encourage your contacts to update your email address in their contacts list or address book to ensure they can reach you without any issues.
- Offer assistance or support if your contacts have any questions or encounter difficulties during the transition.
- Include any relevant instructions, such as requesting your contacts to add your new Gmail email address as a contact or mark it as “not spam” in case the email ends up in their spam folder.
- Consider sending a follow-up reminder closer to the migration date as a gentle nudge for contacts who may have missed the initial notification.
- Personalize the email by addressing each contact by name, if possible, to make it more personalized and increase the likelihood of the message being read.
- Send the notification email to your important contacts, including friends, family, colleagues, clients, and anyone else who regularly communicates with you via email.
- Feel free to reach out to contacts through other communication channels, such as phone calls, social media, or instant messaging, to ensure they are aware of the migration and have updated your email address in their contacts.
By notifying your contacts about your email migration, you minimize the chances of missing important emails and maintain effective communication during the transition. It also demonstrates your professionalism and commitment to keeping your contacts informed.
Remember to keep your Yahoo Mail account active during the migration period to ensure that you don’t miss any incoming emails from contacts who may have not updated your email address in their contacts list.
With your contacts notified about your email migration, you can proceed with confidence knowing that your transition to Gmail will be as seamless as possible.
Stop receiving emails in your Yahoo Mail account
As you complete the migration from Yahoo Mail to Gmail, it’s important to ensure that you stop receiving new emails in your Yahoo Mail account to prevent any missed messages. Follow these steps to stop receiving emails in your Yahoo Mail account:
- Sign in to your Yahoo Mail account using your login credentials.
- Click on the “Settings” icon, represented by a gear, located at the top-right corner of the Yahoo Mail interface.
- In the dropdown menu, select “More Settings” to access the advanced settings.
- In the left-hand sidebar, click on “Mailboxes.”
- Under the “Receiving Messages” section, select “Send and receive messages with other email addresses.”
- Click on “Add mailbox” to add your new Gmail email address.
- Follow the prompts to enter your Gmail address and any additional settings required.
- Check the option to forward incoming emails to your Gmail address, if desired.
- Click on the “Save” button to save the changes.
By adding your Gmail email address as a mailbox in your Yahoo Mail account, you can ensure that incoming emails are automatically forwarded to your Gmail account. This allows you to conveniently access all your emails in one place and avoid the need to regularly check your Yahoo Mail account.
Keep in mind that after setting up forwarding, your Yahoo Mail account will primarily serve as an archive for your old emails. It is recommended to utilize Gmail as your primary email platform moving forward.
Remember to periodically check your Yahoo Mail account for any missed emails during the migration process to ensure you haven’t overlooked any important messages. Once you are confident that all incoming emails are being successfully forwarded to your Gmail account, you can gradually phase out your use of Yahoo Mail and solely rely on Gmail for your email needs.
With the setup complete to stop receiving emails in your Yahoo Mail account, you can fully embrace Gmail as your new email platform.
Periodically check your Yahoo Mail account for any missed emails
Although you have migrated from Yahoo Mail to Gmail, it is still important to periodically check your Yahoo Mail account for any missed emails during the transition period. Follow these steps to ensure you don’t overlook any important messages:
- Sign in to your Yahoo Mail account using your login credentials.
- Set a reminder or schedule a specific time to check your Yahoo Mail account at regular intervals, such as once a week or once a month.
- Scan through your Yahoo Mail inbox and other relevant folders to identify any new or missed emails.
- If you find any important emails, mark them as read or flag them for follow-up.
- Respond to any pending emails and take necessary actions, such as replying, forwarding, or saving relevant attachments.
- Consider notifying the senders that you have transitioned to a new email platform and provide them with your new Gmail email address for future correspondence.
- Take note of any recurring emails or subscriptions that still come to your Yahoo Mail account and make the necessary updates to ensure they are directed to your Gmail account instead.
- Continue this periodic checking process until you are confident that all important emails have been addressed and redirected to your Gmail account.
Periodically checking your Yahoo Mail account during the transition period helps to mitigate the risk of missing any crucial emails. It allows you to stay on top of any lingering messages that may have been overlooked during the migration process.
As you gradually transition to using Gmail as your primary email platform, it becomes increasingly important to update your contacts, online subscriptions, and accounts with your new Gmail email address. This will help ensure that all future communication is directed to your preferred email account.
By regularly monitoring your Yahoo Mail account and taking necessary actions, you can successfully transition to Gmail while minimizing any disruptions in communication or missed opportunities. Remember, eventually, you will rely solely on your Gmail account for all your email needs.