
Ingredients
Making a lingering potion in Minecraft requires a few key ingredients. To create this unique potion, you will need:
- Glass Bottles: These are essential for storing the final potion.
- Brewing Stand: A brewing stand is necessary to combine the ingredients and create the potion.
- Nether Wart: Nether warts are grown in the Nether dimension and serve as the primary ingredient in all potions.
- Base Potion: You will need a base potion to start the brewing process. This can be a mundane potion or any other pre-existing potion.
- Additional Ingredients: Depending on the desired effect of your lingering potion, you will also need specific ingredients such as redstone dust, glowstone dust, or dragon’s breath.
By combining these ingredients in the brewing stand, you can create a lingering potion with various effects such as healing, poison, or invisibility. It’s important to experiment with different combinations to discover the full potential of lingering potions in Minecraft.
Once you have gathered all the necessary ingredients, you’re ready to embark on the exciting brewing process. Gather your tools, prepare the ingredients, and get ready to create powerful and magical potions in the world of Minecraft.
Brewing Stand
A brewing stand is a crucial tool for creating lingering potions in Minecraft. It is used to combine various ingredients and facilitate the brewing process. To make a brewing stand, you will need the following:
- 3 Cobblestones: Cobblestones can easily be obtained by mining stone blocks.
- 1 Blaze Rod: Blaze rods are dropped by Blazes, which can be found in Nether Fortresses.
Once you have gathered these materials, follow these steps to craft a brewing stand:
- Open your crafting table.
- Place the 3 cobblestones in the bottom row of the crafting grid.
- Put the blaze rod in the middle square of the second row.
- Drag the brewing stand to your inventory.
With your brewing stand in hand, find a suitable location to set it up. Place the brewing stand on a solid block, and ensure there is enough space around it for the ingredients.
Remember, the brewing stand is the centerpiece of the brewing process. It is where you will combine the ingredients to create your lingering potions. Familiarize yourself with its various slots and functions to maximize your brewing capabilities.
Now that you have your brewing stand ready, it’s time to gather the remaining ingredients and explore the world of potion-making in Minecraft.
Nether Wart
Nether warts are a vital ingredient in brewing lingering potions in Minecraft. They can only be found and grown in the dangerous Nether dimension. Obtaining Nether warts is essential for advancing your potion-making journey. Here’s how you can obtain and use Nether warts:
To find Nether warts, you need to venture into the Nether dimension. Look for Nether fortress structures, as Nether warts commonly grow within their walls. These fortresses are large structures made of Nether brick, and you can locate them by exploring the Nether carefully.
Once you find Nether warts, harvest them by breaking the Nether wart blocks. Each broken block yields 2-4 Nether wart items. Collect as many as you need for your potion-making endeavors. Be cautious and stay vigilant, as Nether fortresses are also inhabited by dangerous creatures like Blazes and Wither Skeletons.
To cultivate Nether warts, you need Soul Sand. This unique block can be found in the Nether and has a sandy appearance with faces carved on its sides. Create a small farm area by placing Soul Sand in the Overworld or a safe location in your base. Plant the Nether warts on the Soul Sand, and they will grow over time.
Ensure that the Nether warts have sufficient light, either natural or artificial, for them to grow at an optimal rate. As they grow, you can repeatedly harvest them for more ingredients, expanding your potion-making capabilities.
Nether warts are a fundamental resource for creating lingering potions, so always have a steady supply on hand. Combine them with other ingredients like base potions or additional substances to achieve different effects. Experiment and explore the vast possibilities of potion-making in Minecraft using Nether warts.
Base Potion
A base potion serves as the foundation for brewing lingering potions in Minecraft. It acts as a starting point from which you can add additional ingredients to create various effects. Here’s how you can obtain a base potion:
The first step is to create an Awkward Potion. To make an Awkward Potion, you will need a Water Bottle and Nether Wart. Simply place the Water Bottle in the bottom slot of the brewing stand and the Nether Wart in the top slot. Wait for the brewing process to complete, and you will have an Awkward Potion ready.
The Awkward Potion is the base for all other potions in Minecraft. It provides no immediate effects but serves as a blank canvas for you to customize. Now that you have an Awkward Potion, you can modify it to create specific lingering potion effects.
To enhance the effects of the base potion, you can add various ingredients to it. For example, adding Redstone Dust to the base potion will extend the duration of the lingering effect. This can be useful for effects like Strength or Regeneration, allowing you to enjoy their benefits for a longer period of time.
If you want to amplify the potency of the base potion, you can add Glowstone Dust. This will increase the strength of effects such as Healing or Harming, making them more powerful and impactful.
Additionally, Dragon’s Breath can be used to create lingering potions that affect an entire area. By adding Dragon’s Breath to the base potion, you can create lingering versions of effects like Poison, Invisibility, or even Splash Potions.
Experiment with different combinations of ingredients to create lingering potions with unique and beneficial effects. Remember, the base potion is your starting point, and through experimentation and creativity, you can craft powerful and specialized potions in Minecraft.
Adding the Ingredients
After obtaining the base potion, it’s time to add additional ingredients to create specific effects for your lingering potion in Minecraft. Here is how you can add the ingredients:
First, place the base potion in one of the bottom slots of the brewing stand. This will act as the starting point for the brewing process.
Next, depending on the desired effect, add the corresponding ingredient to the top slot of the brewing stand. For example, if you want to create a potion of Healing, add a Glistening Melon Slice to the brewing stand. If you’re looking to brew a potion of Invisibility, add a Fermented Spider Eye.
It’s important to note that certain ingredients may require an additional step. For instance, redstone dust can be added to extend the duration of the effect, but it can only be added after brewing the initial potion with the desired effect. Simply place the brewed potion back into the brewing stand, then add redstone dust to the top slot.
Similarly, glowstone dust can be used to amplify the potency of certain effects. Like redstone dust, it should be added after brewing the initial potion. Once again, place the brewed potion back into the brewing stand, and then add glowstone dust to the top slot.
Dragon’s Breath is unique in that it can be directly added to the brewing stand without the need for a base potion. Adding Dragon’s Breath can create lingering versions of the selected effect, providing a wider range of impact.
With the ingredients added, wait for the brewing process to complete. You will see the resulting lingering potion in one of the bottom slots of the brewing stand. Simply collect it by using empty glass bottles.
Remember, the combination of ingredients determines the effect of the lingering potion. It’s worth experimenting with different ingredient combinations to discover new and powerful effects. Don’t be afraid to be adventurous in your potion-making journey!
Redstone Dust
Redstone dust is a versatile ingredient in Minecraft that can be used to enhance potions, including the creation of lingering potions. When added to a base potion, redstone dust extends the duration of the potion’s effect. Here’s how you can use redstone dust in your brewing process:
To begin, gather redstone dust, which can be obtained by mining redstone ore found deep underground. Once you have acquired redstone dust, proceed with the brewing process by following the steps outlined in the previous sections.
After brewing the desired base potion, place the brewed potion back into the brewing stand. Then, add redstone dust to the top slot of the brewing stand. The redstone dust will interact with the potion, causing its effect to last longer. This is particularly useful for effects like Strength, Regeneration, or any other potion effect that you want to prolong.
As the brewing process continues, the redstone dust will merge with the base potion, extending its effectiveness. Once the process is complete, you can collect the enhanced lingering potion by using empty glass bottles.
It’s important to note that the effect of redstone dust on a potion is not cumulative. Adding additional redstone dust to the same potion will not increase its duration further. However, you can remove the redstone-enhanced potion from the brewing stand and add it back as a base potion, allowing you to apply other ingredients and extend the duration once more.
Experimenting with redstone dust and different ingredient combinations can unlock new possibilities for your lingering potions. It adds a strategic element to potion-making, allowing you to fine-tune the durations of various effects according to your needs and playstyle.
So, don’t forget to gather redstone dust and incorporate it into your brewing process to create powerful and long-lasting lingering potions in Minecraft.
Glowstone Dust
Glowstone dust is a valuable ingredient in Minecraft that can be used to enhance and amplify the effects of certain potions, including lingering potions. When added to a base potion, glowstone dust increases the potency of the potion’s effect. Here’s how you can utilize glowstone dust in your brewing process:
To begin, gather glowstone dust, which can be obtained by mining glowstone ore found in the Nether dimension. Glowstone dust emits light and has a vibrant golden color, making it easy to spot amidst the Nether’s challenging terrain.
Once you have acquired glowstone dust, begin the brewing process by following the steps outlined in the previous sections to obtain the desired base potion.
After brewing the base potion, place it back into the brewing stand. Then, add glowstone dust to the top slot of the brewing stand. The glowstone dust will infuse with the potion, intensifying its effect. This is particularly useful for effects like Healing, Harming, or any other potion effect that you want to enhance.
As the brewing process progresses, the glowstone dust will merge with the base potion, augmenting its strength. Once the brewing process is complete, you can collect the amplified lingering potion by using empty glass bottles.
It’s worth noting that the effect of glowstone dust on a potion is not cumulative. Adding more glowstone dust to the same potion will not further increase its potency. However, you can collect the enhanced potion and use it as a base potion, allowing you to add other ingredients and amplify the effects once again.
Experiment with glowstone dust and different ingredient combinations to discover new and potent effects for your lingering potions. By harnessing the power of glowstone, you can create stronger and more impactful potions that aid you in your Minecraft adventures.
So, be sure to gather glowstone dust and incorporate it into your brewing process to unlock the full potential of your lingering potions in Minecraft.
Dragon’s Breath
Dragon’s Breath is a unique and powerful ingredient in Minecraft that can be used to create lingering potions with area-of-effect effects. Obtained from the Ender Dragon, Dragon’s Breath introduces a new dimension to potion-making. Here’s how you can use Dragon’s Breath:
To acquire Dragon’s Breath, you will need to defeat the Ender Dragon. Once the Ender Dragon is defeated, it will leave behind clouds of Dragon’s Breath. Simply use a glass bottle on these clouds to collect the Dragon’s Breath. Each glass bottle can capture multiple uses of Dragon’s Breath.
Dragon’s Breath can be added directly to the brewing stand without the need for a base potion. When added to the stand’s top slot, it will modify the potion to have an area-of-effect effect when used as a lingering potion.
For example, if you add Dragon’s Breath to a base potion of Harming, it will create a Lingering Potion of Harming that affects a wide radius, damaging any mobs or players within its range. Similarly, effects like Poison, Invisibility, or even Splash Potions can be transformed into area-of-effect lingering potions with the addition of Dragon’s Breath.
When using a Lingering Potion of Dragon’s Breath, throw it like a splash potion, and it will create a lingering cloud with the chosen effect in the area of impact. This allows you to affect multiple targets or create strategic zones of influence.
Dragon’s Breath opens up new possibilities for tactical gameplay and allows for more dynamic and versatile potion usage in Minecraft. Consider the different effects you can create by combining Dragon’s Breath with various base potions and ingredients to further customize your brewing experience.
So, harness the power of Dragon’s Breath and venture into the realm of area-of-effect effects with your lingering potions in Minecraft.
Brewing Time
The brewing time in Minecraft refers to the duration it takes for a potion to complete its brewing process in the brewing stand. Understanding the brewing time is crucial for successfully creating lingering potions. Here’s what you need to know:
When you initially place the ingredients in the brewing stand, the brewing process begins. The brewing stand will display a brewing progress bar, indicating how much time is remaining for the potion to be ready.
The time it takes for a potion to brew depends on several factors, including the type of base potion, the additional ingredients used, and whether or not the ingredient affects brewing time.
By default, a potion takes around 20 seconds to brew. However, this time can be reduced by using Blaze Powder to fuel the brewing stand. Each Blaze Powder reduces the brewing time by 20 seconds, up to a maximum of three Blaze Powders, reducing brewing time to just 2 seconds.
It’s important to note that the brewing time is not affected by the number of brewing stands you have. Even if you have multiple brewing stands, each potion will still take the same amount of time to brew.
During the brewing process, it’s essential to monitor the progress bar to ensure that you don’t miss the ideal moment to collect the brewed potion. Collecting the potion too early will result in an incomplete potion, while leaving it too long may result in the potion becoming a splash potion instead.
Timing and patience are key when brewing potions in Minecraft. By understanding the brewing time and carefully monitoring the progress, you can create potent and effective lingering potions for your Minecraft adventures.
So, be mindful of the brewing time and be ready to collect your carefully crafted lingering potions at the perfect moment.
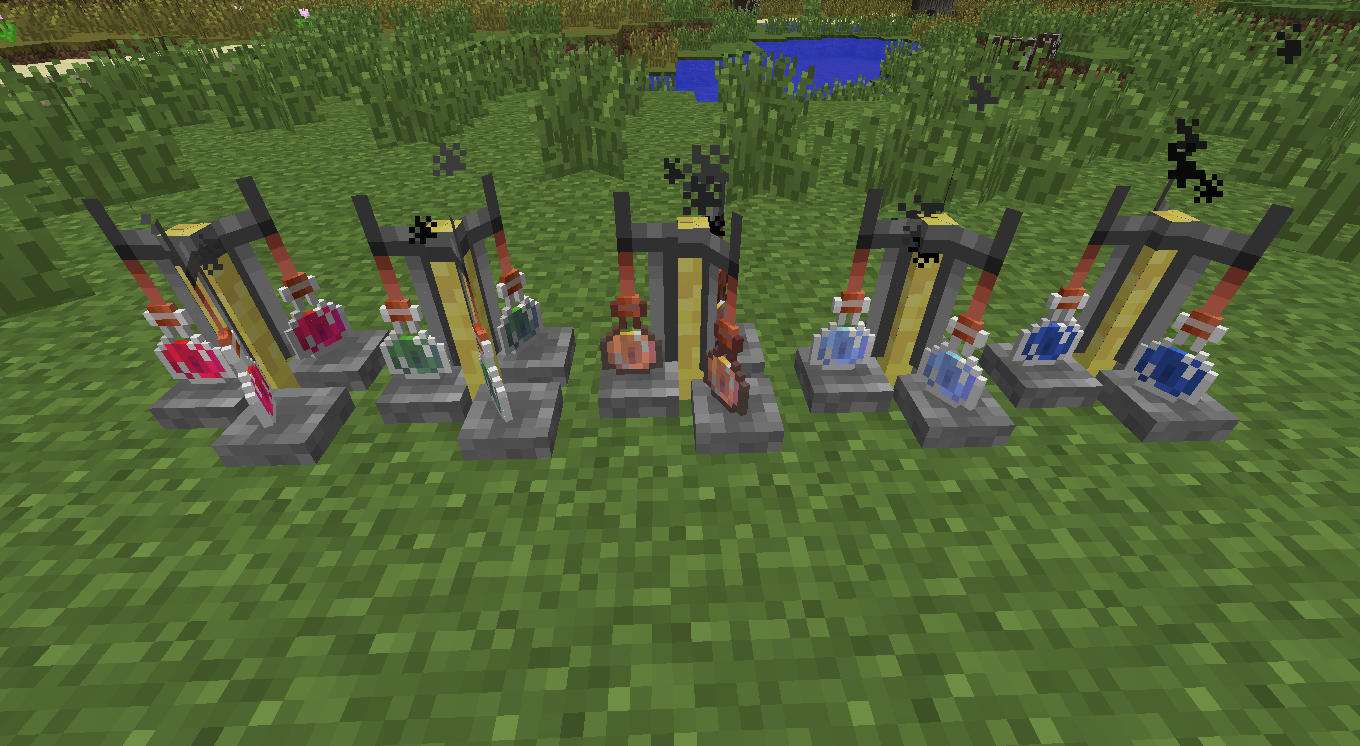
Collecting the Potion
Once the brewing process is complete, it’s time to collect and store your freshly brewed lingering potions. Here’s how you can effectively collect your potions in Minecraft:
When the brewing stand’s progress bar reaches completion, indicating that the potion has finished brewing, you can collect it by using empty glass bottles. Simply right-click on the brewing stand with an empty glass bottle in your hand, and it will automatically fill with the potion.
It’s important to have enough empty glass bottles in your inventory to store the potions. Each brewing session produces a single potion, so ensure that you have an ample supply of empty glass bottles before starting the brewing process.
If you have multiple brewing stands set up, you can collect the potions simultaneously from each stand. This allows you to brew larger quantities of potions and speed up the process.
After collecting the potions, it’s recommended to store them in a safe place to keep them organized and readily accessible. Chests or other storage containers work well for this purpose. Consider labeling the containers or arranging them in a way that makes it easy to identify the different types of lingering potions.
As you collect and store your potions, it’s also helpful to keep track of their effects and durations. This can assist you in quickly selecting the appropriate potion for various situations in your Minecraft adventures.
Remember, lingering potions have a limited duration, so it’s essential to use them strategically to maximize their benefits. Be mindful of when and how you use your potions to make the most of their effects.
With the potions safely collected and stored, you’re ready to embark on your Minecraft journeys, equipped with a variety of powerful and customized lingering potions.
So, make sure to collect your potions promptly and thoughtfully store them, ensuring you have a ready supply of valuable potions whenever you need them in the enchanting world of Minecraft.