
What is a Zombie Villager?
A Zombie Villager is a hostile mob in Minecraft that was once a regular Villager, but has been infected by a zombie. Unlike regular zombies, Zombie Villagers have the ability to be cured and restored back to their original form, making them a valuable asset in the game.
When a Villager is attacked by a zombie, there is a chance that it will turn into a Zombie Villager instead of being killed. Zombie Villagers retain some of their original Villager characteristics, such as their outfit and profession, but their appearance becomes more decayed and zombie-like.
It is important to note that Zombie Villagers are not naturally found in the game, and can only be obtained through the process of curing a regular zombie that has infected a Villager. Curing a Zombie Villager not only saves them from a life of mindless wandering and aggression but also transforms them back into a functioning member of the Villager community.
The process of curing a Zombie Villager is both challenging and rewarding. It requires careful planning, resource gathering, and a bit of luck. However, the effort is well worth it, as a cured Zombie Villager can offer various benefits to players, including trading rare items, providing valuable services, and increasing the population of a player’s village.
Now that we have a basic understanding of what a Zombie Villager is, let’s explore the reasons why one should consider curing them.
Reasons to Cure a Zombie Villager
Curing a Zombie Villager in Minecraft can bring several benefits and advantages to players. Here are some compelling reasons why you should consider undertaking the challenging task of curing these undead villagers:
- Expand your village: Cured Zombie Villagers can become valuable members of your village, helping to increase its population. This, in turn, enables you to unlock more trades and services with the newly restored villagers.
- Gain access to rare items: Cured Zombie Villagers can offer unique and rare items through their trades. By curing them, you can unlock access to these exclusive items, which can significantly enhance your gameplay experience.
- Protect your village: Curing Zombie Villagers helps in maintaining the safety of your village. Once cured, they will no longer pose a threat as hostile mobs and will actively contribute to the defense of the village by fighting off zombies and other hostile creatures.
- Preserve the diversity of professions: Villagers have distinct professions, such as farmers, librarians, blacksmiths, and more. By curing Zombie Villagers, you can ensure that a wide range of professions is available in your village, providing access to various resources and trades.
- Fulfill achievements and challenges: Curing Zombie Villagers is often tied to specific achievements or challenges in Minecraft. By successfully carrying out the curing process, you can unlock achievements and receive rewards, adding an extra layer of accomplishment to your gameplay.
Curing Zombie Villagers is an intricate and rewarding aspect of Minecraft gameplay. It not only adds depth to your village but also offers unique opportunities for trade, protection, and achievement. Now that we understand the significance of curing Zombie Villagers, let’s explore the preparations required before embarking on this challenging task.
Preparations Before Curing a Zombie Villager
Curing a Zombie Villager in Minecraft requires careful planning and preparation to ensure a successful transformation. Before attempting to cure a Zombie Villager, consider the following preparations:
- Secure your surroundings: Find a safe and enclosed area where you can perform the curing process without the risk of outside interruptions or attacks from other mobs. This will keep both you and the Zombie Villager safe during the procedure.
- Gather the necessary resources: Take inventory of the essential items needed for the curing process. These include a Splash Potion of Weakness and a Golden Apple. Make sure you have enough of these items to successfully complete the cure.
- Set up a workstation: Create a designated area with crafting tables, chests, and furnaces for easy access to the necessary tools and materials. This will help streamline the process and prevent you from scrambling to find items while trying to cure the Zombie Villager.
- Stock up on provisions: Ensure you have an ample supply of food, weapons, armor, and torches. Curing a Zombie Villager can be a time-consuming process, so it’s important to be well-prepared for any unexpected challenges or encounters along the way.
- Research Villager traits: Familiarize yourself with the different professions and trades of Villagers. This knowledge will be useful when selecting which Zombie Villagers to cure and determining their role within your village community after the transformation.
- Enchant your gear: If possible, consider enchanting your armor and weapons to enhance your combat abilities and increase your chances of successfully curing the Zombie Villager. Enchantments such as Protection, Sharpness, or Smite can be particularly beneficial.
By taking the time to prepare adequately, you increase your chances of a smooth and successful curing process. Once you’ve completed these preparations, you’ll be ready to set out and find a suitable Zombie Villager to cure. In the next section, we’ll explore how to locate a Zombie Villager in Minecraft.
Finding a Zombie Villager
Finding a Zombie Villager in Minecraft is the first step towards curing it and restoring it to its original form as a Villager. Although they are not naturally spawned mobs, there are a few ways to track down these undead villagers:
- Natural Spawns: Sometimes, Zombie Villagers can naturally spawn in the game during the night or in dark areas such as caves, dungeons, or abandoned mineshafts. Keep an eye out for these locations as you explore.
- Monster Spawners: Zombie Villagers can also spawn from monster spawners found in dungeons. These spawners release a continuous stream of mobs, including regular zombies and occasionally Zombie Villagers.
- Curing Regular Zombies: If you can’t find a Zombie Villager naturally, you can transform a regular zombie into a Zombie Villager by splashing it with a Splash Potion of Weakness and then using a Golden Apple on it.
- Creatures of the Night: It’s worth noting that Zombie Villagers are more likely to spawn during the night or in areas with low light levels. Be sure to take proper precautions, such as carrying torches or using a light-emitting device, to increase the chances of encountering a Zombie Villager.
Once you’ve located a Zombie Villager, it’s vital to create a safe environment for both the Zombie Villager and yourself during the curing process. In the next section, we’ll explore the necessary steps to create a secure space for the transformation to take place.
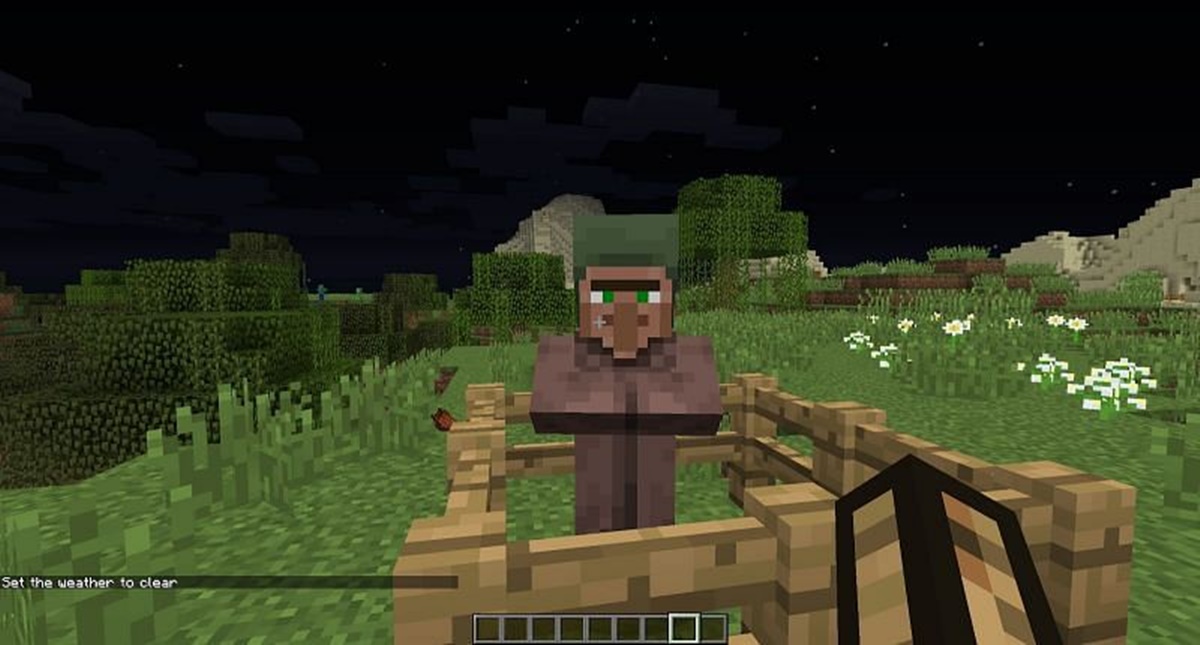
Creating a Safe Environment
Creating a safe environment is crucial when curing a Zombie Villager in Minecraft. Not only does it protect you from potential harm, but it also ensures the smooth progress of the curing process. Here are the steps to follow in order to establish a secure space:
- Enclosed Area: Find or create an enclosed area where you can carry out the curing process without any external interference. This area should have walls, a ceiling, and a secure entrance to prevent any other mobs from entering.
- Lighting: Light up the entire area with torches or other light sources to prevent any hostile mobs from spawning nearby. Zombie Villagers are more likely to be cured successfully in a well-lit environment.
- Block off Access Points: Ensure that there are no openings or gaps in the walls, floor, or ceiling that could allow Zombie Villagers or other mobs to escape or attack you. Seal any entrances or exits other than the controlled entrance you’ll be using.
- Secure Entrance: Create a controlled entrance using a door or gate that can be easily closed when necessary. This allows you to enter and exit the curing area safely while preventing any Zombie Villagers from escaping.
- Clear the Area: Remove any obstacles, such as blocks or items, that could obstruct the transformation process. This ensures that the Zombie Villager has enough space to move around and doesn’t get stuck during the curing process.
- Combat Preparation: Equip yourself with suitable armor, weapons, and potions to defend against any potential attacks from hostile mobs that may spawn nearby. This will help you survive and protect the Zombie Villager during the curing process.
By creating a safe environment, you minimize the risk of interruptions and ensure a smooth and successful transformation of the Zombie Villager. Now that we have established a secure space, let’s move on to the next section, where we’ll discuss the required items for curing a Zombie Villager.
Curing the Zombie Villager
Curing a Zombie Villager in Minecraft involves a series of steps and the use of specific items. By following these steps, you can successfully restore the Zombie Villager back to its original form as a Villager. Let’s dive into the process:
- Gathering the Required Items: Before beginning the cure, make sure you have the necessary items. You’ll need a Splash Potion of Weakness and a Golden Apple. These can be crafted or obtained through various means such as exploration or trading with other villagers.
- Using a Splash Potion of Weakness: Once you’ve located a Zombie Villager and created a safe environment, it’s time to start the curing process. Stand close to the Zombie Villager and throw the Splash Potion of Weakness at it. This will temporarily weaken the zombie and prepare it for the transformation.
- Feeding the Zombie Villager: After splashing it with the potion, quickly use a Golden Apple on the weakened Zombie Villager. To do this, right-click or tap the Zombie Villager with the Golden Apple in your hand. This will initiate the curing process.
- Waiting for the Transformation: Once the Zombie Villager has been fed the Golden Apple, it will enter a conversion period, during which it will slowly transform back into a regular Villager. This process takes a few minutes, so be patient and keep a close eye on the curing progress.
- The Transformation Process: As the Zombie Villager undergoes the transformation, you’ll notice various visual cues, such as particles and the gradual disappearance of its zombie-like features. These signs indicate that the curing process is nearing completion.
- Welcoming the New Villager: Once the transformation is complete, you will be left with a fully cured Villager. They will now possess their original profession, and you can interact with them like any other Villager. Welcome them into your village or assign them a new role based on their profession.
Successfully curing a Zombie Villager is a rewarding accomplishment in Minecraft. It not only restores a once-undead creature to its former self but also adds to the diversity and functionality of your village. In the next section, we’ll explore the benefits of curing Zombie Villagers and why they are valuable additions to your gameplay.
Gathering the Required Items
Before embarking on the process of curing a Zombie Villager in Minecraft, you need to gather the specific items required for a successful transformation. The two essential items you’ll need are a Splash Potion of Weakness and a Golden Apple. Here’s how you can obtain these items:
- Splash Potion of Weakness: To create a Splash Potion of Weakness, you’ll need a Water Bottle and a Fermented Spider Eye. The Water Bottle can be crafted by filling a Glass Bottle with water. The Fermented Spider Eye is crafted by combining a Spider Eye with Sugar and Brown Mushroom in a crafting table. Once you have the ingredients, place the Water Bottle and Fermented Spider Eye in a Brewing Stand to create the potion. Extend the potion’s duration by adding Redstone Dust to the brewing process.
- Golden Apple: A Golden Apple can be crafted using eight Gold Ingots arranged in a square shape in the crafting table. For a greater chance of success, use a regular Apple instead of a Notch Apple, as the latter is crafted using a rare Golden Apple and is generally considered too valuable for the curing process.
- Alternative Methods: If you’re unable or prefer not to craft these items, you can also find them through exploring structures such as dungeons, mineshafts, fortress chests, or by trading with other villagers. Keep an eye out for chests that may contain these valuable items.
Once you’ve gathered the required items, make sure to keep them readily accessible in your inventory or storage area. Having these items at hand during the curing process will ensure a smooth and efficient transformation of the Zombie Villager.
Now that you’ve gathered the necessary items, it’s time to delve into the process of using these items to cure the Zombie Villager. In the following section, we’ll explore how to effectively use the Splash Potion of Weakness and Golden Apple to initiate the transformation.
Using a Splash Potion of Weakness
Using a Splash Potion of Weakness is a crucial step in the process of curing a Zombie Villager in Minecraft. This potion temporarily weakens the zombie, preparing it for the transformation back into its original Villager form. Here’s how you can effectively use a Splash Potion of Weakness:
- Gaining or Crafting the Potion: First, you need to obtain or craft a Splash Potion of Weakness. To craft it, combine a Water Bottle and a Fermented Spider Eye in a Brewing Stand. If you don’t have the necessary ingredients, you can sometimes find pre-made potions in various structures or obtained through trading with villagers.
- Selecting the Zombie Villager: Locate a Zombie Villager either by natural spawn or by converting a regular zombie into one. Ensure that you have a clear line of sight to the Zombie Villager, as the splash potion needs to hit it directly.
- Throwing the Splash Potion: Stand close to the Zombie Villager, then select the Splash Potion of Weakness in your hand. Right-click or tap to throw the potion directly at the Zombie Villager. A well-aimed throw will cause the potion to splash onto the zombie, temporarily weakening it.
- Observing the Effects: Upon being hit by the Splash Potion of Weakness, the Zombie Villager will exhibit visual and audio cues to indicate that it has been successfully affected. These cues include particles surrounding the zombie and a brief sizzling sound.
- Proceeding to the Next Step: Once you have successfully weakened the Zombie Villager with the potion, prepare to feed it a Golden Apple to initiate the transformation process. Time is of the essence, so make sure to have the Golden Apple ready to be used immediately after throwing the potion.
Using a Splash Potion of Weakness is a pivotal step in curing a Zombie Villager. It prepares the zombie for its eventual transformation and brings you one step closer to restoring it to its original Villager form. In the following section, we’ll discuss the next step in the process: feeding the weakened Zombie Villager a Golden Apple.
Feeding the Zombie Villager
Feeding the Zombie Villager a Golden Apple is a crucial step in the process of curing it in Minecraft. The Golden Apple helps facilitate the transformation and restores the Zombie Villager back to its original Villager form. Here’s how you can effectively feed the Zombie Villager:
- Having the Golden Apple Ready: Ensure that you have a Golden Apple in your hand or easily accessible in your inventory before attempting to cure the Zombie Villager. This will allow for a seamless and swift transition between throwing the Splash Potion of Weakness and feeding the Golden Apple to the zombie.
- Approaching the Zombie Villager: Stand close to the weakened Zombie Villager, ready to feed it the Golden Apple. Make sure you have a clear line of sight and are within reach of the zombie. This will ensure a successful interaction without any hindrances.
- Using the Golden Apple: Right-click or tap the Zombie Villager with the Golden Apple in your hand to feed it. Upon doing so, the Golden Apple will be consumed, and the transformation process will commence.
- Observing the Transformation: Once the Zombie Villager has been fed the Golden Apple, the transformation process will begin. Visual cues such as particle effects and a changing appearance will indicate the progress of the transformation. The zombie-like features will gradually diminish, and the Villager traits will start to re-emerge.
- Patience is Key: The transformation process takes time. Be patient and wait for the Zombie Villager to complete its transformation into a fully cured Villager. Avoid any further interaction or damage to the cured Villager during this critical period.
Feeding the Zombie Villager a Golden Apple is a significant step in the curing process. It marks the transition from the weakened state to the gradual restoration of the Villager’s original form. In the next section, we’ll explore the waiting period for the transformation to complete.
Waiting for the Transformation
After feeding a Zombie Villager a Golden Apple in Minecraft, you will need to be patient and wait for the transformation process to take place. During this waiting period, the Zombie Villager slowly undergoes a change and transforms back into its original Villager form. Here’s what you need to know while waiting for the transformation:
- Observing Visual Changes: As the transformation progresses, you will notice visible changes in the appearance of the Zombie Villager. The zombie-like features will fade away, and the Villager traits will gradually become more prominent.
- Particle Effects: Particle effects, such as circling hearts, may appear around the Zombie Villager during the transformation process. These visual cues indicate that the curing process is advancing successfully.
- Important Note: While the transformation is taking place, it is crucial to avoid any further interaction with the Zombie Villager. Damaging the cured Villager or exposing it to new threats can disrupt the process and potentially cause setbacks.
- Duration of Transformation: The transformation process typically takes a few minutes to complete. It may vary slightly, but be prepared for a moderate waiting period. Use this time to ensure the safety of the curing area and make any necessary preparations for the newly cured Villager’s integration into your Minecraft world.
Waiting for the transformation can be an exciting and suspenseful time as you witness the return of the Villager’s original form. Once the transformation is complete, you will have successfully cured the Zombie Villager and welcomed a valuable member back into your Minecraft community. In the next section, we’ll explore the finalization of the transformation and how to integrate the newly cured Villager into your village.
The Transformation Process
The transformation process in Minecraft is the final stage of curing a Zombie Villager and witnessing its return to its original Villager form. This process begins after feeding the Zombie Villager a Golden Apple and involves several noteworthy aspects:
- Visual Changes: As the transformation progresses, you’ll observe significant visual changes in the Zombie Villager’s appearance. The decaying, zombie-like features gradually fade away, and the Villager traits take their place. This includes changes in skin color, facial expression, and attire, reflecting the Villager’s original profession.
- Particle Effects: During the transformation, you may notice particle effects, such as circling hearts, around the Zombie Villager. These particles signify a successful transformation, providing a visual indicator of the progress being made.
- Restoring Villager Traits: The transformation process not only changes the appearance of the Zombie Villager but also restores its original Villager traits. These traits include their profession, trade options, and behavior. Once the transformation is complete, the cured Villager can perform tasks and participate in the functioning of your village, contributing to its growth and development.
- Integration into Your Village: After the transformation, the cured Villager can seamlessly integrate into your existing village or become a valuable addition to a newly established one. You can assign them a suitable profession, interact with them like regular Villagers, and engage in trading various items and resources.
- Ensuring Safety and Protection: Once the Zombie Villager has transformed into a Villager, it is crucial to ensure their safety within your village. Provide them with shelter, access to workstations, and protect them from potential threats, such as hostile mobs or environmental risks.
The transformation process is an exciting and rewarding moment in Minecraft, symbolizing the successful cure of a once-infected Zombie Villager. Embrace the restored Villager as it contributes to the growth and prosperity of your village and enjoy the benefits of their presence in your Minecraft world. In the next section, we’ll explore the numerous benefits of curing Zombie Villagers and why it is a worthwhile endeavor.
Welcoming the New Villager
After a successful transformation, it’s time to welcome the newly cured Villager into your Minecraft community. The restored Villager comes with its original profession, providing unique trading opportunities and contributing to the functionality of your village. Here’s how you can integrate and make the most of the newly cured Villager:
- Assigning a Role: Determine the role or profession you’d like the Villager to have within your village. Depending on their expertise, you can assign them tasks such as farming, librarian, blacksmith, or other professions, ensuring a diverse range of useful services and trades.
- Providing a Workstation: Once you’ve assigned a role, provide the cured Villager with the appropriate workstation for their profession. For example, a librarian would need access to a lectern, while a blacksmith requires an anvil or smithing table. This allows them to perform their tasks efficiently and offer trade options.
- Trading and Bartering: Engage with the restored Villager through the trading interface. Their cured status unlocks unique trading opportunities, allowing you to exchange resources, obtain rare items, or acquire valuable services. Take advantage of these trades to enhance your gameplay experience.
- Protecting the Villager: Ensure the safety of the cured Villager by providing them with a secure living space. Create barriers, light up the area, and set up protective measures to ward off potential threats from hostile mobs. This will help maintain a thriving and safe environment for your Villagers.
- Incorporating into Village Activities: Encourage social interactions among the Villagers by creating communal areas such as meeting points, marketplaces, or gathering spaces. This fosters a sense of community and allows the cured Villager to connect with others, enhancing the overall atmosphere of your village.
- Expanding Population: Utilize the cured Villager as an opportunity to increase the population of your village. By creating suitable living spaces and ensuring the availability of beds, you can encourage the Villagers to breed and grow your community. A larger population opens up more trade options and enhances the overall functionality of your village.
Welcoming the new Villager into your village not only enriches the gameplay experience but also opens doors to various trading possibilities and services. The cured Villager brings unique expertise and benefits to your Minecraft world. In the next section, we’ll explore some valuable tips and tricks to consider when curing Zombie Villagers for optimal success.
Benefits of Curing Zombie Villagers
Curing Zombie Villagers in Minecraft provides several benefits that make the effort worthwhile. Here are some of the advantages you can enjoy by undertaking the task of curing these undead villagers:
- Expanded Trading: Cured Villagers offer a wide range of trades and unique items that can’t be obtained through other means. Take advantage of their expertise to acquire rare and valuable resources, enchanted items, and other useful supplies for your Minecraft adventures.
- Specialized Services: Each cured Villager comes with its own profession, which grants them specific abilities and tasks. Librarians offer enchanted books, farmers provide food and crops, and blacksmiths supply weapons and armor. These specialized services enhance your gameplay and allow you to meet your needs more efficiently.
- Defense and Safety: Cured Villagers actively participate in defending your village from hostile mobs. With their help, you can strengthen the village’s security and ward off attacks, ensuring the safety of your community and its resources.
- Population Growth: Curing Zombie Villagers can lead to an increase in population. As cured Villagers breed, your village expands, introducing more trade options, diversifying professions, and establishing a bustling community that thrives and grows.
- Economic Growth: A larger population of Villagers translates to more trading opportunities, allowing you to accumulate wealth and resources at a faster rate. The cured Villagers contribute to the economic growth of your village, making it more self-sufficient and prosperous.
- Enriched Village Dynamics: Cured Villagers introduce a vibrant and dynamic atmosphere to your village. They engage in social interactions, occupy specialized workstations, and participate in various village activities, creating a sense of life and community in your Minecraft world.
Curing Zombie Villagers not only rescues these undead creatures from their cursed state but also brings significant advantages to your gameplay experience. Embrace the benefits they offer and witness the transformation of your village into a thriving and prosperous community. In the next section, we’ll explore some helpful tips and tricks to keep in mind when it comes to curing Zombie Villagers.
Tips and Tricks for Curing Zombie Villagers
Curing Zombie Villagers in Minecraft can be a challenging endeavor, but with these tips and tricks, you can increase your chances of success and efficiency during the process:
- Prepare in Advance: Gather the necessary resources and set up a designated area before attempting to cure a Zombie Villager. This prevents any last-minute scrambling for items or securing the space while the transformation is already underway.
- Use Splash Potion Efficiently: Aim for a direct hit when throwing the Splash Potion of Weakness at the Zombie Villager. This ensures maximum effect with minimal wastage, reducing the need for additional potions.
- Enchant Your Tools: Prioritize enchanting your armor and weapons with useful enchantments such as Protection, Sharpness, or Smite. This boosts your combat abilities, making it easier to handle hostile mobs and protect the Zombie Villager during the curing process.
- Light Up the Environment: Maintain a well-lit space to eliminate mob spawns and enhance the safety of the Zombie Villager and yourself. Use torches or other light sources to illuminate the area, reducing the risk of the Zombie Villager being attacked by other mobs.
- Be Patient: The transformation process takes time. Avoid rushing or interfering with the Zombie Villager while it undergoes the cure. Allow the process to unfold naturally without any disturbances, ensuring a successful and complete transformation.
- Secure the Curing Area: Seal off the curing area with blocks, fences, or doors to prevent the Zombie Villager from escaping or other mobs from entering. This creates a controlled environment and minimizes potential risks and distractions during the cure.
- Utilize Name Tags: If you want to ensure the safety and identification of a particularly valuable or unique cured Villager, use a Name Tag to give them a distinctive name. This prevents accidental damage or confusion with other Villagers.
- Keep a Stock of Resources: Maintain a stockpile of food, weapons, armor, and other essentials in case unforeseen challenges arise during the curing process. Having a backup plan ensures that you are prepared for any unexpected events.
By following these tips and tricks, you can optimize the process of curing Zombie Villagers and increase your success rate. Embrace the challenge and reap the rewards of adding cured Villagers to your Minecraft world. Now, armed with this knowledge, you are ready to embark on your journey to cure Zombie Villagers and shape a thriving village community.