
Choosing the Right Raspberry Pi Model
When it comes to creating a home automation system using Raspberry Pi, one of the first decisions you’ll need to make is choosing the right Raspberry Pi model for your project. Raspberry Pi offers a range of models, each with its own specifications and capabilities. Understanding these differences will help you select the most suitable one for your needs.
1. Raspberry Pi 3 Model B+: This is a popular choice for home automation projects. It features a 1.4GHz quad-core processor, built-in Wi-Fi, and Bluetooth connectivity. The Model B+ is powerful enough to handle multiple automation tasks and offers excellent compatibility with various add-on modules.
2. Raspberry Pi 4 Model B: If you’re planning to incorporate more demanding tasks in your home automation system, the Raspberry Pi 4 Model B is a great option. With a powerful 1.5GHz quad-core processor and up to 4GB of RAM, it can handle tasks like video streaming and complex automation scripts with ease.
3. Raspberry Pi Zero W: If cost and size are your primary concerns, the Raspberry Pi Zero W is a compact and budget-friendly choice. Although it has a less powerful processor compared to other models, it is still capable of handling basic home automation tasks.
When choosing a Raspberry Pi model, consider the specific requirements and complexity of your home automation system. If you’re planning to control multiple devices and run resource-intensive tasks, opt for a more powerful model like the Raspberry Pi 4 Model B. However, if you just need to automate a few simple tasks, the Raspberry Pi 3 Model B+ or even the Raspberry Pi Zero W might suffice.
Keep in mind that the Raspberry Pi models mentioned here are just a few examples. Raspberry Pi continues to release new models with improved features, so make sure to check their website for the latest options.
Gathering the Required Materials
Before you dive into creating your home automation system with Raspberry Pi, it’s important to gather all the necessary materials. Having everything on hand will ensure a smooth and hassle-free setup process. Here are the essential components you’ll need:
1. Raspberry Pi: Choose the Raspberry Pi model that suits your requirements, as discussed in the previous section.
2. MicroSD Card: You’ll need a microSD card to install the operating system (OS) and store your data. A minimum 8GB or larger card is recommended.
3. Power Supply: Select a compatible power supply unit (PSU) for your Raspberry Pi. Make sure to choose one with sufficient power output to support your chosen model.
4. HDMI Cable: An HDMI cable is required to connect your Raspberry Pi to a monitor or TV for initial setup and configuration.
5. USB Keyboard and Mouse: You’ll need a USB keyboard and mouse to configure your Raspberry Pi and interact with the system.
6. Ethernet Cable (optional): If you prefer a more stable and reliable internet connection, you can use an Ethernet cable to connect your Raspberry Pi directly to your router.
7. WiFi Adapter (optional): In case your chosen Raspberry Pi model does not have built-in Wi-Fi, you can use a compatible USB Wi-Fi adapter to enable wireless connectivity.
8. Sensors and Components: Depending on the specific features you want to incorporate into your home automation system, you may require additional components such as motion sensors, temperature sensors, relays, or smart switches. Research and select the sensors and components relevant to your project.
9. Enclosure (optional): If you want to protect your Raspberry Pi from dust or potential damage, consider getting an enclosure. There are various options available, ranging from simple cases to more sophisticated designs with better heat dissipation capabilities.
Make sure to check for compatibility and reviews of the components you choose and consider any specific requirements of your project. Having all the necessary materials before you start the setup process will save time and avoid any delays during the implementation of your home automation system.
Setting Up the Operating System
Once you have gathered all the required materials, the next step in creating your home automation system with Raspberry Pi is setting up the operating system (OS). Raspberry Pi supports various operating systems, but the most popular one for home automation projects is Raspberry Pi OS (formerly known as Raspbian). Here’s how to get started:
1. Download Raspberry Pi OS: Visit the official Raspberry Pi website and navigate to the download section. Choose the latest version of Raspberry Pi OS and download the image file suitable for your Raspberry Pi model.
2. Flash the OS Image: Use a reliable image flashing tool like Etcher to write the Raspberry Pi OS image onto your microSD card. Insert the microSD card into your computer and follow the instructions provided by the flashing tool to complete the process.
3. Insert the microSD Card: Remove the microSD card from your computer and insert it into the microSD card slot on your Raspberry Pi.
4. Connect Peripherals: Connect your Raspberry Pi to a monitor or TV using an HDMI cable. Plug in the USB keyboard and mouse, Ethernet cable (if using), and power supply. Ensure that all connections are secure.
5. Power On: Turn on your Raspberry Pi by connecting the power supply. The system will boot up, and you will see the Raspberry Pi logo and the start-up messages on the display.
6. Initial Configuration: Follow the on-screen prompts to carry out the initial configuration of Raspberry Pi OS. Set your preferred language, adjust display settings, and enable features such as SSH and VNC if desired.
7. Update Raspberry Pi OS: After the initial configuration, open the terminal and update the operating system by running the following commands: sudo apt update and sudo apt upgrade. This ensures that you have the latest software updates and security patches.
At this point, you have successfully set up the operating system on your Raspberry Pi. You can now move on to the next steps, including installing Home Assistant and configuring your home automation system.
Installing Home Assistant
Home Assistant is a popular open-source platform that allows you to control and automate various devices in your home. To incorporate Home Assistant into your Raspberry Pi home automation system, follow these steps:
1. Access Raspberry Pi: Ensure that your Raspberry Pi is running and connected to the internet.
2. Open Terminal: Open the terminal on your Raspberry Pi. You can do this by clicking on the terminal icon in the Raspberry Pi OS desktop or by pressing Ctrl+Alt+T.
3. Install Home Assistant: Run the following command to install Home Assistant:sudo apt install -y python3 python3-venv python3-pip libffi-dev libssl-dev
4. Create a Virtual Environment: Once the installation process is complete, create a virtual environment for Home Assistant by running the following command:python3 -m venv homeassistant
5. Activate the Virtual Environment: Activate the virtual environment using the following command:source homeassistant/bin/activate
6. Install Home Assistant: Install Home Assistant within the virtual environment by running the following command:pip3 install homeassistant
7. Start Home Assistant: Once the installation is finished, start Home Assistant by executing the following command:hass
8. Access Home Assistant: Open a web browser on your computer and enter the IP address of your Raspberry Pi followed by port 8123 (e.g., http://192.168.0.100:8123). You’ll be prompted to set up an initial username and password for Home Assistant.
9. Set Up Integrations: Follow the on-screen instructions to set up integrations with your devices and services. Home Assistant has a wide range of integrations available, allowing you to control lights, thermostats, cameras, and more.
10. Customize and Automate: Once your devices are integrated, you can customize the user interface and create automations to control and monitor your smart home devices based on specific triggers and conditions.
Installing Home Assistant on your Raspberry Pi is a crucial step to unlock the full potential of your home automation system. Whether you’re a beginner or an experienced user, Home Assistant offers a user-friendly interface and powerful features to enhance your smart home experience.
Configuring Home Assistant
Once you have installed Home Assistant on your Raspberry Pi, the next step is to configure it to suit your specific needs and preferences. The configuration process includes customizing the user interface, adding devices, and setting up automations. Here’s how you can get started:
1. Access Home Assistant Interface: Open a web browser on your computer and enter the IP address of your Raspberry Pi followed by port 8123 (e.g., http://192.168.0.100:8123). Log in with the username and password you set up during the installation process.
2. Customize the User Interface: Home Assistant offers a flexible and customizable user interface. You can modify the dashboard layout, add or remove panels, and create groups for easier device management. Explore the options available in the Home Assistant interface and tailor it to your preferences.
3. Add Devices: Home Assistant supports a wide range of devices and platforms. To add devices, click on the Configuration tab in the Home Assistant interface and choose the integrations option. Here, you can search for specific devices, services, or platforms and follow the on-screen instructions to set them up within Home Assistant.
4. Configure Automations: Automations allow you to create rules and scenarios to control your devices based on specific triggers, conditions, and actions. In the Home Assistant interface, select the Automations tab and click on the “Add Automation” button. Define the trigger, such as a specific time or an event, specify the conditions, and determine the actions to be taken when the automation is triggered.
5. Explore Add-ons: Home Assistant offers a wide range of add-ons that enhance its functionality. These add-ons include additional integrations, services, and other tools. You can access and install add-ons by clicking on the Supervisor tab in the Home Assistant interface and selecting the Add-on Store. Explore the available options and install the add-ons that suit your needs.
6. Back Up Your Configuration: It is essential to regularly back up your Home Assistant configuration to avoid data loss. You can create a backup by going to the Supervisor tab, selecting Snapshots, and creating a new snapshot of your configuration. This ensures that you can easily restore your setup in case of any unforeseen issues.
By properly configuring Home Assistant, you can create a personalized and efficient home automation system that meets your unique requirements. Take the time to explore the various customization options, add your devices and services, and create automations that simplify and enhance your smart home experience.
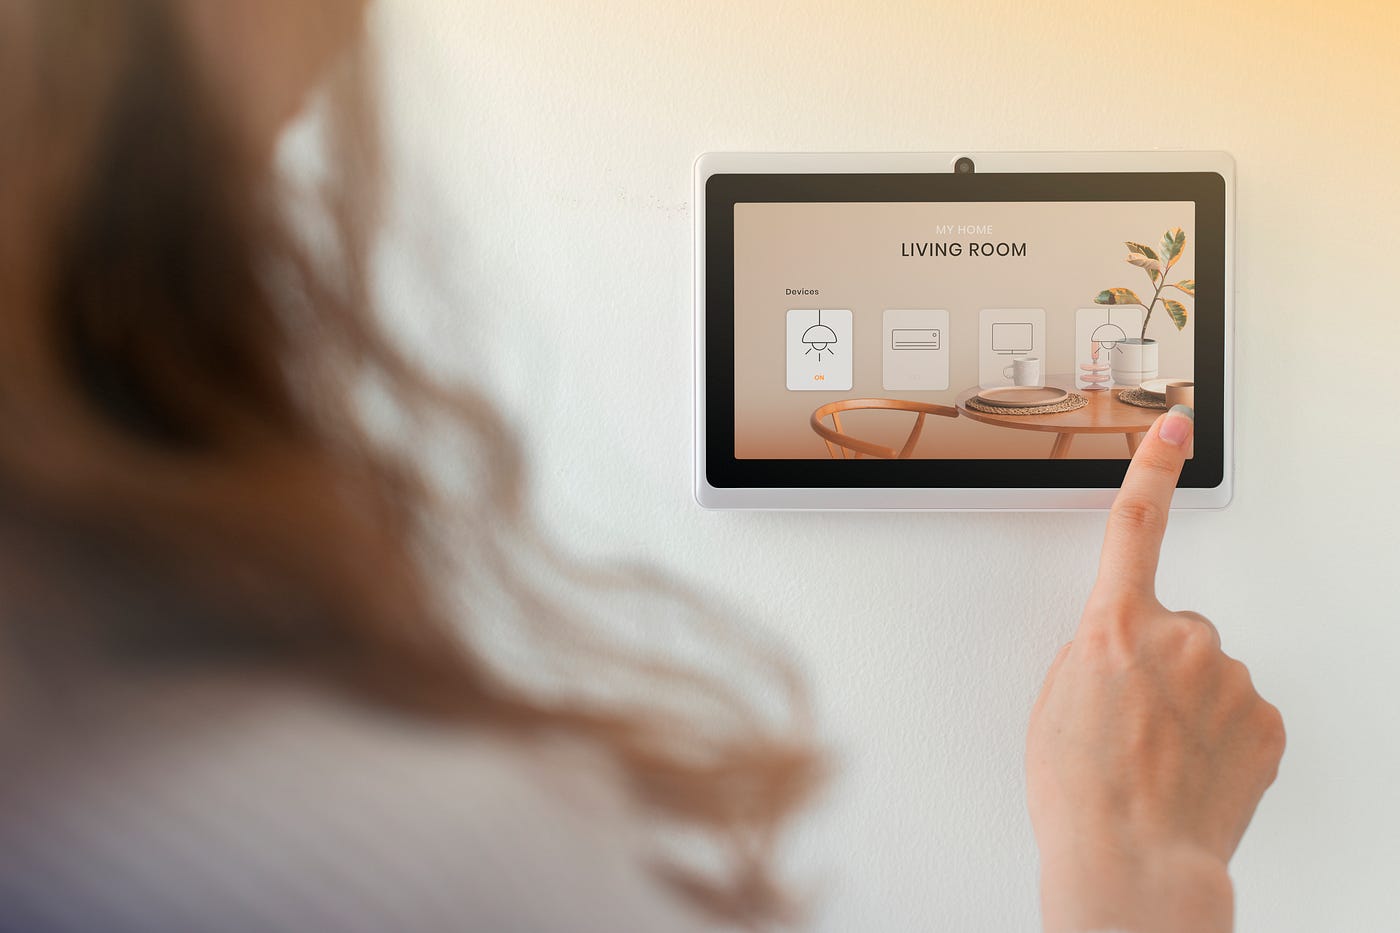
Adding Devices to Home Assistant
With Home Assistant installed and configured on your Raspberry Pi, it’s time to start adding devices to your home automation system. Home Assistant supports a wide range of devices and platforms, allowing you to control and monitor various aspects of your smart home. Here’s how you can add devices to Home Assistant:
1. Open Home Assistant Interface: Launch a web browser and enter the IP address of your Raspberry Pi, followed by port 8123 (e.g., http://192.168.0.100:8123). Log in with your Home Assistant credentials.
2. Access Integrations Page: Click on the Configuration tab in the Home Assistant interface, then select Integrations. Here, you will find a list of supported devices and services.
3. Search for Devices: Use the search bar or browse through the categories to find the specific devices you want to add. Home Assistant supports a wide range of devices, including smart lights, thermostats, sensors, cameras, and more.
4. Add Devices: Once you find the device you want to add, click on it, and follow the on-screen instructions to set it up within Home Assistant. This may involve entering authentication details, IP addresses, or API keys, depending on the device and integration.
5. Configure Device Options: After adding a device, you may have additional options to configure. These options can include customizing device names, setting up room assignments, or adjusting specific settings related to that device.
6. Test Device Integration: Once you have added a device, it’s a good idea to test its integration with Home Assistant. Ensure that you can control the device or receive data from it through the Home Assistant interface.
7. Repeat for Additional Devices: Continue this process for all the devices you want to incorporate into your smart home system. Each device and integration may have specific setup steps, so be sure to follow the instructions provided by Home Assistant.
By adding devices to Home Assistant, you can consolidate control of all your smart home devices into one centralized platform. This allows for seamless automation, control, and monitoring of your home’s various systems, providing convenience and enhanced functionality.
Automating Lights
One of the key benefits of a home automation system is the ability to automate the lighting in your home. With Home Assistant and your Raspberry Pi, you can create various lighting automations to enhance comfort, save energy, and improve security. Here’s how to automate lights with Home Assistant:
1. Identify Lights: Determine the lights in your home that you want to automate. These can include overhead lights, lamps, or even smart bulbs.
2. Add Light Integrations: In the Home Assistant interface, access the Integrations page and search for the specific light integrations you have in your home. Popular integrations include Philips Hue, LIFX, and smart switches.
3. Configure Light Settings: Once you add a light integration, you can customize its settings within Home Assistant. This can include assigning names, organizing lights into groups, or adjusting brightness levels.
4. Create Automations: With Home Assistant’s automation feature, you can create rules to control your lights based on specific triggers. For example, you can set the lights to turn on automatically when motion is detected in a room, or to turn off at a specific time in the evening.
5. Set Time-Based Schedules: If you have a consistent lighting routine, such as turning on certain lights in the morning or dimming them at night, you can create time-based schedules in Home Assistant. This ensures that your lights adhere to your desired schedule automatically.
6. Integrate with Other Systems: Home Assistant allows for integration with other smart systems or platforms. For instance, you can use your home’s occupancy sensors or connect your lights to a voice assistant like Amazon Alexa or Google Assistant for voice control.
7. Utilize Sensor Data: Home Assistant can utilize sensor data to automate your lights. For example, you can set up an automation to turn on the lights when the front door is opened or to adjust the brightness based on the ambient light levels in a room.
8. Experiment and Refine: Home Assistant provides a flexible platform to experiment with different lighting automations. Feel free to refine and adjust the settings based on your preferences and needs. You can also explore additional features such as presence detection or weather-based lighting controls.
Automating your lights with Home Assistant not only brings convenience to your life but also helps you save energy and create a more comfortable living environment. With the flexibility and customization options available, you can create personalized lighting automations that cater to your specific requirements.
Automating Climate Control
Automating climate control is another valuable aspect of a home automation system. With Home Assistant and your Raspberry Pi, you can create intelligent and energy-efficient climate control automations to keep your home comfortable and save on energy costs. Here’s how to automate climate control with Home Assistant:
1. Identify Climate Control Devices: Determine the climate control devices in your home that you want to automate. This can include thermostats, air conditioners, heaters, fans, or smart vents.
2. Add Climate Control Integrations: In the Home Assistant interface, access the Integrations page and search for the specific climate control integrations you have in your home. This may include popular brands like Nest, Ecobee, or smart thermostats.
3. Configure Climate Settings: Once you add a climate control integration, you can customize its settings within Home Assistant. This includes configuring temperature ranges, modes (cool, heat, auto), fan speeds, and other related settings.
4. Set Temperature Automations: With Home Assistant’s automation feature, you can create rules to control your climate based on specific triggers. For example, you can set the thermostat to adjust the temperature when someone arrives home or when a room is unoccupied for a certain period.
5. Utilize Occupancy and Activity Sensors: To optimize energy efficiency, integrate occupancy or activity sensors to detect if a room is currently in use. This enables you to adjust the temperature or turn off climate control in unoccupied areas automatically.
6. Leverage Weather Data: Home Assistant allows you to utilize weather data to automate your climate control. For instance, you can create automations to adjust your thermostat based on outdoor temperature, humidity levels, or weather forecasts. This can help optimize your comfort and energy usage.
7. Integrate with Other Systems: Home Assistant can integrate with other smart systems or platforms like voice assistants. This enables you to control your climate control devices using voice commands or create additional automations based on other smart home activities.
8. Schedule Temperature Changes: For consistent routines, you can create time-based schedules in Home Assistant to adjust the temperature at specific times of the day. This allows you to align your climate control with your daily activities and preferences.
9. Monitor Energy Consumption: Home Assistant provides insights into energy consumption related to your climate control devices. Utilize this information to make informed decisions on energy management and find opportunities for further optimization.
By automating climate control with Home Assistant, you can ensure optimal comfort and energy efficiency in your home. With the ability to customize settings and integrate with other systems, you can create a personalized climate control system that adapts to your needs and preferences.
Controlling Appliances
A significant advantage of a home automation system is the ability to control appliances remotely and automate their functions. With Home Assistant and your Raspberry Pi, you can gain centralized control and create automation routines for various appliances in your home. Here’s how to control appliances with Home Assistant:
1. Identify Appliances: Start by identifying the appliances you want to control. This can include lights, TVs, sound systems, coffee machines, robotic vacuum cleaners, or any other smart appliances.
2. Add Appliance Integrations: In the Home Assistant interface, access the Integrations page and search for the specific integrations for your appliances. Home Assistant supports a wide range of popular brands and devices, making it easy to find and add the necessary integrations.
3. Configure Appliance Settings: Once you add the appliance integration, configure its settings within Home Assistant. This may include assigning names, organizing appliances into groups, or adjusting specific settings such as volume levels or cleaning schedules.
4. Control Appliances Remotely: With Home Assistant, you can control your appliances remotely using the mobile app or through the web interface. This allows you to turn on or off appliances, adjust settings, or initiate specific functions from anywhere.
5. Create Appliance Automations: Utilize Home Assistant’s automation feature to create routines and automations for your appliances. For example, you can create an automation where the lights turn on, the TV powers on, and the sound system starts playing when you arrive home.
6. Integrate with Other Platforms: Home Assistant can integrate with other platforms or services, providing even more control over your appliances. For instance, you can integrate with voice assistants like Amazon Alexa or Google Assistant to control appliances using voice commands.
7. Utilize Sensors for Smart Triggering: Make use of sensors and triggers to automate appliance control. For example, you can create an automation that turns off the coffee machine when motion is no longer detected in the kitchen or starts the robotic vacuum cleaner when you leave home.
8. Set Time-Based Schedules: Take advantage of time-based schedules in Home Assistant to automate appliance control according to your daily routines. This can include turning off appliances at night or activating certain functions during specific time periods.
9. Monitor Energy Consumption: Home Assistant provides insights into energy consumption related to your appliances. Use this information to track and optimize energy usage, potentially leading to cost savings.
By controlling appliances with Home Assistant, you can streamline your daily tasks, reduce energy wastage, and enhance the overall convenience and efficiency of your home. With the flexibility and customization options available, you can create personalized automation routines to suit your specific needs and lifestyle.
Creating Custom Automations
One of the most powerful features of Home Assistant is the ability to create custom automations. Custom automations allow you to define specific rules and actions based on trigger events, conditions, and desired outcomes. With Home Assistant and your Raspberry Pi, you can create personalized automations that cater to your unique needs and preferences. Here’s how to create custom automations:
1. Understand Automation Components: Before creating custom automations, familiarize yourself with the core components involved. An automation generally consists of a trigger, conditions (optional), and actions. The trigger is what initiates the automation, conditions determine if the trigger should proceed, and actions define the intended outcome or response.
2. Access Automation Editor: In the Home Assistant interface, go to Configuration and select Automations. Here, you can access the automation editor, which provides a user-friendly interface to create and manage your custom automations.
3. Define the Trigger: Choose the trigger that will activate your automation. This could be a specific time, an event, a state change of a device, or even the status of another automation. Home Assistant offers a wide range of trigger options to suit various scenarios.
4. Specify Conditions: Conditions add an extra layer of control to your automations. They allow you to define certain criteria that must be met for the automation to proceed. This can include factors such as time of day, device states, or sensor readings. Conditions are optional but useful for creating more complex automations.
5. Determine Actions: Define the actions you want Home Assistant to perform when the automation is triggered and any relevant conditions are met. These actions can include turning on or off devices, adjusting settings, sending notifications, or executing scripts.
6. Test and Refine: Once you have created an automation, test it to ensure it behaves as expected. Monitor the automation and make adjustments as needed. Home Assistant provides tools to monitor the state of devices, view automation logs, and debug any issues that may arise.
7. Combine Multiple Automations: Home Assistant allows you to create complex automations by combining multiple smaller automations. This can enable you to build sophisticated sequences of actions based on specific triggers and conditions.
8. Share and Utilize Automation Blueprints: Home Assistant boasts a community-driven ecosystem of automation blueprints. These pre-built automation templates can be imported and used directly or customized to suit your needs. Sharing your custom automations with the community is also possible, allowing others to benefit from your creativity.
Custom automations empower you to tailor your smart home to your specific requirements. Whether you’re creating simple routines or intricate sequences, Home Assistant offers the flexibility and tools to bring your automation ideas to life.
Integrating Voice Control with Amazon Alexa
One of the most convenient and popular ways to control your home automation system is through voice commands. With Home Assistant and your Raspberry Pi, you can easily integrate voice control using Amazon Alexa. With Alexa, you can control various devices and execute automations hands-free. Here’s how to integrate voice control with Amazon Alexa:
1. Set Up an Amazon Developer Account: Visit the Amazon Developer portal (developer.amazon.com) and sign in or create a new account. This will provide you with the necessary credentials to integrate with Alexa.
2. Create a New Alexa Skill: In the Amazon Developer console, create a new Alexa skill. This skill acts as the bridge between Alexa and Home Assistant, enabling communication between the two.
3. Define Interaction Model: In the Alexa skill configuration, define the interaction model for your skill. This includes defining the phrases and commands that Alexa will use to interact with your Home Assistant devices and automations.
4. Set Up a Custom Lambda Function: To handle the communication between Alexa and Home Assistant, set up a custom AWS Lambda function. This function will act as the middleware, processing commands from Alexa and sending them to your Home Assistant instance.
5. Link Alexa Skill to Lambda Function: Associate your Alexa skill with the custom Lambda function you created. This links the skill to the function, allowing it to be invoked by Alexa commands.
6. Configure Home Assistant for Alexa: In Home Assistant, enable the Alexa integration and generate an Alexa Smart Home skill key. This key is essential for establishing the connection with your Alexa skill.
7. Link Home Assistant to Alexa Skill: In the Alexa skill configuration, input the Home Assistant skill key you generated in the previous step. This links your Home Assistant instance to your Alexa skill, enabling voice control.
8. Discover Devices: In the Alexa app or through the Alexa web portal, discover devices to sync with your Home Assistant setup. Alexa will scan for compatible devices and make them available for voice control.
9. Test Voice Control: With the integration complete, test voice control by issuing commands to your Alexa device. You can ask Alexa to turn on lights, adjust thermostats, or execute specific automations configured in Home Assistant.
10. Extend and Customize: With the integration established, you can further customize the voice control experience by creating additional Alexa skills or refining the interaction model. This allows you to add more specific commands or build upon the existing voice control capabilities.
Integrating voice control with Amazon Alexa provides a convenient and hands-free way to interact with your home automation system. With just a few setup steps, you can control devices and execute automations using simple voice commands, making your smart home experience even more effortless and intuitive.
Securing Your Home Automation System
Securing your home automation system is of utmost importance to protect your privacy, data, and the overall integrity of your smart home. With Home Assistant and your Raspberry Pi, there are several measures you can take to enhance the security of your home automation system. Here are some important steps to consider:
1. Change Default Passwords: Always change the default passwords for your Raspberry Pi and any devices or services integrated with your home automation system. Use strong, unique passwords that include a combination of letters, numbers, and special characters.
2. Enable Two-Factor Authentication (2FA): Activate two-factor authentication for your Home Assistant account and any other accounts associated with your smart home devices or platforms. This adds an extra layer of security by requiring a second verification factor, such as a code sent to your mobile device.
3. Regularly Update Software: Keep your Raspberry Pi, Home Assistant, and all devices in your smart home system up to date with the latest software updates and security patches. This ensures that you have the latest protection against vulnerabilities and exploits.
4. Secure Your Network: Ensure that your home Wi-Fi network is secured with a strong password and WPA2 encryption. Change the default network name (SSID) to one that doesn’t reveal information about your router or network.
5. Use a Firewall: Configure a firewall on your Raspberry Pi to control incoming and outgoing network connections. This adds an additional layer of protection by monitoring and filtering network traffic.
6. Segregate Networks: Consider setting up a separate network for your smart home devices, isolating them from your main network. This way, even if a device is compromised, it will have limited access to other devices and systems in your home.
7. Regularly Backup Your Configuration: Create regular backups of your Home Assistant configuration, as well as any important data associated with your smart home devices. This ensures that you can easily restore your system in case of any unforeseen events or data loss.
8. Disable Unnecessary Features: Review the features and services enabled in your home automation system and disable any that you don’t require. This reduces the potential attack surface and minimizes the exposure to potential vulnerabilities.
9. Monitor Device Permissions: Regularly review and manage the permissions granted to devices, services, and apps within your home automation system. Ensure that only necessary access rights are granted and remove any unnecessary privileges.
10. Stay Informed: Stay updated on the latest security threats, best practices, and recommendations in the smart home and home automation domain. Follow reputable sources and subscribe to security newsletters to stay informed about emerging risks and mitigation strategies.
Implementing these security measures can significantly enhance the protection of your home automation system. By prioritizing security and being proactive, you can enjoy the benefits of a connected smart home while ensuring the safety and privacy of your household.
Troubleshooting Tips
While setting up and using your home automation system with Home Assistant and Raspberry Pi, you may encounter various challenges or unexpected issues. Troubleshooting these problems can help you get your system back up and running smoothly. Here are some troubleshooting tips to help you:
1. Check Power Connections: Ensure that your Raspberry Pi and all connected devices have a stable power supply. Make sure the power cables are properly connected and verify that the power source is functioning correctly.
2. Restart Raspberry Pi: Sometimes, a simple restart can resolve minor issues. Power off your Raspberry Pi, wait a few seconds, and then power it back on again. This can help clear any temporary glitches or software errors.
3. Check Network Connectivity: Verify that your Raspberry Pi is properly connected to your network. Ensure that Wi-Fi or Ethernet connections are active and verify that your network router is functioning correctly.
4. Review Configuration Settings: Double-check your configuration settings in Home Assistant. Ensure that all required fields are properly filled and that all necessary integrations and devices are correctly added. Typos or incorrect settings can cause issues with device recognition and functionality.
5. Check Logs: Review the logs in Home Assistant to identify any error messages, warnings, or issues that could be causing the problem. The logs can provide insights into specific errors or conflicts that need to be addressed.
6. Update Software: Ensure that you have the latest versions of Raspberry Pi firmware, Home Assistant, and any additional software or add-ons you are using. Updates often include bug fixes and improvements that can address known issues.
7. Clear Cache and Cookies: If you are experiencing issues with the Home Assistant web interface, clear your browser cache and cookies. Sometimes, outdated or corrupted browser data can interfere with proper functionality.
8. Check Device Compatibility: Verify that the devices you are trying to integrate are compatible with Home Assistant and that the appropriate integrations and drivers are installed and up to date. Incompatible or outdated device drivers can cause malfunctions or limited functionality.
9. Community Support: Reach out to the Home Assistant community for support. Visit the Home Assistant website, community forums, or social media groups to seek assistance from experienced users who may have encountered similar issues and can provide guidance or solutions.
10. Documentation and Resources: Refer to the official documentation, user guides, tutorials, and troubleshooting resources provided by Home Assistant and the Raspberry Pi community. These resources can offer step-by-step instructions and troubleshooting tips for common problems.
By following these troubleshooting tips, you can address common issues and get your home automation system back on track. Remember to be patient and systematic in your approach, and don’t hesitate to seek assistance from the community if needed.