
Choosing the Right Template
When creating a flyer with Microsoft Word, the first step is to select the right template. A template provides a pre-designed layout with placeholders for your text, images, and graphics. Here are some tips to help you choose the perfect template for your flyer:
1. Consider your audience: Think about who you are targeting with your flyer. Is it for a business event, a charity fundraiser, or a social gathering? Select a template that aligns with the tone and style of your event or message.
2. Look for customization options: Find a template that allows you to easily customize the colors, fonts, and layout. This will give you the flexibility to make your flyer unique and eye-catching.
3. Consider the size: Think about how you plan to distribute your flyer. If you are printing it at home, ensure the template fits standard paper sizes. If you are planning to email or share the flyer online, consider using a template optimized for digital distribution.
4. Check for responsiveness: If you are creating a flyer that will be viewed on different devices, such as smartphones or tablets, choose a template that is responsive and adjusts to different screen sizes.
5. Read user reviews: If you are unsure about a template, take a look at user reviews or comments. This can provide valuable insights into the template’s functionality and user experience.
Once you have chosen the right template, you can start customizing it to fit your needs. Remember to save your work periodically as you make changes to avoid losing any progress. With the right template and a little creativity, your flyer will be ready to grab attention and convey your message effectively.
Editing Text and Fonts
After selecting the appropriate template for your flyer in Microsoft Word, the next step is to edit the text and fonts to personalize your content. Here are some helpful tips to make your flyer stand out:
1. Replace placeholder text: Most templates come with generic text placeholders. Double-click on the text to select and delete it. Replace it with your own catchy headlines, informative details, and persuasive calls to action. Remember to proofread your text for accuracy and clarity.
2. Experiment with fonts: Microsoft Word offers a wide range of fonts to choose from. Selecting the right font can help convey the right tone for your flyer. Consider the purpose of your flyer and the audience you are targeting. For a professional or formal event, choose a clean and legible font. For a more creative or playful flyer, opt for a font that reflects that style.
3. Use font hierarchy: Font hierarchy refers to the visual hierarchy created by using different font sizes, weights, and styles to emphasize important information. Make your headlines larger and bold to catch the reader’s attention. Use a smaller and lighter font for supporting text that provides additional details. Be consistent with your font choices throughout the flyer to maintain a cohesive look.
4. Utilize text effects: Microsoft Word offers a variety of text effects such as shadow, outline, and reflection. These effects can add depth and visual interest to your flyer. However, use them sparingly and make sure they enhance the readability of your text rather than detract from it.
5. Adjust line spacing and alignment: Proper line spacing and alignment can greatly improve the readability of your flyer. Ensure there is enough space between lines to avoid overcrowding. Experiment with left, right, centered, or justified alignment to find the best visually appealing layout.
Remember to save your changes periodically as you edit the text and fonts. It’s a good practice to preview your flyer frequently to ensure it looks visually appealing and the text is legible.
By customizing the text and fonts in your Microsoft Word flyer template, you can create a professionally designed and visually appealing flyer that effectively communicates your message to the target audience.
Adding Images and Graphics
One of the key elements that can enhance the visual appeal of your Microsoft Word flyer is the addition of images and graphics. Here are some tips and techniques to help you effectively incorporate visuals into your flyer:
1. Selecting high-quality images: Choose images that are high-resolution and relevant to your flyer’s theme or message. You can find free stock images on websites like Unsplash or Pixabay, or use your own photos if they align with the content. Make sure the images are visually appealing and of sufficient quality to avoid pixelation when printed.
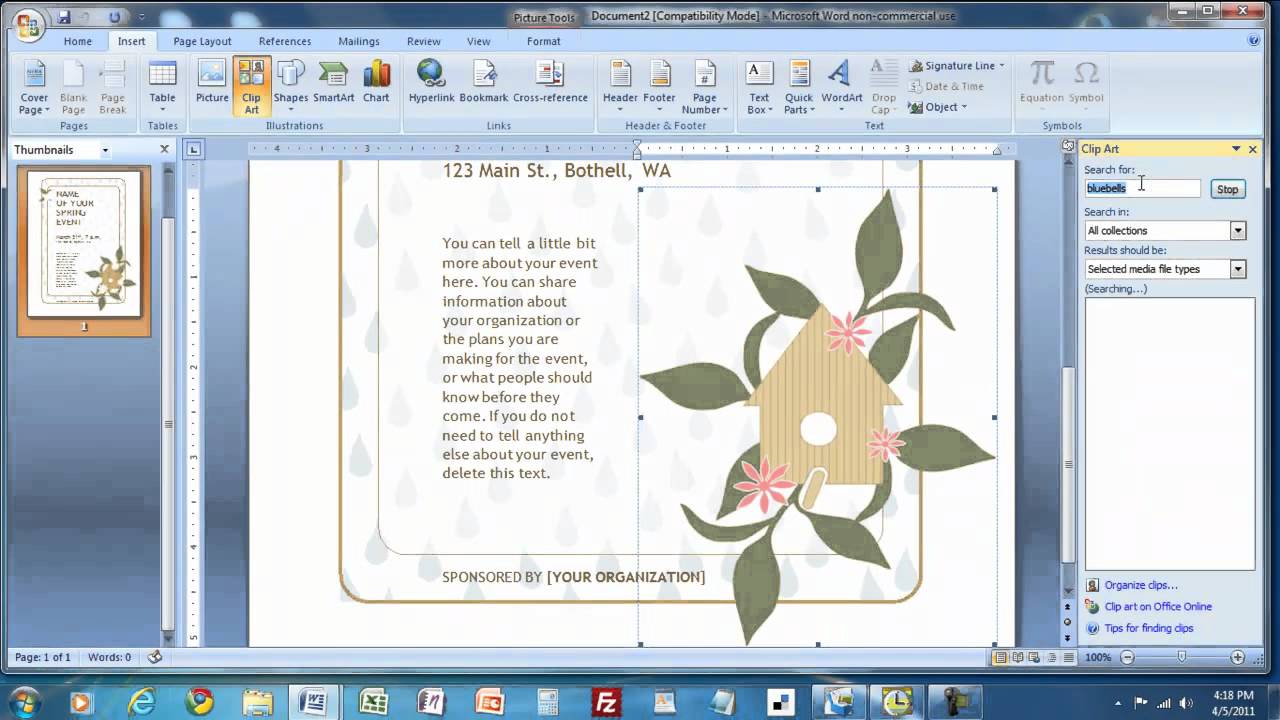
2. Inserting images: To add an image, click on the “Insert” tab in the Word menu, then select “Pictures” from the options. Choose the image file from your computer and click “Insert.” You can position and resize the image within the flyer by clicking on it and dragging the handles.
3. Positioning and alignment: Experiment with the placement of your images to find the most visually appealing arrangement. Consider using a grid layout to maintain a sense of organization. Align the images with the text or other elements to create a cohesive design.
4. Incorporating graphics and icons: Adding icons or graphics can help visually communicate certain concepts or highlights in your flyer. Microsoft Word offers a variety of built-in icons and shapes that you can insert by selecting the “Insert” tab, then choosing “Icons” or “Shapes.” Customize the size, color, and position of the graphics to suit your flyer’s design.
5. Adding captions or labels: If your flyer contains a lot of images, consider adding captions or labels to provide additional context. You can do this by right-clicking on the image and selecting “Add Caption.” This can be especially useful if the images need explanations or if you want to attribute them to specific sources.
Remember to maintain a balance between text and images to avoid overwhelming the reader. A well-designed flyer will have a harmonious combination of visuals and informative content that captures attention and effectively conveys your message.
Adjusting Colors and Backgrounds
When creating a flyer using Microsoft Word, you have the option to adjust colors and backgrounds to further enhance the overall visual impact. Here are some tips and techniques to help you effectively incorporate colors and backgrounds into your flyer:
1. Choose a color scheme: Selecting a cohesive color scheme is essential for creating a visually appealing flyer. Consider the mood or theme of your flyer and select colors that align with it. You can use websites like Adobe Color or Canva’s color palette generator to explore various color combinations and find inspiration.
2. Adjust the flyer background color: To change the background color of your flyer, go to the “Design” tab in Microsoft Word and click on “Page Color.” Choose a color from the palette or select “More Colors” for custom options. Experiment with different background colors to find the one that complements your content and enhances readability.
3. Apply color to text and shapes: Customize the color of your text and shapes to create a harmonious design. Select the element you want to change, and then use the “Font Color” or “Shape Fill” options to choose your desired color. Ensure that the text color contrasts well with the background color for optimal readability.
4. Utilize gradients: Gradients can add depth and visual interest to your flyer. To apply a gradient to an object, select the object, go to the “Format” tab, choose “Shape Fill,” and then select “Gradient.” Experiment with different gradient styles and color combinations to find the effect that best suits your flyer.
5. Use color overlays: If you have an image as the background or a prominent element in your flyer, consider adding a color overlay to enhance the overall aesthetic. This can be done by inserting a shape or text box on top of the image and adjusting its transparency and color fill accordingly.
Remember to maintain consistency in your color choices throughout the flyer to establish a cohesive and professional look. By carefully adjusting colors and backgrounds, you can create a visually captivating flyer that effectively grabs attention and conveys your message in an engaging way.
Formatting and Aligning Elements
Formatting and aligning the elements in your Microsoft Word flyer is crucial for creating a visually appealing and well-organized design. Here are some tips and techniques to help you effectively format and align the different elements of your flyer:
1. Consistent font styles: Use a consistent font style throughout your flyer for a cohesive and professional look. Choose a font that is legible and reflects the tone of your message. Consider using different font weights (bold, italic) or sizes to create emphasis and hierarchy within the text.
2. Consistent text formatting: Ensure that the formatting within your flyer remains consistent. Keep consistent margins, line spacing, and paragraph indents to maintain readability and a polished appearance. Avoid excessive use of different text formatting styles, as it can make the flyer appear cluttered.
3. Alignment and grid layout: Aligning elements on a grid layout can create a visually pleasing and organized design. Use the ruler tool in Microsoft Word to set up a grid system, so you can easily align text boxes, images, and other elements. This will ensure that your flyer looks balanced and professional.
4. Grouping and organizing elements: If your flyer has multiple elements, such as text boxes, images, and shapes, consider grouping them together. Select the elements you want to group, right-click, and choose “Group.” This makes it easier to move and align multiple elements as a single unit.
5. Using white space: White space (also known as negative space) refers to the empty areas in your design. Utilize white space strategically to give your flyer a clean and uncluttered appearance. Avoid overcrowding elements and allow enough space between different sections and text to enhance readability.
6. Aligning text and objects: Ensure that text and other objects are properly aligned within your flyer. Use the alignment options available in Microsoft Word (such as left, right, centered, or justified) to align text paragraphs, headings, and subheadings. Align objects, such as images or shapes, with the text or other elements to maintain a cohesive design.
7. Adjusting spacing and margins: Pay attention to the spacing and margins of your flyer. Adjust the spacing between elements to achieve a balanced and visually appealing layout. Consider adding appropriate margins around the flyer to ensure that important elements are not too close to the edges and may get cut off when printed.
By carefully formatting and aligning the elements of your Microsoft Word flyer, you can create a visually appealing and well-organized design that effectively communicates your message and engages your target audience.
Adding Shapes and Borders
When creating a flyer using Microsoft Word, you have the option to add shapes and borders to enhance the design and draw attention to specific elements. Here are some tips and techniques to help you effectively incorporate shapes and borders into your flyer:
1. Inserting shapes: To add a shape, go to the “Insert” tab in Microsoft Word and choose “Shapes” from the toolbar. Select the desired shape from the drop-down menu, such as rectangles, circles, arrows, or speech bubbles. Click and drag on the page to draw the shape’s outline, and you can resize and adjust its properties as needed.
2. Using shapes for emphasis: Use shapes to highlight important information in your flyer. For example, you can place a rectangle behind a headline or key message to make it stand out. Experiment with different shapes and their sizes to create visual interest and direct the reader’s attention to specific details.
3. Customizing shape properties: Once you have inserted a shape, you can customize its appearance. Right-click on the shape and select “Format Shape” to access various options. You can change the fill color, outline color, line thickness, transparency, and more. Adjust these properties to match the overall design and color scheme of your flyer.
4. Adding borders: Borders can add a polished and finished look to your flyer. To add a border to an element, select it, go to the “Format” tab, and click on “Shape Outline.” Choose the desired border style and color. You can add a border to text boxes, images, shapes, or the entire flyer. Experiment with different border styles, such as solid lines, dashes, or double lines, to find the one that best complements your design.
5. Combining shapes and borders: Consider combining shapes and borders to create interesting visual effects. For example, you can place a circular shape with a border around an image or use a series of rectangles to create a unique background pattern. By combining shapes and borders creatively, you can enhance the overall visual appeal of your flyer.
6. Aligning and positioning: Ensure that your shapes and borders are properly aligned and positioned within your flyer. Use the alignment options in Microsoft Word to align shapes with each other and with other elements, such as text or images. Pay attention to the spacing between shapes and other elements to achieve a balanced layout.
Remember to use shapes and borders strategically, keeping them consistent with your overall design and layout. By incorporating these elements effectively, you can create a visually engaging and professional-looking flyer that captures attention and effectively delivers your message.
Including Contact Information
When creating a flyer, it’s essential to include contact information so that your audience can easily get in touch with you or learn more about your event or business. Here are some important considerations for including contact information in your Microsoft Word flyer:
1. Phone number: Provide a phone number where potential customers or attendees can reach you directly. Format the phone number in a clear and easily readable manner, using dashes or parentheses to separate the area code and number.
2. Email address: Include an email address as an alternative method of contact. Format the email address with proper spacing and ensure it is accurate—double-check for any typos before finalizing your flyer. Remember to use an email address that you check regularly to ensure timely responses.
3. Website or landing page: If you have a website or a specific landing page related to your flyer’s topic, include the URL. This allows interested individuals to visit your website for more information or to make a purchase. Format the URL as a hyperlink to make it clickable in the digital version of your flyer.
4. Social media handles: If your business or event has a presence on social media platforms, consider including your social media handles or usernames. This encourages your audience to connect and engage with you on platforms such as Facebook, Twitter, Instagram, or LinkedIn.
5. Physical address: If applicable, include your physical address to provide a location for your event or business. This is especially important for local businesses or events taking place at a specific venue. Format the address in a clear and concise manner, including the street name, city, state, and zip code.
6. QR codes: Consider using a QR code to make it easier for individuals to access your contact information or navigate to your website. Generate a QR code using an online tool and place it on your flyer. When scanned, the QR code will direct users to the designated webpage.
Remember to choose an appropriate location and format for your contact information on the flyer. Common placements include the bottom of the page or in a dedicated section at the side. Ensure that the font size is legible and easily visible, even from a distance.
Including contact information in your Microsoft Word flyer enables potential customers or attendees to reach out to you and learn more about your business or event. By providing accurate and easily accessible contact details, you increase the likelihood of engagement and conversion.
Proofreading and Spell Checking
Before finalizing your Microsoft Word flyer, it’s crucial to thoroughly proofread and spell-check the content to ensure it is error-free and professional. Here are some important steps to follow when proofreading your flyer:
1. Take a break: After creating your flyer, take a short break before starting the proofreading process. This will help you approach the content with a fresh perspective and a clearer eye for errors.
2. Read aloud: Read the text of your flyer aloud to catch any grammatical or punctuation mistakes that may have been overlooked during the initial drafting. Hearing the words spoken can help identify sentence structure issues or awkward phrasings. Pay attention to clarity and flow.
3. Use spell-check: Utilize the built-in spell-check feature of Microsoft Word to identify and correct any spelling errors. However, be aware that spell-check may not catch all mistakes, especially if they are correctly spelled but used incorrectly (e.g., “their” vs. “there”). Review each suggestion provided by the spell-checker carefully to ensure accuracy.
4. Check grammar and punctuation: Pay close attention to grammar and punctuation errors. Look for issues such as subject-verb agreement, improper use of apostrophes, incorrect verb tenses, and inconsistent punctuation. Verify that sentences are structured correctly and that proper punctuation marks are used.
5. Review layout and formatting: Aside from content errors, check the overall layout and formatting of your flyer. Ensure that all text and images are aligned properly, consistent font styles are used, and headers and subheadings are formatted consistently. Verify that the font sizes and colors are easily readable and visually appealing.
6. Proofread backward: To catch spelling errors and typos that may have been missed during regular reading, proofread the text backward—starting from the last word and working your way back to the first. This technique helps to isolate each word, making it easier to identify individual errors.
7. Ask for a second opinion: Consider having someone else review your flyer. A fresh pair of eyes may spot errors and offer valuable feedback on the overall readability and impact of the content.
8. Print a test copy: Before finalizing and distributing your flyer, print a test copy to ensure that it appears as intended on paper. Proofread the printed version carefully, as errors can be more noticeable in print compared to on-screen.
Remember, proofreading is an essential step in creating a professional and error-free flyer. By dedicating time and attention to this process, you can ensure that your message is clear, concise, and free of any mistakes that may detract from your credibility.
Printing and Saving the Flyer
Once you have finalized your Microsoft Word flyer and completed all necessary edits and proofreading, it’s time to print and save your design. Here are some steps and considerations to help you with this process:
1. Check print settings: Before printing your flyer, review the print settings to ensure they are suitable for your desired output. Adjust the paper size, orientation (portrait or landscape), and resolution for optimal printing results. Consider using high-quality paper that complements your design and desired visual impact.
2. Print a test copy: Print a test copy of your flyer to check for any formatting issues, color inconsistencies, or unexpected printing errors. Examine the layout, text readability, and overall print quality. Make adjustments as needed before printing multiple copies.
3. Choose the right printer: Select a printer that offers high-quality output and is capable of producing the desired print size. If you don’t have access to a suitable printer, consider using a commercial printing service or a local print shop that specializes in producing professional flyers.
4. Save a digital copy: Save your flyer as a digital file to easily share or distribute online. Click on “Save As” in MS Word and choose a file format, such as PDF or JPEG, that preserves the layout and ensures compatibility across different devices and software. This way, others can view or print your flyer without needing MS Word.
5. Share electronically: If you plan to distribute your flyer electronically through email or social media, consider saving it as a smaller file size to ensure faster upload and download times. Compress any images used to reduce file size without compromising image quality.
6. Consider multiple formats: Depending on your needs, create different file formats of your flyer. For example, you may want a high-resolution version for printing and a lower-resolution version for online sharing. Having multiple formats allows for versatility in distribution methods.
7. Backup your file: Make sure to create backups of your flyer file. Store it on multiple devices or in cloud storage to prevent loss of your hard work. This ensures you have a copy for future reference or for making updates or modifications if necessary.
8. Print in sufficient quantities: Determine the number of copies you need and print accordingly. Consider your distribution plan and allow for extra copies to account for unexpected needs or last-minute attendees.
Remember to review the final printed copies for any errors or imperfections before distributing them to your intended audience. Taking the time to print and save your flyer correctly ensures that your message is effectively communicated and visually appealing to maximize engagement and impact.