
Checking Your Car’s USB Compatibility
Checking Your Car’s USB Compatibility
Before you start the process of listening to music from a USB flash drive in your car, it is important to ensure that your car’s audio system is compatible with USB devices. Not all car audio systems support USB connectivity, so it is crucial to check the specifications of your car’s audio system or consult your car’s manual for detailed information.
Here are the key steps to check your car’s USB compatibility:
- Consult the car’s manual: Look up the user manual or documentation that came with your car to find information about the audio system’s supported audio sources. The manual will typically mention whether USB devices are supported and any specific requirements.
- Check the audio system interface: Take a close look at your car’s audio system interface. Look for a USB port or an input labeled “USB” or “Auxiliary/USB.” Make sure the USB port is not solely intended for charging and can also be used for audio playback.
- Research online: Consult online forums or search for information specific to your car make and model. Car enthusiasts and owners may have already tested USB compatibility and posted their findings online.
- Test compatibility: Connect a USB flash drive with audio files to the USB port in your car. If the audio system recognizes the drive and allows you to navigate through the songs, it is likely compatible. If it does not, or if you encounter any error messages, it is possible that the USB device is not supported.
By following these steps, you can quickly determine whether your car’s audio system supports USB playback. If it does not, you may need to explore alternative options such as using an auxiliary cable or Bluetooth connectivity to listen to music from external devices in your car.
Formatting Your USB Flash Drive
Formatting Your USB Flash Drive
Once you have confirmed that your car’s audio system supports USB connectivity, the next step is to format your USB flash drive. Formatting your USB drive ensures compatibility, removes any existing files, and optimizes storage capacity for your music files.
Here are the key steps to format your USB flash drive:
- Backup your files: Before formatting, it is important to back up any important files on your USB flash drive to prevent data loss. Transfer the files to your computer or an external backup device.
- Connect the USB flash drive: Plug your USB flash drive into an available USB port on your computer. Wait for your computer to detect and recognize the drive.
- Open the file explorer: Open the file explorer on your computer by clicking on the file folder icon in the taskbar or accessing it through the Start menu.
- Select the USB flash drive: Locate your USB flash drive in the file explorer, which is usually labeled as a removable drive. Right-click on the drive and select “Format” from the context menu.
- Choose the file system and allocation unit size: In the format dialog box, choose the desired file system. The recommended file system for USB flash drives is FAT32, as it is widely supported by car audio systems. Leave the allocation unit size as the default.
- Format the USB flash drive: Double-check that you have selected the correct drive and click on the “Start” button to begin the formatting process. You may receive a warning message about data loss. Confirm the formatting process and wait for it to complete.
- Verify the format: Once the formatting process is complete, the file explorer will display a message indicating successful formatting. Safely eject the USB flash drive from your computer.
Formatting your USB flash drive prepares it for storing and playing music in your car. Remember to avoid using the USB drive for anything other than audio files to ensure smooth playback. Keep a backup of your music files on your computer or another storage device and regularly update your USB flash drive with new music to keep your car’s audio experience fresh and enjoyable.
Organizing Your Music Files
Organizing Your Music Files
Properly organizing your music files on the USB flash drive will make it easier to navigate through your songs and create playlists in your car. Here are some tips to help you organize your music files effectively:
- Create folders: Start by creating main folders for different genres or categories of music. You can create folders like “Rock,” “Pop,” “Hip-hop,” “Classical,” or any other genre that suits your music collection. This will help you quickly locate the type of music you want to listen to while driving.
- Subfolders for artists or albums: Within each genre folder, create subfolders for artists or albums. This will further categorize your music collection and make it easier to find specific songs or albums. For example, within the “Rock” folder, you can have subfolders for artists like “The Beatles,” “Led Zeppelin,” or subfolders for albums like “Abbey Road” or “Physical Graffiti.”
- Organize files by track number: To maintain a consistent order of songs within each album folder, rename the audio files to include the track number at the beginning of the file name. This will ensure that the songs play in the correct order when listening to an album sequentially.
- Include metadata: Add metadata tags to your music files to provide additional information about each song. Include details like the artist’s name, album name, track title, genre, and year of release. This information will be displayed on your car’s audio system while navigating through your music library.
- Check file formats: Ensure that your music files are in a compatible audio format supported by your car’s audio system. Most car audio systems support popular formats like MP3, WMA, AAC, and FLAC. Convert any incompatible files to a supported format using audio conversion software.
Organizing your music files in a structured manner will save you time when browsing through your music collection in your car. Take some time to review and organize your files before transferring them to your USB flash drive. This way, you’ll have a streamlined and easily accessible music library right at your fingertips, making your car rides more enjoyable and convenient.
Transferring Music to Your USB Flash Drive
Transferring Music to Your USB Flash Drive
Now that you have organized your music files, it’s time to transfer them to your USB flash drive. Follow these steps to ensure a smooth and successful transfer process:
- Connect your USB flash drive: Insert your USB flash drive into an available USB port on your computer. Wait for your computer to detect and recognize the drive.
- Open the file explorer: Open the file explorer on your computer by clicking on the file folder icon on the taskbar or through the Start menu.
- Locate your music files: Navigate to the folder or location on your computer where your organized music files are stored.
- Select and copy: Select the music files or folders you want to transfer to your USB flash drive. Right-click on the selected files and choose “Copy” from the context menu.
- Paste to your USB flash drive: Go back to the file explorer window and locate your USB flash drive, usually labeled as a removable drive. Right-click on the drive and choose “Paste” from the context menu to start transferring the selected files.
- Wait for the transfer to complete: Depending on the size of your music files, the transfer process may take a few moments. Ensure that the transfer is complete before safely ejecting the USB flash drive from your computer.
- Safely eject the USB flash drive: Right-click on the USB flash drive icon in the file explorer and choose the “Eject” or “Safely Remove Hardware” option. This ensures that all data is written to the drive before it is disconnected. Wait for the system to notify you that it is safe to remove the USB flash drive.
Remember to transfer the music files in the folder structure you created earlier to maintain the organization in your car’s audio system. Once the transfer is complete, disconnect the USB flash drive from your computer and proceed to connect it to your car’s USB port for music playback.
Always keep a backup of your music files on your computer or another storage device in case of any accidental loss or corruption on the USB flash drive. Regularly update your USB flash drive with new music to keep your car rides entertaining and enjoyable.
Connecting Your USB Flash Drive to Your Car
Connecting Your USB Flash Drive to Your Car
Now that you have transferred your music files to your USB flash drive, it’s time to connect it to your car’s audio system and start enjoying your favorite tunes during your drives. Follow these steps to connect your USB flash drive to your car:
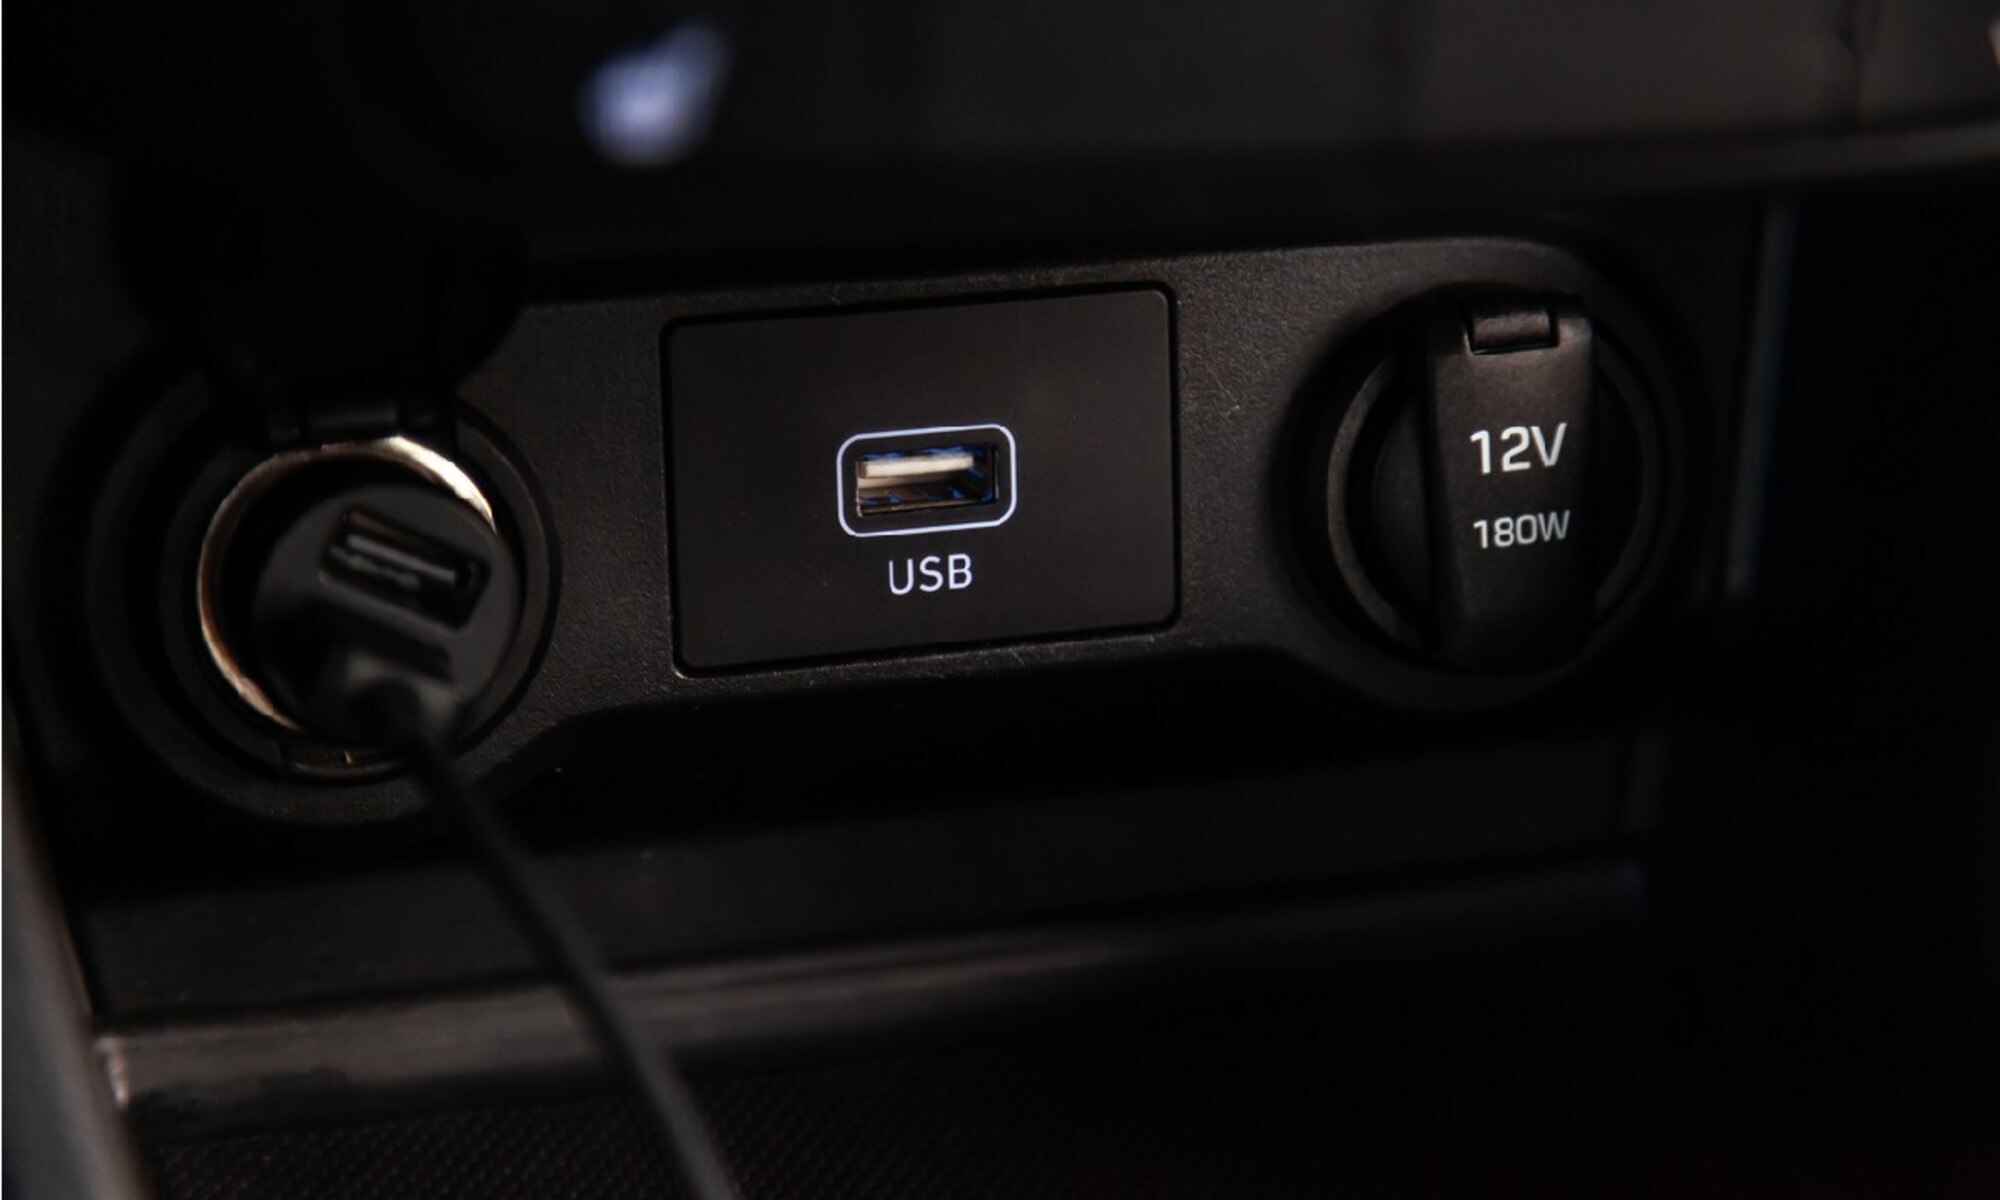
- Locate the USB port: Take a look at your car’s dashboard or center console to locate the USB port. It is usually labeled with an icon or the word “USB.” The port may be located behind a panel or in a visible spot.
- Connect the USB flash drive: Insert the USB flash drive into the USB port of your car. Ensure that it is inserted securely and properly aligned with the port.
- Switch on the car’s audio system: Start your car and switch on the audio system. Most car audio systems will automatically detect the USB flash drive and begin scanning for music files.
- Wait for the scanning process: Depending on the size of your music library, the scanning process may take a few seconds or a couple of minutes. Allow your car’s audio system enough time to scan and index all the songs on your USB flash drive.
- Navigate through your music: Once the scanning process is complete, you can navigate through your music using the controls on your car’s audio system. Use the menu options, browse buttons, or rotary dials to scroll through folders, artists, albums, or playlists.
- Select your desired music: Use the audio system’s controls to select the specific song, album, or artist you wish to listen to. The audio system may also have options to shuffle the songs or choose different playback modes.
- Control playback: Use the audio system’s controls to play, pause, skip tracks, or adjust the volume levels while your music is playing. Familiarize yourself with the different buttons and their functions for an enhanced audio experience.
Once your USB flash drive is connected and recognized by your car’s audio system, you can enjoy your favorite music directly from the drive. Experiment with different navigation options to explore your music collection and create personalized playlists for different moods or occasions.
Remember to disconnect the USB flash drive properly from your car’s audio system when not in use. This will prevent any potential damage or data corruption on the drive. With your USB flash drive and car’s audio system working seamlessly together, you’re all set to enjoy high-quality music on your car journeys.
Navigating Through Your Music
Navigating Through Your Music
Once your USB flash drive is connected to your car’s audio system, you can easily navigate through your music library to find and play your favorite songs, albums, or playlists. Here are some tips to help you navigate efficiently:
- Browse by folder: If you organized your music files into folders, you can navigate through each folder to find the genre, artist, or album you want to listen to. Use the menu options or browse buttons on your car’s audio system to explore the folder structure.
- Browse by artist or album: Many car audio systems allow you to browse your music collection by artist or album. This allows you to quickly locate specific artists or albums and enjoy their entire discography or selected tracks.
- Search function: Some advanced car audio systems offer a search function that allows you to search for specific songs, artists, or albums. Utilize this feature if you have a large music library or are looking for a specific track.
- Create playlists: If your car’s audio system supports playlist creation, take advantage of this feature to curate personalized music collections for different moods or occasions. Create playlists for road trips, relaxing drives, or upbeat commuting.
- Use shortcuts: If your car’s audio system supports shortcuts or preset buttons, assign your favorite artists, albums, or playlists to these buttons for quick and convenient access to your most frequently played music.
Experiment with different navigation options offered by your car’s audio system to find the method that works best for you. Get familiar with the controls and menu options to easily navigate through your music collection without distractions while driving.
It’s worth noting that the navigation features might vary depending on the make and model of your car’s audio system. Refer to your car’s manual or consult the manufacturer’s website for specific instructions and features related to music navigation.
By mastering the navigation features of your car’s audio system, you can effortlessly find and play your favorite music, allowing you to enjoy a customized and immersive audio experience during your car journeys.
Creating Playlists
Creating Playlists
One of the benefits of listening to music from a USB flash drive in your car is the ability to create personalized playlists. Playlists allow you to group together specific songs, albums, or artists, catering to your mood, genre preferences, or specific occasions. Here’s how you can create playlists with your USB flash drive:
- Access playlist creation: Check if your car’s audio system offers the option to create playlists. This feature is typically available in more advanced audio systems. Consult your car’s manual or explore the settings menu to access the playlist creation function.
- Choose a name for your playlist: Select a name for your playlist that represents the theme or mood of the songs you want to include. For example, you might create a playlist called “Driving Vibes” or “Relaxing Tunes.”
- Select songs: Browse through your music library and select the songs you want to include in the playlist. Use the menu options or browse buttons on your car’s audio system to navigate to the desired tracks.
- Add songs to the playlist: Once you have selected a song, choose the option to add it to the playlist you created. Repeat this process for each song you want to include.
- Arrange the order of songs: If desired, use the playlist editing options to rearrange the order of the songs. This allows you to create a seamless flow of music that matches your preferences.
- Save the playlist: Once you have finished adding and organizing the songs, save the playlist on your car’s audio system. Follow the prompts on the screen to confirm and save the playlist.
- Access and play the playlist: To access and play the playlist, navigate to the playlist section on your car’s audio system. Find the playlist you created and select it to start playing the songs in the desired order.
Creating playlists helps you curate a tailored music experience in your car, ensuring that your favorite songs are readily available for your enjoyment. You can create playlists for different moods, occasions, or even specific road trips to make your driving experience more enjoyable.
Remember to update and modify your playlists regularly by adding new songs or removing ones that you no longer wish to include. This will keep your music collection fresh and exciting, providing a personalized soundtrack for your car rides.
Updating Your Music Collection
Updating Your Music Collection
As your musical tastes evolve and new songs are released, it’s important to regularly update your music collection on your USB flash drive. This ensures that you always have a fresh and diverse selection of music to enjoy during your car rides. Here are some tips for updating your music collection:
- Discover new music: Keep an eye out for new releases, explore different genres, and discover new artists. Check out music streaming platforms, music blogs, radio stations, or recommendations from friends to find new songs that resonate with you.
- Download new songs: Once you come across new tracks or albums that you want to add to your music collection, download them to your computer. Make sure they are in a compatible audio format supported by your car’s audio system.
- Organize the new music: Just like with your existing music files, organize the new songs into appropriate folders and subfolders on your computer. This will help you easily transfer them to your USB flash drive later.
- Transfer the new music: Connect your USB flash drive to your computer and transfer the newly downloaded music files to the appropriate folders on the drive. If necessary, update your existing playlists or create new ones to include the new songs.
- Remove outdated or unwanted songs: While updating your music collection, it’s a good time to remove any songs that you no longer enjoy or want to include. This helps keep your music collection clutter-free and makes it easier to navigate through your favorite tracks.
Remember to safely eject your USB flash drive from your computer once the transfer is complete. Once you’ve updated your music collection and organized it on your USB flash drive, reconnect it to your car’s audio system and enjoy your updated music library on your drives.
Make it a habit to regularly update your music collection so that you constantly have a fresh and exciting selection of songs to listen to. Stay connected to the latest music releases and curate a diverse range of music genres and artists to match your evolving musical preferences.
Troubleshooting Common Issues
Troubleshooting Common Issues
While listening to music from a USB flash drive in your car is generally straightforward, you may encounter some common issues along the way. Here are some troubleshooting steps to help you resolve these issues:
- USB drive not recognized: If your car’s audio system does not detect or recognize your USB flash drive, try unplugging the drive and plugging it back in. Ensure that it is inserted securely into the USB port. If the problem persists, try using a different USB port or testing the drive on a different car audio system.
- Unsupported audio format: If you experience issues playing some of your music files, it is possible that they are in an unsupported audio format. Check your car’s manual or consult the manufacturer’s website to determine the supported audio formats. Convert any unsupported files to a compatible format using audio conversion software.
- Corrupted files: Occasionally, files on your USB flash drive may become corrupted, leading to playback issues. To address this, try copying the files from your USB drive to your computer, delete the original files from the USB drive, and then transfer the copied files back to the drive. This can help remove any corruption from the files.
- Skipping or freezing during playback: If you experience skipping or freezing while playing music, it could be due to insufficient power supply to the USB port or issues with the USB connection. Try using a shorter and high-quality USB cable to connect the drive. Additionally, avoid overloading the USB drive with too many files, as this can cause performance issues.
- Slow navigation: If navigating through your music library is slow or laggy, it may be due to a large number of files or folders on the USB drive. Consider organizing your music files into folders or subfolders to reduce the overall file count. This can improve navigation speed and make it easier to find specific songs or albums.
- Random playback issues: If your car’s audio system is experiencing random playback issues, such as songs skipping or playing out of order, it could be due to incorrect metadata or naming conventions. Check the metadata tags of your music files to ensure they are accurate and properly formatted. Rename any improperly named files to align with their respective track numbers and titles.
If these troubleshooting steps do not resolve the issues you are facing, consult your car’s manual or contact the manufacturer’s customer support for further assistance and guidance specific to your car’s audio system.
By addressing and resolving these common issues, you can ensure a smooth and uninterrupted music listening experience from your USB flash drive in your car.
Enhancing Your Car’s Audio Quality with EQ Settings
Enhancing Your Car’s Audio Quality with EQ Settings
Adjusting the equalizer (EQ) settings of your car’s audio system can significantly enhance the quality of your music playback and customize the sound to your personal preferences. The EQ settings allow you to modify the balance of different audio frequencies, such as bass, midrange, and treble, to optimize the sound output. Here’s how you can make use of EQ settings to enhance your car’s audio quality:
- Understand the different EQ bands: Familiarize yourself with the different EQ bands available on your car’s audio system. These bands typically include settings for bass, midrange, and treble. Each band represents a specific range of frequencies that can be adjusted.
- Experiment with preset EQ settings: Many car audio systems offer preset EQ settings such as “Rock,” “Pop,” “Jazz,” and “Custom.” Start by trying different presets to find one that suits your music preferences. If none of the presets match your taste, move on to customizing the EQ settings manually.
- Adjust the bass level: The bass frequencies add depth and richness to your music. Increase the bass level to enhance the low-end response and make your music feel more impactful. Decrease the bass level if it feels too overpowering or if you notice distortion in the sound.
- Tweak the midrange frequencies: The midrange frequencies determine the clarity and presence of vocals and instruments. Adjust the midrange levels to make the vocals and instruments stand out or blend in with the rest of the audio. Increase the midrange for clearer vocals and accentuated instrumentals, or decrease it for a smoother and warmer sound.
- Fine-tune the treble: The treble frequencies control the crispness and brightness of the higher tones. Increase the treble level for enhanced detail and clarity, particularly with instruments like cymbals and high-pitched vocals. Decrease the treble if the sound feels too sharp or sibilant.
- Save and test your settings: Once you have adjusted the EQ settings to your liking, save them as a custom setting if your car’s audio system allows it. Take some time to listen to different genres of music and make sure the sound remains balanced across different tracks.
- Make small adjustments: Keep in mind that slight adjustments can make a significant difference in the sound. Instead of making drastic changes, make small tweaks to the EQ settings until you achieve the desired audio quality.
It’s important to note that every car’s audio system is different, and the available EQ settings may vary. Refer to your car’s manual or consult the manufacturer’s website for specific instructions on accessing and adjusting the EQ settings on your particular audio system.
By utilizing the EQ settings on your car’s audio system, you can customize the sound output to match your preferences and enhance the audio quality of your music playback while driving.
Taking Care of Your USB Flash Drive
Taking Care of Your USB Flash Drive
Proper care and handling of your USB flash drive can ensure its longevity and reliable performance. Here are some essential tips to keep your USB flash drive in optimal condition:
- Handle with care: When inserting or removing your USB flash drive, handle it gently and avoid excessive force. Mishandling can lead to physical damage or bending of the connector, which may render the drive unusable.
- Protect from extreme temperatures: USB flash drives are sensitive to extreme temperatures. Avoid exposing your drive to direct sunlight, excessive heat, or frigid temperatures. Extreme temperature conditions can cause physical damage to the drive or lead to data corruption.
- Store in a safe place: When not in use, store your USB flash drive in a protective case or a dry and dust-free environment. This helps prevent scratches, dirt accumulation, and potential damage to the drive’s connector.
- Eject safely: Always eject your USB flash drive safely from your computer or car’s audio system before removing it. This ensures that all data transfers are complete and reduces the risk of file corruption.
- Regularly backup your files: It’s a good practice to regularly back up the content of your USB flash drive onto your computer or an external storage device. This provides an additional layer of protection in case of accidental loss, damage, or data corruption on the USB drive.
- Avoid bending or twisting: USB flash drives are delicate electronic devices. Avoid bending or twisting your drive, as this can damage the internal components and render it inoperable.
- Keep away from liquids: Liquids can severely damage USB flash drives. Keep your drive away from water, beverages, or any other liquids that could accidentally come into contact with it.
- Scan for viruses: Regularly scan your USB flash drive for viruses or malware using reliable antivirus software. This helps protect your drive and prevents any potential transfer of infected files to other devices.
- Replace if necessary: USB flash drives have a lifespan and may eventually wear out over time, especially with frequent use. If you notice significant deterioration in performance or problems with file transfers, consider replacing your USB flash drive to avoid potential data loss.
By following these tips, you can extend the lifespan of your USB flash drive and ensure that it provides reliable storage and playback of your music files in your car.
Additional Tips and Tricks
Additional Tips and Tricks
Here are some additional tips and tricks to enhance your experience of listening to music from a USB flash drive in your car:
- Keep your USB flash drive organized: Regularly organize and update your music library on your USB flash drive by removing outdated or unwanted songs. This helps you easily navigate through your collection and maintain a clutter-free music library.
- Create a backup of your music: Maintain a backup of your music files on your computer or another storage device. This ensures that you have a copy of your music collection in case of accidental loss or corruption on the USB flash drive.
- Charge your USB flash drive: If your car’s audio system has a USB port specifically for charging, utilize it to keep your USB flash drive charged. A fully charged drive ensures smooth playback and better performance.
- Use a USB extension cable: If the USB port in your car is difficult to access or located in an awkward position, consider using a USB extension cable. This allows you to connect your USB flash drive more conveniently and avoids straining the USB port itself.
- Label your USB flash drive: To easily identify your USB flash drive in a collection or when inserting it into your car’s audio system, label it with a unique and recognizable name or sticker. This makes it quick and easy to locate your drive among other USB devices.
- Update your car’s firmware: Check if there are any firmware updates available for your car’s audio system. Updating the firmware can improve compatibility with USB devices and provide additional features or bug fixes.
- Minimize distractions: While listening to music from a USB flash drive, be sure to prioritize safe and focused driving. Minimize distractions and avoid operating the audio system or browsing through music while driving. Set up your desired playlist or track in advance or safely pull over to make any necessary adjustments.
- Explore other audio sources: In addition to using a USB flash drive, experiment with other audio sources your car’s audio system supports, such as Bluetooth streaming or auxiliary input. This allows you to vary your music listening options and expand your musical enjoyment.
By implementing these tips and tricks, you can make the most of your USB flash drive and create an enjoyable and tailored music experience in your car.