
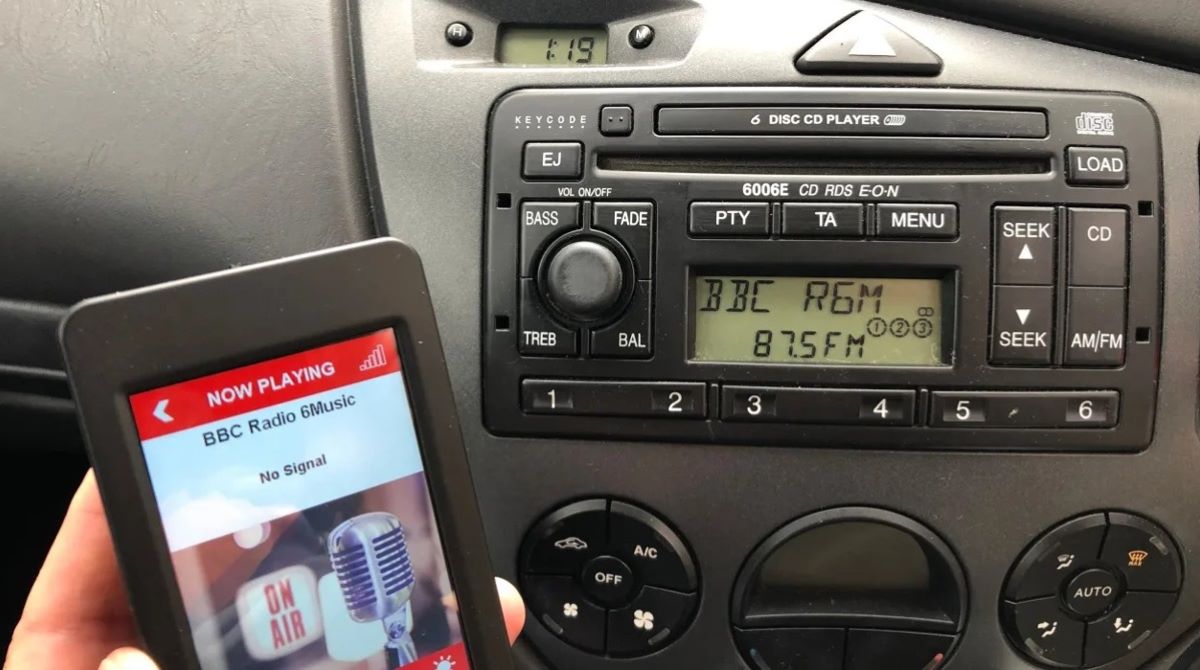
Why Add USB to an Older Car Stereo?
Adding USB functionality to an older car stereo can greatly enhance your driving experience. With the popularity of digital music and portable devices, having a USB port in your car allows you to easily connect and play music from a USB flash drive or even charge your devices on the go. Here are a few reasons why you should consider adding USB to your older car stereo:
- Access to Digital Music: One of the main advantages of adding USB to your car stereo is the ability to access and play digital music files. Instead of relying on CDs or radio stations with limited song options, you can store thousands of songs on a USB flash drive and enjoy a wide variety of music during your drives.
- Convenience: With a USB port, you don’t have to deal with the hassle of carrying around CDs or connecting your smartphone via an auxiliary cable. Simply plug in your USB flash drive, and you’re ready to go. Plus, you can easily navigate through your music collection using the car stereo’s controls, making it safer and more convenient to select your desired songs.
- Charging Capability: In addition to playing music, a USB port allows you to charge your devices while on the road. Whether it’s your smartphone, tablet, or other USB-powered gadgets, you can keep them fully charged during your travels without the need for additional charging adapters or cables.
- Affordability: Upgrading your car stereo to include USB functionality is often a more cost-effective solution than replacing the entire system. By adding a USB adapter, you can enjoy the benefits of modern technology while preserving the classic design and functionality of your older car stereo.
- Compatibility: USB connectivity is widely supported by various portable devices, making it a versatile and future-proof option for your car stereo. Whether you have an iPod, MP3 player, or a smartphone, you can easily connect and enjoy your favorite digital music through the USB port.
By adding USB functionality to your older car stereo, you can bring it into the digital age and enjoy the convenience, versatility, and affordability that USB connectivity offers. So, if you’re tired of relying on outdated audio sources, it’s time to consider upgrading your car stereo with a USB adapter.
Things You’ll Need
Before you begin the process of adding USB to your older car stereo, make sure you have the following items:
- USB adapter: This is the main component that will allow you to connect a USB device to your car stereo. Ensure that you choose an adapter that is compatible with your specific car stereo model and has the necessary features for your desired functionality.
- Tools: Depending on your car stereo and the installation process, you may need a set of basic tools such as screwdrivers, pliers, wire strippers, and electrical tape. It’s always a good idea to have these tools handy to make the installation process smoother.
- USB cable: You will need a USB cable to connect the USB adapter to your car stereo. Make sure to choose a cable of sufficient length that can easily reach from the adapter to a convenient location in your car, such as the center console or dashboard.
- Mounting equipment: If the USB adapter does not come with its own mounting hardware, you may need additional equipment such as adhesive mounts, brackets, or screws to secure the adapter in place. This will ensure that it stays in position and is easily accessible while driving.
- Knowledge of your car stereo: It’s important to have some knowledge of your car stereo’s wiring and connections. Familiarize yourself with the wiring diagram or consult the user manual to understand the available ports and how to access them. This will make it easier to identify the appropriate connections for the USB adapter.
Gathering these essential items before starting the installation process will help you proceed smoothly and ensure that you have everything you need to successfully add USB functionality to your older car stereo.
Step 1: Determine Compatibility
Before you begin adding USB functionality to your older car stereo, it’s crucial to determine if your car stereo is compatible with this upgrade. Here’s how you can check for compatibility:
- Research your car stereo model: Look up the specifications and features of your car stereo model. Check if it has any auxiliary inputs or ports that can be utilized for connecting a USB adapter. Additionally, find out if there are any specific recommendations or restrictions provided by the car manufacturer regarding modifications or upgrades.
- Inspect your car stereo’s front panel: Examine the front panel of your car stereo for any visible USB or auxiliary ports. Some older car stereos may have hidden or concealed ports that can be accessed by removing a cover or panel. If you find a USB port, determine if it is functional or if it requires any additional accessories to enable USB connectivity.
- Check for compatibility with your device: Consider the devices you plan to connect to the USB port. Ensure that they are compatible with the file formats supported by your car stereo. For example, if you primarily use an iPhone, make sure that the USB adapter and car stereo are compatible with Apple’s proprietary audio system or offer alternative methods for connecting your iPhone.
- Consult a professional: If you are uncertain about the compatibility or technical aspects of adding USB to your car stereo, it’s advisable to seek assistance from a professional car audio installer. They can provide expert advice and help you determine the best options for your specific car stereo and requirements.
By thoroughly researching your car stereo model, inspecting the front panel, checking device compatibility, and seeking expert advice, you can determine if your older car stereo is compatible with USB upgrades. This will ensure a smooth installation process and allow you to enjoy the benefits of USB connectivity conveniently.
Step 2: Find the Right USB Adapter
Once you have determined the compatibility of your car stereo with USB upgrades, the next step is to find the right USB adapter that meets your needs. Here’s what you should consider when selecting a USB adapter:
- Compatibility: Ensure that the USB adapter is compatible with the make and model of your car stereo. Check if it supports the necessary features, such as audio playback and charging capabilities, based on your preferences.
- Connectivity options: Determine the type of connectivity options you require. Some USB adapters connect directly to an existing port on the car stereo, while others use FM transmitters or auxiliary inputs. Choose the option that suits your car stereo setup and provides a reliable and interference-free connection.
- Audio quality: Look for a USB adapter that maintains high-quality audio output. It should support a wide range of audio file formats and provide clear, distortion-free sound for an enjoyable listening experience.
- User-friendly design: Consider the ease of use and accessibility of the USB adapter. Look for features such as intuitive controls, a user-friendly interface, and clear indications for managing your music and controlling playback. This will make it more convenient and safer to operate while driving.
- Power capabilities: If you plan to charge your devices using the USB adapter, check its power output. Make sure it provides sufficient power to charge your devices quickly and efficiently.
- Brand reputation and reviews: Research and read reviews about different USB adapter brands to gauge their reliability, durability, and customer satisfaction. Choosing a reputable brand with positive reviews can increase the chances of a successful installation and long-term performance.
By considering compatibility, connectivity options, audio quality, user-friendliness, power capabilities, and brand reputation, you can find the right USB adapter for your needs. This will ensure a seamless integration and enhance your older car stereo with USB functionality.
Step 3: Prepare Your Car Stereo
Before installing the USB adapter, it’s important to properly prepare your car stereo to ensure a smooth and successful integration. Follow these steps to prepare your car stereo:
- Gather necessary tools: Collect the tools you may need for this step, such as a screwdriver, pliers, and wire strippers. Having these tools on hand will make the process more efficient.
- Turn off your car and disconnect the battery: To prevent any electrical issues or damage during the installation, turn off your car’s ignition and disconnect the negative terminal of the battery. This step will ensure safety and prevent any potential short circuits.
- Identify the power source: Locate the power source for your car stereo. You may need to consult your car’s manual or the stereo’s documentation to identify the specific power wire. Take note of its color and location for future reference.
- Remove the car stereo: Use the appropriate tools, such as a screwdriver, to carefully remove the car stereo from its slot or dashboard. Follow the manufacturer’s instructions or seek professional guidance if needed. Be gentle to avoid damaging any delicate parts.
- Identify the ports: Examine the back of the car stereo and identify the available ports or connectors. Look for auxiliary input ports or unused ones that can be utilized for connecting the USB adapter. Refer to the car stereo’s manual for guidance if necessary.
- Prepare wiring connections: Determine the appropriate wires for connecting the USB adapter to the car stereo. Strip a small portion of insulation from the wires to expose the metal conductor. This will allow for proper electrical connections.
- Tidy up the wiring: Organize and secure the wires behind the car stereo to prevent them from getting tangled or interfering with other components. Consider using zip ties or electrical tape to secure the wires and keep them neat and organized.
By preparing your car stereo properly, you ensure a smooth installation process and minimize any potential issues. Take your time during this step to ensure that everything is set up correctly, as it will pave the way for a successful integration of the USB adapter with your older car stereo.
Step 4: Install the USB Adapter
Once you have prepared your car stereo, it’s time to install the USB adapter. Follow these steps to ensure a proper installation:
- Refer to the USB adapter instructions: Read the instructions provided with the USB adapter carefully. They will guide you through the specific installation process for your adapter model. Familiarize yourself with the different components and connections.
- Connect the USB adapter to the car stereo: Find the appropriate port on the back of the car stereo for the USB adapter. Connect the adapter securely to the port, ensuring a snug fit. Take note of any additional cables or wiring that may need to be connected for power or audio output.
- Connect the power wires: If necessary, connect the power wires from the USB adapter to the power source of the car stereo that you identified in the previous step. Follow the manufacturer’s instructions for proper wiring connections. Make sure all connections are secure and insulated using electrical tape if needed.
- Ensure proper grounding: Some USB adapters may require grounding to ensure optimal performance. Follow the instructions provided with your USB adapter to properly ground it if required. This step will help minimize any potential interference or noise in the audio signal.
- Double-check connections: Before reattaching the car stereo to the dashboard or slot, double-check all connections to ensure they are secure and properly aligned. This includes the USB adapter connection, power wires, and any additional audio cables or connectors that are part of the installation process.
- Test the USB adapter: Once the installation is complete, reattach the car stereo to the dashboard or slot. Reconnect the negative terminal of the car battery and turn on the car’s ignition. Test the USB adapter by inserting a USB flash drive with music files and confirming that the car stereo recognizes and plays the files correctly.
By following these steps, you can successfully install the USB adapter into your car stereo. Take your time to ensure all connections are secure and double-check everything before proceeding to the next step. Installing the adapter properly will pave the way for a reliable and functional USB integration with your older car stereo.
Step 5: Connect the USB Cable
Once the USB adapter is installed, the next step is to connect the USB cable. Follow these steps to ensure a proper connection:
- Choose the appropriate USB cable: Select a USB cable that is compatible with your USB adapter and the devices you plan to connect. Ensure that the cable is long enough to reach a convenient location in your car, such as the center console or dashboard.
- Locate the USB port: Identify the USB port on the USB adapter. It is usually marked with the USB symbol or labeled “USB.” Ensure that you can easily access the USB port without any obstructions.
- Connect the USB cable to the adapter: Plug one end of the USB cable into the USB port on the adapter. Make sure it is securely inserted, and there is a firm connection. The cable should fit snugly without any play or looseness.
- Route the USB cable: Determine the optimal route for the USB cable to reach your desired location in the car. Avoid any areas where the cable might get tangled or damaged, such as near moving parts or vents. Use cable clips or adhesive mounts to secure the cable along the route and prevent it from dangling or becoming a distraction while driving.
- Connect the other end of the USB cable: Once you have routed the USB cable to the desired location, connect the other end of the cable to the USB device you want to use, such as a USB flash drive or a smartphone. Ensure a secure and stable connection.
- Test the USB connection: Turn on your car’s ignition and test the USB connection by playing audio files from the connected USB device. Use the car stereo’s controls to navigate through the files and adjust the volume. Make sure the audio playback is clear and uninterrupted.
By carefully connecting the USB cable to the USB adapter and ensuring a secure and reliable connection, you can enjoy the convenience of playing digital music and charging devices through your car stereo. Take your time to route the cable properly and double-check all connections before testing the USB functionality.
Step 6: Test the Connection
After connecting the USB cable, it’s essential to test the connection to ensure everything is working correctly. Follow these steps to test the USB connection:
- Turn on your car’s ignition: Start your car and turn on the car’s ignition to provide power to the car stereo and USB adapter. Make sure the volume is set at a reasonable level to avoid any sudden, loud noises.
- Insert a USB device: Insert a USB device, such as a USB flash drive or your smartphone, into the USB port of the USB adapter. Ensure that the USB device contains audio files that are compatible with your car stereo.
- Access the USB input: Use the controls on your car stereo to select the USB input as the source for audio playback. This may involve navigating through a menu and selecting the appropriate option, depending on your car stereo’s interface.
- Playback audio files: Once you have selected the USB input, use the car stereo’s controls to navigate through the audio files on the USB device. Test the playback of different files and ensure that the audio quality is clear and free from any distortion or static.
- Adjust settings: Experiment with the various settings on your car stereo, such as equalizer presets, audio balance, and volume levels, to customize the audio output to your preference. Test these settings to ensure they are functioning correctly and producing the desired sound quality.
- Check device charging: If charging your devices through the USB adapter is one of your desired functionalities, verify that your USB device is charging properly while connected to the USB port. Monitor the battery level on your device to ensure that it is increasing or maintaining a stable charge.
- Test functionality: Test any additional features or functionalities of the USB adapter, such as shuffle mode, repeat mode, or folder navigation. Ensure that these features are working as expected and providing a seamless user experience.
By testing the connection and verifying the functionality of the USB adapter, you can confirm that the integration is successful and that you can enjoy a hassle-free USB experience with your older car stereo. Take note of any issues or abnormalities and troubleshoot them if necessary to ensure optimal performance.
Step 7: Secure the USB Adapter
Securing the USB adapter is an important step to ensure it remains stable and protected during your drives. Follow these steps to securely fasten the USB adapter in place:
- Evaluate mounting options: Assess the available mounting options based on the design of your car stereo and the USB adapter. Some adapters may come with their own mounting brackets or mounting holes. Alternatively, you can use adhesive mounts or double-sided tape to secure the adapter in a convenient location.
- Choose a suitable location: Select a location for the USB adapter where it is easily accessible but does not obstruct your view or interfere with other dashboard controls. The center console or a neatly integrated spot in the dashboard are popular choices.
- Clean and prepare the mounting surface: Clean the mounting surface with a suitable cleaning agent to ensure proper adhesion. Remove any dust or residue that may hinder the adhesive or mounting process. Allow the surface to dry thoroughly before proceeding.
- Attach the mounting brackets or adhesive mounts: If the USB adapter comes with mounting brackets or adhesive mounts, secure them to the adapter according to the manufacturer’s instructions. Ensure that the brackets or mounts are firmly attached and ready for installation.
- Position and attach the USB adapter: Position the USB adapter in the chosen location, aligning it with the mounting brackets or adhesive mounts. Press firmly to adhere the adapter to the mounting surface, ensuring it is securely fastened and remains stable during normal driving conditions.
- Test stability and adjust if needed: Gently wiggle the USB adapter to test its stability. If it feels loose or moves excessively, make any necessary adjustments to tighten it. Recheck the mounting brackets or adhesive mounts to ensure they are properly secured.
- Route and secure the cables: Along with securing the USB adapter, ensure that the USB cable and any other connected cables are neatly routed and secured. Use cable organizers, clips, or adhesive mounts to prevent cables from tangling or interfering with other components in your car.
By securely fastening the USB adapter in place, you can ensure that it remains stable and protected during your drives. Take your time to choose a suitable mounting location and follow the manufacturer’s instructions for proper installation. A securely mounted USB adapter will provide a reliable and convenient USB solution for your older car stereo.
Step 8: Mount the USB Port
Once the USB adapter is securely installed, the next step is to mount the USB port in a convenient and accessible location. Follow these steps to properly mount the USB port:
- Choose a suitable location: Select a location for the USB port that is easily accessible while driving. Common mounting spots include the center console, dashboard, or a custom panel or adapter designed for USB ports.
- Prepare the mounting surface: Clean the mounting surface with a suitable cleaning agent to ensure proper adhesion. Wipe away any dust or residue, and allow the surface to dry completely before proceeding.
- Inspect the USB port: Check the USB port for any mounting mechanisms or brackets provided with the USB adapter. If the USB port does not have built-in mounting features, consider using adhesive mounts or a custom mounting bracket to secure it in place.
- Align and position the USB port: Align the USB port with the chosen mounting location, ensuring proper orientation and accessibility. Make sure the USB port does not interfere with other dashboard controls or obstruct your view while driving.
- Attach the USB port: If the USB port has built-in mounting mechanisms, follow the manufacturer’s instructions to securely attach it to the mounting surface. If not, use adhesive mounts or a custom mounting bracket to affix the USB port in its desired location.
- Ensure stability: Gently test the stability of the mounted USB port by lightly tugging on it. If it feels loose or moves excessively, make any necessary adjustments to ensure a secure and stable mounting. Consider reinforcing the mount with additional adhesive or screws if needed.
- Test the USB port: Plug in a USB cable or USB device into the mounted USB port to ensure a proper connection. Test the accessibility and functionality of the USB port, making sure that it provides a secure and reliable connection for your USB devices.
By mounting the USB port in a suitable location, you can ensure easy access to the USB functionality while keeping it securely in place. Take your time to position the USB port properly and follow the appropriate mounting instructions or use adhesive mounts for a stable installation. A well-mounted USB port will enhance your overall experience of using USB devices with your older car stereo.
Step 9: Enjoy Your New USB Capability
Congratulations! You have successfully added USB capability to your older car stereo. Now it’s time to sit back, relax, and enjoy the convenience and versatility that USB integration brings. Here are a few tips to make the most of your new USB capability:
- Organize your music: Use folders or playlists to organize your music files on your USB device. This will make it easier to navigate and find your favorite songs while driving.
- Create customized playlists: Take advantage of the flexibility of digital music by creating customized playlists for different moods or occasions. This allows you to easily switch between different genres or personalize your driving experience.
- Keep your USB device up to date: As you discover new music or update your existing collection, remember to update your USB device regularly. This ensures that you always have fresh and exciting content to enjoy on the road.
- Charge your devices on the go: Take advantage of the USB capability to not only play music but also charge your devices. Keep your smartphone, tablet, or other USB-powered gadgets fully charged during your drives to stay connected and entertained.
- Explore additional functionalities: Depending on your USB adapter, you may have additional functionalities available, such as support for Bluetooth connectivity or hands-free calling. Discover and explore the full range of features and make the most of your upgraded car stereo.
- Be mindful of distractions: While having USB capability in your car stereo is convenient, it’s important to remember to prioritize safety and minimize distractions. Avoid changing songs or browsing through music files while driving. Use voice control or familiarize yourself with the car stereo’s controls to operate it easily and safely.
- Share the experience: If you have passengers in your car, let them enjoy the USB capability too. Share your favorite playlists or collaborate on creating new ones. It’s a great way to enhance the overall driving experience and make road trips more enjoyable.
By following these tips, you can fully enjoy the benefits of your new USB capability. Embrace the convenience, flexibility, and accessibility that the integration brings, and make your drives more enjoyable with a personalized soundtrack. Stay safe, focus on the road, and let your upgraded car stereo provide the perfect musical backdrop for your journeys.