
What are checkboxes in Excel?
Checkboxes in Excel are interactive elements that allow users to make a binary selection – either checked or unchecked. They are a valuable feature in Excel, enabling users to create lists, track information, and perform calculations more efficiently.
Checkboxes offer a visual representation of options, making it easy to mark tasks as complete, track attendance, or filter data based on certain criteria. They are commonly used for to-do lists, project management, inventory tracking, and survey responses.
When a checkbox is checked, its linked cell will display the value “TRUE.” Conversely, when a checkbox is unchecked, the linked cell will display the value “FALSE.” This binary representation is useful for various scenarios, such as conditional formatting, data analysis, and automating processes.
Excel provides the flexibility to customize checkboxes, allowing users to change their appearance by choosing from various design options. Additionally, checkboxes can be linked to other cells to perform calculations, create formulas, or trigger specific actions based on the selected state.
Whether you’re a business professional, student, or casual user, checkboxes in Excel offer a practical way to organize and analyze data. By leveraging this feature, you can streamline your workflow, improve efficiency, and gain better insights from your spreadsheets.
How to enable the Developer tab in Excel?
The Developer tab in Excel provides access to various advanced features and customization options, including the ability to insert checkboxes. By default, the Developer tab is not visible in the Excel ribbon. However, you can enable it by following these steps:
- Open Excel and click on the File tab located in the top left corner of the screen.
- In the File menu, select Options. This will open the Excel Options dialog box.
- In the Excel Options dialog box, click on the Customize Ribbon tab.
- Under the Customize the Ribbon section, you will see a list of Main Tabs on the right-hand side. Scroll down and locate the Developer option.
- Check the box next to the Developer option to enable it.
- Click OK to save the changes and close the Excel Options dialog box.
Once you have enabled the Developer tab, you will find it displayed in the Excel ribbon along with other default tabs like Home, Insert, and Formulas. You can now access the advanced functionality offered by the Developer tab and insert checkboxes in your Excel spreadsheets.
Enabling the Developer tab in Excel gives you access to a wide range of tools and features that can greatly enhance your productivity and expand the capabilities of your spreadsheets. So, take a few moments to enable this tab, and unleash the full potential of Excel for your data management and analysis tasks.
How to insert a checkbox using the Developer tab?
Once you have enabled the Developer tab in Excel, you can easily insert checkboxes into your spreadsheets using the following steps:
- Click on the Developer tab in the Excel ribbon.
- Under the Controls group, click on the Insert button. This will open a drop-down menu with various form controls.
- From the drop-down menu, select the Checkbox control. Your cursor will now change to a crosshair symbol.
- Click and drag on the cell where you want to insert the checkbox. The size of the cell will determine the size of the checkbox.
- Release the mouse button, and a checkbox will be inserted into the selected cell.
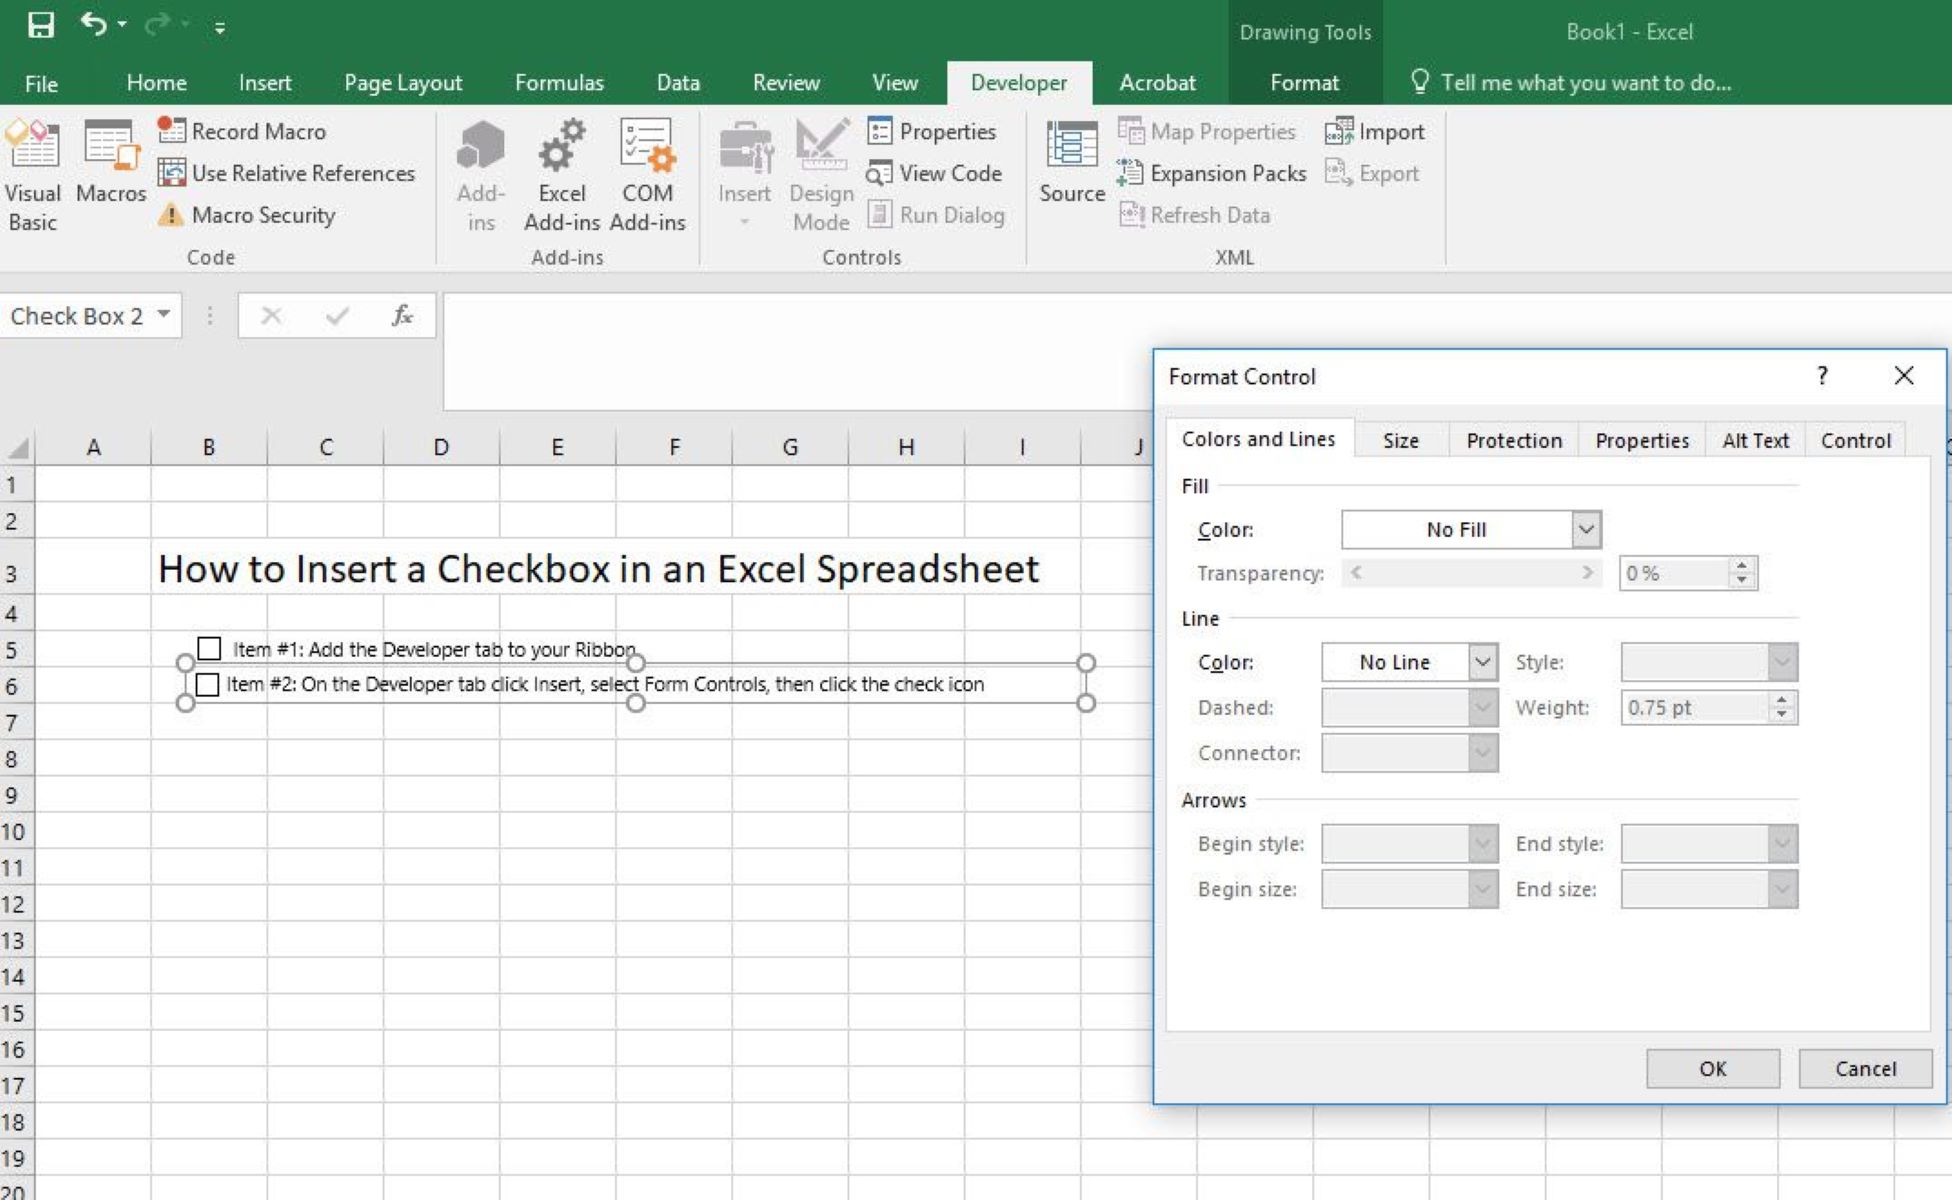
By default, the checkbox will have the standard appearance of a square with a checkmark inside it. You can customize the appearance and behavior of the checkbox by right-clicking on it and selecting Format Control. From there, you can change the checkbox’s colors, size, font, and other properties.
Alternatively, you can also double-click on the checkbox to open the Format Control window. This allows you to make adjustments to the checkbox properties without right-clicking.
Once you have inserted a checkbox, you can copy and paste it to other cells to create multiple checkboxes quickly. You can also resize or move the checkbox by clicking and dragging its edges.
Inserting checkboxes using the Developer tab in Excel provides a convenient way to add interactivity and make selections within your spreadsheets. With this capability, you can create interactive to-do lists, track progress, and automate certain tasks based on checkbox selections.
How to customize the checkbox appearance?
Excel allows you to customize the appearance of checkboxes to suit your preferences or match the design of your spreadsheet. Here’s how you can customize the checkbox appearance:
- Right-click on the checkbox you want to customize.
- In the right-click menu, select Format Control. This will open the Format Control window.
- In the Format Control window, navigate to the Control tab.
- Here, you can make changes to various properties of the checkbox:
- To change the appearance of the checkbox, click on the ‘Color and Lines’ tab. From there, you can modify the checkbox’s fill color, border color, and border width.
- To resize the checkbox, adjust the height and width values in the ‘Size’ section.
- Under the ‘Font’ section, you can specify the font type, size, style, and color of the text within the checkbox. You can also choose to display or hide the text.
- For more advanced customization options, click on the ‘Control’ tab. Here, you can define the checkbox’s linked cell, determine its behavior for printed documents or protected worksheets, and specify the checkbox’s three-state option.
- Once you have made the desired changes, click on the OK button to apply the new appearance to the checkbox.
By customizing the checkbox appearance, you can add a personal touch to your spreadsheets or ensure that the checkboxes align with the overall design and visual style. This flexibility allows you to create professional-looking and visually appealing checkboxes that enhance the user experience and make your Excel sheets more engaging.
How to link a checkbox to a cell?
Linking a checkbox to a cell in Excel allows you to capture the state of the checkbox (checked or unchecked) in a specific cell. This linkage enables you to perform calculations, create formulas, or trigger certain actions based on the checkbox’s selected state. Follow these steps to link a checkbox to a cell:
- Right-click on the checkbox you want to link to a cell.
- In the right-click menu, select Format Control. The Format Control window will appear.
- In the Control tab, you will see an option called ‘Cell link.’
- Click on the text box next to ‘Cell link’ and select the cell where you want to link the checkbox.
- Click on the OK button to apply the linking.
Once you have linked the checkbox to a cell, the linked cell will display the value “TRUE” when the checkbox is checked and “FALSE” when the checkbox is unchecked.
The linked cell can then be used in various ways within your Excel spreadsheet. For example:
- You can use the linked cell in formulas to perform calculations or make logical decisions based on the checkbox’s state.
- You can apply conditional formatting to other cells based on the value of the linked cell, changing the formatting when the checkbox is checked or unchecked.
- You can filter or sort data based on the value of the linked cell, allowing you to dynamically organize and analyze your data.
Linking a checkbox to a cell offers a powerful way to incorporate user interaction and automate processes in your Excel spreadsheets. By leveraging this feature, you can enhance the functionality and usability of your spreadsheets and streamline your data management tasks.
How to sum or count the checked checkboxes?
In Excel, you can easily sum or count the checked checkboxes to calculate totals or track the number of completed tasks. To perform these calculations, follow these steps:
- Create a new cell where you want the sum or count to be displayed.
- Use the SUMIF function to sum the values of the linked cells corresponding to the checked checkboxes. The syntax of the SUMIF function is as follows:
=SUMIF(range, criteria, sum_range). In this case: - The
rangeis the range of cells where the checkbox linked cells are located. - The
criteriais the value “TRUE” to count the checked checkboxes. - The
sum_rangeis the range of cells you want to sum. - For example, if your checkbox linked cells are in the range B2 to B10, and you want to sum the values in cells C2 to C10 when the checkbox is checked, your formula would be:
=SUMIF(B2:B10, TRUE, C2:C10). - Press Enter to calculate the sum.
- To count the checked checkboxes, use the COUNTIF function. The syntax is similar to the SUMIF function but without the sum_range. For example,
=COUNTIF(B2:B10, TRUE)would count the number of checked checkboxes in the range B2 to B10.
By using the SUMIF and COUNTIF functions in combination with checkbox linked cells, you can easily perform calculations and generate reports based on checkbox selections. This allows you to keep track of completed tasks, calculate totals, or count specific criteria within your Excel spreadsheets.
How to copy or move checkboxes to other cells?
In Excel, you can easily copy or move checkboxes to other cells within your spreadsheet. This allows you to quickly duplicate checkboxes or reposition them as needed. Follow these steps to copy or move checkboxes:
- Select the checkbox or checkboxes that you want to copy or move. To select multiple checkboxes, hold down the Ctrl key while clicking on each checkbox.
- Once the checkboxes are selected, right-click on one of the selected checkboxes.
- In the right-click menu, choose either ‘Copy’ or ‘Cut’ depending on whether you want to copy or move the checkboxes, respectively.
- Next, select the cell or range of cells where you want to paste the copied or moved checkboxes.
- Right-click on the selected cell or range and choose ‘Paste’ from the right-click menu.
The copied or moved checkboxes will be inserted into the new cells, retaining the same properties and characteristics as the original checkboxes. You can resize or reposition the checkboxes as needed by clicking and dragging their edges.
Note that when you copy or move checkboxes, the link to the original cell may not be updated automatically. You may need to adjust the linked cell manually if you want the copied or moved checkboxes to update a different cell.
Copying or moving checkboxes is a handy feature in Excel that allows you to duplicate and rearrange interactive elements quickly. Whether you’re reorganizing your spreadsheet or creating templates, this functionality helps streamline your workflow and save time.
How to group checkboxes?
Grouping checkboxes in Excel allows you to manage and manipulate them as a collective unit. By grouping checkboxes, you can perform certain actions, such as resizing or formatting, on multiple checkboxes simultaneously. Here’s how you can group checkboxes:
- Select the checkboxes you want to group. To select multiple checkboxes, hold down the Ctrl key while clicking on each checkbox.
- Once the checkboxes are selected, right-click on one of the selected checkboxes.
- In the right-click menu, choose the ‘Group’ option.
When the checkboxes are grouped, you can perform various actions on the entire group, such as:
- Resize: Click and drag any edge of the group to resize all checkboxes proportionally.
- Format: Apply formatting options, such as font, color, or border, to all checkboxes within the group.
- Move: Click and drag anywhere within the group to move all checkboxes simultaneously.
- Delete: Right-click on the group and choose ‘Delete’ to remove all checkboxes from the group at once.
If you want to make changes to individual checkboxes within a group, right-click on the group and choose ‘Ungroup’ to revert them to individual checkboxes.
Grouping checkboxes provides a practical way to manage a collection of checkboxes efficiently. It simplifies the process of making edits or adjustments to multiple checkboxes simultaneously, saving time and effort in Excel spreadsheet management.