
Why Use Google Docs for Checklists
Checklists are an essential tool for staying organized and ensuring that tasks and projects are completed efficiently. While there are many methods for creating checklists, using Google Docs offers numerous advantages that make it an ideal choice for managing your tasks. Here are some compelling reasons to use Google Docs for your checklists.
1. Access Anywhere, Anytime
Google Docs is a web-based platform, which means you can access your checklists from any device with an internet connection. Whether you’re at home, in the office, or on the go, you can easily view, edit, and update your checklists using your computer, smartphone, or tablet.
2. Real-Time Collaboration
One of the standout features of Google Docs is its ability to facilitate collaboration. You can share your checklists with colleagues, team members, or clients, allowing them to make changes, add notes, or mark tasks as complete in real-time. This ensures seamless teamwork and efficient communication.
3. Automatic Saving and Version History
Google Docs automatically saves your work as you type, eliminating the fear of losing your progress or accidentally closing the document without saving. Additionally, it keeps track of the revision history, allowing you to revert to any previous version of the checklist if needed.
4. Customizable Templates
Google Docs offers a wide range of customizable templates, including various checklist formats. Whether you prefer a simple checklist with bullet points or a more structured template with checkboxes and due dates, you can easily find or create a template that suits your needs.
5. Easy Formatting and Organization
With Google Docs, you have full control over the formatting and organization of your checklists. You can adjust the font styles, size, and colors to make your checklist visually appealing. Additionally, you can use bullet points, numbered lists, indentation, and headings to structure and categorize your tasks.
6. Integration with Other Google Tools
Google Docs seamlessly integrates with other Google tools, such as Google Drive, Google Sheets, and Google Calendar. This allows you to streamline your workflows by linking relevant documents, spreadsheets, or calendar events to your checklists, providing a comprehensive overview of your tasks and deadlines.
7. Accessibility Features
Google Docs includes various accessibility features that make it user-friendly for individuals with visual impairments or other disabilities. It offers screen reader support, keyboard shortcuts, and the ability to adjust text size and contrast, ensuring that everyone can easily navigate and use the checklist.
These are just a few reasons why Google Docs is an excellent choice for creating and managing checklists. It provides a versatile, collaborative, and accessible platform that simplifies task management and enhances productivity. Give it a try and experience the convenience and efficiency of using Google Docs for your checklists.
Setting Up a New Document
Creating a new document in Google Docs to serve as your checklist is a straightforward process. Follow these steps to set up your checklist document:
1. Access Google Docs
If you don’t already have a Google account, create one by visiting docs.google.com. Once you’re logged in, you’ll have access to Google Docs.
2. Click on “Blank” or Choose a Template
When you open Google Docs, you’ll be presented with various document templates. You can choose a blank document by clicking on “Blank” or select a checklist template from the template gallery, which you can customize as per your requirements.
3. Add a Title
Give your checklist document a meaningful title that reflects the purpose or topic of the checklist. To add a title, click on the location where you want it to appear (usually at the top of the document) and type the title in bold.
4. Organize your Content
Decide how you want to structure your checklist. You can use bullet points, numbered lists, or headings to organize the items. Start by typing the first task or item and press “Enter” to create a new line for the next item. Repeat this process for all the tasks or items you want to include in your checklist.
5. Format Your Checklist
Besides organizing your content, you can customize the appearance of your checklist. Highlight specific text and use the formatting toolbar to change the font style, size, color, and alignment. You can also apply bold, italics, or underline to emphasize certain items on your checklist.
6. Save Your Document
Google Docs automatically saves your work as you make changes. However, it is always a good practice to periodically save your document manually as well. Click on “File” in the top left corner and select “Save” or use the keyboard shortcut (Ctrl + S on Windows or Command + S on Mac) to save your checklist document.
7. Rename the Document
If you want to give your document a different name, click on “File,” then select “Rename” from the drop-down menu. Provide a new name for your checklist document and click “OK” to save the changes.
By following these steps, you can quickly set up a new document in Google Docs for your checklist. Now that you have your document ready, you can start adding tasks and organizing your checklist according to your preference.
Using Bullet Points
Bullet points are a popular way to present information in a concise and organized manner. They are especially useful for creating checklists in Google Docs. Here’s how you can effectively use bullet points in your checklist:
1. Start a Bullet List
To begin a bullet list, position your cursor at the desired location in your document and press the “Bulleted list” button in the toolbar. Alternatively, you can use the keyboard shortcut (Ctrl + Shift + 8 on Windows or Command + Shift + 8 on Mac) to start a bullet list.
2. Add Items to the Bullet List
Type the first task or item in your checklist and press “Enter” to create a new line. Google Docs will automatically insert a bullet point for each new line. Continue adding items by repeating this process.
3. Indentation
You can use indentation to create sub-levels within your bullet points. Simply press the “Tab” key to indent an item, creating a nested bullet point. Press “Shift + Tab” to decrease the indentation and return to the previous level. This is useful for creating hierarchies in your checklist.
4. Customize Bullet Points
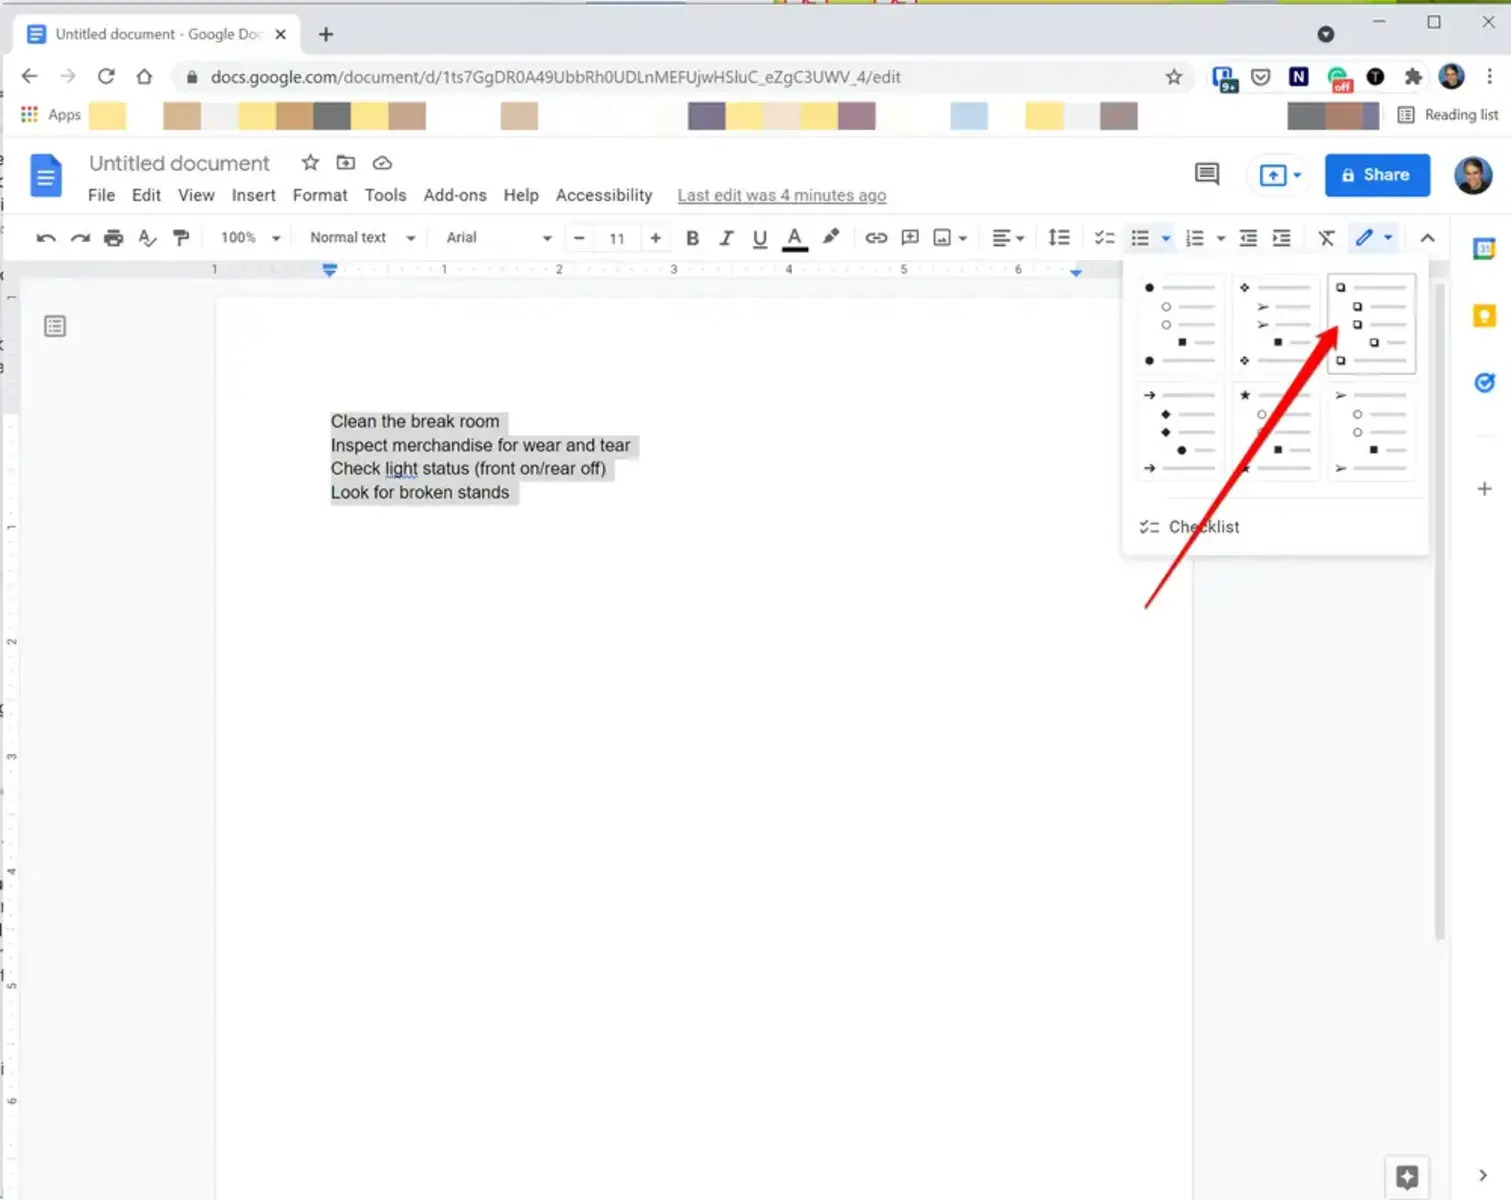
Google Docs provides various options for customizing the appearance of your bullet points. To change the bullet style, highlight the desired text and click on the “Bulleted list” button in the toolbar. From there, you can choose different bullet point styles, such as circles, squares, or checkmarks.
5. Formatting Text within Bullet Points
Within each bullet point, you can format the text to enhance readability or emphasize certain items. Highlight the text you want to modify and utilize the text formatting options in the toolbar. You can change the font style, size, color, or apply formatting such as bold, italics, or underline.
6. Managing the Bullet List
If you want to remove a bullet point, simply press “Backspace” or “Delete” on your keyboard when the cursor is positioned at the beginning of a line. To add a new bullet point directly beneath an existing one, press “Enter” at the end of the current line.
7. Increase List Depth
If you want to increase the depth of a bullet list, position the cursor at the end of a line and press “Enter”. Google Docs will automatically create a new bullet point at the next level. This is useful when you want to add more information or subtasks beneath an existing item on your checklist.
Using bullet points in your checklist not only makes it visually appealing but also enhances readability and organization. By following these guidelines, you can create an effective checklist using bullet points in Google Docs.
Creating a Dropdown Checklist
A dropdown checklist is a useful feature that allows you to hide checklist items until they are needed. This can help declutter your list and provide a more streamlined view of your tasks. Here’s how you can create a dropdown checklist in Google Docs:
1. Open the Bulleted List
To create a dropdown checklist, start by creating a bulleted list as you would normally. Place your cursor at the location where you want the dropdown list to start.
2. Select the Checklist Items
Select the items you want to include in the dropdown list. You can highlight the text by clicking and dragging the cursor over the desired items or hold down the “Ctrl” key (or “Command” key on Mac) while clicking on each item you want to include.
3. Access the “More Actions” Menu
In the toolbar, locate the “More Actions” button (represented by three dots) and click on it. A drop-down menu will appear with additional formatting options.
4. Select “Collapse”
In the “More Actions” menu, select “Collapse”. This will collapse the selected checklist items into a dropdown format.
5. Expand and Collapse the List
Once the dropdown checklist is created, you can expand and collapse it as needed. Click on the small arrow next to the collapsed text to expand the dropdown and reveal the checklist items. Click on the arrow again to collapse the list and hide the items.
6. Adding New Items to the Dropdown Checklist
If you want to add new items to the dropdown checklist, simply position your cursor to the right of the last item and press “Enter”. The new item will be added as a regular bullet point. To convert it into a dropdown item, select the new item and repeat steps 3 and 4.
7. Other Formatting Options
Google Docs offers various formatting options for dropdown checklists. You can customize the appearance of the dropdown arrow, change the color or font style, and adjust the alignment of the text within the dropdown list.
By following these steps, you can create a dropdown checklist in Google Docs, allowing you to hide and reveal checklist items as needed. This can help you maintain a more organized and focused view of your tasks.
Adding Checkbox Options
Checkbox options are a great way to track the completion status of tasks in your checklist. By adding checkboxes, you can visually indicate which items have been completed and which are still pending. Follow these steps to add checkbox options in your Google Docs checklist:
1. Create a Bulleted List
Start by creating a bulleted list in Google Docs. Position your cursor at the desired location and click on the “Bulleted list” button in the toolbar. Alternatively, you can use the keyboard shortcut (Ctrl + Shift + 8 on Windows or Command + Shift + 8 on Mac).
2. Add Items to the Checklist
Type the tasks or items you want to include in your checklist. Press “Enter” to create a new line for each item, and Google Docs will automatically create a bullet point for each line.
3. Convert Bullet Points to Checkboxes
Select the items you want to convert into checkboxes. To select multiple items, hold down the “Ctrl” key (or “Command” key on Mac) and click on each item. Once the desired items are selected, go to the toolbar and click on the “Bulleted list” button.
4. Enable the Checkbox Option
In the dropdown menu that appears, select the checkbox option. This will convert the bullet points into checkboxes.
5. Mark Tasks as Complete
Click on the checkbox next to each task to mark it as complete. The checkbox will be filled with a checkmark. To toggle the status of a task, simply click on its checkbox again.
6. Customize Checkbox Appearance
You can customize the appearance of the checkbox to suit your preferences. Right-click on a checkbox and select “Bulleted list options” from the context menu. In the pop-up window, you can choose different checkbox styles, such as square, circle, or diamond.
7. Manage Checklist Items
If you want to add new items to the checklist, simply position your cursor at the end of the last item and press “Enter”. Google Docs will automatically create a new bullet point with a checkbox. To remove an item, highlight its text and press “Backspace” or “Delete”.
By following these steps, you can easily add checkbox options to your Google Docs checklist. This allows you to track the completion status of tasks, ensuring that you stay organized and on top of your to-do list.
Using Numbered Lists
Numbered lists are a useful way to sequence or prioritize items in your checklist. They can help bring order to your tasks and provide a clear sense of progression. Here’s how you can effectively use numbered lists in your Google Docs checklist:
1. Create a Numbered List
To create a numbered list, position your cursor at the desired location in your document and click on the “Numbered list” button in the toolbar. Alternatively, you can use the keyboard shortcut (Ctrl + Shift + 7 on Windows or Command + Shift + 7 on Mac).
2. Add Items to the Numbered List
Type the tasks or items you want to include in your checklist, pressing “Enter” after each item to create a new line. Google Docs will automatically number each line in sequential order.
3. Change List Style
If you want to change the list style, right-click on a number and select “Bulleted list options” from the context menu. In the pop-up window, you can choose different numbering styles, such as numeric or alphabetical sequences, Roman numerals, or customized numbering formats.
4. Adjust Indentation and Hierarchy
You can create sub-levels within your numbered list by using indentation. To indent an item, press the “Tab” key. Each indent creates a new level in the hierarchy. To decrease the indentation and return to the previous level, press “Shift + Tab”. This allows you to create a hierarchical structure for your checklist.
5. Customize Numbering Format
To customize the numbering format, right-click on a number and select “Bulleted list options”. In the pop-up window, click on the “More options” link. Here, you can specify the starting value, choose whether to continue the numbering from the previous list, and even create a custom numbering format using prefixes, suffixes, or specific number patterns.
6. Managing Numbered List Items
To add a new item to the numbered list, position your cursor at the end of the last item and press “Enter”. A new number will be automatically added for the new item. To remove an item, highlight its text and press “Backspace” or “Delete”. Google Docs will automatically renumber the remaining items.
7. Nesting Numbered Lists
If you want to create a nested numbered list, press “Enter” after an item to create a new line. Then, press the “Tab” key to indent the line and create a sub-level. Enter the next item on the sub-level, and Google Docs will automatically number it accordingly.
By following these steps, you can effectively use numbered lists to structure and prioritize your tasks in your Google Docs checklist. This will help you stay organized and maintain a clear sense of progression as you work through your to-do list.
Adding Notes or Descriptions
Adding notes or descriptions to your checklist items in Google Docs can provide additional context, instructions, or details for each task. This can help ensure clarity and provide necessary information when working through your checklist. Here’s how you can add notes or descriptions to your checklist items:
1. Create a Checklist
Start by creating your checklist in Google Docs. Use bullet points, numbered lists, or any other format that suits your needs.
2. Add Checklist Items
Type the tasks or items you want to include in your checklist. Press “Enter” after each item to create a new line for the next task.
3. Insert a Note
To add a note or description for a specific checklist item, place your cursor next to the item. Click on “Insert” in the toolbar and select “Comment” from the dropdown menu. A comment box will appear on the right-hand side of the document.
4. Write the Note
In the comment box, enter the necessary notes or description for the corresponding checklist item. You can provide additional information, clarify any uncertainties, or give specific instructions related to that task.
5. Reply and Resolve Comments
If someone else is collaborating with you on the checklist, they can leave replies or suggestions on your comments. You can also respond to their comments and discuss any further details. Once a comment is resolved or no longer necessary, you can mark it as resolved by clicking on the checkmark icon next to the comment.
6. Format and Customize Comments
Google Docs allows you to format and customize comments to increase readability or emphasize important points. You can change the text color, highlight sections, or use bold and italic formatting to draw attention to specific details in your notes.
7. View and Access Comments
To quickly view all the comments in the document, click on the Comments button in the toolbar. This will display a list of all the comments, allowing you to navigate and access each note easily.
By following these steps, you can easily add notes or descriptions to your checklist items in Google Docs. This helps provide additional context and information, ensuring that you have all the necessary details when working through your tasks.
Customizing Checklist Options
Customizing your checklist options in Google Docs allows you to tailor the appearance and functionality of your checklist to suit your specific needs. From changing the color and style to adding additional elements, here are some ways to customize your checklist options:
1. Formatting Styles
You can change the formatting styles of your checklist items to make them stand out. Use the formatting toolbar to adjust the font style, size, color, or apply formatting such as bold, italics, or underline. This can help differentiate between different types of tasks or highlight important items on your checklist.
2. Bullet Point Styles
In addition to the default bullet point style, Google Docs offers various options for customizing the appearance of your checklist bullets. Right-click on a bullet point and select “Bulleted list options” from the context menu. In the pop-up window, you can select different bullet point styles like circles, squares, or checkmarks.
3. Numbering Styles
If you’re using a numbered list for your checklist, you can customize the numbering style to fit your preference. Right-click on a numbered item and select “Bulleted list options”. In the pop-up window, click “More options” to access additional customization settings. From there, you can choose different numbering styles, change the starting number, or even create a custom numbering format.
4. Highlighting Important Items
To draw attention to specific checklist items, you can use the highlighting feature in Google Docs. Select the text you want to highlight and click on the “Text color” button in the toolbar. Choose a background color that stands out from the rest of the checklist, making important items more noticeable.
5. Adding Images or Icons
Google Docs allows you to insert images or icons into your checklist. Use the “Insert” menu in the toolbar to insert images or icons that represent certain tasks or serve as visual indicators. This can add visual interest and enhance the overall appearance of your checklist.
6. Organizing Checklist Sections
If your checklist is divided into sections, you can customize the organization and layout of those sections. Use headings and subheadings to separate different sections of your checklist. Adjust the font size, color, or style of the heading text to create clear visual distinctions.
7. Adding Hyperlinks
Consider adding hyperlinks within your checklist to reference relevant files, websites, or additional resources. Highlight the text you want to turn into a hyperlink, then click on the “Link” button in the toolbar. Enter the URL or search for your desired link to create a clickable hyperlink in your checklist.
By utilizing these customization options, you can create a visually appealing and effective checklist that meets your specific requirements. Remember to strike a balance between customization and readability, ensuring that your checklist remains clear and easy to understand.
Sharing and Collaborating with Others
Google Docs offers robust features for sharing and collaborating with others on your checklist. Whether you’re working with a team, sharing tasks with colleagues, or seeking input from clients, here’s how you can effectively collaborate on your checklist in Google Docs:
1. Sharing Permissions
Click on the “Share” button in the top right corner of the Google Docs toolbar. In the sharing settings, enter the email addresses of the people you want to share the checklist with. Choose the appropriate sharing permissions, such as “Can edit,” “Can comment,” or “Can view,” depending on the level of access you want to grant to each person.
2. Real-Time Collaboration
One of the key benefits of Google Docs is real-time collaboration. When you share your checklist with others, they can make edits, add comments, or mark tasks as complete in real-time. This ensures seamless teamwork and efficient communication, allowing everyone to see the most up-to-date version of the checklist.
3. Commenting and Discussion
Use the comment feature to initiate discussions or provide feedback on specific checklist items. Select a section of text or click on a specific line and add a comment. Your collaborators can reply to your comments, enabling clear communication and allowing for easy collaboration and decision-making.
4. Version History
Google Docs automatically saves a version history of your checklist, allowing you to review and revert to previous versions if needed. Click on “File” in the toolbar and select “Version history” to see a list of saved versions. You can view the changes made in each version and restore an earlier version if necessary.
5. Suggesting Edits
If you want to propose changes to the checklist without directly editing the document, you can use the “Suggesting” mode. Click on the pencil icon at the top right of the document and select “Suggesting” mode. This allows you to make suggested edits that can be accepted or rejected by the document owner or other collaborators.
6. Notifications and Email Sharing
When sharing your checklist, you can choose to send notifications or email invitations to the recipients. This ensures that they are aware of the shared document and can access it easily. They will receive an email with a link to the checklist, allowing for quick and convenient access.
7. Offline Access
Google Docs also provides the option to work on your checklist offline. By installing the Google Docs Offline extension, you can access and make edits to your checklist without an internet connection. Once you are back online, your changes will sync with the online version of the checklist.
With the sharing and collaboration features in Google Docs, you can easily work together with others on your checklist. Whether it’s assigning tasks, receiving feedback, or coordinating with team members, Google Docs provides a seamless and effective platform for collaborative checklist management.
Filtering and Sorting Checklist Items
When working with large checklists, it can be beneficial to filter and sort the items to locate specific tasks or prioritize certain items. Google Docs provides helpful tools that allow you to filter and sort your checklist items efficiently. Here’s how you can effectively filter and sort checklist items in Google Docs:
1. Filter Checklist Items
To filter checklist items in Google Docs, click on the “Filter” button in the toolbar. This will display a drop-down menu with options to filter by text, font color, fill color, or create custom filter criteria. Choose the desired filter option and enter the criteria to narrow down the checklist items based on your requirements.
2. Sort Checklist Items
To sort checklist items in Google Docs, click on the “Sort” button in the toolbar. This will open a dialog box with sorting options. You can choose to sort the checklist items alphabetically, by numerical order, by font color, or in ascending or descending order. Select the preferred sorting method and click “OK” to apply the sorting to your checklist.
3. Multiple Level Sorting
If you have a multi-level checklist with hierarchies or sub-sections, you can apply multiple levels of sorting to organize your tasks. For example, you can sort first by priority, then by due date, or any other combination that suits your needs. Google Docs allows you to add up to three levels of sorting for effective organization.
4. Reset Filters and Sorting
If you want to remove filters or revert to the original order of your checklist items, click on the “Filter” or “Sort” button in the toolbar again. In the drop-down menu or dialog box, select the “Clear” or “Remove” option to reset the filters or sorting options.
5. Apply Preset Filters
In addition to custom filters, Google Docs provides preset filters that can help you quickly narrow down your checklist items. Click on the “Filter” button in the toolbar, then select one of the preset filters such as “Checked items,” “Unchecked items,” or “Has comments” to instantly filter your checklist based on these criteria.
6. Collaboration with Filters and Sorting
Filters and sorting can be particularly useful when collaborating with others on a checklist. Each collaborator can apply their own filters and sorting preferences to view the checklist in a way that suits their needs. This allows for customization while maintaining a unified document that everyone can work on together.
7. Automatic Updates
When multiple collaborators are working on a checklist with filters and sorting applied, any changes made by one collaborator will be automatically reflected in real-time for others. This ensures that everyone sees the most up-to-date filtered and sorted version of the checklist as they are working on it.
By utilizing the filtering and sorting features in Google Docs, you can easily manage and organize your checklist. Whether you need to locate specific tasks, prioritize items, or collaborate effectively, these tools provide a seamless and efficient way to work with your checklist items.