
Why Indenting in Excel is Important
Excel is widely known as a powerful spreadsheet tool, capable of handling complex calculations, organizing data, and creating visualizations. However, one often overlooked feature is the ability to indent cells. Indenting in Excel refers to adjusting the horizontal space between the cell borders and the contents within the cell. While it may seem like a small detail, indenting has several important benefits that can greatly improve the readability and organization of your Excel spreadsheets.
First and foremost, indenting allows you to create hierarchies within your data. By indenting cells, you can visually indicate the sub-levels and relationships between different pieces of information. This is particularly useful when working with complex data sets or creating structured outlines. Indenting helps you to easily discern parent-child relationships, making it easier to analyze and interpret the data.
Furthermore, indenting enhances the clarity of your spreadsheet. By creating visual separation between different levels of information, indenting makes it easier for users to understand the structure and flow of your data. It helps to guide the eye, making it simpler to follow the logic and navigate through the spreadsheet. This becomes especially significant in large datasets or when collaborating with others on a shared Excel file.
Indenting in Excel also improves the aesthetics of your spreadsheet. It adds a professional touch by providing a clean and organized appearance. Utilizing indentation creates a sense of visual hierarchy, lending an air of professionalism to your work. Whether you are creating financial reports, project plans, or any other type of spreadsheet, indenting helps to present your data in an appealing and visually pleasing manner.
Another advantage of indenting is its impact on formula readability. When you use formulas in Excel, particularly complex ones, it can be challenging to understand the logic behind them. By indenting the formula cells, you can clarify the structure and nesting of the formulas, making them easier to comprehend and troubleshoot. This is particularly helpful for anyone who needs to review or modify the spreadsheet in the future.
How to Indent Cells in Excel
Indenting cells in Excel is a simple and straightforward process. There are a few different methods you can use, depending on your preference and the desired level of indentation. Here are the two primary ways to indent cells in Excel:
- Using the Increase Indent Button: This method allows you to incrementally increase the indent level of a cell or range of cells. To do this, select the cell(s) you want to indent and click on the Increase Indent button in the Home tab of the Excel ribbon. You can find this button in the Alignment section, represented by a rightward-pointing arrow with a horizontal line.
- Using the Decrease Indent Button: Conversely, if you need to reduce the indent level of a cell, you can use the Decrease Indent button. Select the indented cell(s) and click on the Decrease Indent button located next to the Increase Indent button in the Alignment section of the Home tab.
Indenting can also be applied to multiple cells simultaneously. To do this, select the range of cells you wish to indent, and then use either the Increase Indent or Decrease Indent button as described above. This feature is particularly useful when you want to maintain consistent indentation across multiple rows or columns.
Excel also provides the option to customize indentation according to your specific requirements. You can adjust the default indentation level, change the width of the indents, or even create a combination of left and right indents. To access these options, right-click on the selected cell(s), choose the Format Cells option, and navigate to the Alignment tab. From there, you can modify the indentation settings to best suit your needs.
One additional technique to keep in mind is hiding and displaying indented text. Excel allows you to collapse or expand the indented content so that you can focus on specific sections of your data. This can be especially useful when working with large datasets or when you want to present information in a concise and organized manner. To hide or display indented text, use the small triangle icon that appears to the left of the indented cells.
By following these methods and exploring the various customization options, you can easily and effectively indent cells in Excel, enhancing the readability and organization of your spreadsheets.
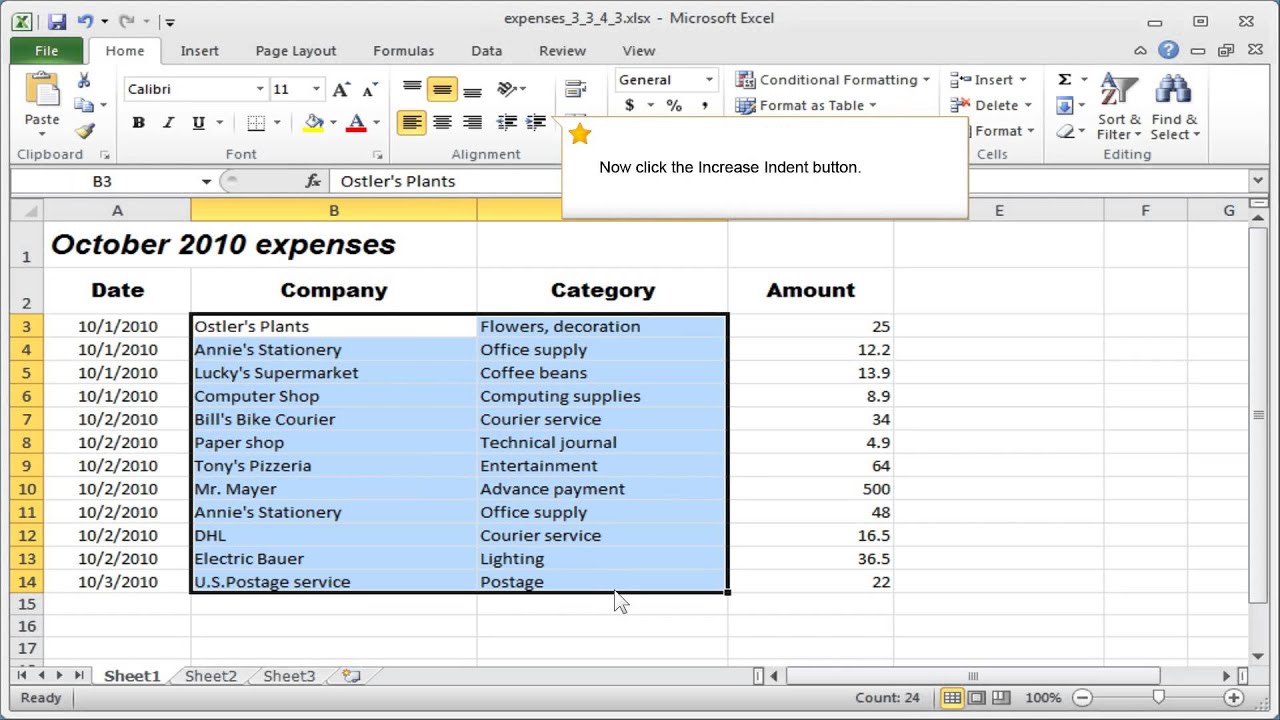
Using the Increase Indent Button
The Increase Indent button in Excel is a convenient tool to adjust the indentation level of cells. This feature allows you to visually structure and organize your data by creating indented sections. Here is how you can use the Increase Indent button:
- Select the cell(s) or range of cells that you want to indent. You can do this by clicking on a single cell and dragging to select multiple cells or by clicking on the first cell and holding the Shift key while selecting the last cell in the range.
- Navigate to the Home tab in the Excel ribbon.
- In the Alignment section, you will find the Increase Indent button represented by a rightward-pointing arrow with a horizontal line. Click on this button to increase the indent level of the selected cells. Each click on the button will add one level of indentation to the cells.
- By default, each level of indentation increases the width of the cells by a set amount. However, you can customize the width of the indents by right-clicking on the selected cells, choosing the Format Cells option, and adjusting the indentation settings in the Alignment tab.
- Alternatively, you can use the keyboard shortcut by selecting the desired cell(s) and pressing the Ctrl + Alt + Tab keys together. Each press of the shortcut will incrementally increase the indent level.
The Increase Indent button is particularly helpful when you want to create hierarchical structures within your data. It enables you to visually represent different levels of information, making it easier to identify relationships and navigate through the spreadsheet.
Remember that using the Increase Indent button is reversible. If you need to decrease the indent level of a cell or range of cells, you can use the Decrease Indent button located next to the Increase Indent button in the Alignment section of the Home tab. This button will reduce the indent level of the selected cells with each click.
By utilizing the Increase Indent button, you can easily create structured and organized Excel spreadsheets, improving the readability and clarity of your data.
Using the Decrease Indent Button
The Decrease Indent button in Excel is a handy feature that allows you to reduce the indentation level of cells. This button is particularly useful when you want to adjust the formatting of indented cells or revert the changes made by the Increase Indent button. Here’s how you can use the Decrease Indent button:
- Select the cell(s) or range of cells that you want to decrease the indentation level. You can do this by clicking on a single cell and dragging to select multiple cells, or by clicking on the first cell and holding the Shift key while selecting the last cell in the range.
- Navigate to the Home tab in the Excel ribbon.
- In the Alignment section, you will find the Decrease Indent button located next to the Increase Indent button. It is represented by a leftward-pointing arrow with a horizontal line. Click on this button to reduce the indentation level of the selected cells. Each click on the button will decrease the indent level by one.
- By default, each level of indentation decreases the width of the cells by a set amount. However, if you want to customize the width of the indents further, you can right-click on the selected cells, choose the Format Cells option, and adjust the indentation settings in the Alignment tab.
- Alternatively, you can use the keyboard shortcut by selecting the desired cell(s) and pressing Shift + Tab keys together. Each press of the shortcut will decrement the indent level of the selected cells.
The Decrease Indent button allows you to easily adjust the formatting of indented cells and revert the changes made by the Increase Indent button. It is particularly useful when you want to modify the hierarchy or structure within your data or if you need to correct any accidental indentation.
Remember that the Decrease Indent button is reversible. If you want to increase the indentation level of a cell or range of cells, you can use the Increase Indent button, as mentioned in the previous section. This button will incrementally increase the indent level of the selected cells with each click.
By utilizing the Decrease Indent button, you have greater control over the indentation of cells in Excel. It allows you to maintain a visually appealing and structured format for your data, ensuring readability and clarity in your spreadsheets.
Indenting Multiple Cells at Once
Indenting multiple cells at once in Excel is a useful technique when you want to maintain consistent formatting across a range of cells. This allows you to apply indentation to multiple rows or columns simultaneously, saving time and effort. Here’s how you can indent multiple cells at once:
- Select the range of cells that you want to indent. You can do this by clicking on the first cell and dragging to select multiple cells, or by clicking on the first cell and holding the Shift key while selecting the last cell in the range.
- Navigate to the Home tab in the Excel ribbon.
- In the Alignment section, you will find the Increase Indent button represented by a rightward-pointing arrow. Click on this button to increase the indent level of the selected cells. Each click on the button will add one level of indentation to all the cells in the range.
- Similarly, if you want to decrease the indent level of the selected cells, you can use the Decrease Indent button located next to the Increase Indent button. Click on this button to reduce the indentation level of all the cells in the range.
Indenting multiple cells at once is particularly helpful when you want to maintain visual consistency and hierarchy across multiple rows or columns. This allows you to create a structured and organized format for your data, making it easier to read and understand.
By selecting a range of cells and applying indentation, you can ensure that the entire dataset maintains the same indentation level. This is especially useful when dealing with large spreadsheets or when you need to present information in a cohesive and visually appealing manner.
Remember that when indenting multiple cells, the indentation level will be applied to all the selected cells. If you need to customize the indentation level for specific cells within the range, you can individually adjust the indent level for those cells using the increase or decrease indent buttons or by modifying the alignment settings.
By utilizing the ability to indent multiple cells at once, you can maintain consistent formatting and organization in your Excel spreadsheets, enhancing readability and making your data more accessible.
Customizing Indentation
Excel offers various customization options when it comes to indentation, allowing you to adjust the default indentation level and modify the width of indents to suit your specific requirements. Customizing indentation helps you achieve a more personalized and visually appealing formatting for your data. Here’s how you can customize indentation in Excel:
- Select the cell(s) or range of cells for which you want to customize the indentation.
- Right-click on the selected cell(s) and choose the Format Cells option from the context menu. Alternatively, you can go to the Home tab in the Excel ribbon, click on the Format drop-down arrow in the Cells group, and select the Format Cells option.
- In the Format Cells dialog box, navigate to the Alignment tab.
- Under the Indent section, you will find options to customize the indentation:
- Indent: Use this option to set the default indentation level for the selected cell(s). Increase the value to indent the cells further to the right, or decrease it for less indentation.
- Text indent: Here, you can specify the width (in characters) that you want to use for indentation. Increasing the value will create a larger indent, while decreasing it will reduce the width of the indent.
- Use default: Tick this checkbox to revert to the default indentation settings for the cell(s).
By customizing indentation in Excel, you have the flexibility to create the desired visual structure and alignment for your data. This is particularly helpful when you want to emphasize certain sections, clarify relationships, or adhere to specific formatting guidelines provided by your organization or project.
In addition to adjusting the default indentation and text indent, you can also combine left and right indents or use negative values to create custom indentation effects. These options are available in the Indentation section of the Format Cells dialog box.
Remember that the customization options for indentation are specific to each cell or range of cells. This means you can have different indentation settings for different cells within the same worksheet, giving you full control over the appearance and structure of your data.
By leveraging the customization options, you can create visually appealing and organized Excel spreadsheets that align with your specific needs and preferences.
Hiding and Displaying Indented Text
In Excel, you have the ability to hide and display indented text, allowing for a more focused and concise view of your data. This feature is particularly useful when working with large datasets or when you want to present information in a streamlined manner. Here’s how you can hide and display indented text in Excel:
- Select the range of cells containing the indented text that you want to hide or display.
- Note that to the left of the indented cells, you will see a small triangle icon (▶/▼). This icon indicates whether the indented text is currently hidden or displayed.
- To hide the indented text, click on the small triangle icon. This will collapse the indented rows or columns, hiding the content within.
- If you want to display the indented text again, click on the small triangle icon once more. This will expand the indented rows or columns, revealing the hidden content.
Hiding indented text can be advantageous when you want to focus on specific sections of your data or when you need to present a summary view of your spreadsheet. By collapsing the indented rows or columns, you can streamline the presentation of information, making it easier to navigate and comprehend.
This feature is particularly useful when working with complex hierarchical data structures or when you want to present an overview of your data that requires less detailed information. Hiding and displaying indented text provides a way to manage the level of detail shown in your spreadsheet without permanently altering the indentation or structure of your data.
It is essential to note that hiding or displaying indented text only affects the visibility of the content and does not remove or modify the indentation itself. This means that your data structure and hierarchy remain intact even when the indented text is hidden.
By using the hidden and displayed text feature, you can create more focused and streamlined views of your indented data in Excel, improving the clarity and readability of your spreadsheets.
Working with Indents in Formulas in Excel
In Excel, indents can be applied not only to text but also within formulas. This comes in handy when you’re working with complex calculations and need to clearly represent the hierarchy or nesting of functions and arguments. By using indents within formulas, you can enhance the readability and understanding of your calculations. Here’s how you can work with indents in formulas:
- Select the cell in which you want to enter your formula or navigate to the formula bar.
- To start a new function or argument within your formula, press the Tab key. This will automatically create an indent to show the relationship between different parts of the formula.
- If you need to nest functions within each other, use additional indents by pressing the Tab key multiple times to create a deeper level of hierarchy.
- To decrease the indent level, press Shift + Tab to move back to the previous indent level.
- Continue building your formula, using appropriate indents to visually represent the structure and hierarchy of your calculations.
Working with indents in formulas is particularly beneficial when dealing with complex calculations. By utilizing indents, you can better organize and visually differentiate between the different levels of functions and their arguments. This makes it easier for you and others to understand the logic behind the formula.
Indenting within formulas allows you to create a clearer representation of nested functions and their relationships. It helps to reduce confusion and minimizes the risk of errors, as each indent level signifies the level of calculation involved.
Remember that indenting within formulas is purely for visual purposes and does not impact the functionality or result of the formula. The indents serve as a guide to help you navigate and comprehend the formula structure more easily.
It’s also important to note that indentation within formulas doesn’t affect the alignment of the formula itself within the cell. The fixed alignment ensures that the formula remains neatly presented, even with varying levels of indentation.
By incorporating indents within your formulas, you can create more readable and comprehensible calculations in Excel, making it easier to analyze and troubleshoot your complex formulas.
Troubleshooting Indentation Issues in Excel
While working with indentation in Excel, you may occasionally encounter some issues that affect the desired formatting and structure of your spreadsheet. Here are a few troubleshooting tips to help you address common indentation issues:
- Indentation not applied: If you find that the indentation settings are not being applied to your selected cells, ensure that you have selected the correct range of cells. Verify that the indentation buttons, such as Increase Indent or Decrease Indent, are enabled and clickable. If the issue persists, try saving and reopening the Excel file or restarting the program.
- Uneven indentation: If the indentation appears uneven or inconsistent across your spreadsheet, check if you have accidentally applied different indentation settings to different cells or ranges. Select the affected cells and use the Format Cells option in the right-click menu or the Excel ribbon to adjust the indentation settings uniformly.
- Indentation alignment: If you notice that the indentation appears skewed or misaligned, ensure that the alignment settings for the cells are set properly. You can adjust the cell alignment using the alignment options available under the Home tab in the Excel ribbon or by right-clicking on the selected cells and selecting the Format Cells option.
- Indentation inconsistencies in formulas: When working with formulas that involve indented cells, ensure that the indentation levels are applied correctly to the respective arguments and functions within the formula. Double-check the indentation of each element to ensure accurate calculation and interpretation of the formula.
- Indentation not displaying: If you find that the indented cells or rows are not displaying the hidden text when expanded, check if you have accidentally collapsed the cells using the triangle icon. Click on the small triangle icon next to the indented cells to expand and reveal the hidden content.
If these troubleshooting tips don’t resolve the indentation issues, you may consider repairing or reinstalling your Microsoft Excel application or seeking assistance from Microsoft support or online Excel communities for further assistance.
By being aware of these common issues and implementing the appropriate troubleshooting techniques, you can resolve indentation problems in Excel and ensure that your spreadsheet formatting and structure align with your intended design.