
What You’ll Need
To hook up the Philips Hue Bulb Starter Kit, you’ll need a few essential items. Here’s a list of what you’ll need to get started:
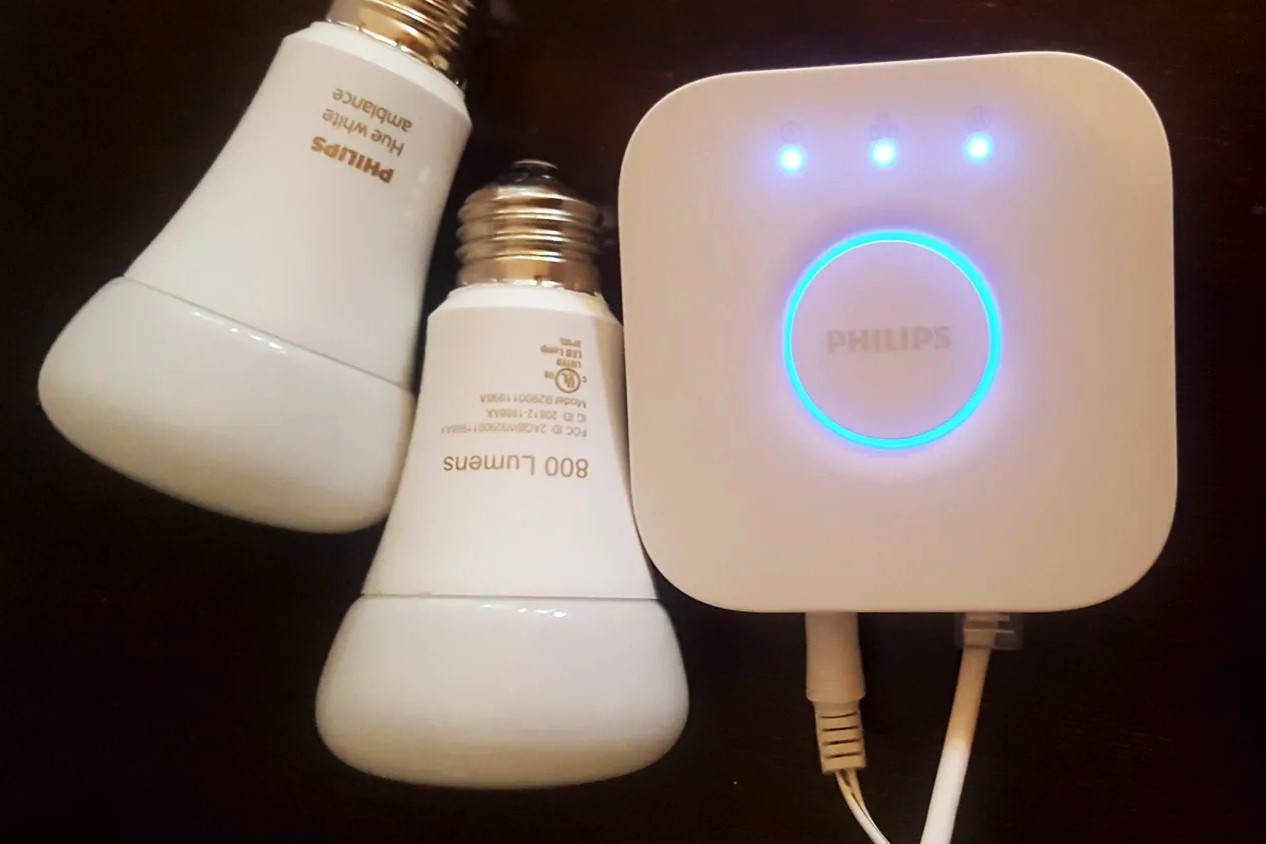
1. Philips Hue Bulb Starter Kit: This includes the necessary components to set up your smart lighting system, including the Hue bridge and a set of Hue bulbs.
2. Wi-Fi Connection: To control your Philips Hue bulbs remotely, you’ll need a stable Wi-Fi network in your home.
3. Smartphone or Tablet: You’ll need a smartphone or tablet running on iOS or Android to download and set up the Philips Hue app.
4. Philips Hue App: This app is essential for controlling your Hue bulbs, setting up scenes, and customizing your lighting experience.
5. Power Outlet: Make sure you have access to a power outlet near where you plan to install your Hue bulbs and bridge.
6. Compatible Light Fixtures: The Philips Hue bulbs are designed to fit standard light fixtures. Ensure that your fixtures are compatible with the Hue bulbs before installation.
7. Internet Connection: A stable and reliable internet connection is necessary for performing initial setup and accessing advanced features.
8. Optional Accessories: Depending on your preferences, you may want to consider additional accessories like a Hue dimmer switch or motion sensor for added convenience and automation.
These are the basic items you’ll need to get started with your Philips Hue Bulb Starter Kit. Now, let’s dive into the step-by-step process of setting up your smart lighting system.
Step 1: Unboxing the Starter Kit
Congratulations on your purchase of the Philips Hue Bulb Starter Kit! Before you can start enjoying the convenience and versatility of smart lighting, you’ll need to unbox the starter kit and familiarize yourself with its contents. Here’s a step-by-step guide on how to unbox your starter kit:
1. Locate the Box: Find the package that contains your Philips Hue Bulb Starter Kit. It should be clearly labeled and easy to identify.
2. Open the Box: Carefully open the box using a pair of scissors or a box cutter. Be mindful not to damage any of the contents inside.
3. Remove the Contents: Take out all the components included in the starter kit. Generally, you’ll find a Hue bridge, Hue bulbs, power adapters, and any additional accessories you purchased.
4. Check the Contents: Verify that all the components listed in the user manual are present. If anything is missing or damaged, contact the retailer or Philips Hue customer support for assistance.
5. Read the User Manual: Take some time to read the user manual provided in the package. This will help you get familiar with the different components and their functions.
6. Inspect the Hue Bridge: Take a closer look at the Hue bridge, which is the heart of the system. Check for any visible damage and make sure all the ports and connectors are in good condition.
7. Examine the Hue Bulbs: Carefully inspect each Hue bulb to ensure that they are intact and undamaged. Check the bulb base and the glass for any signs of cracks or defects.
8. Keep the Packaging: It’s good practice to keep the original packaging in case you need to return or store the kit in the future. This will help protect the components from potential damage.
By following these steps, you will have successfully unboxed your Philips Hue Bulb Starter Kit. Now you’re ready to move on to the next step, which is connecting the bridge to your home network.
Step 2: Connecting the Bridge
Now that you have unboxed your Philips Hue Bulb Starter Kit, it’s time to connect the Hue bridge to your home network. The bridge acts as a central hub that connects your Hue bulbs to the Philips Hue app and allows you to control them remotely. Here’s a step-by-step guide on how to connect the bridge:
1. Find a Suitable Location: Choose a suitable location for your Hue bridge. It should be placed near your Wi-Fi router for a strong and stable connection.
2. Connect the Power Adapter: Plug the power adapter into a nearby power outlet, and connect the other end to the Hue bridge. Make sure the bridge is receiving power.
3. Connect the Ethernet Cable: Use the Ethernet cable provided to connect the bridge to an available Ethernet port on your Wi-Fi router. This will establish a wired connection between the bridge and your network.
4. Power On the Bridge: Press the power button on the bridge to turn it on. Wait for the bridge to boot up and initialize. The indicator lights on the bridge will indicate its status.
5. Download the Philips Hue App: While the bridge powers on, download the Philips Hue app on your smartphone or tablet. It is available for free on the App Store for iOS devices and the Google Play Store for Android devices.
6. Launch the App: Once the app is downloaded, launch it and follow the on-screen instructions to set up an account or log in if you already have one.
7. Add a New Bridge: In the app, navigate to the settings or setup section and select “Add New Bridge”. The app will guide you through the setup process.
8. Press the Bridge Button: On the Hue bridge, press the round button located on the front. This will initiate the pairing process with the app.
9. Wait for the App to Detect the Bridge: The app will search for the bridge and detect it automatically. Once the bridge is found, the app will prompt you to confirm the pairing.
10. Confirm Pairing: Follow the app’s instructions to confirm the pairing between the bridge and the app. This will establish the connection between the bridge, your smart home network, and the app.
Once the bridge is successfully connected to your home network, you can proceed to the next step, which is installing the Philips Hue bulbs.
Step 3: Installing the Hue Bulbs
With the Hue bridge successfully connected to your home network, it’s time to install the Philips Hue bulbs. These smart bulbs will replace your traditional light bulbs and allow you to control them remotely through the Philips Hue app. Follow these steps to install the Hue bulbs:
1. Choose a Bulb Placement: Decide where you want to install the Hue bulbs. They can be used in any standard light fixture, such as lamps, ceiling lights, or wall sconces.
2. Turn Off the Power: Before installing the bulbs, make sure to turn off the power to the light fixture you are working with. This will prevent any accidents and ensure your safety.
3. Remove the Existing Bulb: Unscrew and safely remove the existing light bulb from the fixture. Set it aside, as you may need it in the future if you wish to revert back to traditional lighting.
4. Insert the Hue Bulb: Take the Philips Hue bulb and screw it into the vacant socket of the light fixture. Make sure to securely tighten it, but avoid over-tightening to prevent damage.
5. Repeat for Each Bulb: If you have multiple bulbs to install, repeat the previous step for each one. Ensure that all the bulbs are seated properly in their respective sockets.
6. Power On the Fixture: With the Hue bulbs installed, turn the power back on for the light fixture. The bulbs should receive power and illuminate, indicating that they are ready for setup.
7. Wait for Bulbs to Initialize: Give the bulbs a few moments to initialize and connect to the Hue bridge. During this time, they may blink or change colors as they establish the connection.
8. Open the Philips Hue App: Launch the Philips Hue app on your smartphone or tablet. If you have already set up the bridge in the previous steps, the app should automatically detect the newly installed bulbs.
9. Follow App Instructions: The app will guide you through the process of identifying and naming each bulb. Follow the instructions to assign each bulb to a specific location or room in your home.
10. Test the Bulbs: Once the bulbs are added to the app, you can use the app’s controls to test their functionality. Turn them on and off, adjust their brightness, or explore different colors and effects.
With the Philips Hue bulbs successfully installed and connected to the bridge, you can now begin enjoying the full range of smart lighting features. Proceed to the next step to learn how to download and set up the Philips Hue app.
Step 4: Downloading the Philips Hue App
To control and customize your Philips Hue bulbs, you’ll need to download and install the Philips Hue app on your smartphone or tablet. The app allows you to set up scenes, create schedules, and control your lights remotely. Here’s a step-by-step guide on how to download the Philips Hue app:
1. Open the App Store or Google Play Store: Depending on whether you have an iOS or Android device, open the respective app store on your smartphone or tablet.
2. Search for “Philips Hue”: In the search bar of the app store, type “Philips Hue” and tap the search button. Look for the official Philips Hue app developed by Signify.
3. Select the App: From the search results, select the Philips Hue app. Look for the app with the official Philips logo and positive user reviews.
4. Download and Install: Tap the “Download” or “Install” button to start the download process. The app may require access to certain permissions, such as camera access for syncing with the Hue bulbs.
5. Wait for the Installation: Depending on your internet connection and device speed, the app may take a few moments to download and install. You can monitor the progress through the app store interface.
6. Launch the App: After the installation is complete, tap the “Open” or “Launch” button to open the Philips Hue app. Alternatively, you can find the app icon on your home screen or app drawer and tap it to start.
7. Sign In or Create an Account: If you already have an existing Philips Hue account, sign in with your credentials. Otherwise, follow the on-screen prompts to create a new account. This will allow you to personalize your lighting experience.
8. Grant Necessary Permissions: The app may require access to your location, Wi-Fi, and camera to set up and control your Philips Hue bulbs. Grant the necessary permissions as prompted.
9. Follow On-Screen Instructions: The app will provide on-screen instructions to connect to the Hue bridge and discover your bulbs. Follow the prompts to complete the setup process.
10. App Customization: Once the app is connected to the Hue bridge and bulbs, you can customize your lighting experience. Explore options such as creating scenes, setting timers, or adjusting color and brightness levels.
By downloading and setting up the Philips Hue app, you have gained access to a wide range of features to enhance your smart lighting experience. In the next step, we’ll cover connecting the bridge to your Wi-Fi network.
Step 5: Connecting the Bridge to Your Wi-Fi Network
Now that you have downloaded and installed the Philips Hue app, it’s time to connect your Hue bridge to your Wi-Fi network. By doing so, you can control your smart lighting system remotely and enjoy the full range of features. Follow these steps to connect the bridge to your Wi-Fi network:
1. Launch the Philips Hue App: Open the Philips Hue app on your smartphone or tablet. Make sure you are logged in to your Hue account.
2. Navigate to Bridge Settings: In the app, navigate to the settings menu. Look for options related to the bridge, such as “Bridge Settings” or “Bridge Configuration”.
3. Connect a Device to the Bridge: On the bridge, locate the small button or connect it to your device using a wired connection (Ethernet cable). This will allow the bridge to communicate with the app.
4. Press the Bridge Button: Within the app, follow the instructions to press the button on the bridge. This will initiate the process of connecting the bridge to your Wi-Fi network.
5. Enter Network Credentials: When prompted, enter the network credentials for your Wi-Fi network, such as the network name (SSID) and password. Double-check the accuracy of the information before proceeding.
6. Wait for Connection: The app will attempt to establish a connection between the bridge and your Wi-Fi network. It may take a few moments for the connection to be established. Be patient during this step.
7. Confirm Connection: Once the bridge is successfully connected to your Wi-Fi network, the app will display a confirmation message. Double-check that the Wi-Fi indicator on the bridge is solid or has changed color.
8. Test the Connection: To ensure a successful connection, test the remote control functionality within the app. Try turning the lights on and off or adjusting their brightness. If the bulbs respond, the connection is working correctly.
9. Repeat for Multiple Bridges: If you have multiple Hue bridges in your setup, repeat the previous steps for each bridge to connect them to your Wi-Fi network.
10. Enjoy Remote Control: With the bridge connected to your Wi-Fi network, you can now control your Hue bulbs remotely from anywhere with an internet connection.
By connecting your Hue bridge to your Wi-Fi network, you have unlocked the ability to control your smart lights from anywhere. In the next step, we’ll cover pairing the Hue bulbs with the bridge.
Step 6: Pairing the Hue Bulbs with the Bridge
Now that the Hue bridge is connected to your Wi-Fi network, it’s time to pair the Hue bulbs with the bridge. This will enable the bulbs to communicate with the bridge and be controlled through the Philips Hue app. Follow these steps to pair the Hue bulbs with the bridge:
1. Launch the Philips Hue App: Open the Philips Hue app on your smartphone or tablet. Make sure you are logged in to your Hue account.
2. Navigate to Bulb Pairing: In the app, go to the settings menu or bulb configuration section. Look for options related to pairing or connecting new bulbs.
3. Start Bulb Discovery: Within the app, follow the instructions to start the bulb discovery process. This will put the Philips Hue bulbs in pairing mode, allowing them to be detected by the bridge.
4. Press the Hue Bridge Button: On the Hue bridge, press the button located on the front. This will initiate the pairing and discovery process between the bridge and the bulbs.
5. Wait for Bulb Detection: The app will search for and detect the Hue bulbs that are in pairing mode. This process may take a few moments. Make sure the bulbs are within range of both the bridge and app.
6. Confirm Bulb Pairing: Once the bulbs are detected, the app will display a list of the newly found bulbs. Review the list to ensure that all the bulbs you want to pair are included.
7. Assign Bulb Locations: In the app, assign each bulb to its corresponding location or room in your home. This will help you easily identify and control the bulbs later on.
8. Test Bulb Control: To ensure successful pairing, test the control functionality within the app. Turn the bulbs on and off, adjust their brightness, or explore different colors and effects. The bulbs should respond accordingly.
9. Repeat for Additional Bulbs: If you have more Hue bulbs to pair, repeat the previous steps for each bulb. The app will guide you through the process for each bulb.
10. Enjoy Customizable Lighting: Once the bulbs are successfully paired with the bridge, you can fully customize your lighting experience through the Philips Hue app. Create scenes, adjust brightness, set timers, and explore various color options to suit your preferences and mood.
By pairing the Hue bulbs with the bridge, you have completed the setup process and can begin to enjoy the full functionality of your Philips Hue lighting system. In the next step, we’ll cover how to sync the bulbs with the Philips Hue app.
Step 7: Syncing the Hue Bulbs with the App
Now that you have successfully paired the Hue bulbs with the bridge, it’s time to sync them with the Philips Hue app. Syncing ensures that the app recognizes and controls each bulb accurately. Follow these steps to sync the Hue bulbs with the app:
1. Open the Philips Hue App: Launch the Philips Hue app on your smartphone or tablet. Make sure you are logged in to your Hue account.
2. Navigate to Bulb Settings: In the app, go to the settings menu or bulb configuration section. Look for options related to syncing or updating bulbs.
3. Start the Syncing Process: Within the app, follow the instructions to start the syncing process. This will initiate a communication between the app and the Hue bulbs.
4. Wait for Sync Completion: The app will send signals to each paired bulb individually and wait for their response. This process may take a few moments, depending on the number of bulbs you have.
5. Verify Synced Bulbs: Once the syncing process is complete, the app will display a list of synchronized bulbs. Review the list to ensure that all the paired bulbs are recognized and synced correctly.
6. Test Bulb Control: To ensure successful syncing, test the bulb control functionality within the app. Turn the bulbs on and off, adjust their brightness, or change their colors. The bulbs should respond promptly and accurately.
7. Troubleshoot Syncing Issues: If any bulbs are not syncing or are not responding correctly, there may be a connection issue. Check the bulb’s connection to the bridge or the strength of the Wi-Fi signal in that area. Resetting the bulb or restarting the bridge might help resolve the issue.
8. Fine-Tune Bulb Settings: After syncing, you can fine-tune the settings for each bulb. Rename bulbs, group them into rooms or zones, and customize their behavior using advanced features offered by the app.
9. Create Personalized Scenes: Take advantage of the Philips Hue app’s scene creation feature to capture your favorite lighting combinations. Experiment with different color schemes and brightness levels to create a personalized ambiance for any occasion.
10. Enjoy Seamless Control: With the Hue bulbs synced to the app, you can now effortlessly control and personalize your lighting experience. Set the mood, schedule lighting routines, and enjoy the convenience of smart lighting at your fingertips.
By syncing the Hue bulbs with the app, you have fully integrated your smart lighting system and can easily control and customize your lights to suit your preferences. In the next step, we’ll cover how to set up scenes and routines for even greater control and automation.
Step 8: Setting Up Scenes and Routines
One of the key benefits of the Philips Hue system is the ability to create scenes and routines, allowing you to automate and customize your lighting experience. With scenes, you can set the perfect ambiance for different activities, while routines enable you to schedule lighting changes throughout the day. Follow these steps to set up scenes and routines using the Philips Hue app:
1. Open the Philips Hue App: Launch the Philips Hue app on your smartphone or tablet. Make sure you are logged in to your Hue account.
2. Access Scene and Routine Settings: In the app, navigate to the settings or routines section. Look for options related to scenes or routines.
3. Set Up Scenes: Select “Scenes” in the app, and then tap on the “+” or “Add” button to create a new scene. Give the scene a descriptive name and select the desired bulbs to be included. Adjust the color, brightness, and other settings to create the desired ambiance. Repeat this process for each scene you want to create.
4. Customize Scene Settings: Fine-tune each scene’s settings to your liking. For example, you can activate a scene with a specific voice command, set a scene to activate at a certain time, or trigger it based on your location.
5. Create Routines: To set up routines, navigate to the routines section in the app and tap on the “+” or “Add” button. Give the routine a name and specify the desired time or trigger that will activate the routine. Select the scene or settings you want to apply during the routine.
6. Schedule Routines: Set the schedule for each routine by choosing the days of the week and the specific time when the routine should activate. You can also set up multiple routines for different times of the day or different occasions.
7. Explore Advanced Options: The Philips Hue app offers various advanced options to enhance your scenes and routines. You can add additional triggers, integrate with other smart home devices, or even create complex sequences of lighting changes.
8. Test and Refine: Once you have set up scenes and routines, test them to ensure they function as desired. Make necessary adjustments to the settings, timings, or scene configurations if needed.
9. Expand and Explore: Don’t be afraid to explore and experiment with different scenes and routines. Try out new combinations of colors, brightness levels, and timings to create unique lighting experiences for various activities or moods.
10. Enjoy Automated Lighting: With the scenes and routines set up, you can sit back and enjoy the convenience and automation that your Philips Hue system offers. Let your lighting adapt to your daily routines and preferences effortlessly.
By setting up scenes and routines, you have taken your smart lighting experience to the next level. In the next step, we’ll cover exploring additional features and settings to further customize your Philips Hue setup.
Step 9: Exploring Additional Features and Settings
In addition to scenes and routines, the Philips Hue system offers a variety of additional features and settings that allow you to further customize and enhance your smart lighting experience. Here are some steps to help you explore these additional features:
1. Open the Philips Hue App: Launch the Philips Hue app on your smartphone or tablet. Make sure you are logged in to your Hue account.
2. Access Additional Features: In the app, navigate to the settings menu or explore the various sections and options to discover additional features and settings.
3. Explore Color Options: Philips Hue offers a wide range of colors and shades that you can explore. Experiment with different color combinations to create unique lighting effects for specific occasions or moods.
4. Adjust Color Temperature: If you have the Philips Hue White Ambiance or Philips Hue White and Color Ambiance bulbs, you can adjust the color temperature of the lights to create a warm or cool lighting environment.
5. Customize Brightness: Adjust the brightness settings of your Hue bulbs to suit your preference. Dim the lights for a cozy ambiance or brighten them for task-oriented activities.
6. Configure Schedules: Besides creating routines, the Philips Hue app allows you to configure specific schedules for individual bulbs or groups. This feature is useful for setting up wake-up routines or automatic turning off of lights at specific times.
7. Explore Third-Party Integrations: The Philips Hue system is compatible with various third-party apps and platforms, allowing you to integrate your smart lighting with other devices and services. Browse the app store or Philips Hue website to discover compatible integrations.
8. Voice Control with Smart Assistants: If you own a smart assistant like Amazon Alexa, Google Assistant, or Apple Siri, consider integrating it with your Philips Hue system. This allows you to control your lights with voice commands for added convenience.
9. Group and Organize Bulbs: In the settings menu of the app, you have the option to group and organize your bulbs into rooms or zones. Not only does this simplify control, but it also provides easy access to adjust multiple lights simultaneously.
10. Firmware Updates: Stay up to date with the latest firmware updates for your Philips Hue bulbs and bridge. These updates often introduce new features, improvements, and bug fixes, ensuring optimal performance.
By exploring these additional features and settings, you can truly personalize and optimize your Philips Hue lighting system. Take your time to experiment and discover the various possibilities to create the perfect lighting environment for every moment.
Troubleshooting Common Issues
While setting up and using your Philips Hue Bulb Starter Kit, you may encounter some common issues. Here are some troubleshooting steps to help resolve these issues:
1. Connection Problems: If you’re experiencing issues with connecting the bridge to your Wi-Fi network, ensure that the bridge is within range of the Wi-Fi signal and that the Wi-Fi credentials entered are correct. Try restarting your router and bridge and make sure there are no conflicting Wi-Fi networks nearby.
2. Unresponsive Bulbs: If your Hue bulbs are unresponsive, ensure that they are securely screwed into the light fixtures and that the power is turned on. If they still don’t respond, try power cycling the bulbs by turning them off and on again. Additionally, double-check that the bulbs are within range of the bridge.
3. Dim or Flickering Lights: If you notice dim or flickering lights, it could indicate a compatibility issue with the light fixtures. Check if the fixtures are compatible with the Philips Hue bulbs, as certain dimmers or transformers may interfere with their performance. If necessary, replace the fixtures with compatible ones.
4. Connection Drops: If you frequently experience connection drops between the bulbs and the bridge, ensure that the bridge is placed close to the bulbs and free from any obstructions that may interfere with the signal. If necessary, move the bridge to a more centralized location within your home.
5. App Connectivity Problems: If you’re unable to connect to the Philips Hue app, ensure that you have a stable internet connection and that your smartphone or tablet is running on the latest software version. Restart your device and check for any app updates. If the issue persists, try reinstalling the app.
6. Firmware Updates: Check if your Hue bulbs and bridge have the latest firmware updates installed. Outdated firmware can lead to compatibility issues and may limit the functionality of the system. Use the Philips Hue app to check for and install any available firmware updates.
7. Reboot the Bridge: If you’re experiencing multiple issues, try rebooting the bridge by disconnecting the power for a few seconds and then reconnecting it. This can help resolve temporary glitches and restore the bridge’s functionality.
8. Contact Customer Support: If you’ve exhausted all troubleshooting steps and are still experiencing issues with your Philips Hue Bulb Starter Kit, don’t hesitate to reach out to Philips Hue customer support. They can provide further assistance and help resolve any persistent issues.
Remember to refer to the user manual and documentation provided with your Philips Hue Bulb Starter Kit for more specific troubleshooting steps and solutions tailored to your setup. By addressing these common issues, you can ensure a smooth and enjoyable experience with your smart lighting system.