
Enable Text Message Forwarding on Your iPhone
If you want to receive text messages on your Mac, the first step is to enable text message forwarding on your iPhone. This feature allows your Mac to receive and send SMS and MMS messages through the Messages app. Follow these simple steps to get started:
1. Open the Settings app on your iPhone.
2. Scroll down and tap on “Messages”.
3. In the Messages settings, tap on “Text Message Forwarding”.
4. You will see a list of devices that are linked to your Apple ID. Look for your Mac in the list and toggle the switch to enable text message forwarding.
5. A verification code will be displayed on your Mac screen. Enter this code on your iPhone to confirm the forwarding process.
Once you have successfully enabled text message forwarding on your iPhone, your Mac will be able to receive all your incoming text messages. You can now conveniently read and reply to your messages right from your Mac.
It’s important to note that both your iPhone and Mac need to be connected to the same Wi-Fi network for text message forwarding to work properly. If you’re experiencing any issues, make sure that both devices are connected to the same network.
With text message forwarding enabled, you’ll never have to switch back and forth between your iPhone and Mac to keep up with your text conversations. Stay connected and productive by taking advantage of this convenient feature.
Make Sure Your Mac and iPhone Are Connected to the Same Wi-Fi Network
In order for text message forwarding to work seamlessly between your Mac and iPhone, it is crucial that both devices are connected to the same Wi-Fi network. This ensures a stable connection and allows for the smooth transfer of messages. Follow these steps to check the Wi-Fi connection on both your devices:
1. On your Mac, click on the Wi-Fi icon in the menu bar at the top right corner of the screen. Make sure that the Wi-Fi is turned on and connected to the desired network.
2. On your iPhone, go to the Settings app and tap on “Wi-Fi”. Check that the Wi-Fi is turned on and connected to the same network as your Mac.
3. If both devices are already connected to the same network, you’re good to go. However, if they are connected to different networks, follow these steps to connect them to the same network:
a. On your iPhone, tap on the Wi-Fi network you want to connect to from the available list and enter the password if required.
b. On your Mac, click on the Wi-Fi icon and select the same network that your iPhone is connected to.
c. If prompted, enter the password to connect your Mac to the network.
Ensuring that both your Mac and iPhone are connected to the same Wi-Fi network will eliminate any connectivity issues and enable the seamless transfer of text messages between devices.
It’s important to note that if you’re still experiencing issues even after connecting both devices to the same network, you may try restarting your Mac and iPhone. Restarting can often resolve minor connectivity glitches and restore smooth functionality.
By following these simple steps, you can ensure that your Mac and iPhone are connected to the same Wi-Fi network, allowing you to enjoy the convenience of receiving and replying to text messages on your Mac without any interruptions.
Open the Messages App on Your Mac
Once you have enabled text message forwarding on your iPhone and ensured that both your Mac and iPhone are connected to the same Wi-Fi network, you’re ready to open the Messages app on your Mac and start receiving text messages. Here’s how to do it:
1. Locate the Messages app on your Mac. You can find it in the Applications folder or by using Spotlight search.
2. Click on the Messages icon to launch the app.
3. If you have previously signed in to the Messages app with your Apple ID, you will be automatically logged in. If not, you will be prompted to sign in with your Apple ID. Enter your credentials and click “Sign in”.
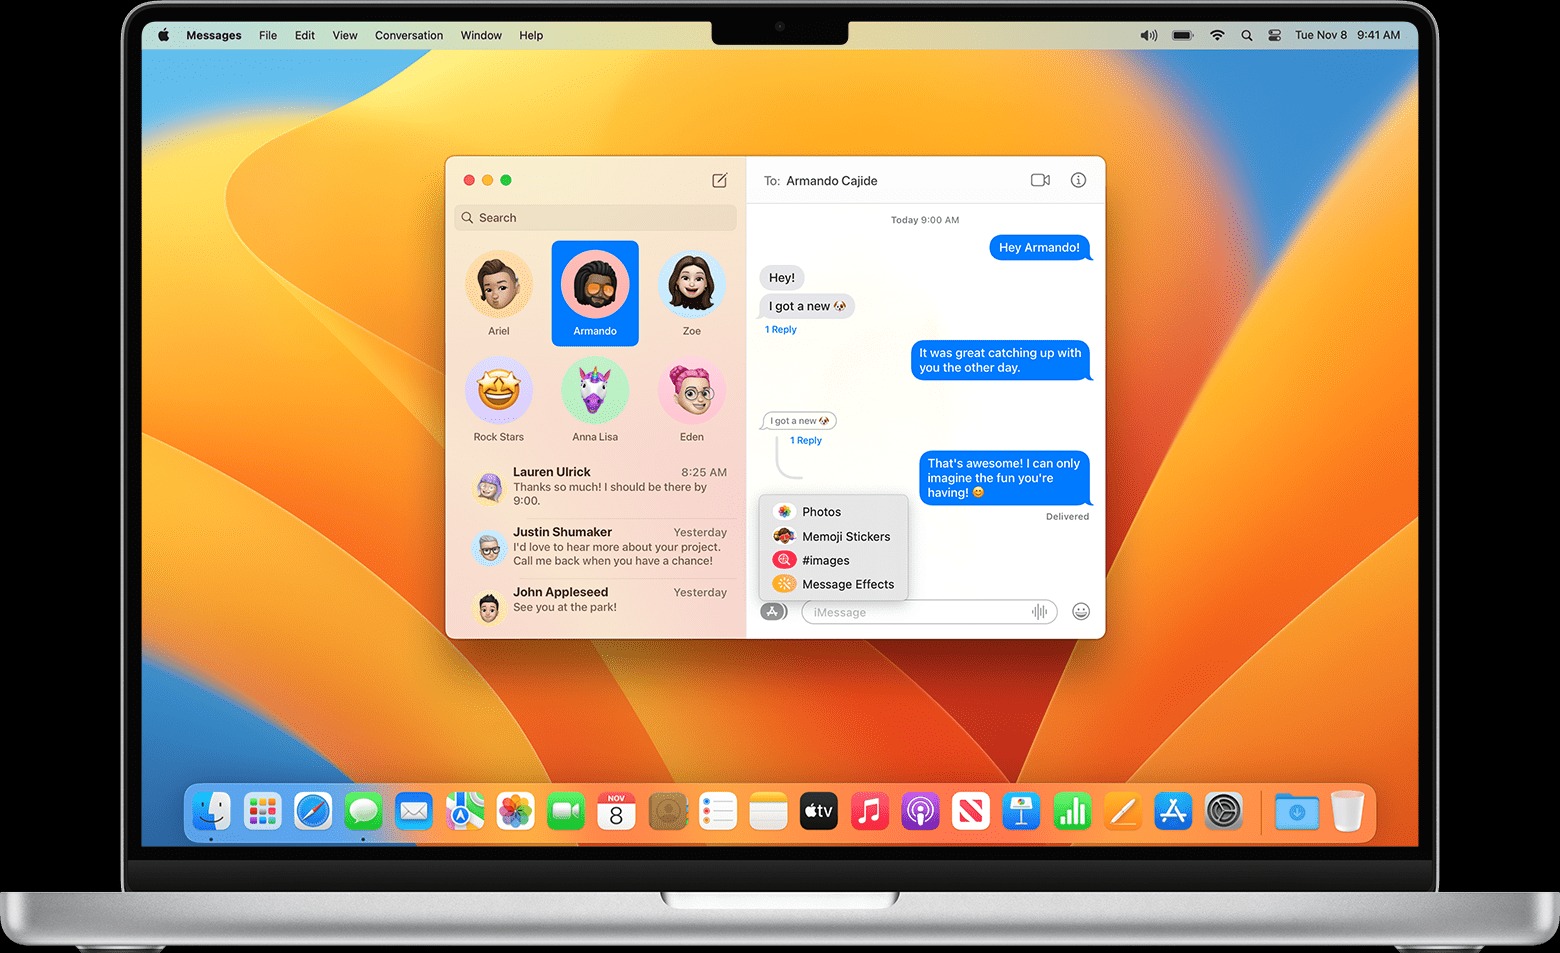
4. The Messages app will open, displaying your contacts and recent conversations on the left side.
5. To start receiving text messages on your Mac, make sure that your iPhone is nearby and the Messages app on your iPhone is running in the background.
6. As soon as a new text message is received on your iPhone, it will also appear in the Messages app on your Mac.
With the Messages app on your Mac up and running, you can now conveniently view and respond to your text messages without having to pick up your iPhone. This is especially useful when you’re working on your Mac and don’t want to be constantly switching between devices.
The Messages app on your Mac also offers additional features such as sending and receiving multimedia messages (MMS), sharing files and documents, and creating group chats. Explore the various functionalities of the Messages app to make the most out of your text messaging experience on your Mac.
Now that you have successfully opened the Messages app on your Mac, it’s time to explore how to sign in with your Apple ID on your Mac in the next section.
Sign in with Your Apple ID on Your Mac
In order to fully utilize the text message forwarding feature on your Mac, you need to sign in with your Apple ID in the Messages app. This will ensure that your messages sync seamlessly between your iPhone and Mac. Follow these steps to sign in with your Apple ID on your Mac:
1. Open the Messages app on your Mac, if it’s not already open.
2. Locate the Messages menu in the menu bar at the top of the screen. Click on “Messages” and then click on “Preferences”.
3. In the Messages preferences window, click on the “Accounts” tab.
4. Click the “+” button at the bottom left corner of the window to add a new account.
5. A dialogue box will appear asking you to select the account type. Choose “iMessage” and click “Continue”.
6. Enter your Apple ID email address and password in the provided fields and click “Sign In”.
7. If you have two-factor authentication enabled, you will receive a verification code on one of your trusted devices. Enter the code when prompted.
8. Once you have successfully signed in with your Apple ID, your account will be added to the Messages app on your Mac.
By signing in with your Apple ID, you enable the synchronization of your iMessages across all your Apple devices. This means that any messages you send or receive on your iPhone will be replicated on your Mac, allowing for a seamless messaging experience.
It’s important to note that your Apple ID must be the same on both your iPhone and Mac for the text message forwarding feature to work properly. If you have multiple Apple IDs, make sure you use the same one on both devices.
Now that you have successfully signed in with your Apple ID on your Mac, let’s move on to the next section to learn how to check for text message forwarding settings on your iPhone.
Check for Text Message Forwarding Settings on Your iPhone
In order to enable text message forwarding on your iPhone, you need to ensure that the forwarding settings are properly configured. By checking these settings, you can make sure that your messages are being forwarded to your Mac. Here’s how to check for text message forwarding settings on your iPhone:
1. Open the Settings app on your iPhone.
2. Scroll down and tap on “Messages”.
3. In the Messages settings, look for the option called “Text Message Forwarding”. Tap on it.
4. You will see a list of devices that are linked to your Apple ID for text message forwarding. Look for your Mac in the list.
5. If your Mac is listed, the text message forwarding feature is already enabled for your device. The toggle switch next to your Mac’s name should be turned on.
6. If your Mac is not listed, you will need to enable text message forwarding for it. Toggle the switch next to your Mac’s name to turn on text message forwarding.
7. A verification code will be displayed on your Mac screen. Enter this code on your iPhone to confirm the forwarding process.
Once you have checked and configured the text message forwarding settings on your iPhone, your Mac will start receiving your incoming text messages. This allows you to conveniently read and reply to your messages from your Mac, without having to switch back and forth between devices.
If you ever want to disable text message forwarding to your Mac, simply go back to the “Text Message Forwarding” settings on your iPhone and toggle the switch next to your Mac’s name to turn it off.
Now that you have ensured that the text message forwarding settings are properly configured on your iPhone, let’s move on to the next section to learn how to enable text message forwarding for your Mac.
Enable Text Message Forwarding for Your Mac
Once you have checked the text message forwarding settings on your iPhone, you may need to enable text message forwarding specifically for your Mac. By doing this, you will ensure that your Mac can receive and send text messages through the Messages app. Here’s how to enable text message forwarding for your Mac:
1. On your iPhone, go to the “Text Message Forwarding” settings as mentioned earlier.
2. Look for your Mac in the list of devices and make sure the toggle switch next to your Mac’s name is turned on.
3. If your Mac is not listed or the toggle switch is turned off, tap on the switch to enable text message forwarding for your Mac.
4. A verification code will be displayed on your Mac screen.
5. On your iPhone, enter the verification code that appears on your Mac to confirm the forwarding process.
Once you have successfully enabled text message forwarding for your Mac, your Mac will be able to receive all the incoming text messages that are sent to your iPhone. This means you can conveniently manage and respond to your text conversations directly from your Mac.
Keep in mind that both your Mac and iPhone need to be connected to the same Wi-Fi network for text message forwarding to work properly. If either device is not connected or there are any connectivity issues, you may not be able to receive text messages on your Mac.
Now that you have enabled text message forwarding for your Mac, let’s move on to the next section to verify your Mac on your iPhone.
Verify Your Mac on Your iPhone
After enabling text message forwarding for your Mac, it’s important to verify the connection on your iPhone to ensure that your Mac is successfully linked. Verifying your Mac allows for a seamless transfer of text messages between your iPhone and Mac. Follow these steps to verify your Mac on your iPhone:
1. On your iPhone, open the Messages app.
2. Open a conversation with any contact or create a new message.
3. In the message composition field, you should see your contact’s name at the top of the screen.
4. Tap the contact’s name to bring up the Message Details screen.
5. Scroll down until you see the option “Text Message Forwarding” and tap on it.
6. You will see a list of devices with text message forwarding enabled. Look for your Mac in the list.
7. If your Mac is listed, it means it has been successfully verified, and you can start receiving text messages on your Mac.
8. If your Mac is not listed, make sure that text message forwarding is enabled for your Mac and try the verification process again.
Verifying your Mac on your iPhone ensures that your devices are properly synced, and any text messages you receive on your iPhone will also appear on your Mac. This seamless integration allows for a more unified messaging experience, whether you’re at your desk or on the go.
If you encounter any issues during the verification process, make sure that both your iPhone and Mac are connected to the same Wi-Fi network. Additionally, double-check that you have followed the steps to enable text message forwarding and sign in with your Apple ID correctly on both devices.
Now that you have successfully verified your Mac on your iPhone, you can start receiving and replying to text messages on your Mac. In the next section, we will explore how to start receiving text messages on your Mac.
Start Receiving Text Messages on Your Mac
Now that you have enabled text message forwarding and verified your Mac on your iPhone, you’re ready to start receiving text messages on your Mac. With this feature, you can stay connected and manage your messages conveniently from your Mac. Here’s how to get started:
1. Open the Messages app on your Mac by clicking on the Messages icon in the Applications folder or using Spotlight search.
2. With the Messages app open, make sure your Mac is connected to the same Wi-Fi network as your iPhone.
3. On your iPhone, ensure that the Messages app is running in the background.
4. As soon as you receive a new text message on your iPhone, it will also appear in the Messages app on your Mac. You can view and read the message on your Mac without needing to pick up your iPhone.
5. To reply to a text message on your Mac, simply click on the message and start typing your response. Press enter or click the send button to send your reply.
Receiving text messages on your Mac allows for a more efficient workflow, as you can stay focused on your work without interruptions from constantly checking your iPhone. It provides the convenience of managing your text conversations on a bigger screen and utilizing the keyboard of your Mac.
In addition to receiving text messages, the Messages app on your Mac lets you send and receive multimedia messages (MMS), share files and documents, and even create group chats. Take advantage of these features to enhance your messaging experience.
It’s important to note that your Mac needs to remain connected to the Wi-Fi network and have the Messages app open to continue receiving text messages. If you close the Messages app or disconnect from the network, you won’t receive new messages until you reconnect and open the app again.
Now that you know how to start receiving text messages on your Mac, let’s move on to the next section to learn how to reply to text messages directly from your Mac.
Reply to Text Messages on Your Mac
One of the advantages of receiving text messages on your Mac is the ability to easily reply to them without needing to switch to your iPhone. With the Messages app on your Mac, you can quickly compose and send responses to your text conversations. Here’s how to reply to text messages on your Mac:
1. Open the Messages app on your Mac if it’s not already open.
2. In the Messages app, locate the text message you want to reply to in the conversation list on the left side of the screen.
3. Click on the message to open it and view the full conversation.
4. In the text entry field at the bottom of the Messages window, start typing your reply.
5. Once you have composed your reply, press Enter or click the Send button to send the message.
6. Your reply will be sent, and the conversation will be updated with your response.
Replying to text messages on your Mac is simple and efficient, allowing you to seamlessly continue your conversations without interruptions. You can type your responses with ease using the keyboard on your Mac, saving you time and effort compared to typing on the smaller keyboard of your iPhone.
In addition to plain text responses, the Messages app on your Mac also supports the inclusion of emojis, stickers, and other multimedia elements in your replies. Click on the emoji icon next to the text entry field to access the emoji picker and choose from a wide variety of expressive options.
Furthermore, if you receive a text message with a photo, video, or any other type of attachment, you can view and download the files directly in the Messages app on your Mac. This makes it convenient to access and share media content without having to transfer files between devices.
With the ability to reply to text messages on your Mac, you can stay productive and engaged in your conversations without needing to switch back and forth between devices. Enjoy the convenience and efficiency of managing your texts directly from your Mac.
Now that you know how to reply to text messages on your Mac, let’s explore how to sync messages on your Mac with your iPhone in the next section.
Sync Messages on Your Mac with Your iPhone
Syncing messages between your Mac and iPhone ensures that your text conversations stay up to date on both devices. By syncing, you can seamlessly switch between using your Mac or iPhone to send and receive messages without any loss of data. Here’s how to sync messages on your Mac with your iPhone:
1. Open the Messages app on your Mac if it’s not already open.
2. In the Messages app, click on the “Messages” menu in the menu bar at the top of the screen.
3. From the drop-down menu, select “Preferences”.
4. In the Messages preferences window, click on the “Accounts” tab.
5. Make sure that your Apple ID is listed under the “iMessage” section.
6. Check the box next to “Enable Messages on iCloud” to enable message synchronization between devices.
7. On your iPhone, go to the Settings app and tap on your Apple ID at the top of the screen.
8. Tap on “iCloud” and make sure that “Messages” is enabled.
Once you have enabled Messages on iCloud on both your Mac and iPhone, your messages will sync automatically. This means that any messages you send or receive on one device will also appear on the other device, keeping your conversations in sync.
Syncing messages not only ensures consistency between your devices but also provides additional benefits. For example, if you delete a message on one device, it will be deleted from all devices, freeing up storage space and creating a unified messaging experience.
Messages on iCloud also provides a backup of your text conversations, so if you ever change or upgrade your Mac or iPhone, you can easily restore your messages without losing any important conversations.
Keep in mind that syncing messages between devices requires a stable internet connection and sufficient storage space in your iCloud account. Additionally, both your Mac and iPhone need to be signed in with the same Apple ID.
Now that you have synced messages on your Mac with your iPhone, you can seamlessly switch between devices while keeping your text conversations in perfect harmony. In the next section, we will provide some troubleshooting tips for text message forwarding on your Mac.
Troubleshooting Tips for Text Message Forwarding on Your Mac
While text message forwarding on your Mac is a convenient feature, it’s possible to encounter some issues along the way. If you’re experiencing difficulties with text message forwarding, try these troubleshooting tips to resolve the problem:
1. Ensure Wi-Fi connectivity: Make sure both your Mac and iPhone are connected to the same Wi-Fi network. Inconsistent or weak Wi-Fi signals can disrupt the forwarding process.
2. Restart your devices: Try restarting both your Mac and iPhone. This simple step can often resolve minor connectivity issues and restore the proper functioning of text message forwarding.
3. Check for software updates: Ensure that your Mac and iPhone are running on the latest software versions. Software updates often include bug fixes and improvements that can address compatibility issues.
4. Verify Apple ID: Double-check that you have signed in with the correct Apple ID on both your Mac and iPhone. Text message forwarding requires the use of the same Apple ID on both devices.
5. Review forwarding settings: Confirm that text message forwarding is enabled for your Mac on your iPhone’s “Text Message Forwarding” settings. Make sure the toggle switch next to your Mac’s name is turned on.
6. Reset settings: If none of the above solutions work, you can try resetting the settings related to text message forwarding. On your iPhone, go to “Settings” > “General” > “Reset” > “Reset All Settings”. Keep in mind that this will reset all your device settings, so make sure to back up your data beforehand.
If you continue to experience issues with text message forwarding on your Mac, you may want to reach out to Apple Support for further assistance. They can provide specific troubleshooting steps tailored to your situation.
Remember that the text message forwarding feature is reliant on a stable internet connection and proper configuration. Ensuring these factors are in place will allow you to fully leverage the convenience of receiving and replying to text messages on your Mac.
With these troubleshooting tips, you can overcome common obstacles and optimize the functionality of text message forwarding on your Mac.
Now that you’re equipped with troubleshooting knowledge, you can make the most of text message forwarding and enjoy a seamless messaging experience on both your Mac and iPhone.