
Enabling Voice Recognition on the Mac
Voice recognition technology has come a long way in recent years, making it easier than ever to control your Mac using just your voice. Whether you have a disability, prefer hands-free operation, or simply find it more convenient, enabling voice recognition on your Mac opens up a new world of possibilities. Here’s how you can do it:
1. Accessing the System Preferences: To get started, open the Apple menu and select “System Preferences.” This will bring up a window where you can customize various settings on your Mac.
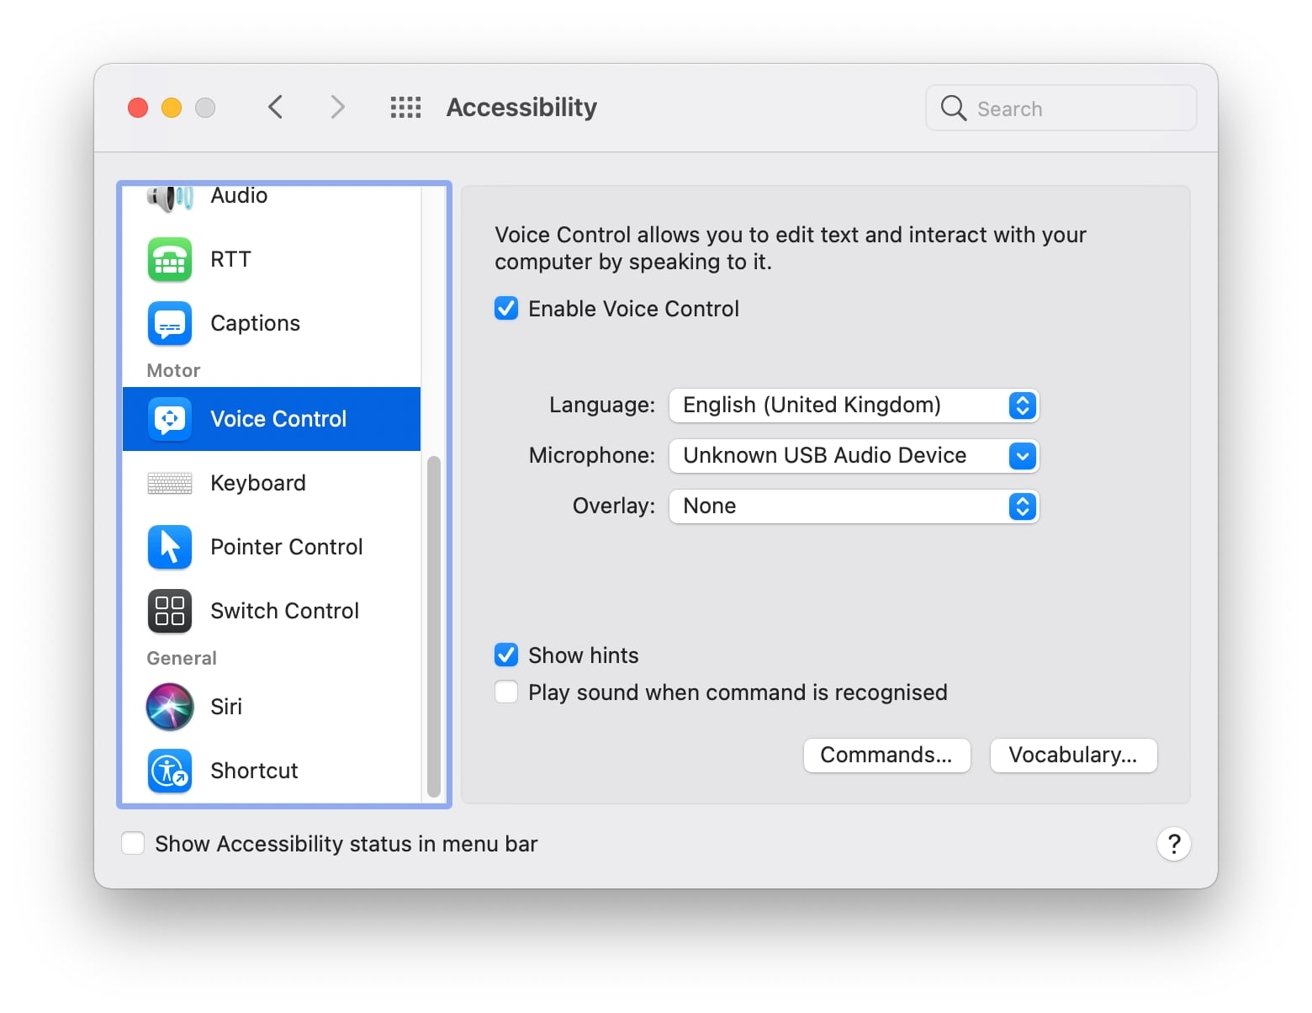
2. Click on “Accessibility”: Within the System Preferences window, locate and click on the “Accessibility” icon. This section contains a range of features designed to enhance the usability of your Mac, including voice recognition.
3. Enable “Dictation”: Once you’re in the Accessibility menu, click on “Dictation” in the left sidebar. You’ll then have the option to turn on dictation for your Mac. This feature enables you to convert your spoken words into text, allowing for hands-free typing.
4. Configure Dictation Settings: After enabling dictation, you can customize various settings to suit your preferences. For example, you can choose the language, enable the use of Enhanced Dictation for offline operation, and set a keyboard shortcut for activating dictation.
5. Train your Mac’s voice recognition: To ensure accurate recognition, it’s recommended to train your Mac to recognize your voice. This involves reading various phrases aloud to help the system learn your speech patterns and improve accuracy over time.
6. Start using voice commands: With voice recognition enabled, you can now control your Mac using voice commands. Simply say the trigger phrase, such as “Hey Siri” or “Computer,” followed by your command. You can ask Siri to open applications, search the web, send messages, set reminders, and much more.
Enabling voice recognition on your Mac not only enhances accessibility but also adds a new level of convenience to your everyday computing tasks. It allows you to navigate your Mac, dictate text, and control applications effortlessly using just your voice. Take advantage of this powerful feature and discover a whole new way to interact with your Mac.
Setting Up Microphone and Input Preferences
Before you can fully utilize voice recognition on your Mac, it’s essential to ensure that your microphone and input preferences are properly set up. Follow these steps to get started:
1. Check your microphone: Make sure your microphone is working correctly by connecting it to your Mac and testing it with other applications. You can use the built-in microphone on your Mac or connect an external one, depending on your preference and requirements.
2. Adjust input volume: Open System Preferences, click on “Sound,” and navigate to the “Input” tab. Here, you’ll find your microphone listed. Adjust the input volume to an appropriate level to ensure optimal voice recognition accuracy without any distortion.
3. Select the microphone input: Once you’ve verified that your microphone is working, select it as the input device within the System Preferences. This ensures that your Mac recognizes and utilizes the correct microphone for voice recognition purposes.
4. Test microphone input: To ensure your Mac is accurately picking up your voice commands, test the microphone input by speaking into it and observing the input level meter within the Sound preferences pane. If the meter shows activity when you speak, your microphone is properly configured.
5. Consider ambient noise: Keep in mind the presence of any background noise that may affect voice recognition. If you’re in a noisy environment, consider using a noise-canceling microphone or reducing the ambient noise level to improve voice recognition accuracy.
6. Explore additional input preferences: In the Sound preferences, you may find additional options to adjust input settings, such as microphone boost and input monitoring. Experiment with these settings to find the optimal configuration that works best for your microphone and voice recognition needs.
By setting up your microphone and input preferences correctly, you ensure that your Mac can accurately capture and interpret your voice commands. This eliminates any barriers to effective voice recognition and enhances your overall user experience. Take the time to configure these settings properly to maximize the benefits of using voice recognition on your Mac.
Training the Mac for Voice Recognition
To achieve optimal accuracy and performance with voice recognition on your Mac, it’s essential to train the system to recognize your voice. This process involves reading out specific phrases and texts, allowing the Mac to adapt and understand your unique speech patterns. Here’s how you can train your Mac for voice recognition:
1. Access Dictation & Speech preferences: Open System Preferences, click on “Accessibility,” and select “Dictation” from the left sidebar. Then, click on the “Dictation” tab to access the dictation and speech preferences.
2. Enable dictation: Ensure that dictation is turned on. If it isn’t, click the checkbox next to “Enable dictation.” This enables your Mac to listen to your voice and convert it into text.
3. Choose a language: Select the language you want to use for dictation by clicking on the drop-down menu under “Language.” It’s important to choose the language in which you’re most comfortable speaking to ensure accurate voice recognition.
4. Train the Mac: To train your Mac for voice recognition, click on the “Dictation” toggle switch to turn it on, and a new option called “Dictation Training” will appear.
5. Follow the prompts: Click on the “Dictation Training” button, and your Mac will guide you through a series of prompts. Read the provided phrases out loud, paying attention to pronunciation, clarity, and natural speech patterns.
6. Complete the training: Continue reading aloud the prompted phrases until the training process is complete. The more you train your Mac, the better it will understand your unique voice and improve its accuracy in recognizing your commands.
7. Review and improve accuracy: After training, you can review and tweak the recognition accuracy. You’ll find options to enable “Enhanced Dictation,” which offers offline dictation capabilities and a more extensive vocabulary. You can also choose to enable profanity filtering and adjust the keystroke sound to give you auditory feedback as you dictate.
Training your Mac for voice recognition is a fundamental step in ensuring accurate and reliable performance. By dedicating time to train your Mac and familiarize it with your voice, you can enjoy a seamless and efficient hands-free experience when interacting with your computer.
Using Voice Commands to Control the Mac
Once you have enabled voice recognition on your Mac and trained it to recognize your voice, you can start using voice commands to control various aspects of your computer. Voice commands offer a convenient and hands-free way to interact with your Mac. Here’s how you can use voice commands to take control:
1. Initiate voice recognition: Activate voice recognition by using the trigger phrase, such as “Hey Siri” or “Computer.” Your Mac will then listen for your voice commands.
2. Open applications: You can launch applications on your Mac by simply stating the name of the application followed by the command “Open.” For example, say “Open Safari” to launch the Safari web browser.
3. Control system functions: Control various system functions and settings using voice commands. For example, say “Turn on Wi-Fi” or “Increase volume” to perform the respective actions. You can also adjust display settings, enable “Do Not Disturb” mode, and more.
4. Perform searches: Use voice commands to search the web or perform specific searches within applications. Simply say the search query, followed by the name of the search engine or application. For example, say “Search for recipes on Google” or “Search for emails from John Doe in Mail.”
5. Dictate text: Take advantage of voice recognition by dictating text instead of typing. Whether it’s composing emails, writing documents, or entering text in various applications, you can simply speak your thoughts, and the Mac will convert them into text.
6. Control media playback: Enjoy hands-free control over media playback on your Mac. Use voice commands to play, pause, skip tracks, or adjust the volume in media players, such as iTunes or Spotify.
7. Set reminders and alarms: Manage your schedule effortlessly through voice commands. Set reminders, create events, and schedule appointments using the built-in voice assistant or compatible calendar applications.
By utilizing voice commands, you can streamline your workflow, navigate your Mac with ease, and perform tasks without touching a keyboard or mouse. Incorporate voice recognition into your daily routine to enhance productivity and make interacting with your Mac a seamless experience.
Dictating Text and Controlling Applications
One of the key benefits of voice recognition on the Mac is the ability to dictate text and control applications with ease. Whether you’re composing emails, writing documents, or navigating various apps, using voice commands can significantly enhance your productivity. Here’s how you can dictate text and control applications using voice recognition on your Mac:
1. Dictating text: Open a text editor or a document where you want to input text. Activate voice recognition by using the designated trigger phrase, such as “Hey Siri” or “Computer.” Once voice recognition is active, you can start dictating your text. Simply speak clearly and naturally, and your Mac will transcribe your words into written text, replacing the need for manual typing.
2. Controlling word processing applications: If you’re using a word processing application like Pages or Microsoft Word, voice commands can help you navigate and format your documents. For example, you can use voice commands to select text, apply different font styles, adjust spacing, and even add tables or images to your document.
3. Managing emails: Dictating your emails can save you time and energy. Open your email client, compose a new message, and start dictating. With voice recognition, you can speak the recipients’ email addresses, dictate the subject line, and speak the body of the email. You can also use voice commands to format the text, add attachments, and send the email.
4. Commanding applications: Voice recognition allows you to control various applications on your Mac with simple voice commands. For example, in a web browser, you can say “Open a new tab” or “Go back” to navigate between pages. In media players, you can use voice commands to play, pause, or skip tracks. Voice commands can even be used to control productivity applications like task management tools or note-taking apps.
5. Editing and formatting text: Voice recognition on the Mac also enables you to edit and format text using voice commands. You can use commands like “Select all,” “Copy,” “Paste,” or “Undo” to manipulate text easily. Voice commands can also be used to change font size, style, or color within compatible applications.
By harnessing the power of voice recognition, you can significantly improve your efficiency when working with text and applications. Take advantage of this feature to streamline your workflow, reduce typing fatigue, and unlock the full potential of your Mac.
Troubleshooting Voice Recognition Issues on the Mac
While voice recognition on the Mac is a powerful tool, you may encounter occasional issues that can impact its performance. If you’re facing difficulties with voice recognition, don’t worry. Here are some troubleshooting steps you can take to address common issues:
1. Check microphone connectivity: Ensure that your microphone is properly connected to your Mac and that it’s functioning correctly. Try disconnecting and reconnecting your microphone or using a different one to see if the issue is with the hardware.
2. Verify microphone settings: Open your Mac’s System Preferences, click on “Sound,” and navigate to the “Input” tab. Ensure that the correct microphone is selected as the input device. Also, check that the input volume is adjusted appropriately for accurate voice recognition.
3. Restart voice recognition: If voice recognition stops working or becomes unresponsive, try restarting the voice recognition feature. Disable and then re-enable dictation in the “Accessibility” preferences to refresh the system’s recognition function.
4. Check for software updates: Ensure that your Mac is running the latest software updates. Outdated software can sometimes cause compatibility issues or affect the performance of voice recognition. Go to the “System Preferences” and click on “Software Update” to check for any available updates and install them if necessary.
5. Improve microphone position: If you’re experiencing poor voice recognition accuracy, try adjusting the position of your microphone. Ensure that it’s not too far away from your voice or obstructed by any objects. A clear line of communication between your voice and the microphone can improve recognition accuracy.
6. Train voice recognition: If voice recognition consistently misinterprets your commands, consider retraining your Mac’s voice recognition. Access the dictation training settings and go through the training prompts again to help the system become more accurate in recognizing your speech patterns.
7. Check for conflicting applications: Some applications may interfere with voice recognition or take control over microphone input. Check for any applications running in the background that may be conflicting with voice recognition. Quit those applications or adjust their settings to ensure compatibility with voice recognition.
By following these troubleshooting steps, you can address common voice recognition issues on your Mac and improve its overall performance. If the problem persists, consider seeking additional support from Apple or consulting forums and communities dedicated to Mac users.