
Issues with Windows Updates
Windows updates play a crucial role in keeping your operating system secure and up to date with the latest features and bug fixes. However, sometimes these updates can cause issues that can be quite frustrating to deal with. From installation errors to system crashes, here are some common problems you may encounter with Windows updates:
- Installation Failures: One of the most common issues with Windows updates is failed installations. This can occur due to various reasons like corrupted update files, incompatible software, or insufficient disk space. When updates fail to install, it can disrupt your system’s functionality and leave it vulnerable to security threats.
- Slow Performance: Some users have reported that after installing Windows updates, their system’s performance slows down. This can be due to the update consuming system resources or conflicts with other software installed on the computer. Slow performance can disrupt your productivity and make your computer sluggish.
- Blue Screen of Death (BSOD): The infamous Blue Screen of Death can sometimes occur after installing certain Windows updates. This occurs when the system encounters critical errors and is forced to shut down to prevent further damage. BSOD can be caused by incompatible drivers, hardware issues, or conflicts between system components and the update.
- Device Compatibility Issues: Windows updates are designed to be compatible with a wide range of devices, but sometimes compatibility issues arise. Certain hardware or software configurations may not work well with the update, resulting in device malfunctions or errors.
- Missing or Deleted Files: In rare cases, Windows updates have been known to delete or overwrite important files, causing data loss or rendering specific applications inoperable. This can be highly frustrating, especially if you haven’t backed up your important files.
- Constant Reboots: After installing updates, some users have experienced their system going into an endless cycle of rebooting. This can occur due to issues with the update installation process or conflicts with other system components.
It is important to address these issues promptly to ensure your system’s stability and functionality. In the following sections, we will explore various methods to fix these problems and restore your system to optimal performance.
Common Problems Caused by Windows Updates
Windows updates are designed to improve the overall performance, security, and stability of your operating system. However, they can sometimes introduce unexpected issues and errors. Understanding the common problems caused by Windows updates can help you troubleshoot and resolve these issues quickly. Here are some of the most encountered problems:
- Installation Errors: One of the common problems with Windows updates is the failure to install correctly. This can occur due to various reasons such as interrupted internet connection, insufficient disk space, or conflicts with existing software. When an installation error occurs, it prevents the update from being applied to your system, leaving it vulnerable to security threats and missing out on important bug fixes.
- Compatibility Issues: Sometimes, certain updates may not be compatible with your hardware or software configuration. This can lead to issues such as malfunctioning devices or software crashes. It is important to ensure that your system meets the minimum requirements for the updates and to check for any known compatibility issues before installing them.
- System Performance Degradation: After installing some updates, you may notice a decrease in system performance. This can manifest as slow startup times, laggy applications, or slower overall responsiveness. Performance degradation can occur due to various factors including resource-intensive updates, hardware incompatibilities, or conflicts with background processes or software running on your system.
- Software Incompatibilities: Updates can sometimes create conflicts with existing software installed on your system. This can result in applications not working properly, crashing, or displaying error messages. Incompatibilities can occur when updates modify system files or settings that are critical for the functioning of certain software.
- Blue Screen of Death (BSOD): A dreaded occurrence, the infamous Blue Screen of Death can be triggered by certain Windows updates. The BSOD usually indicates a serious system error that forces your computer to crash and restart. BSOD errors can stem from issues such as faulty drivers, hardware conflicts, or errors in the update installation process.
- Data Loss: Although rare, there have been instances where Windows updates have caused data loss. This can happen when important system files or user data gets accidentally deleted or overwritten during the update process. It is essential to regularly back up your data to minimize the risk of irreversible data loss.
Knowing these common problems can help you troubleshoot and address issues that may arise after installing Windows updates. In the following sections, we will explore various troubleshooting methods and solutions to fix these problems and ensure a smoother update experience.
Checking for Updates
Checking for updates regularly is essential to ensure that your system is up to date with the latest patches, bug fixes, and security enhancements. Windows updates often include important improvements that can enhance the performance and stability of your operating system. Here are the steps to check for updates:
- Step 1: Open Windows Update Settings: To begin, open the Windows Update settings. You can do this by searching for “Windows Update” in the Start menu or by going to the Control Panel and selecting “Windows Update.”
- Step 2: Check for Updates: In the Windows Update settings, click on the “Check for updates” button. Windows will then start checking for available updates for your system.
- Step 3: Install the Updates: If there are any updates available, Windows will display a list of them. Review the updates and select the ones you want to install. It is recommended to install all critical and security updates to ensure your system’s safety.
- Step 4: Restart if Required: After the installation is complete, you may need to restart your system for some updates to take effect. If a restart is required, Windows will prompt you to do so. Save any important work before restarting your computer.
- Step 5: Verify Successful Installation: After restarting, it’s important to verify that the installed updates were successful. Go back to the Windows Update settings and click on “Update history” to see a list of all installed updates. Check for any failed installations or errors. If any issues are encountered, you may need to troubleshoot them using the methods we will discuss in later sections.
Regularly checking for updates ensures that your system remains secure and up to date. It is also a good practice to enable automatic updates, which will automatically download and install updates for your system without requiring manual intervention. This helps to keep your system protected with the latest security patches and bug fixes.
Now that you know how to check for updates, let’s move on to the next section where we will discuss troubleshooting methods for Windows update issues.
Windows Update Troubleshooter
Windows Update Troubleshooter is a built-in tool provided by Microsoft to help users diagnose and fix problems related to Windows updates. If you are experiencing issues with Windows updates, running the troubleshooter can often help identify and resolve the underlying problems. Here’s how to use the Windows Update Troubleshooter:
- Step 1: Open Windows Settings: Start by opening the Windows Settings. You can do this by clicking on the Start menu and selecting the gear icon or by pressing the Windows key + I on your keyboard.
- Step 2: Go to Update & Security: In the Windows Settings window, click on “Update & Security” to access the update settings and troubleshooting options.
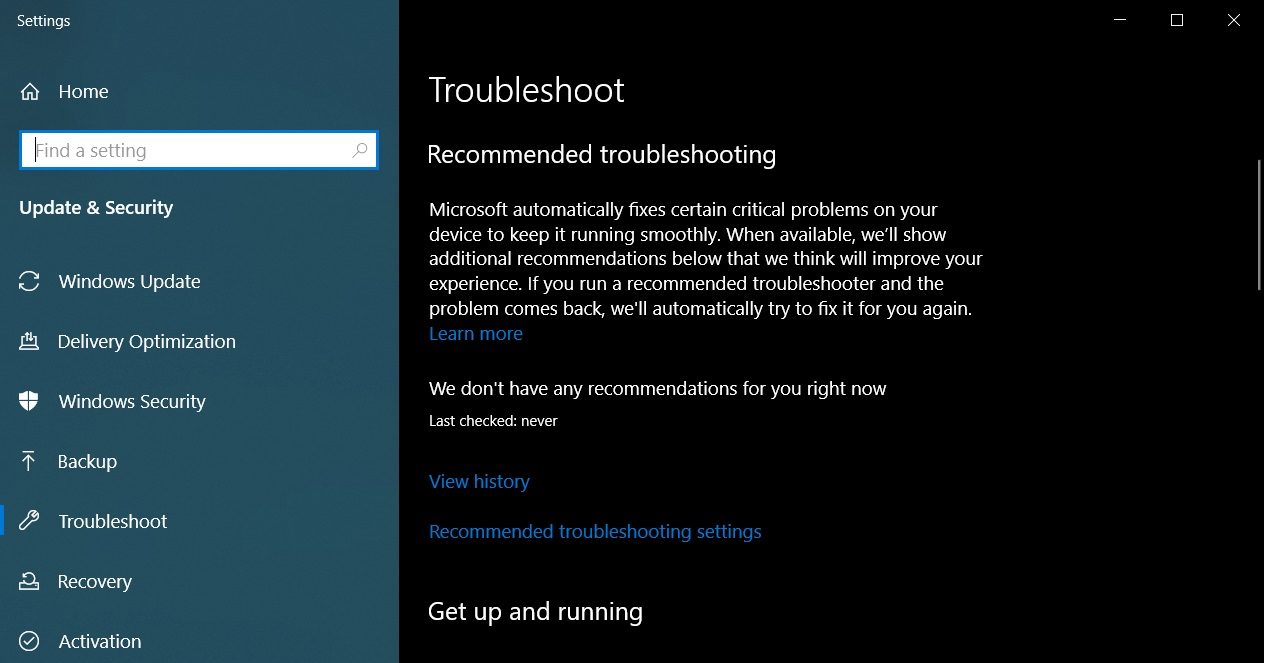
- Step 3: Open Troubleshoot: In the left-hand menu, click on “Troubleshoot” to access various troubleshooting options for different system components and features.
- Step 4: Run Windows Update Troubleshooter: Scroll down and locate the “Windows Update” section. Click on it and then click on the “Run the troubleshooter” button.
- Step 5: Follow the Troubleshooter Instructions: The Windows Update Troubleshooter will now run and analyze your system for any issues related to Windows updates. Follow the on-screen instructions and prompts to complete the troubleshooting process.
- Step 6: Apply Recommended Fixes: The troubleshooter will detect and recommend fixes for any problems it identifies. Review the recommended fixes, and if there are any issues found, click on the “Apply this fix” or similar button to apply the suggested solutions.
- Step 7: Restart Your Computer: After applying the recommended fixes, it is recommended to restart your computer to allow the changes to take effect. Save any important work before restarting.
The Windows Update Troubleshooter can resolve various common Windows update issues, such as update installation failures, update download errors, and update-related errors. However, it may not be able to fix all issues, especially complex or unique problems. If you are still experiencing issues after running the troubleshooter, don’t worry. We will explore additional troubleshooting methods in the following sections to help you resolve Windows update problems.
Restarting and Resetting Update Components
Restarting and resetting update components can often resolve issues related to Windows updates. Sometimes, the update components may encounter errors or get stuck, preventing the installation or proper functioning of updates. Restarting and resetting these components can help clear any temporary glitches and allow your system to start fresh. Here’s how you can restart and reset update components:
- Step 1: Open Command Prompt as Administrator: Start by opening the Command Prompt as an administrator. To do this, right-click on the Start menu and select “Command Prompt (Admin)” or “Windows PowerShell (Admin)”.
- Step 2: Stop Windows Update Services: In the Command Prompt window, type the following commands one by one and press Enter after each command, to stop the Windows Update services:
net stop wuauservnet stop cryptSvcnet stop bitsnet stop msiserver
These commands will stop the Windows Update services, Cryptographic services, Background Intelligent Transfer Service (BITS), and Windows Installer service.
- Step 3: Rename SoftwareDistribution and Catroot2 folders: Next, navigate to the following locations and rename the
SoftwareDistributionandCatroot2folders:C:\Windows\SoftwareDistributionC:\Windows\System32\catroot2
To rename the folders, you can append a “.old” or any other suffix to the folder names. This step ensures that the update components start fresh.
- Step 4: Start Windows Update Services: After renaming the folders, go back to the Command Prompt window and enter the following commands to start the Windows Update services:
net start wuauservnet start cryptSvcnet start bitsnet start msiserver
These commands will restart the Windows Update services, Cryptographic services, BITS, and Windows Installer service.
- Step 5: Check for Updates: Once the services are started, you can now check for updates again by following the previous method of checking for updates as discussed in the earlier section. This process will allow your system to start with fresh update components and may resolve any issues that were causing problems previously.
Restarting and resetting update components can help resolve various issues related to Windows updates, such as update installation failures, update download errors, and update hanging or freezing. If you are still experiencing issues with Windows updates after performing these steps, don’t worry. There are other troubleshooting methods we will discuss in the upcoming sections to help you overcome such problems.
Uninstalling Problematic Updates
If you are facing issues with specific Windows updates, such as compatibility problems or performance degradation, uninstalling those updates can often resolve the problems. Windows allows you to uninstall individual updates and roll back to a previous version. Here’s how you can uninstall problematic updates:
- Step 1: Open Windows Settings: Start by opening the Windows Settings. You can do this by clicking on the Start menu and selecting the gear icon or by pressing the Windows key + I on your keyboard.
- Step 2: Go to Update & Security: In the Windows Settings window, click on “Update & Security” to access the update settings and options.
- Step 3: Open Windows Update: In the left-hand menu, click on “Windows Update” to access the Windows Update settings and options.
- Step 4: View Update History: Under the Windows Update settings, click on the “View update history” link. This will display a list of all the installed updates on your system.
- Step 5: Uninstall an Update: In the update history, locate the problematic update that you want to uninstall. Click on it, and then click on the “Uninstall” button. Follow any on-screen prompts to complete the uninstallation process. Note that some updates cannot be uninstalled if they are essential for system security or stability.
- Step 6: Restart Your Computer: After uninstalling the update, it is recommended to restart your computer to ensure that any changes take effect. Save any important work before restarting.
By uninstalling problematic updates, you can restore your system to a previous state and potentially resolve issues introduced by those updates. It’s important to note that uninstalling an update does not prevent it from being installed again in the future. Windows might try to reinstall the same update if it is considered necessary for system stability or security. In such cases, you can block or hide the update to prevent it from being installed again.
If you are still experiencing issues with Windows updates after uninstalling problematic updates, don’t worry. There are additional troubleshooting methods we will discuss in the upcoming sections to help you troubleshoot and resolve Windows update problems.
Running System File Checker (SFC) Scan
If you are encountering issues with Windows updates, it’s possible that corrupted or missing system files are causing the problem. Running a System File Checker (SFC) scan can help identify and repair any damaged system files. Here’s how to run an SFC scan:
- Step 1: Open Command Prompt as Administrator: Start by opening the Command Prompt as an administrator. To do this, right-click on the Start menu and select “Command Prompt (Admin)” or “Windows PowerShell (Admin)”.
- Step 2: Run the SFC Scan: In the Command Prompt window, type the following command and press Enter:
sfc /scannow. This will initiate the System File Checker scan. It may take some time to complete, so be patient and let the scan run. - Step 3: Wait for the Scan to Complete: The SFC scan will analyze your system files and repair any corrupted or missing files it finds. The progress will be displayed in the Command Prompt window. Do not interrupt the scan.
- Step 4: Review the Scan Results: Once the scan is complete, the Command Prompt will display the results. It will inform you if any corrupted files were repaired or if the scan found any issues that it couldn’t fix.
- Step 5: Restart Your Computer: After the scan is complete, it is recommended to restart your computer to allow the changes to take effect. Save any important work before restarting.
Running an SFC scan can help fix issues with Windows updates by repairing any damaged or missing system files. If the scan successfully resolves the problem, you should be able to install updates without any issues. However, if the SFC scan doesn’t fix the problem, there are other troubleshooting methods we will discuss in the upcoming sections to help you overcome Windows update problems.
Updating Drivers
Outdated or incompatible drivers can often cause issues with Windows updates. Drivers are essential software components that allow your hardware devices to communicate with the operating system. If you’re experiencing problems with Windows updates, updating your drivers can help resolve compatibility issues and ensure smooth installation and functioning of updates. Here’s how you can update your drivers:
- Identify Outdated Drivers: Start by identifying which drivers on your system are outdated or need updating. You can manually check for driver updates by visiting the manufacturer’s website for each hardware device installed on your computer. Alternatively, you can use driver updating software that scans your system and automatically identifies and updates outdated drivers.
- Visit Manufacturer’s Website: If you decide to manually update your drivers, visit the manufacturer’s website for each hardware device. Look for a “Support” or “Downloads” section on the website where you can find driver updates specific to your hardware model.
- Download and Install Updated Drivers: Locate the appropriate driver update for your hardware device and download it from the manufacturer’s website. Follow the instructions provided to install the updated driver. Make sure to download the correct version and architecture (32-bit or 64-bit) that matches your operating system.
- Windows Update for Generic Drivers: In some cases, Windows Update can automatically download and install generic drivers for your hardware devices. To check for driver updates via Windows Update, open the Windows Settings, navigate to “Update & Security,” and click on “Windows Update.” Click on “Check for updates” and wait for Windows to search for available driver updates.
- Use Driver Updating Software: If you prefer a more automated approach, you can use driver updating software. These tools scan your system, identify outdated drivers, and automatically download and install the latest versions. However, it’s important to choose reputable software from trusted sources.
- Restart Your Computer: After updating your drivers, it’s always recommended to restart your computer to ensure that the changes take effect. This will help to stabilize your system and ensure that the updated drivers are properly integrated.
Updating drivers can help resolve compatibility issues and ensure that your hardware devices work seamlessly with Windows updates. By keeping your drivers up to date, you minimize the risk of encountering problems during the update process and enhance the overall performance and stability of your system.
Clearing Windows Update Cache
If you’re facing issues with Windows updates, clearing the Windows Update cache can potentially resolve update-related problems. The update cache stores temporary files related to Windows updates, and clearing it can help remove corrupt or incomplete files that may be causing issues. Here’s how you can clear the Windows Update cache:
- Step 1: Open Command Prompt as Administrator: Start by opening the Command Prompt as an administrator. To do this, right-click on the Start menu and select “Command Prompt (Admin)” or “Windows PowerShell (Admin)”.
- Step 2: Stop Windows Update Services: In the Command Prompt window, type the following commands one by one and press Enter after each command to stop the Windows Update services:
net stop wuauservnet stop cryptSvcnet stop bitsnet stop msiserver
These commands will stop the Windows Update services, Cryptographic services, Background Intelligent Transfer Service (BITS), and Windows Installer service.
- Step 3: Clear the Update Cache: In the Command Prompt window, type or paste the following command and press Enter to clear the Windows Update cache:
del %windir%\SoftwareDistribution /q /f. - Step 4: Start Windows Update Services: After clearing the cache, go back to the Command Prompt window and enter the following commands to start the Windows Update services:
net start wuauservnet start cryptSvcnet start bitsnet start msiserver
These commands will restart the Windows Update services, Cryptographic services, BITS, and Windows Installer service.
- Step 5: Check for Updates: Once the services are started, you can now check for updates again by following the method discussed earlier in this article. Clearing the Windows Update cache gives your system a fresh start, and this may resolve any issues that were causing problems previously.
Clearing the Windows Update cache can help resolve various update-related issues, such as update download errors, update installation failures, or update hangs. It’s worth noting that clearing the update cache does not delete installed updates; it only removes the temporary files associated with them.
If you’re still experiencing issues with Windows updates after clearing the cache, don’t worry. There are additional troubleshooting methods we will discuss in the upcoming sections to help you overcome update problems.
Performing a System Restore
If you’re encountering persistent issues with Windows updates and other troubleshooting methods have failed to resolve the problem, performing a system restore can help rollback your computer’s settings to a previous state when updates were working properly. This allows you to undo recent system changes that may have caused the update issues. Here’s how you can perform a system restore:
- Step 1: Open System Restore: Start by opening the System Restore feature. You can do this by typing “System Restore” in the search bar and selecting “Create a restore point” from the search results. In the System Properties window, click on the “System Restore” button.
- Step 2: Choose a Restore Point: In the System Restore window, click on the “Next” button to proceed. You will be presented with a list of available restore points. These are checkpoints created automatically or manually at various points in time when system changes were made. Select a restore point that predates the occurrence of the update-related issues.
- Step 3: Confirm the Restore Point: After selecting a restore point, click on the “Next” button. Review the details of the selected restore point to ensure it is the desired one. Take note that performing a system restore will revert your computer’s settings, but it won’t affect your personal files.
- Step 4: Start the System Restore: Once you have confirmed the restore point, click on the “Finish” button to start the system restore process. Your computer will restart, and the restoration will begin. This process may take some time, so be patient and do not interrupt it.
- Step 5: Verify the System Restore: After the system restore is complete and your computer has restarted, check if the update-related issues have been resolved. It’s recommended to check for updates again to ensure that the update process is now functioning correctly.
Performing a system restore can help revert your computer’s settings to a time when updates were working without any issues. However, it’s important to note that system restore will undo any changes made to system settings and installed programs after the selected restore point. It’s advisable to create a backup of your important files before performing a system restore.
If performing a system restore does not resolve the update problems, there are still other troubleshooting methods we will discuss in the upcoming sections to help you troubleshoot and resolve Windows update issues.
Resetting Windows Update Components
If you continue to experience issues with Windows updates even after trying various troubleshooting methods, resetting the Windows Update components to their default state can often fix the problem. Resetting the update components will clear the existing configuration and reset the Windows Update service back to its default settings. Here’s how you can reset the Windows Update components:
- Step 1: Open Command Prompt as Administrator: Start by opening the Command Prompt as an administrator. Right-click on the Start menu and select “Command Prompt (Admin)” or “Windows PowerShell (Admin)”.
- Step 2: Stop Windows Update Services: In the Command Prompt window, type the following commands one by one and press Enter after each command to stop the Windows Update services:
net stop wuauservnet stop cryptSvcnet stop bitsnet stop msiserver
These commands will stop the Windows Update services, Cryptographic services, Background Intelligent Transfer Service (BITS), and Windows Installer service.
- Step 3: Rename SoftwareDistribution and Catroot2 folders: In the Command Prompt window, type or paste the following commands one by one and press Enter after each command to rename the
SoftwareDistributionandCatroot2folders:ren C:\Windows\SoftwareDistribution SoftwareDistribution.oldren C:\Windows\System32\catroot2 Catroot2.old
Renaming these folders will allow Windows to recreate them with fresh configurations.
- Step 4: Start Windows Update Services: After renaming the folders, go back to the Command Prompt window and enter the following commands to start the Windows Update services:
net start wuauservnet start cryptSvcnet start bitsnet start msiserver
These commands will restart the Windows Update services, Cryptographic services, BITS, and Windows Installer service.
- Step 5: Check for Updates: Once the services are started, you can now check for updates again by following the method discussed earlier. Resetting the Windows Update components to their default state can help resolve issues related to update installation failures, update download errors, or update hangs.
After resetting the Windows Update components, your system will recreate the necessary configurations and settings for the Windows Update service. This can often fix issues that were caused by corrupted or misconfigured update components. If you are still encountering problems with Windows updates, there are additional troubleshooting methods we’ll discuss in the upcoming sections to help you address Windows update issues.
Seeking Support from Microsoft
If you have exhausted all troubleshooting methods and are still struggling with Windows update problems, it may be time to seek support directly from Microsoft. Microsoft provides various resources and channels to assist users in resolving Windows update issues. Here’s how you can seek support from Microsoft:
- Microsoft Support Website: Visit the official Microsoft Support website at support.microsoft.com. Here you can find a vast knowledge base of articles, guides, and troubleshooting steps for various Windows update issues. Use the search function or navigate through the categories to find information relevant to your specific problem.
- Windows Support Assistant: Download and install the Windows Support Assistant tool provided by Microsoft. This tool can help diagnose and resolve common Windows update problems automatically. It also provides access to additional resources and troubleshooting tips.
- Community Forums and User Groups: Microsoft has community forums and user groups where you can ask questions and seek assistance from experienced users and MVPs (Most Valuable Professionals). These forums are an excellent place to get help, share your problem, and learn from others who may have experienced similar issues.
- Contact Microsoft Support: If you’ve tried the self-help resources and still need assistance, you can contact Microsoft Support directly. Visit the Microsoft Support website and navigate to the “Contact Us” section for instructions on how to reach out to Microsoft support representatives. Depending on your location and the severity of the issue, you may have different support options available, such as online chat, phone support, or email support.
When seeking support from Microsoft, it’s helpful to provide specific details about the issue you’re facing, any error codes or messages you’ve encountered, and the troubleshooting steps you’ve already taken. This information will assist the support representative in understanding your problem and providing the best possible solution.
Remember, Microsoft support is there to help you with Windows update problems that may require advanced solutions beyond what can be achieved through self-help troubleshooting. Don’t hesitate to reach out to them for assistance when you’ve exhausted all other options.