
What is osetup.dll?
The osetup.dll file is a dynamic link library file that is associated with the installation and setup process of Microsoft Office. DLL files, short for Dynamic Link Libraries, contain code and resources that multiple programs can use simultaneously. Specifically, the osetup.dll file is responsible for handling various setup tasks during the installation or removal of Microsoft Office on your computer.
The osetup.dll file plays a crucial role in ensuring the smooth functioning of Microsoft Office applications. It is responsible for tasks such as validating licenses, checking system requirements, installing necessary components, and configuring the installation process. Without the osetup.dll file, the proper installation and functioning of Microsoft Office can be compromised.
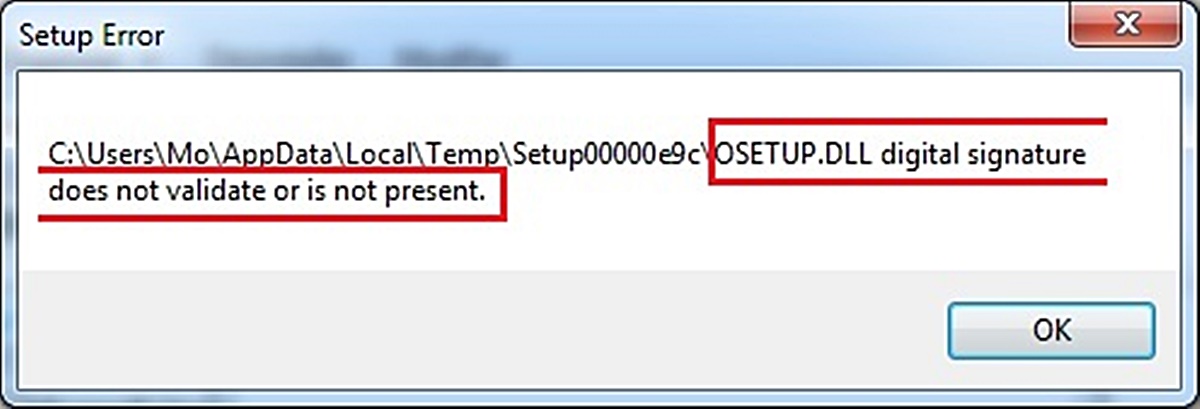
Like any other DLL file, osetup.dll can encounter issues that result in error messages. These error messages usually indicate that the DLL file is missing, corrupted, or incompatible. When such errors occur, you may experience difficulties installing or using Microsoft Office applications.
It is worth noting that the osetup.dll file is specific to the version of Microsoft Office you have installed. Therefore, incompatibility issues can arise if you try to use an incompatible version of osetup.dll with your current Microsoft Office installation. To avoid such issues, it is important to ensure that you have the correct version of osetup.dll for your specific version of Microsoft Office.
In the following sections, we will explore some common causes of osetup.dll errors and provide you with troubleshooting methods to resolve these issues and get your Microsoft Office applications up and running smoothly again.
Common Causes of osetup.dll Errors
Before we delve into the methods to fix osetup.dll errors, it is important to understand some of the common causes behind these errors. By identifying the root cause, you can effectively troubleshoot and resolve the issue. Here are some common causes of osetup.dll errors:
- Missing or Corrupted osetup.dll file: One of the primary causes of osetup.dll errors is when the DLL file itself is missing or has become corrupted. This can occur due to various reasons, such as accidental deletion, malware infection, or errors during software installation or updates.
- Conflict with other software: Another common cause is a conflict between osetup.dll and other software or applications installed on your system. Sometimes, certain programs may overwrite or modify the osetup.dll file, leading to errors when running Microsoft Office.
- Outdated Microsoft Office: Using an outdated version of Microsoft Office can also contribute to osetup.dll errors. Incompatibility between the older installation files and the updated osetup.dll file can result in functionality issues.
- Registry issues: Problems within the Windows registry can also trigger osetup.dll errors. The registry is a crucial component of the operating system that stores important configuration settings. If the registry entries related to osetup.dll become corrupt or invalid, it can lead to errors.
- Hardware issues: In some cases, hardware issues can cause osetup.dll errors. Problems with the hard drive, RAM, or other system components can prevent the proper functioning of the DLL file, resulting in installation or operational errors.
By understanding the common causes of osetup.dll errors, you can narrow down the potential solutions and apply the appropriate troubleshooting methods. Let’s explore these methods in the upcoming sections to help you resolve the osetup.dll errors and get your Microsoft Office applications back to working seamlessly.
Method 1: Restart Your Computer
One of the simplest yet effective methods to resolve osetup.dll errors is to restart your computer. This may seem like a basic solution, but it can help in many cases where temporary issues or conflicts are causing the error. Here’s how you can do it:
- Save your work: Before restarting your computer, make sure to save any important work you have open in Microsoft Office applications.
- Close all applications: Close any open programs, including Microsoft Office applications, to ensure a clean restart.
- Click on Start: Click on the Start button in the bottom-left corner of your screen.
- Click Restart: From the Start menu, select the Restart option. This will initiate the computer’s restart process.
- Wait for the computer to restart: Allow your computer to fully restart. This may take a few moments.
- Launch Microsoft Office: After the restart, open Microsoft Office and check if the osetup.dll error is resolved.
Restarting your computer can help in cases where temporary issues or conflicts were causing the error. It allows your computer to start fresh, potentially resolving any underlying issues that were affecting the functioning of osetup.dll. If the error persists after the restart, you can proceed with other troubleshooting methods.
Method 2: Run a Virus/Malware Scan
Another common cause of osetup.dll errors is malware or virus infection on your computer. Malicious programs can corrupt or modify DLL files, including osetup.dll, leading to errors when running Microsoft Office. Running a thorough virus/malware scan can help identify and remove any malicious software that may be causing the issue. Follow these steps to run a scan:
- Install a reputable antivirus program: If you don’t already have one, download and install a reliable antivirus program. There are numerous options available, such as Avast, AVG, or Norton.
- Update the antivirus software: Ensure that your antivirus software is up to date with the latest virus definitions and database updates. This will ensure that it can effectively detect and remove the latest malware threats.
- Run a full system scan: Open the antivirus program and initiate a full system scan. This may take some time, as the software thoroughly scans all files and folders on your computer.
- Follow the recommended actions: If the antivirus program detects any malware or viruses, follow the prompts to take appropriate action. This may involve quarantining or deleting infected files.
- Restart your computer: After the scan and any necessary actions are completed, restart your computer to ensure that any lingering malware or viruses are fully removed.
- Open Microsoft Office: Launch Microsoft Office and check if the osetup.dll error is resolved. If the error still persists, proceed to the next method.
Running a virus/malware scan can help eliminate any potential security threats that may be causing the osetup.dll error. It is crucial to regularly scan your system with updated antivirus software to prevent and address any malware-related issues. If the error remains unresolved after the scan, continue with the next troubleshooting step.
Method 3: Reinstall the Program
If you continue to experience osetup.dll errors, it may be necessary to reinstall the Microsoft Office program to resolve the issue. This method can help in cases where the DLL file has become corrupted or the installation files are incomplete. Follow these steps to reinstall Microsoft Office:
- Uninstall Microsoft Office: Before reinstalling, it is important to uninstall the existing Microsoft Office program from your computer. To do this, go to the Control Panel, select “Programs and Features” or “Add/Remove Programs,” find Microsoft Office in the list of installed programs, and click on “Uninstall.”
- Download the Office installation files: Visit the official Microsoft Office website or use your Microsoft Office installation media to download the installation files for the version of Microsoft Office you wish to reinstall.
- Run the installer: Once the installation file is downloaded, run the installer and follow the on-screen prompts to reinstall Microsoft Office. Make sure to select the appropriate installation options and customize settings as needed.
- Restart your computer: After the reinstallation is complete, restart your computer to ensure that all changes are applied correctly.
- Launch Microsoft Office: Open Microsoft Office and check if the osetup.dll error is resolved. If the error persists, proceed to the next troubleshooting method.
Reinstalling Microsoft Office can help resolve issues related to corrupt or incomplete installation files. By starting fresh with a clean installation, you can ensure that all necessary files, including osetup.dll, are properly installed and configured. If the error remains unresolved after reinstalling, don’t worry. We still have more troubleshooting techniques to try.
Method 4: Update Windows
Keeping your operating system up to date is crucial for optimal performance and to resolve various software-related issues, including osetup.dll errors. Outdated Windows versions may lack important updates and patches that could address compatibility issues with Microsoft Office. To update Windows and potentially resolve osetup.dll errors, follow these steps:
- Open Windows Update: Click on the Start button and type “Windows Update” in the search bar. Select the “Windows Update” option from the search results.
- Check for updates: In the Windows Update window, click on the “Check for updates” button. Windows will then check for available updates for your operating system.
- Install updates: If any updates are found, click on the “Install updates” button to start the installation process. This may take some time depending on the size and number of updates.
- Restart your computer: After the updates are installed, restart your computer to apply the changes.
- Launch Microsoft Office: Open Microsoft Office and check if the osetup.dll error is resolved. If the error persists, proceed to the next troubleshooting method.
Updating your Windows operating system ensures that you have the latest security patches, bug fixes, and compatibility improvements. By keeping your system up to date, you increase the likelihood of resolving osetup.dll errors and enhancing the overall performance of your Microsoft Office applications. If the error persists after updating Windows, move on to the next troubleshooting step.
Method 5: Perform a System Restore
If you’re still encountering osetup.dll errors, performing a system restore can be an effective solution. System restore allows you to revert your computer’s settings back to a previous point in time, effectively undoing any recent changes that may have caused the DLL error. Follow these steps to perform a system restore:
- Open the System Restore utility: Press the Windows key and type “System Restore” in the search bar. Select “Create a restore point” from the search results, then click on the “System Restore” button.
- Choose a restore point: In the System Restore window, click on the “Next” button to view a list of available restore points. Select a restore point that predates the occurrence of the osetup.dll error.
- Initiate the system restore: Follow the on-screen prompts to confirm your restore point selection and start the system restore process. This may take some time, and your computer will restart during the process.
- Check for resolved osetup.dll error: After the system restore is complete and your computer restarts, check if the osetup.dll error has been resolved in your Microsoft Office applications.
Performing a system restore can be a powerful method to revert any system changes that may have caused the osetup.dll error. It allows you to roll back your computer to a previous state where the DLL file and Microsoft Office were functioning properly. If the error persists after performing a system restore, continue with the next troubleshooting method to address the issue.
Method 6: Use System File Checker (SFC)
System File Checker (SFC) is a built-in Windows utility that scans for and repairs corrupt or missing system files, including DLL files like osetup.dll. If the osetup.dll error is caused by a corrupted file, running the SFC tool can help resolve the issue. Here’s how you can use the System File Checker:
- Open Command Prompt as administrator: Right-click on the Start button and select “Command Prompt (Admin)” from the context menu. If prompted for permission, click “Yes” or enter the administrator password.
- Run the SFC command: In the Command Prompt window, type the following command and press Enter:
sfc /scannow - Wait for the scan to complete: The System File Checker will now scan your system for any corrupted files and attempt to repair them. This process may take a while, so be patient and avoid interrupting it.
- Check the scan results: After the scan is complete, check the output for any indications of repaired files. If the scan finds and fixes any issues, restart your computer and check if the osetup.dll error is resolved.
Running the SFC tool can help repair any corrupt or missing system files, including the osetup.dll file that may be causing the error. If the SFC scan does not resolve the issue, proceed to the next troubleshooting method to further troubleshoot and fix the osetup.dll error.
Method 7: Repair Corrupted Files Using DISM
If the osetup.dll error persists after using the System File Checker (SFC) tool, you can try repairing system files using the Deployment Image Servicing and Management (DISM) tool. This tool is designed to repair the Windows image and replace any corrupted files. Here’s how to use DISM to repair corrupted files:
- Open Command Prompt as administrator: Right-click on the Start button and select “Command Prompt (Admin)” from the context menu. If prompted for permission, click “Yes” or enter the administrator password.
- Run the DISM command: In the Command Prompt window, type the following command and press Enter:
dism /Online /Cleanup-Image /Restorehealth - Wait for the process to complete: The DISM tool will now scan your system for any corruption and attempt to repair it. This may take some time, so be patient and avoid interrupting the process.
- Restart your computer: After the repair process is finished, restart your computer to apply the changes.
- Check for resolved osetup.dll error: Once your computer restarts, launch Microsoft Office and check if the osetup.dll error is resolved. If the error persists, proceed to the next troubleshooting method.
Repairing corrupted files using the DISM tool can be effective in resolving osetup.dll errors that persist after using the System File Checker. The DISM tool works at a deeper level, repairing the Windows image and replacing any corrupted files on your system. If the error remains unresolved, continue to the next troubleshooting method to address the issue.
Method 8: Manually Register osetup.dll
If the osetup.dll error persists, you can try manually registering the DLL file to fix any registration-related issues. By registering the osetup.dll file, you ensure that it is recognized and utilized correctly by the operating system and the Microsoft Office applications. Here’s how you can manually register osetup.dll:
- Open Command Prompt as administrator: Right-click on the Start button and select “Command Prompt (Admin)” from the context menu. If prompted for permission, click “Yes” or enter the administrator password.
- Navigate to the Microsoft Office installation directory: In the Command Prompt window, type the following command and press Enter:
cd C:\Program Files\Microsoft Office\OfficeXX(replace “XX” with the version number of your Microsoft Office installation, such as “16” for Office 2016). - Register the osetup.dll file: In the Command Prompt, type the following command and press Enter:
regsvr32 osetup.dll - Wait for the registration process to complete: The Command Prompt will display a message confirming the successful registration of the osetup.dll file.
- Restart your computer: After successfully registering the osetup.dll file, restart your computer to ensure that the changes are applied.
- Launch Microsoft Office: Open Microsoft Office and check if the osetup.dll error is resolved. If the error persists, continue to the next troubleshooting method.
Manually registering the osetup.dll file can resolve issues related to its registration, allowing the operating system and Microsoft Office to utilize it properly. If the error still persists after completing this method, proceed to the next troubleshooting step for further resolution.
Method 9: Uninstall and Reinstall Microsoft Office
If none of the previous methods have resolved the osetup.dll error, you can try uninstalling and reinstalling Microsoft Office. This method can address more complex issues and ensure a fresh and clean installation of Microsoft Office, including all associated files and components. Follow these steps to uninstall and reinstall Microsoft Office:
- Uninstall Microsoft Office: Go to the Control Panel and select “Programs and Features” or “Add/Remove Programs.” Find Microsoft Office in the list of installed programs, right-click on it, and select “Uninstall.”
- Remove remnants of Microsoft Office: After the uninstallation is complete, manually delete any remaining Microsoft Office files and folders from your computer. You can search for “Microsoft Office” in File Explorer and delete the relevant folders.
- Download the Office installation files: Visit the official Microsoft Office website or use your Microsoft Office installation media to download the installation files for the version of Microsoft Office you want to reinstall.
- Run the installer: Once the installation file is downloaded, run the installer and follow the on-screen prompts to reinstall Microsoft Office. Choose the appropriate installation options and customize settings as needed.
- Restart your computer: After the reinstallation is complete, restart your computer to ensure that all changes are applied correctly.
- Open Microsoft Office: Launch Microsoft Office and check if the osetup.dll error is resolved. If the error persists, proceed to the next troubleshooting method.
Uninstalling and reinstalling Microsoft Office can address issues with corrupted files, incomplete installations, or conflicts that may be causing the osetup.dll error. By starting fresh with a clean installation, you can ensure that all necessary files, including osetup.dll, are properly installed and configured. If the error continues to persist, there is one final troubleshooting method we can explore.
Method 10: Contact Microsoft Support
If you have tried all the previous methods and the osetup.dll error still persists, it may be time to seek assistance from Microsoft Support. Microsoft’s support team has the expertise and resources to help diagnose and resolve complex issues related to Microsoft Office. Here’s how you can reach out to Microsoft Support:
- Visit the Microsoft Support website: Go to the official Microsoft Support website (support.microsoft.com).
- Choose a support option: On the Microsoft Support website, explore the available support options. This may include contacting support via phone, chat, or submitting a support request.
- Provide relevant information: When contacting Microsoft Support, be prepared to provide detailed information about the osetup.dll error, including any error messages received, steps already taken to troubleshoot, and your Microsoft Office version.
- Follow the guidance provided: Microsoft Support will provide you with instructions and guidance based on your specific issue. Follow their recommendations and troubleshooting steps to resolve the osetup.dll error.
- Continue the conversation: If the initial support interaction does not resolve the issue, continue working with Microsoft Support to explore further troubleshooting options or escalated support if necessary.
Contacting Microsoft Support is an effective way to obtain personalized assistance and guidance in resolving the osetup.dll error. Their support professionals will work with you to diagnose the issue and provide solutions tailored to your situation. Don’t hesitate to reach out for help if you’ve exhausted all other troubleshooting methods.